10 Orange Thanksgiving Nails 2026: Warm Harvest Looks
10 Orange Thanksgiving Nails 2026: Warm Harvest Looks
Orange thanksgiving nails are the shade of the season when November rolls around and every table starts filling up with pumpkin pie, roasted squash and flickering candles. There is something about that warm, spiced glow that feels made for gratitude season: cosy without being dull, festive without tipping back into Halloween territory. If you have been scrolling for a manicure that captures the whole harvest mood in a single look, you are in exactly the right place. Below you will find ten orange Thanksgiving nail designs, each one photographed on real hands, styled for real outfits and easy to recreate at home or in the salon. From glossy burnt-orange solids to gilded pumpkin art, every idea keeps the spotlight firmly on rich autumn colour. Settle in, pick your favourite and get ready to screenshot.
Why does orange work so beautifully for Thanksgiving? It is the colour of the feast itself: pumpkin, sweet potato, cinnamon, falling leaves and candlelight all live in the same warm family. A burnt or terracotta orange flatters almost every skin tone, pairs effortlessly with the burgundy, brown and cream outfits we all reach for in late autumn, and photographs gorgeously in cosy indoor light. Unlike the neon oranges of summer or the black-and-orange combos of October, these harvest shades feel grown-up and grounded. They say celebration without shouting, which makes them ideal whether you are hosting dinner, travelling to family or just soaking up the season.
This roundup is built for easy browsing. Each of the ten ideas below comes with its own photo, a styling breakdown and practical wear tips, so you can choose a look that fits your nail length, your plans and your patience level. Some are minimalist single-colour manis you can paint in twenty minutes; others are detailed nail-art moments worth booking a salon appointment for. Whether you are a minimalist who loves a clean solid or a maximalist ready for gold-foil pumpkins, there is a shade of orange here with your name on it. If you want even more seasonal inspiration after this list, our main Thanksgiving nails roundup covers the full holiday palette from cranberry to gold. Now let us get into the orange.
Burnt Orange Thanksgiving Nails
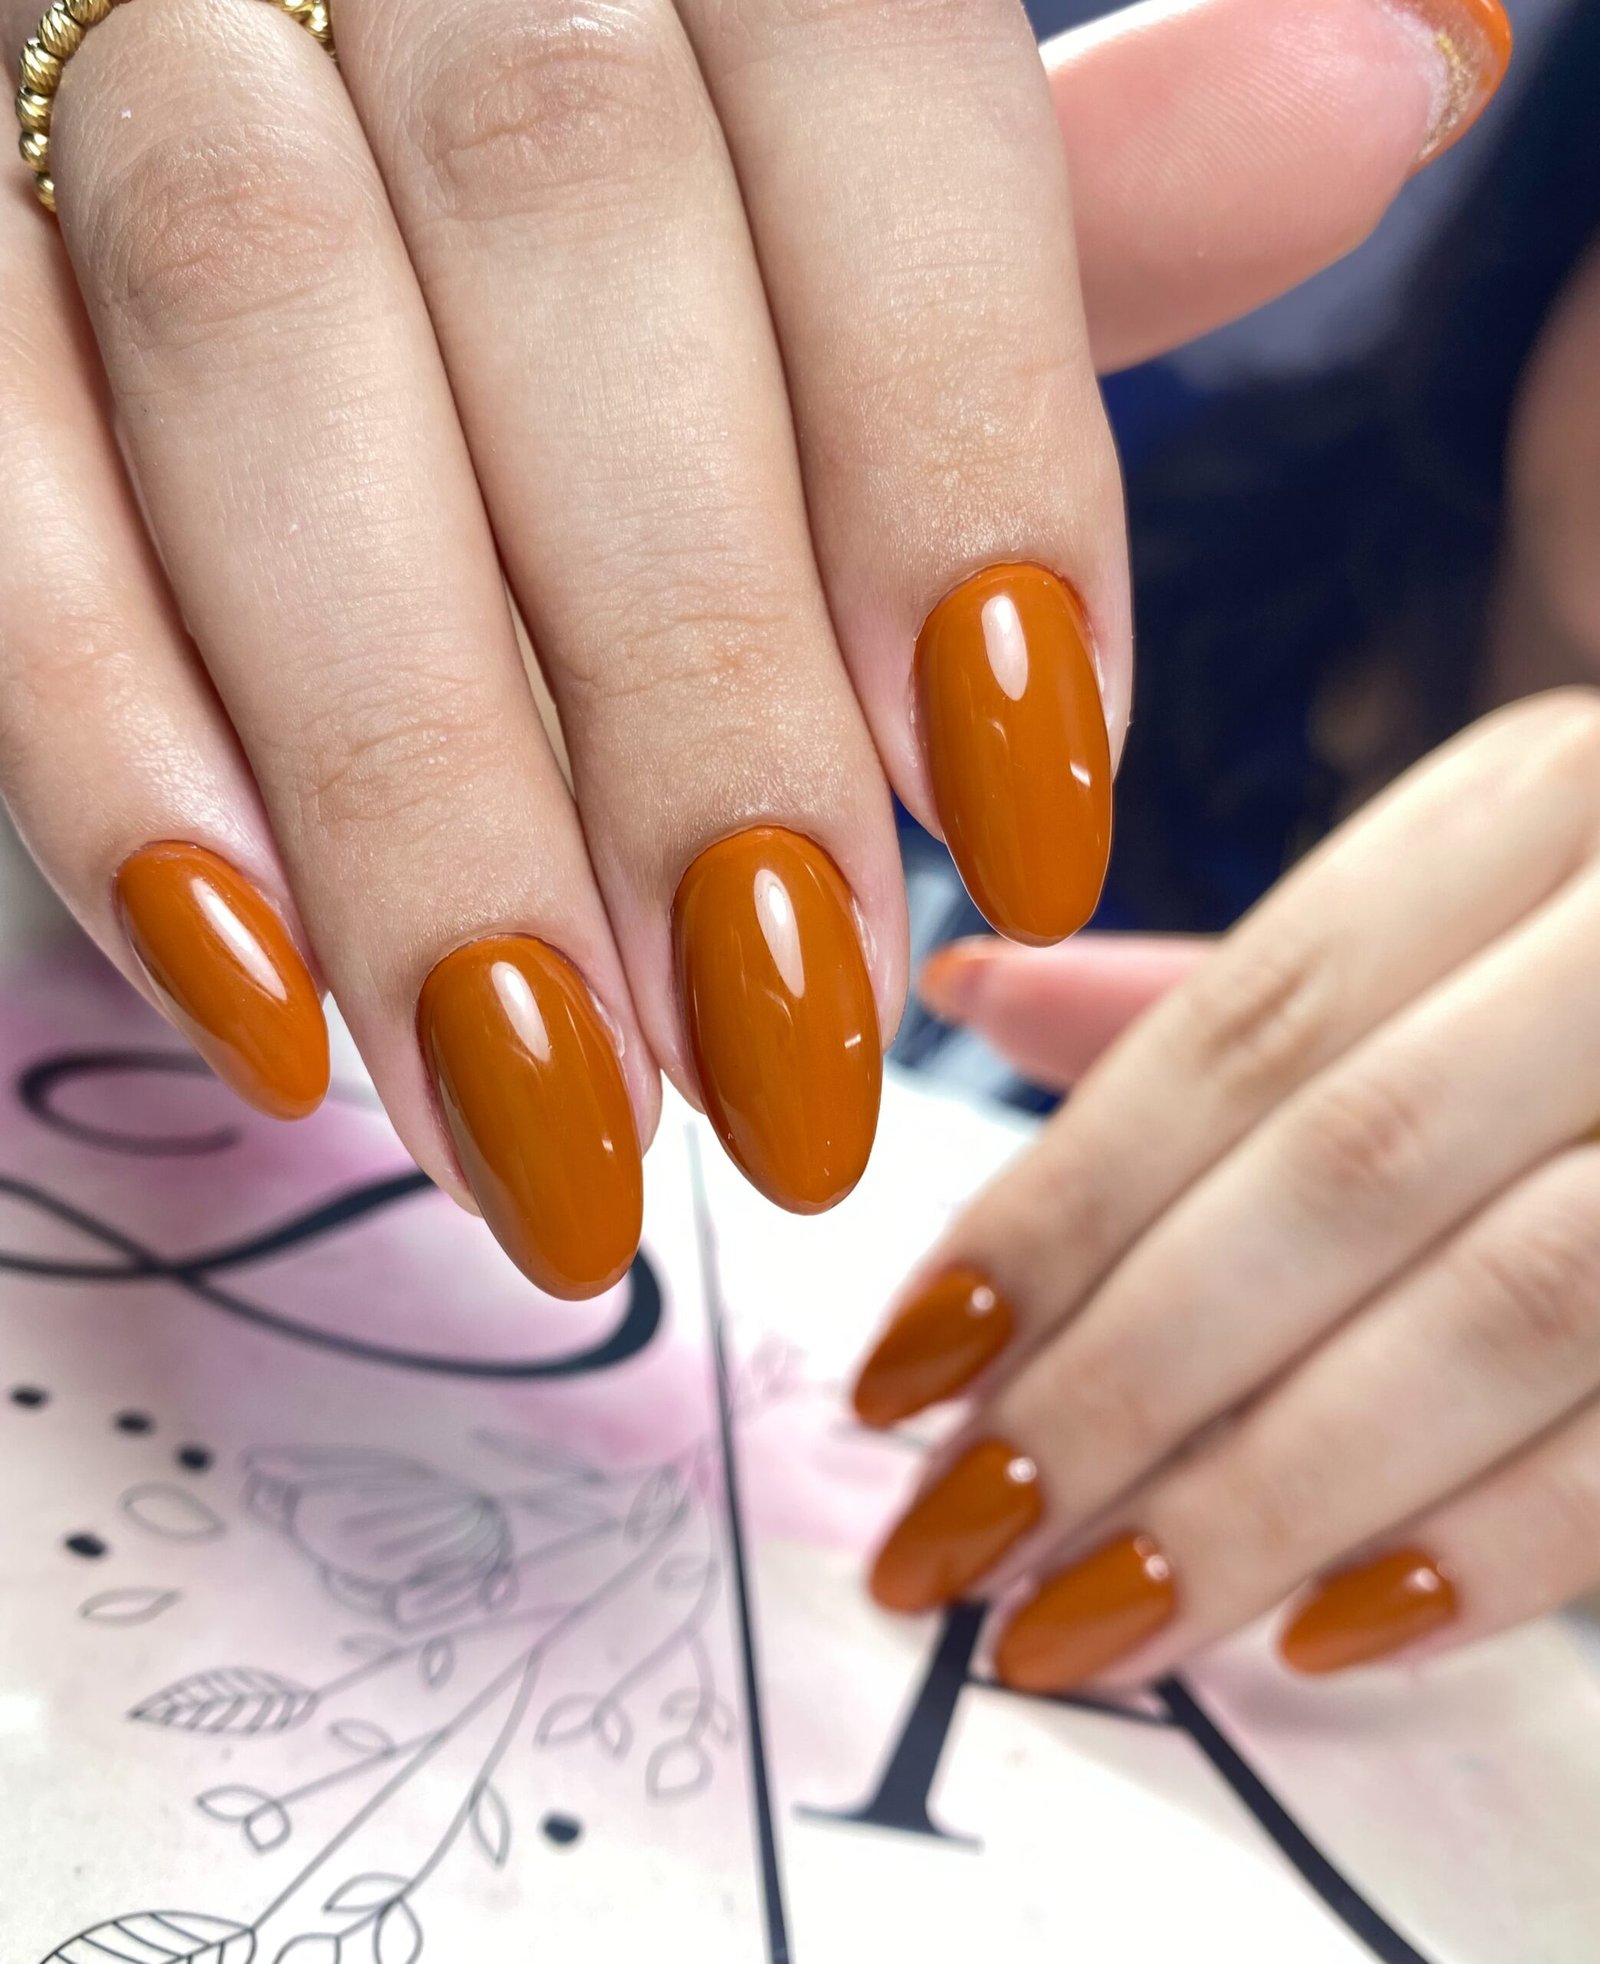
The classic burnt-orange solid manicure is the beating heart of orange thanksgiving nails, and it earns that title for good reason. This is the shade of fallen maple leaves and slow-roasted pumpkin: deep, warm and quietly luxurious. On an almond or oval shape it looks endlessly elegant, the glossy finish catching candlelight at the dinner table in the most flattering way. What makes this design so wearable is its simplicity. There is no art to chip, no glitter to grow out awkwardly and no fussy detail that dates the look. It works on short natural nails just as well as on long extensions, and it suits literally every outfit in a November wardrobe, from a chunky cream knit to a tailored burgundy blazer. If you are new to the orange family, start here; it is the most forgiving entry point and the easiest to love.
For the most salon-fresh orange thanksgiving nails, prep matters more than the polish brand. Push back cuticles, lightly buff the nail plate and always use a ridge-filling base coat so the deep pigment applies evenly without streaking. Two thin coats of a burnt-orange creme will give you full, rich coverage; a third coat only if your polish formula is sheer. Seal everything with a high-shine top coat and reapply that top layer every two to three days to extend wear through the whole holiday week. Warm-toned oranges can stain the nail plate slightly, so do not skip the base coat if you plan to wear the shade for more than a few days. Pair the finished set with gold jewellery and a swipe of terracotta blush to tie the whole look together.
Pumpkin Spice French Tips
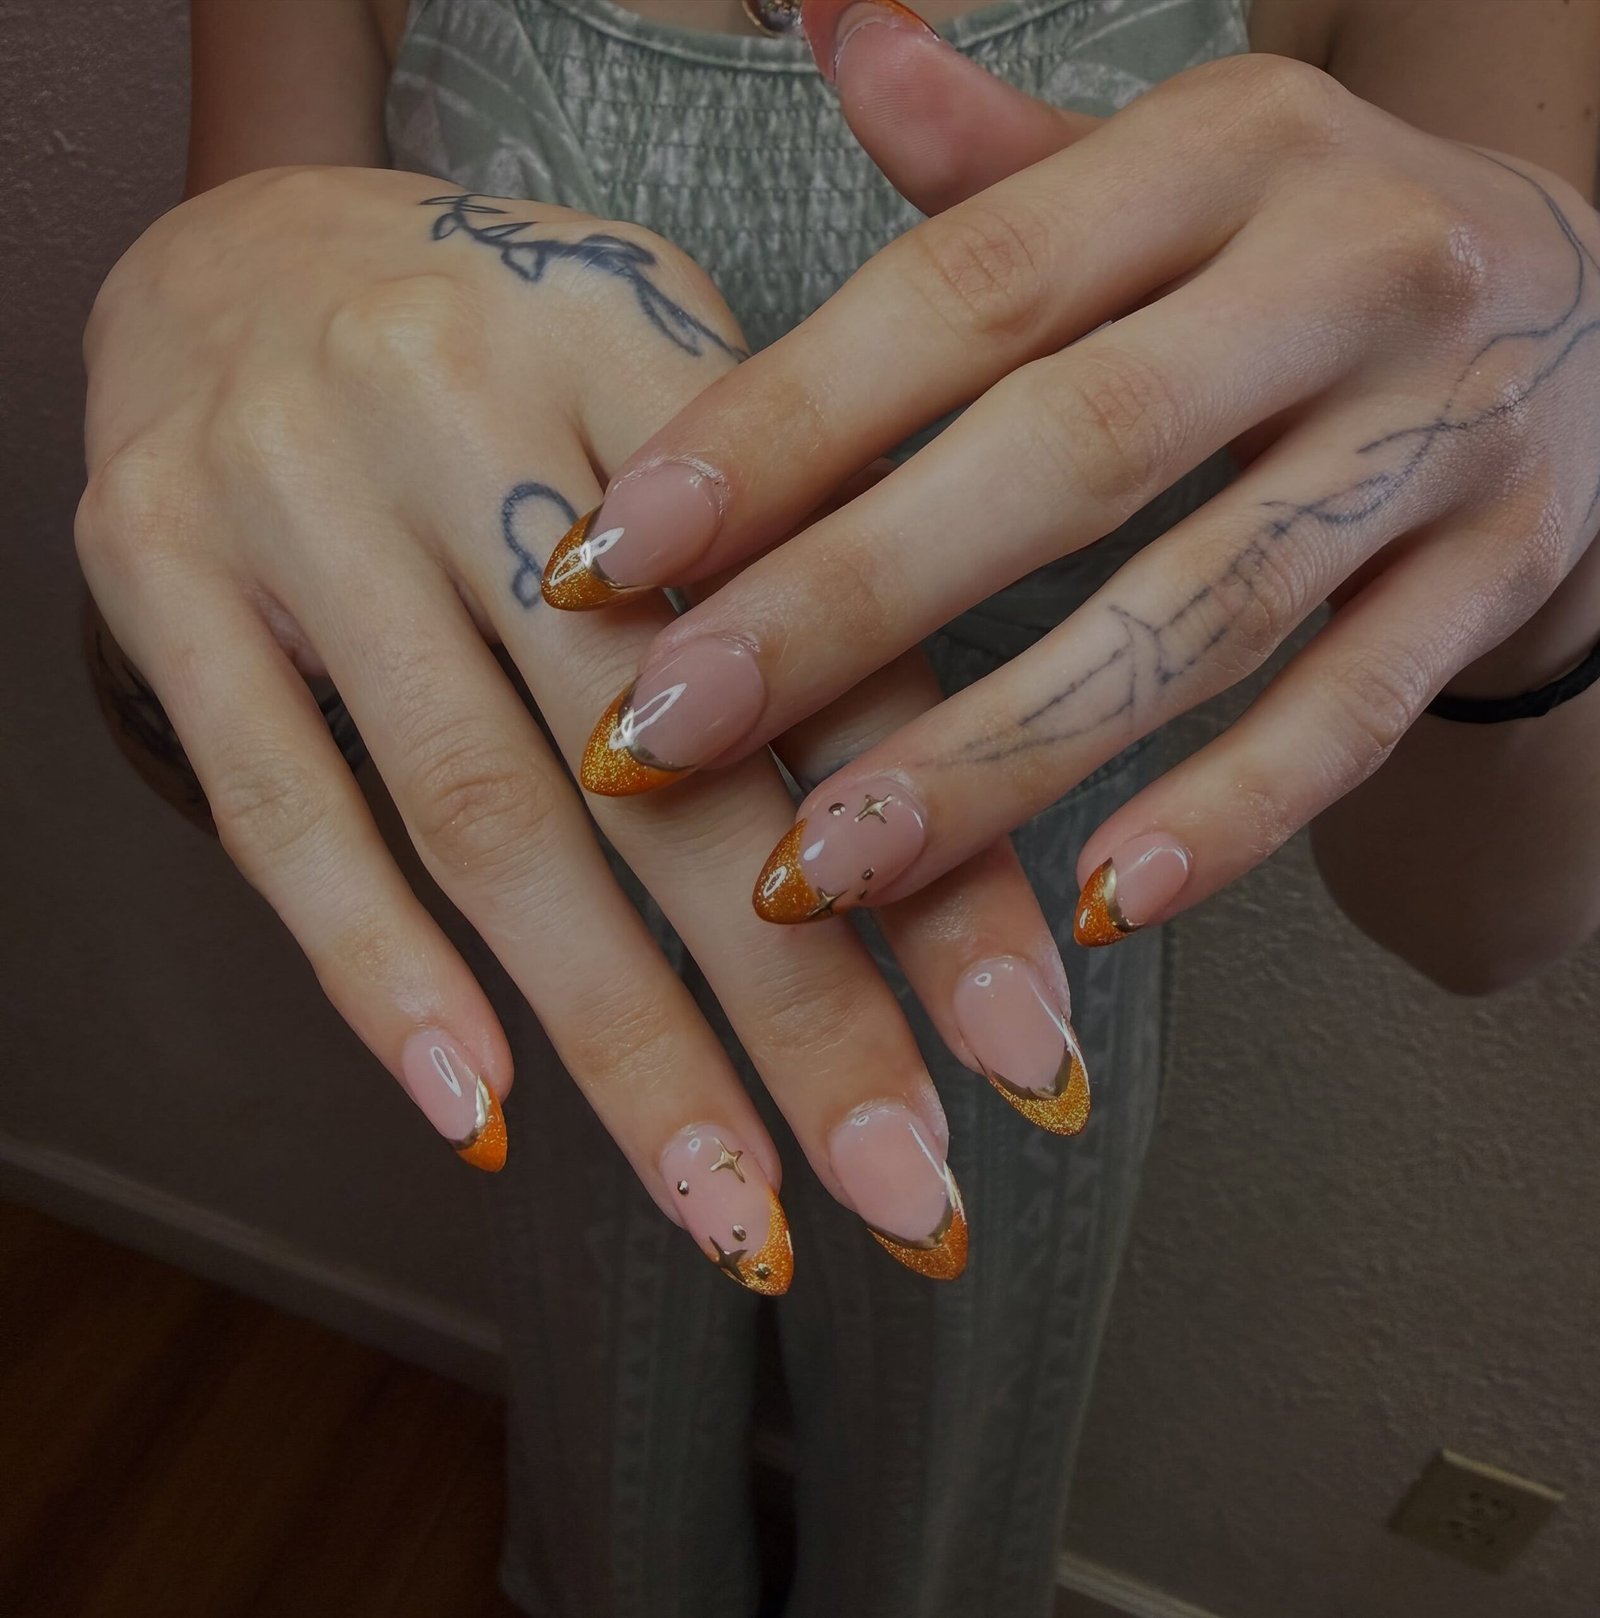
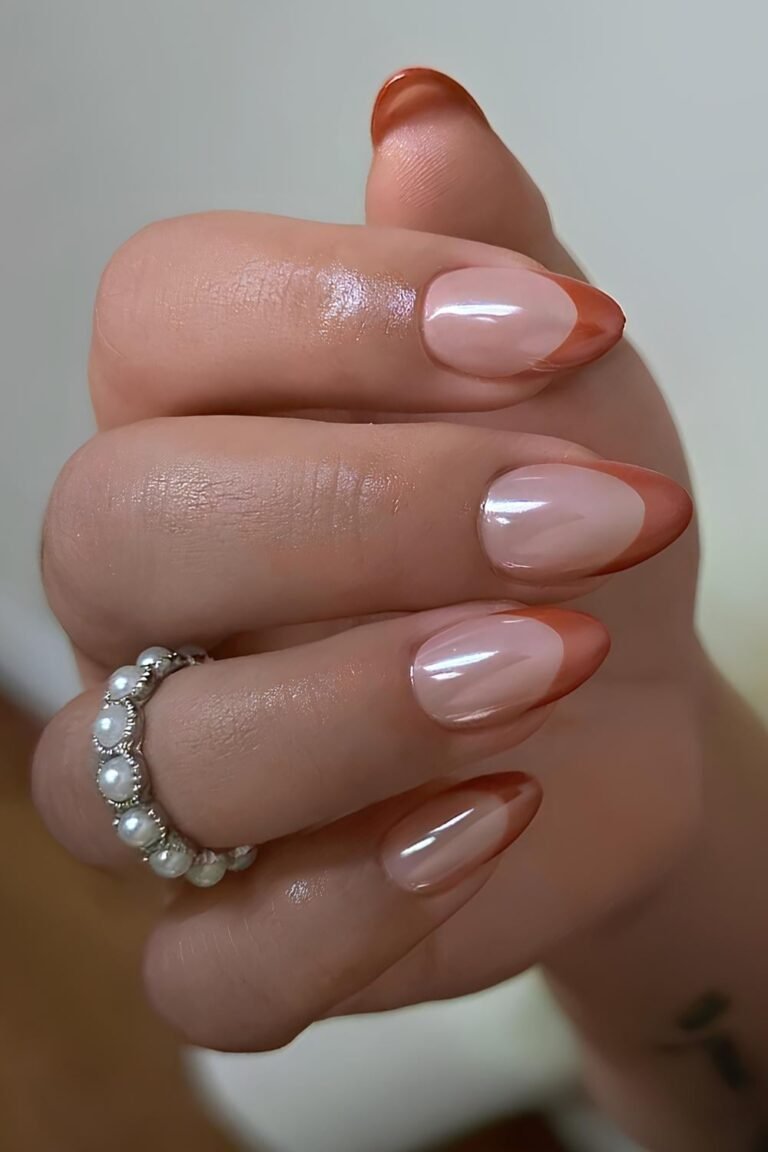
French tips get a harvest makeover in this design, swapping the traditional white for a creamy pumpkin-spice orange. The result is playful yet polished: the nude or milky base keeps the manicure soft and office-friendly, while the warm orange tips add just enough seasonal personality to feel festive. This is one of the most flattering thanksgiving nail art options for short nails, because the tip colour draws the eye outward and creates the illusion of extra length. It also grows out gracefully, since the base blends into your natural nail and the tip is the only part that shows wear. Choose a muted, spiced shade rather than a bright neon orange to keep the look firmly in autumn territory. The warm tip colour flatters every skin tone, making this French twist one of the most elegant orange thanksgiving nails ideas to try first.
Crisp smile lines are the secret to this design, and they are easier to achieve than they look. After your nude base dries completely, use a thin striping brush or French-tip guides to paint the orange tips in one stroke, following your natural smile line. Clean up any wobbles with a small angled brush dipped in acetone before the polish sets. For extra dimension, add a whisper-thin gold chrome line where the orange meets the nude; it catches the light and elevates the set. If freehand tips feel intimidating, try the look on almond or squoval shapes first, where the curve is more forgiving. Among november nails trends, soft French-tip variations like this are leading the 2026 season. For a cosier twist, see our pumpkin spice nails roundup for more ways to wear this beloved autumn blend.
Copper Glitter Accent Nails
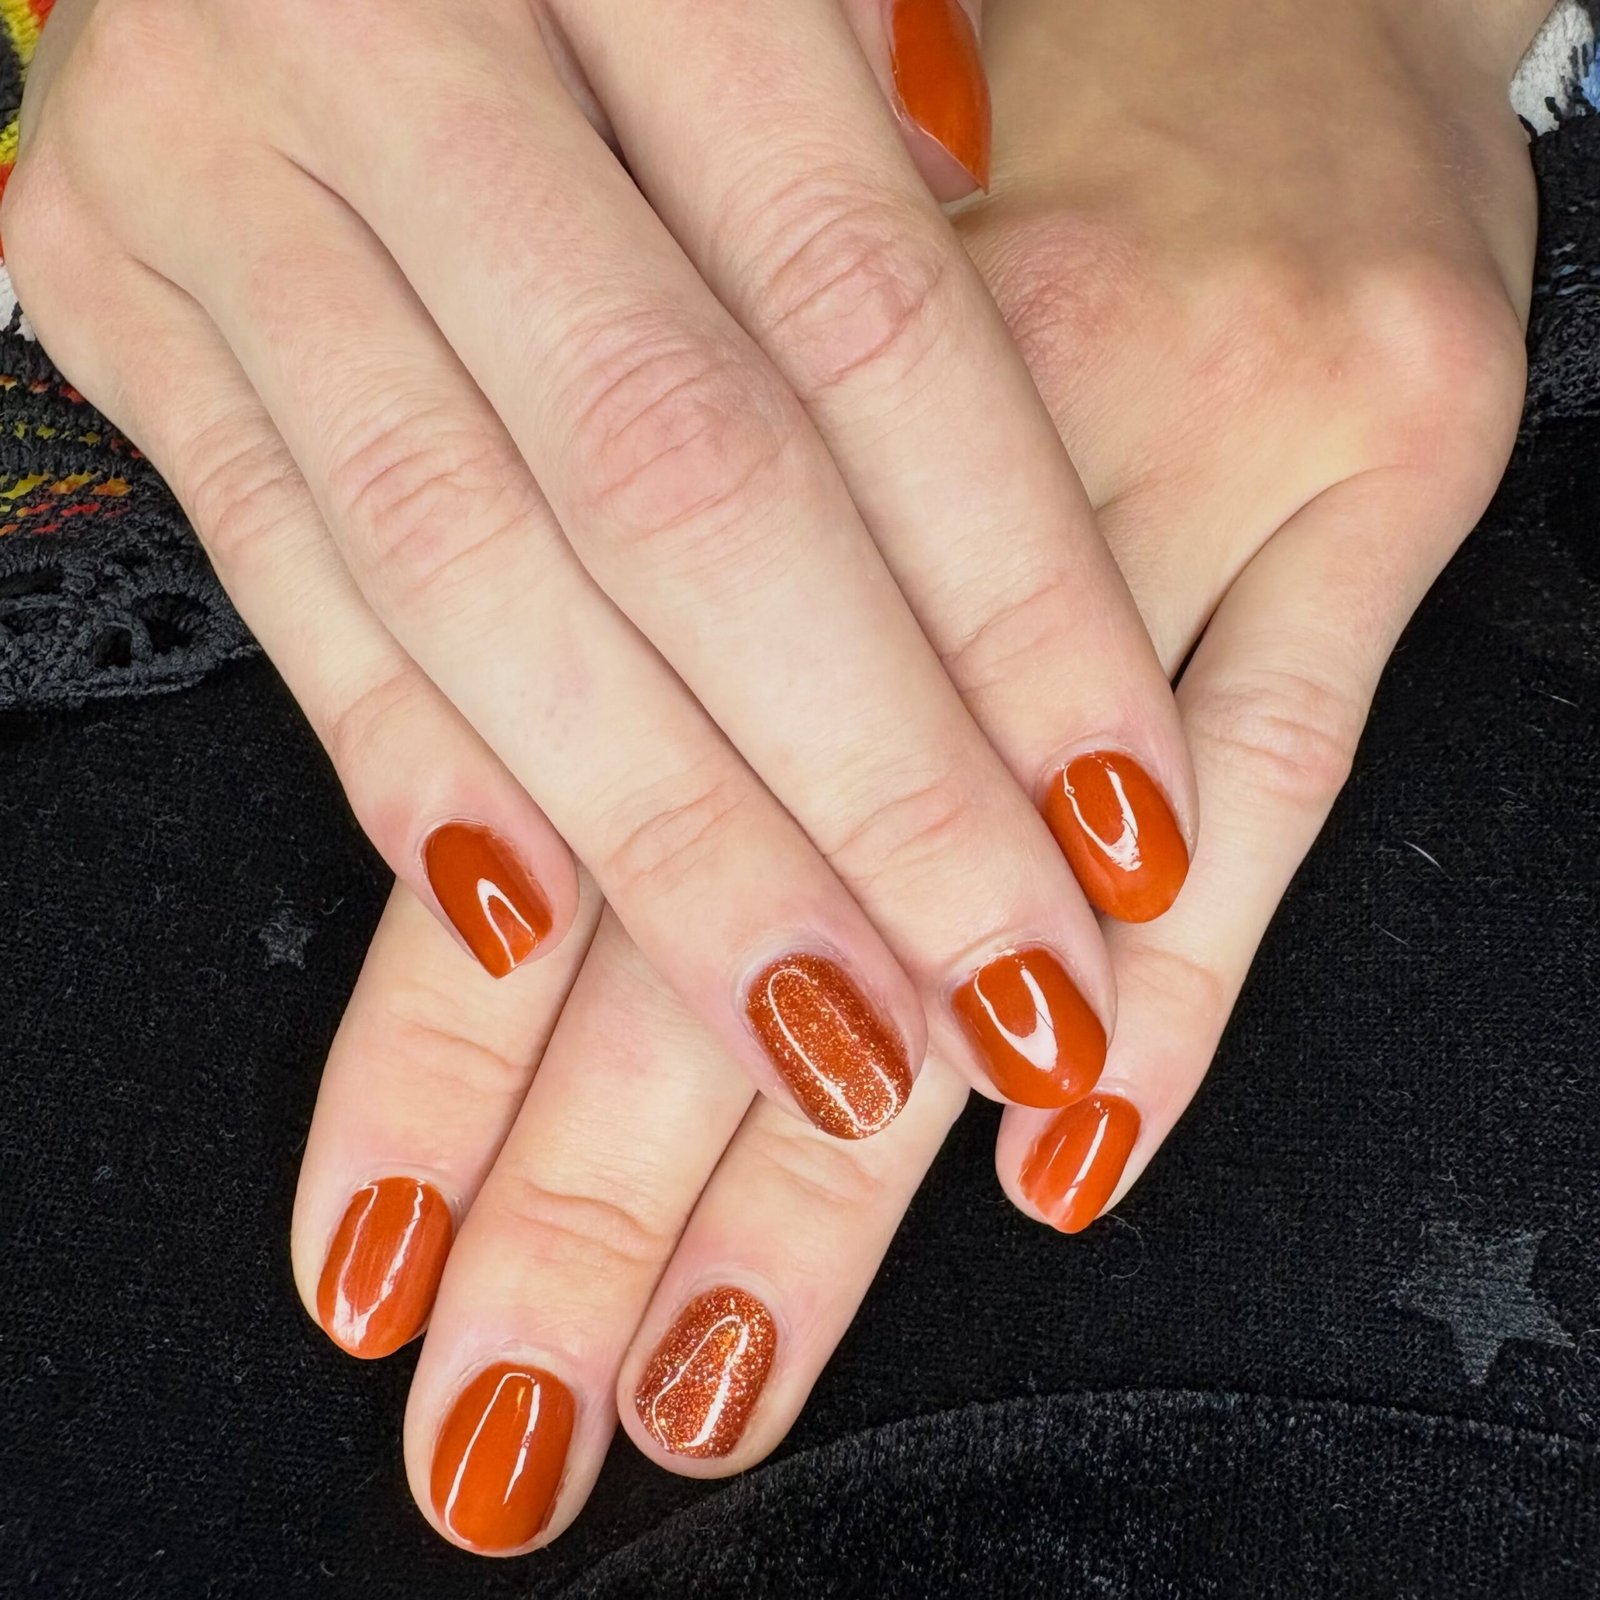
If plain solids feel too quiet but full nail art feels like too much, copper glitter accents are the perfect middle ground. This design pairs a rich burnt-orange base on most nails with one or two feature nails coated in fine copper glitter, usually the ring finger or a mix of ring and middle. The effect is pure harvest glamour: the glitter reads like candlelight on the nails, warm and dimensional rather than flashy. It is a brilliant choice for Thanksgiving dinner itself, when you want your hands to look special in photos without competing with your outfit. The glitter also hides tip wear beautifully, so this set stays photo-ready longer than a plain creme manicure through a busy holiday week. The combination suits every nail length, from short squovals to long stilettos. If you want seasonal sparkle without full glitter coverage, this balanced design delivers exactly that.
Application is straightforward, but a few tricks make the glitter look expensive rather than crafty. Apply your orange base first and let it dry fully, then press the glitter polish on in thin layers, building to full coverage over two or three coats instead of one thick gloopy layer. A peel-off base coat under the glitter accent nails makes removal dramatically easier when you are ready for a change. Seal the glitter with two layers of glossy top coat to smooth the texture and lock in the sparkle; the double seal also stops the glitter from catching on knitwear. Keep the remaining nails in a simple solid orange so the glitter stays the star. This balance of soft creme and light-catching shimmer is what makes these orange thanksgiving nails feel festive rather than overdone.
Moody Amber Ombré Nails
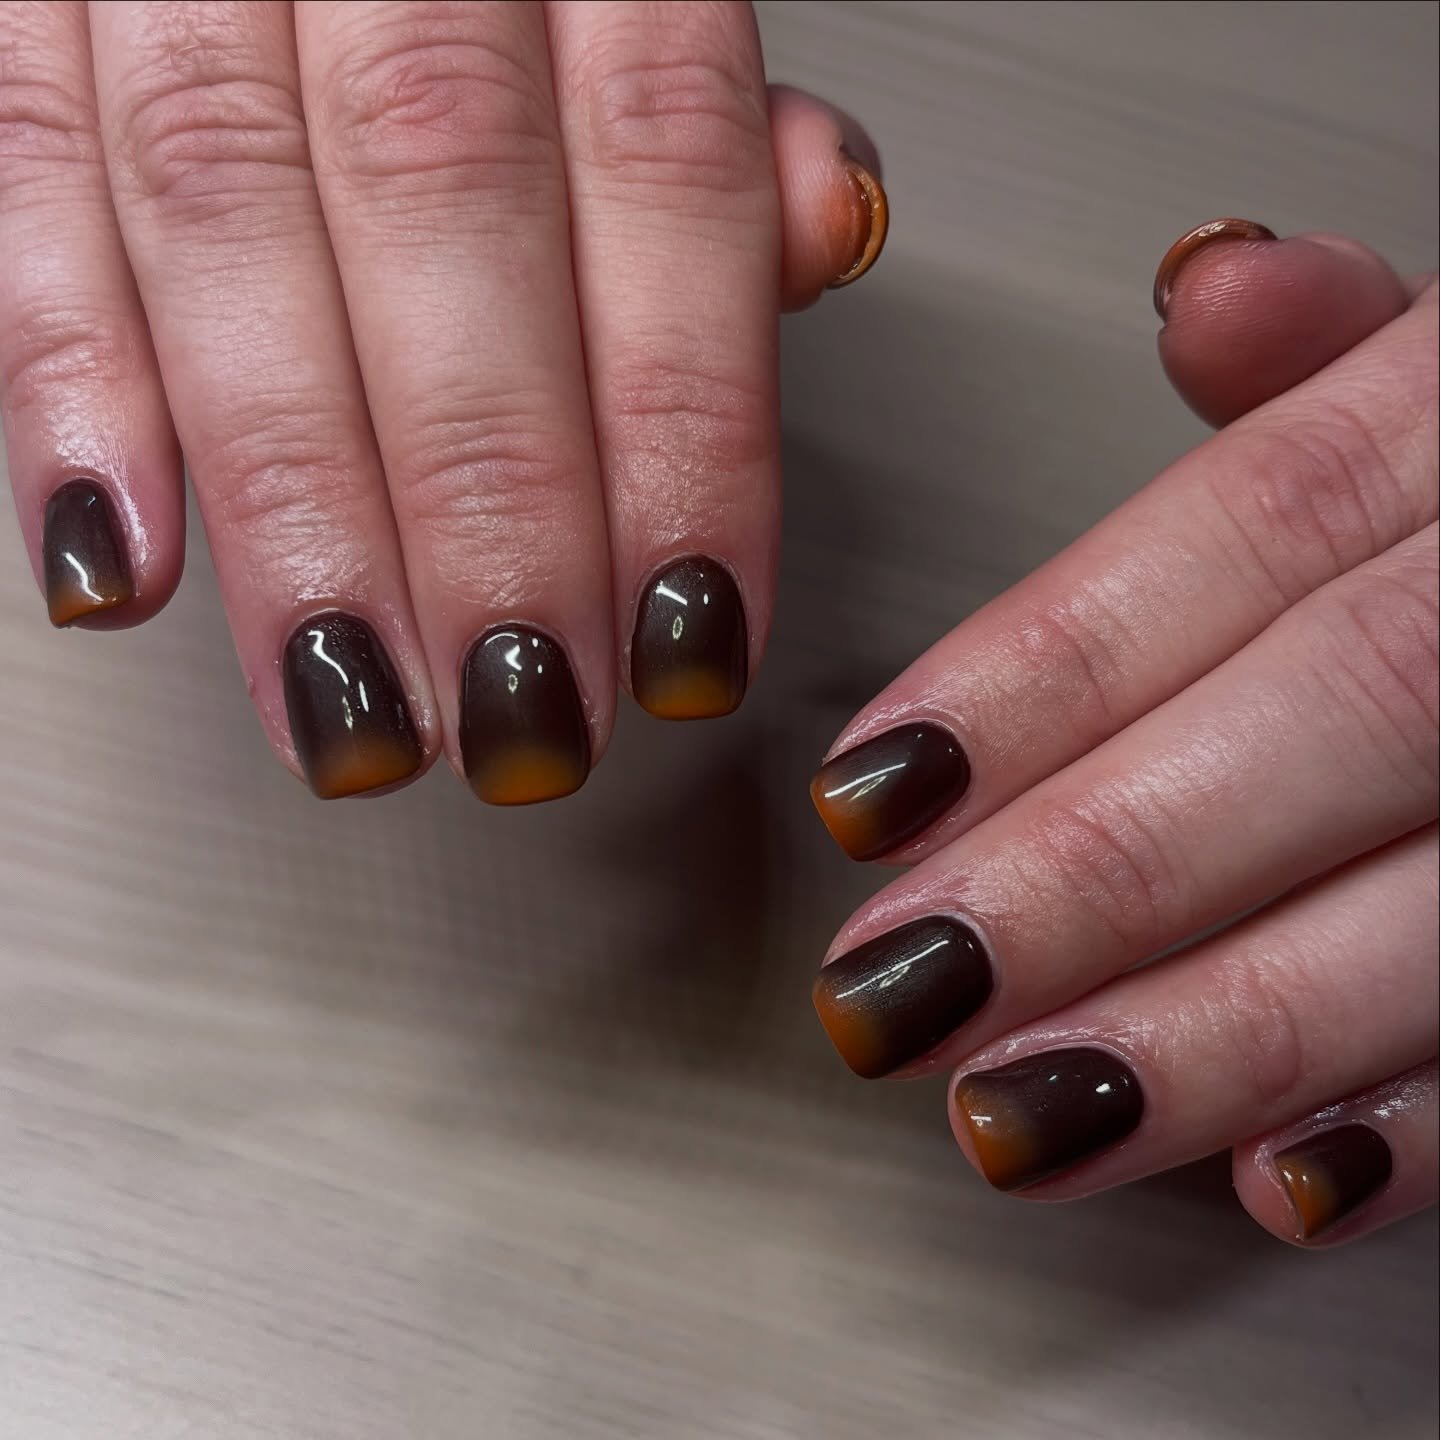
For the woman who finds bright orange a little loud after dark, this moody amber ombré is the answer. The design melts deep espresso brown at the cuticle into glowing amber orange at the free edge, like the last light of a November sunset sinking into night. It is the most dramatic look in this collection, yet it stays firmly in the harvest family thanks to that warm amber glow. The dark base makes the orange tips appear to burn brighter by contrast, while the glossy finish gives the whole manicure a lacquered, expensive depth. On short squoval nails the fade looks especially chic, proving that ombré needs no length to make an impact. It pairs beautifully with gold jewellery and a dark evening outfit, completing the after-dusk autumn aesthetic. This is Thanksgiving evening glamour: mysterious, cosy and quietly bold.
The classic sponge technique is still the best way to nail this blend at home. Paint a stripe of deep espresso and a stripe of amber orange side by side on a makeup sponge, then dab it onto the nail in gentle bouncing motions, reloading the sponge between nails. Two to three rounds of dabbing builds a seamless fade; do not drag the sponge or you will muddy the colours. Clean up the cuticles with an acetone-dipped brush while the polish is still tacky, then apply a glossy top coat to melt the layers together into one smooth gradient. A pro tip: work one nail at a time so the sponge stays damp and the colours stay blendable. The finished orange thanksgiving nails look airbrushed, expensive and completely custom. A final touch of cuticle oil keeps the skin around the gradient looking neat and hydrated.
Harvest Leaf Detail Art

Nothing says Thanksgiving quite like hand-painted leaves, and this design keeps them chic rather than crafty. A warm orange base, either solid or a soft gradient, sets the stage for delicate leaf detailing on one or two accent nails, painted in deeper rust, gold and brown tones. The key to keeping this thanksgiving nail art elegant is restraint: tiny, finely drawn leaves on a single feature nail look far more expensive than busy foliage across all ten. Think botanical illustration rather than cartoon autumn. The contrast between the smooth orange base and the intricate leaf work in these orange thanksgiving nails creates a focal point that photographs beautifully, especially in the golden afternoon light that streams through windows in late November. This restraint is what separates chic nail art from cluttered designs. A single well-painted leaf can say more about the season than ten busy nails ever could.
You do not need to be an artist to pull this off. Start with your orange base fully dry, then use a fine detail brush or even a toothpick to paint simple leaf shapes: a central vein line with two curved strokes on either side reads instantly as a leaf. Layer two or three leaves in slightly different rust and gold shades on the accent nail, keeping them small and clustered near the cuticle or tip rather than scattered randomly. A dotting tool can add tiny berry dots for extra harvest charm. If freehand still feels daunting, water-slide leaf decals or nail stickers give a near-identical result in seconds; just seal them well under top coat. Keep the remaining nails in clean solid orange so the art has room to breathe.
Terracotta Almond Classics
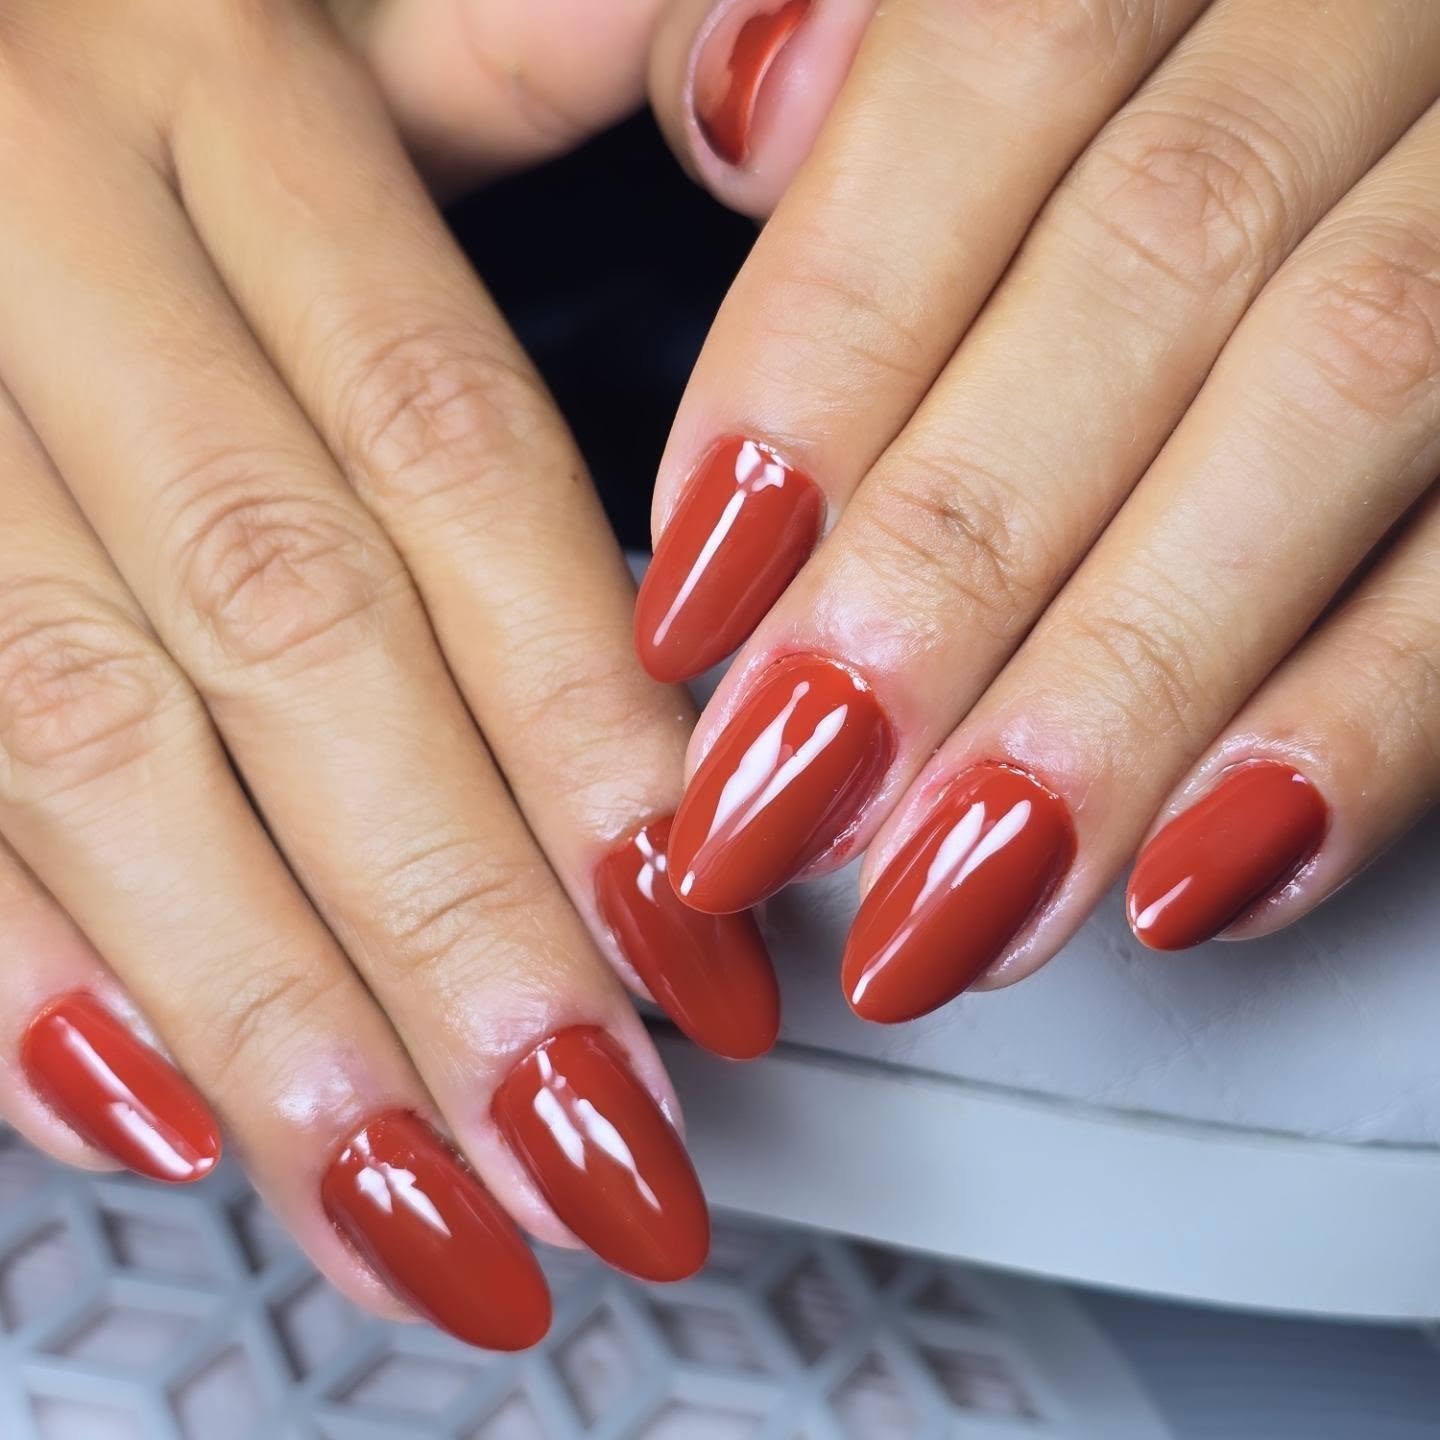
Terracotta sits at the sophisticated end of the orange spectrum: earthy, muted and impossibly chic. This design wears it in a satin or soft-matte finish on a classic almond shape, creating a manicure that belongs in a ceramics studio or a Tuscan farmhouse. It is the quiet-luxury answer to orange thanksgiving nails, perfect if you love warm colour in an understated style. The earthy undertone flatters olive and deep skin tones particularly well, and it pairs beautifully with the other harvest neutrals of the season. Our brown Thanksgiving nails roundup explores similar earthy territory if this palette speaks to you. Terracotta transitions effortlessly into December, so you get weeks of wear from one manicure. It is the shade designers reach for when they want warmth without noise. Understated yet memorable, terracotta proves neutrals can still shine.
The finish makes or breaks this look, so choose carefully. A true matte top coat gives terracotta a velvety, modern edge, while a satin or soft-touch finish keeps a hint of sheen that is more forgiving of imperfections. Matte formulas show every ridge and application flaw, so spend extra time on prep: thorough cuticle work, careful buffing and a perfectly smooth base coat are non-negotiable. Apply the terracotta in two even coats, then seal with your chosen matte or satin topper. One practical note: matte top coats can look tired after a few days of hand cream and cooking, so refresh the top layer mid-week to keep the velvety effect crisp. If terracotta feels too muted, the same matte technique works beautifully on deeper burnt orange nails for a bolder harvest statement. The result is a manicure that feels calm, grounded and quietly confident.
Glossy Marmalade Jelly Nails
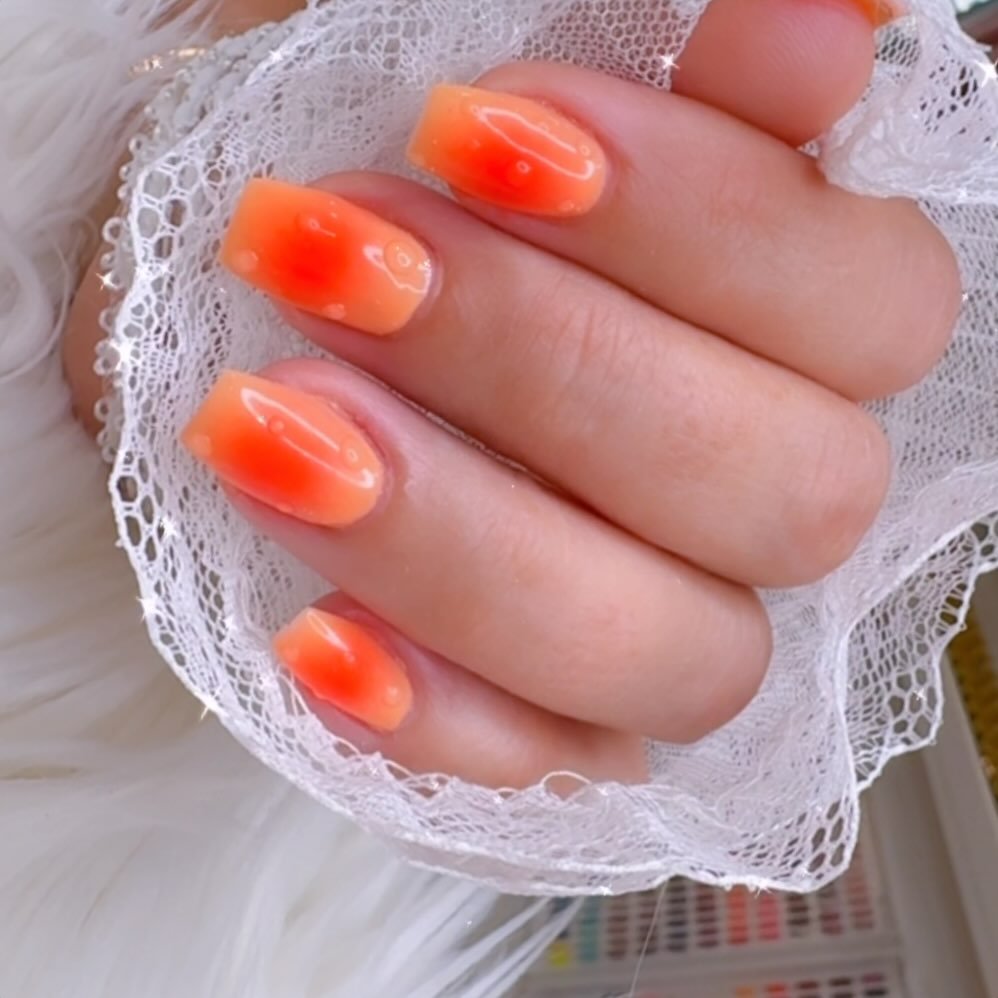
Jelly nails are the trend that keeps on giving, and a marmalade-orange jelly is pure autumn in a bottle. Unlike opaque cremes, jelly polish is translucent, letting light pass through the colour for a juicy, glass-like depth that looks almost edible. This design is perfect if you find solid orange thanksgiving nails a little heavy; the sheerness keeps the colour light and luminous, like sunlight through a jar of preserves. The glossy finish is essential here, amplifying the see-through effect and giving the nails a plump, hydrated look. It is a youthful, fresh take on harvest colour that works beautifully on short, natural nails where the translucency shows off a healthy nail bed. The see-through formula also forgives imperfect application, since sheer layers blend more easily than opaque cremes. It is a playful, modern finish that feels fresh against the deeper, moodier shades of late autumn.
Building jelly colour takes patience but the technique is simple. Start with a clear base coat, then apply the jelly orange in three to four thin coats, letting each layer dry fully before adding the next. The colour deepens with every coat, so you control the intensity: stop at two coats for a sheer wash or push to four for full marmalade richness. Thin coats are critical because thick jelly layers stay tacky and dent easily. Finish with a glassy top coat to maximise the juicy effect. For extra fun, sandwich a layer of fine gold glitter between two jelly coats on an accent nail; the glitter suspended in the translucent colour looks like embers glowing inside the nail. The result is dimensional, modern and endlessly stare-worthy. It is a fresh, modern entry among autumn orange nails that feels made for golden-hour photos.
Rust Tortoiseshell Accents
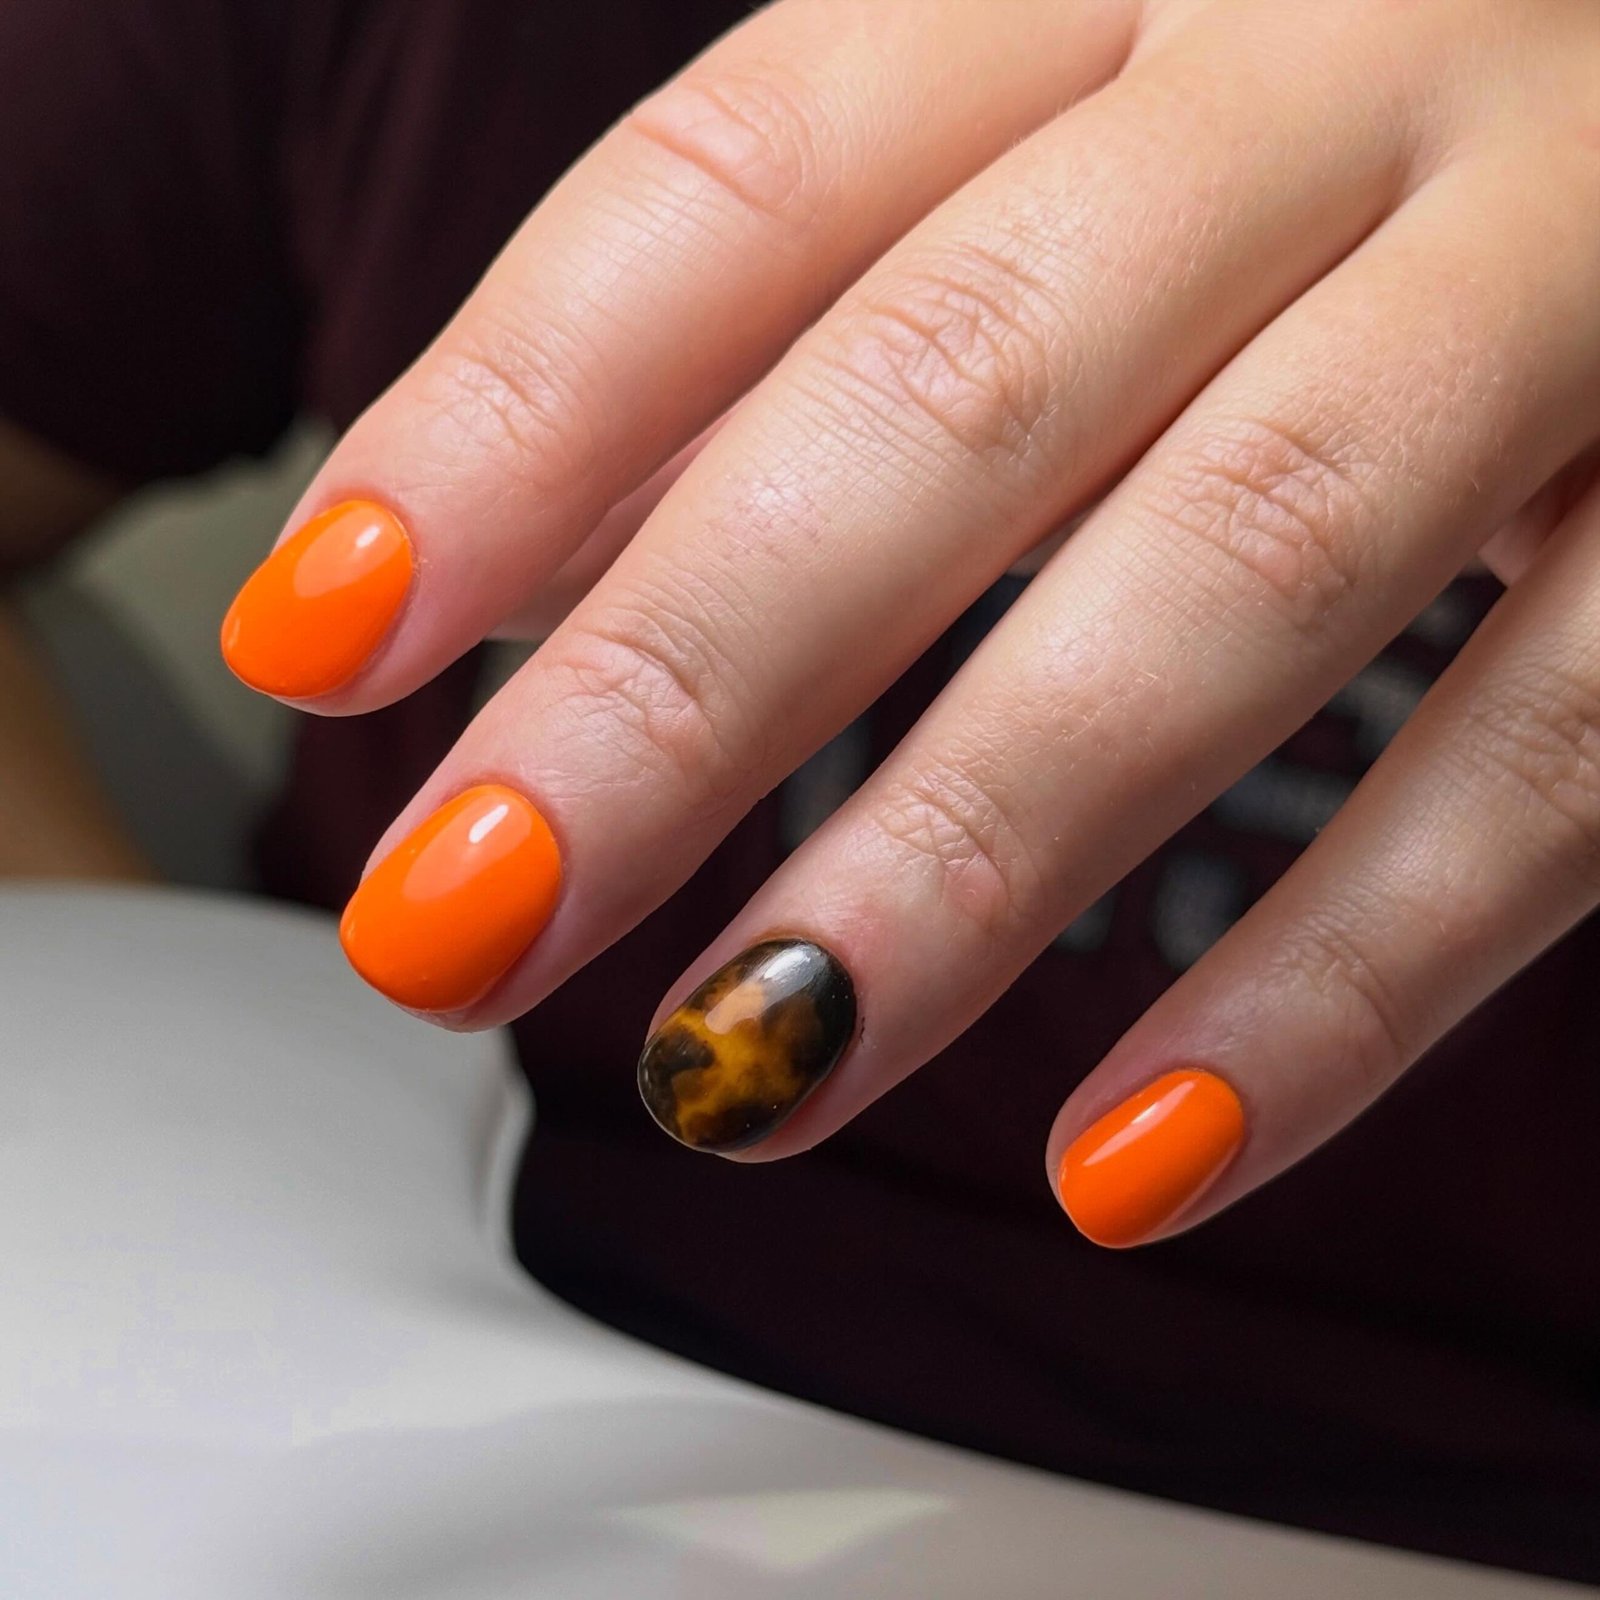
Tortoiseshell print is the pattern of the season, and the rust-orange version feels tailor-made for November. This design mixes solid rust-orange nails with one or two tortoiseshell accent nails, where blobs of amber, caramel and deep brown melt together under a glossy top coat. The print has a vintage, heirloom quality that suits Thanksgiving perfectly: it echoes tortoiseshell glasses, leather-bound books and well-loved wooden tables. It is also wonderfully forgiving as nail art goes, because the organic, irregular blobs are supposed to look random. No two accent nails will match, and that is the point. The overall effect is rich, textured and quietly luxurious. The print’s vintage charm makes it a natural fit for Thanksgiving, echoing heirloom pieces and well-loved leather. Because no two nails match, the design feels artistic and personal rather than mass-produced. It is pattern done the grown-up way.
The tortoiseshell technique is easier than it looks and very satisfying to do. Start with a sheer amber or caramel jelly base on the accent nails. While it is still slightly tacky, use a dotting tool to place irregular blobs of burnt orange and deep brown polish, then immediately dab a little more of the sheer amber over the top to melt the layers together. The wet-on-wet blending creates that signature depth. Do not overthink placement; randomness is your friend. Seal with two coats of glossy top coat for the glassy tortoiseshell finish. Keep the remaining nails in a solid rust creme that matches the darkest tone in the print, which ties the whole set together. These orange thanksgiving nails look far more complex than the twenty minutes they actually take.
Sunset Gradient Fade
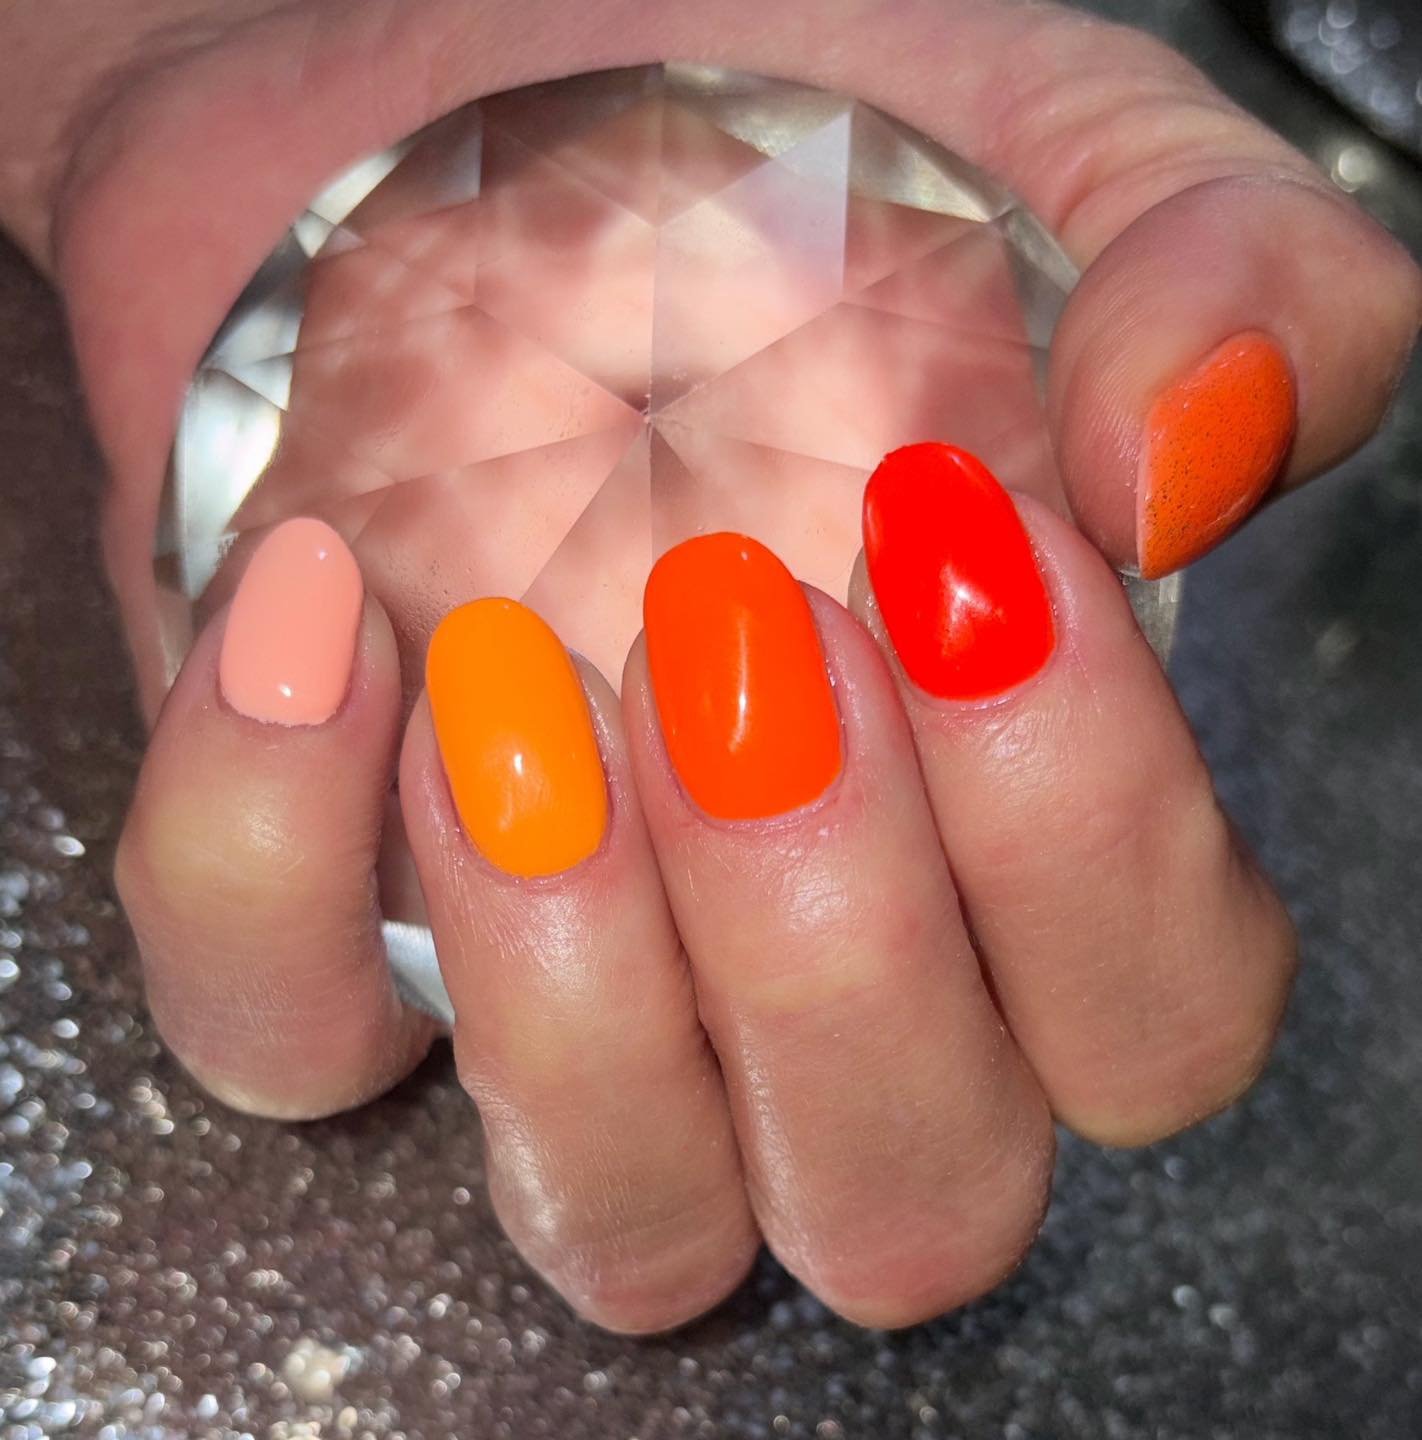
Why choose one orange when you can wear the whole sunset? This skittle-style design paints each nail a different shade from the same warm family: pale peach, apricot, tangerine, burnt orange and deep rust, flowing from thumb to pinky like a November sky at golden hour. It is joyful, modern and surprisingly wearable, because all the shades share the same undertone and read as one cohesive story. This is a brilliant option if you struggle to commit to a single polish colour; the gradient gives you variety without clashing. It also makes a fantastic conversation starter at the dinner table, where guests will inevitably ask which shade is which and hold your hand up to compare. The shared warm undertone is what keeps five different polishes looking intentional. As far as cheerful orange thanksgiving nails go, this sunset skittle is impossible not to love.
Execution is delightfully simple: the only skill required is choosing five polishes that flow well together. Line your shades up from lightest to darkest before you start, and assign them thumb to pinky (or reverse the order on the second hand for a mirrored effect). Apply two coats of each shade, keeping your application neat since there is no art to hide behind. A glossy top coat unifies the different formulas into one seamless finish. If your polish collection is thin, you can fake the gradient by mixing: start with your darkest orange and add a drop of white or nude to the bottle cap for each progressively lighter nail. The key is keeping the undertone consistent; mixing warm and cool oranges in one set breaks the sunset illusion instantly. Few orange thanksgiving nails are this joyful, and the finished gradient looks stunning in holiday photos.
Gilded Orange Thanksgiving Nails
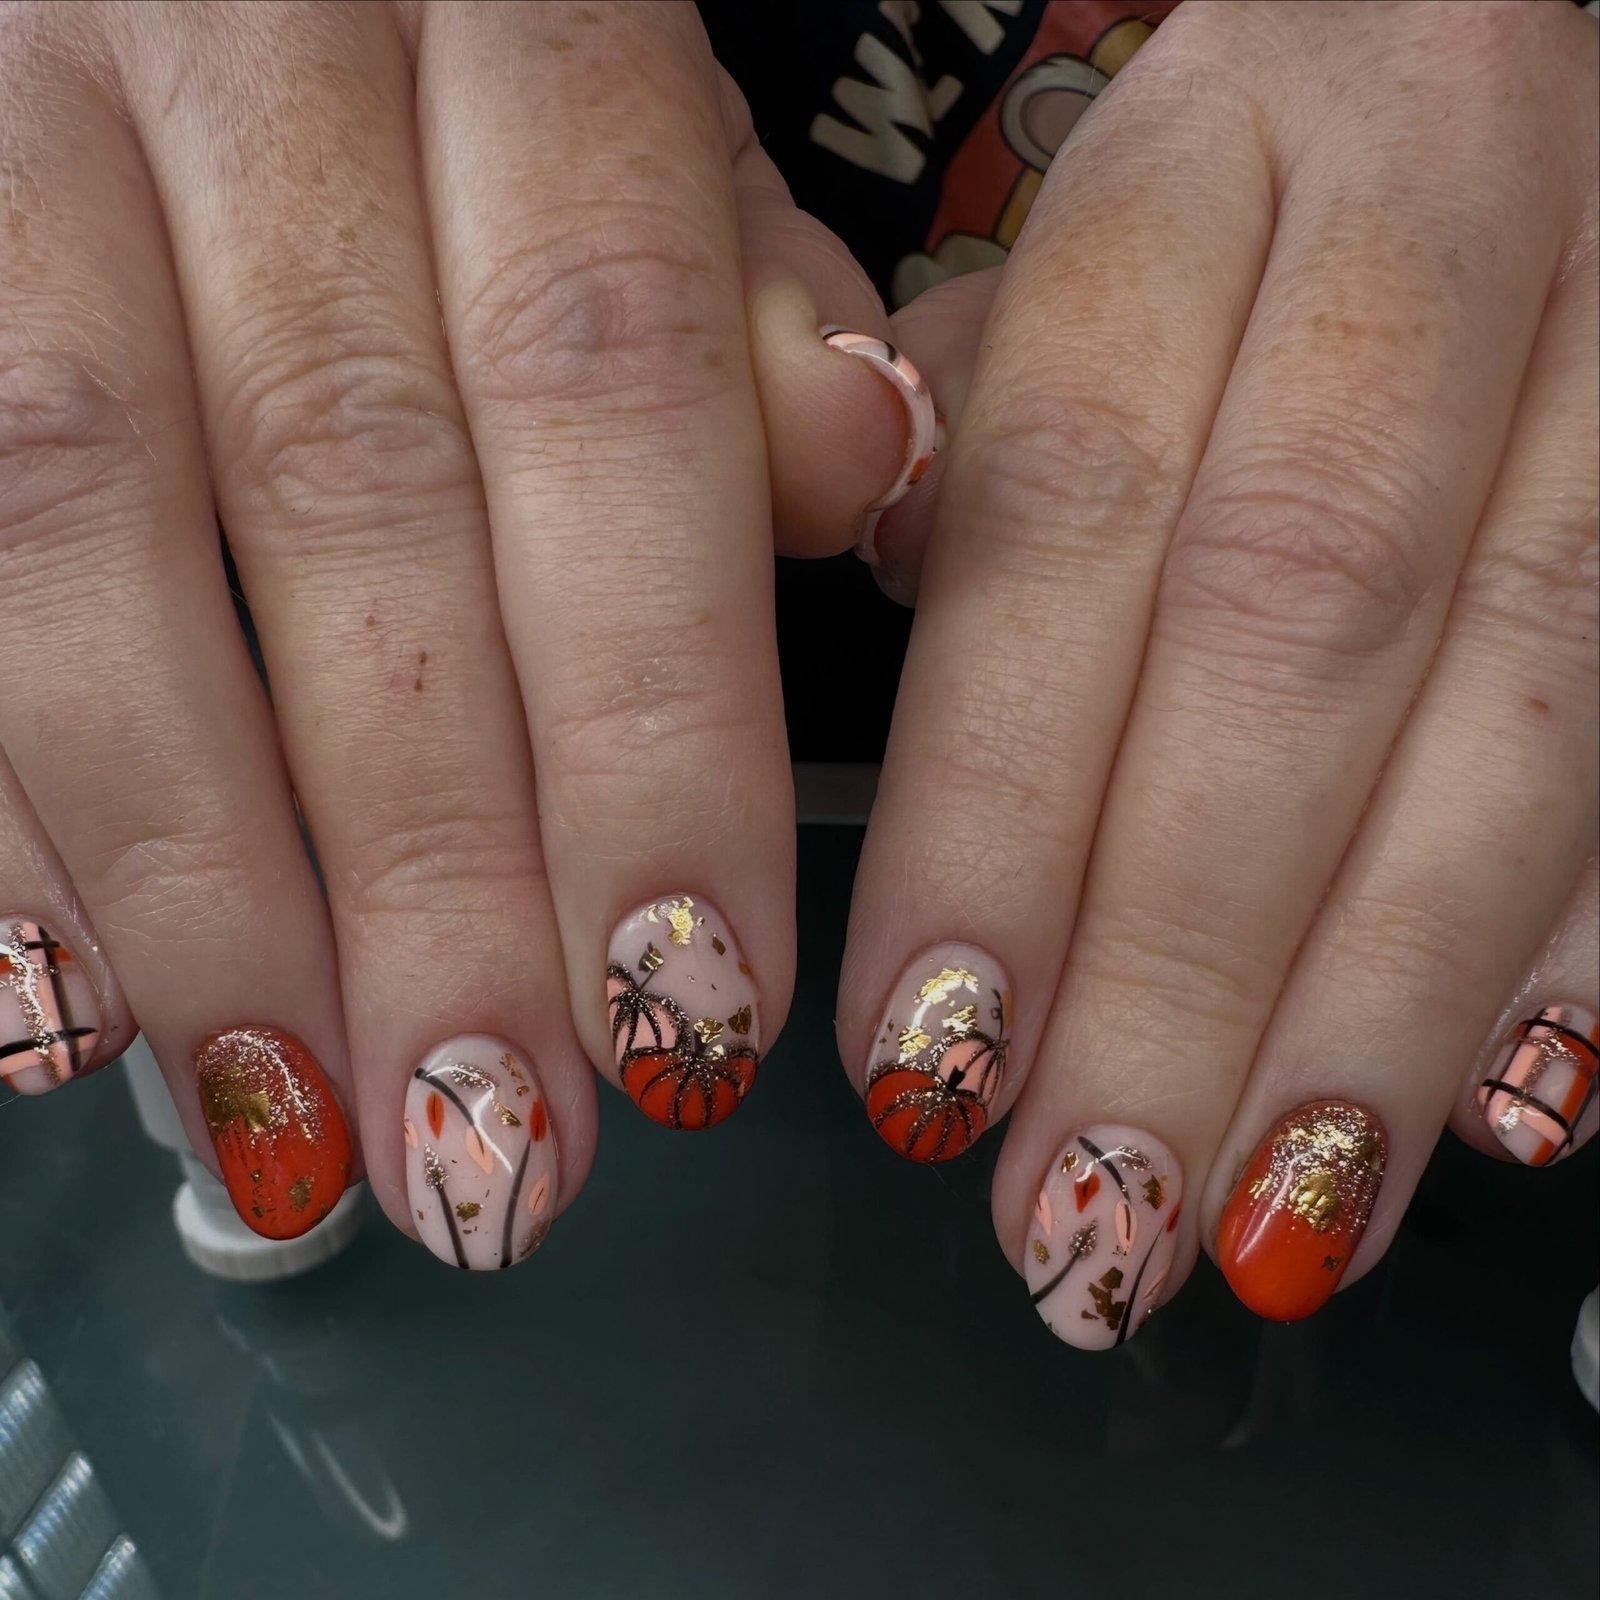
For the grand finale, this design goes full celebration: rich orange bases with gold-foil pumpkin art and gilded accents. Tiny hand-painted pumpkins in metallic gold sit on one or two feature nails, while the remaining nails wear deep burnt or copper orange, some with a whisper of gold flake scattered near the cuticle. It is the most festive look in this collection and unapologetically so, made for the holiday table. The gold elevates the orange from seasonal to special-occasion, catching candlelight and camera flashes alike. If you are hosting Thanksgiving and want your hands to look as considered as the tablescape, this is your manicure. These gilded orange thanksgiving nails are pure harvest luxury. The metallic details catch every flicker of candlelight, making your hands part of the tablescape. For maximum impact, this gilded finish is the one to wear when you are hosting the feast yourself.
Gold foil is easier to work with than its precious reputation suggests. Apply your orange base and let it dry completely, then brush a thin layer of foil adhesive or tacky top coat exactly where you want the gold to stick. Press small pieces of gold transfer foil onto the tacky areas with a silicone tool, then peel away to reveal the metallic finish; the irregular edges are part of the charm. For the pumpkins, paint simple rounded shapes in gold polish or use the foil over an orange pumpkin silhouette for a two-tone effect. Seal everything with two coats of top coat, capping the free edge, because foil edges can lift if left exposed. The result is a manicure that looks like it cost a fortune and took all afternoon.
Orange Thanksgiving Nails FAQs
What shade of orange works best for Thanksgiving nails?
Muted, earthy oranges win for Thanksgiving: think burnt orange, terracotta, rust, copper and pumpkin spice. These shades echo the harvest palette and read as warm and sophisticated. Bright neon or traffic-cone orange belongs to summer and Halloween, so steer toward colours with brown, red or golden undertones. If you are unsure, hold the bottle next to a fall leaf or a piece of cinnamon bark; if it harmonises, it is a Thanksgiving winner.
How do I keep orange nails elegant instead of Halloween-like?
The trick is in the undertones and the company your orange keeps. Choose spiced, brown-based oranges over vivid pumpkin brights, and pair them with gold, cream, brown or nude rather than black. A glossy or satin finish reads more refined than flat matte brights, and grown-up shapes like almond or oval soften the look. Leaf art, French tips and subtle glitter all say harvest; jack-o-lantern motifs say October, so save those for another month.
Can I do orange Thanksgiving nails at home?
Absolutely. Solid burnt-orange manicures, French tips with guides and skittle gradients are all very achievable with basic tools and a little patience. The key is thorough prep: tidy cuticles, a good base coat and thin, even polish layers. More detailed looks like hand-painted leaves or tortoiseshell print are doable too, but give yourself a practice run a few days before the holiday. When in doubt, a clean solid orange with a glossy top coat always looks intentional and chic.
What colours pair well with orange Thanksgiving nails?
Orange is a team player in the autumn palette. Gold and copper amplify its warmth and add festive sparkle, while cream, beige and chocolate brown ground it beautifully. Deep burgundy and cranberry create a rich, harvest-table contrast, and soft sage or olive green nods to autumn foliage. For outfits, lean into the same family: camel coats, cream knits, brown leather boots and gold jewellery all harmonise effortlessly with orange thanksgiving nails.
A Toast to Harvest Season
However you wear it, orange is the colour that makes November feel like November. Whether you choose the quiet confidence of a terracotta solid, the playful charm of pumpkin-spice French tips or the full glamour of gilded pumpkin art, these ten ideas prove that orange thanksgiving nails can be as elegant as they are festive. Screenshot your favourite, gather your polishes and give yourself a little harvest-season pampering. Your hands will be doing a lot of celebrating this month; they deserve to look the part.