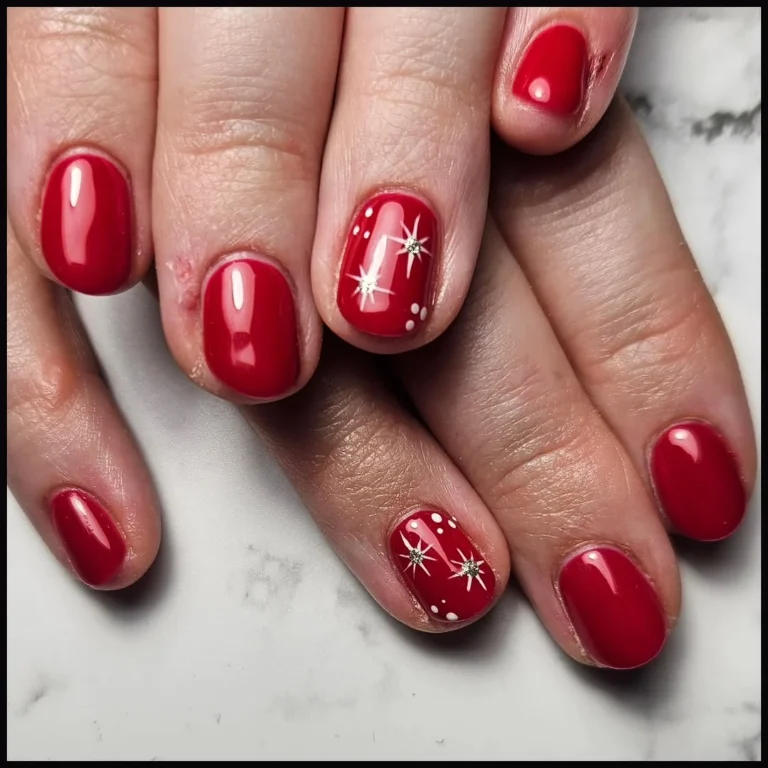
10 Snowflake Nails 2026: Frosty Winter Designs
Few manicures capture the magic of winter quite like snowflake nails. The moment the first frost appears on the windows and the evenings turn crisp, our Pinterest boards fill with icy blues, glittering whites and delicate hand-painted flakes, and it is easy to see why: a snowflake manicure feels festive without shouting and elegant without trying too hard. From minimalist nail art to full festive glamour, snowflake nails flatter every nail shape and length, from neat short squares to dramatic long almonds. They also photograph beautifully, which explains why winter nail designs featuring snowflakes dominate seasonal mood boards year after year. Each look was chosen for genuine wearability, not just camera appeal, so every set below works as beautifully in real life as it does in photographs.
Each design below pairs a wintery base with thoughtful snowflake detailing, from icy blue ombres and iridescent French tips to cosy sweater textures and modern negative-space art. You will find practical guidance with every idea, whether you are recreating it at home or describing it to your nail technician, plus notes on the shapes and lengths each look flatters most. We have mixed short and long lengths, subtle and statement finishes, so minimalists and maximalists alike will find a favourite. Many of these winter nail designs double as Christmas or New Year manicures, stretching your salon investment across the season. If crisp whites are your weakness, our white winter nails roundup has even more frosty inspiration to explore. Pin your favourites to your winter beauty board, then book that salon appointment: December fingers deserve their moment.
Frosty White Snowflake Nails
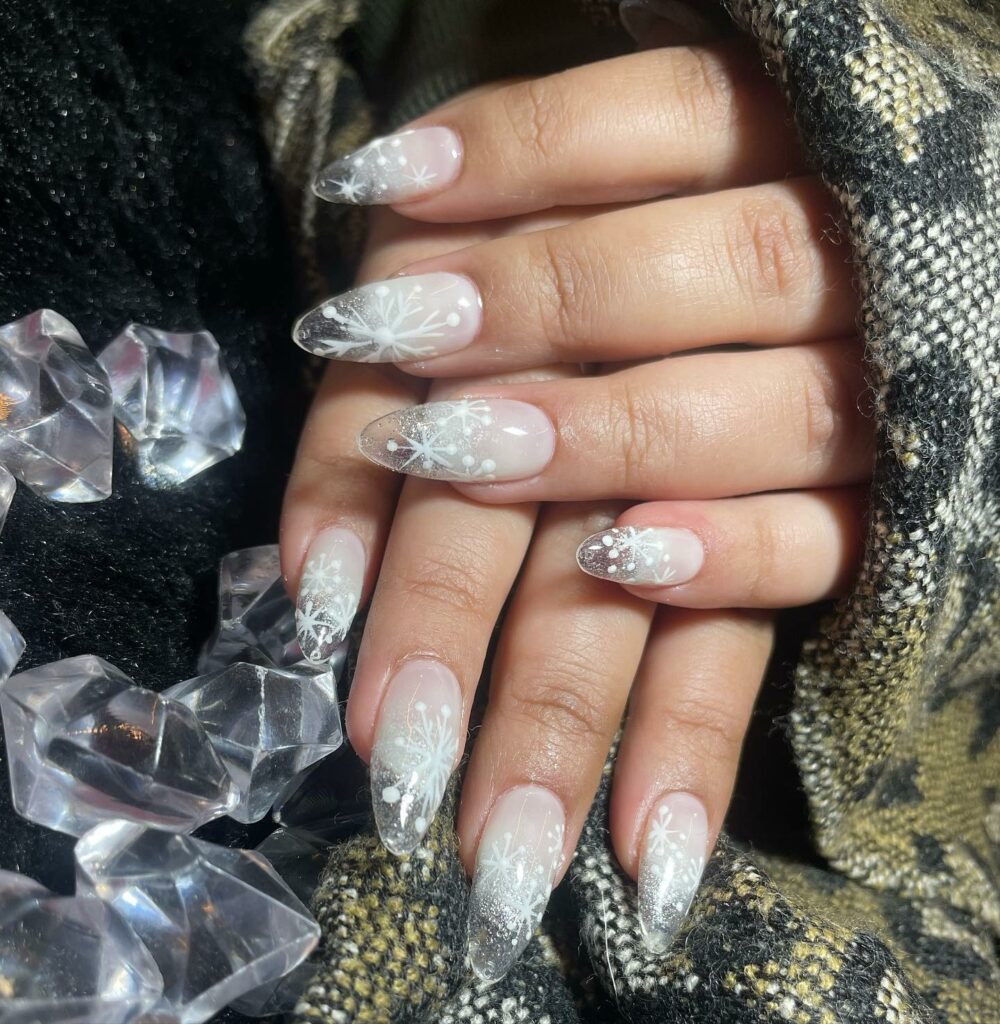
This ethereal set is the definition of frosty nails, with milky white almond nails decorated in delicate hand-painted snowflakes of every size. The sheer, almost glassy base keeps the look light and luminous, like breath fogging on a winter window, while the varying flake sizes add depth and movement. Staged here among ice cubes and chunky knits, the manicure captures that fresh-fallen-snow feeling perfectly, yet the neutral palette means it pairs with absolutely everything in a winter wardrobe. It is a beautiful choice for anyone who finds bold festive colours too loud but still wants seasonal snowflake nail art with real presence. The almond shape elongates the fingers and gives each snowflake room to breathe. A tiny crystal at the centre of the largest flake adds gorgeous dimension, and the look carries beautifully into January too, since frosty whites suit the whole season.
To recreate this frosty white look, start with a sheer milky white or pale nude base built up in thin coats for that translucent glow. A fine detail brush and opaque white polish will give you the crispest flakes; begin with six radiating lines from a central point, then add tiny branches and dots. Keep the flakes varied in size across the nails for a natural, organic finish rather than a stamped look. Seal with a glossy top coat to protect the white art, capping the free edge since pale designs show wear first. For a softer take on these snowflake nails, swap the milky base for sheer pink and keep the flakes delicate. If visiting a salon, show your technician a photo and ask for a frosted-glass finish to match the translucency.
White French Snowflakes
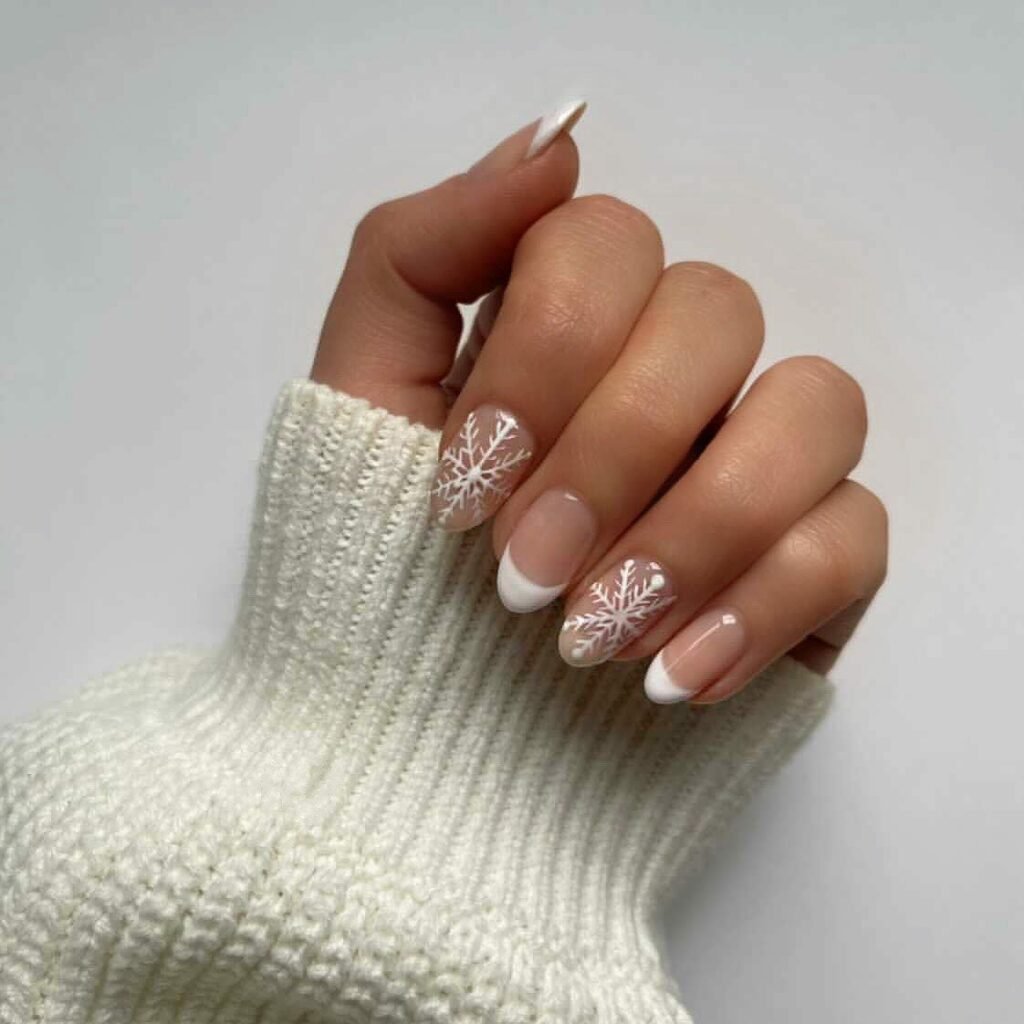
The classic French manicure gets a wintry upgrade in this charming set, where crisp white tips are joined by two accent nails carrying bold white snowflakes. The short, neat length keeps the look fresh and wearable rather than bridal, while the nude base lets the white detailing pop with lovely contrast. Photographed against a cream knit cuff, this is snowflake nail art at its most versatile: polished enough for the office, festive enough for December gatherings, and simple enough to maintain for weeks. Short nails suit this design especially well, since the snowflake motifs stay large enough to read clearly without crowding the nail. The nude base also makes regrowth far less obvious than a full-colour manicure, so the set keeps looking fresh between appointments. For evening events, a whisper of fine glitter over the tips transforms the daytime look into party-ready nails in seconds.
Painting white French snowflake nails at home starts with neat tips, using guides or a steady hand, then letting them dry fully before adding the flake art. On the accent nails, paint your snowflakes slightly larger than you think, as bold shapes read better on shorter lengths. A white stamping plate is a brilliant shortcut if freehand flakes feel daunting, giving crisp results in seconds. Finish with a glossy top coat for shine and protection, and refresh the tips with a thin white line if they begin to wear. Keep your detail brush clean between flakes by wiping it on a lint-free pad, which stops the white going grey. Short nails chip faster at the corners, so be generous with top coat there, and these snowflake nails will easily last a full week.
Deep Blue Snowfall

If you love drama, this deep blue snowfall design is pure winter-night magic. A rich cobalt-to-sky ombre fades across long almond nails, scattered with white dots of every size that look exactly like snowflakes drifting through dark air. The varying dot sizes create wonderful depth, so the manicure feels alive rather than flat, and the glossy finish makes the blues glow like a frosty evening sky. It is a bold take on icy blue nails that still feels wearable, since the darker tones ground the sparkle. The almond shape adds to the drama, giving the snowfall plenty of canvas, while the glossy finish deepens the blues beautifully. These are snowflake nails with real evening presence, made for candlelit dinners and frosty nights out. For more moody blue inspiration, our navy blue winter nails roundup is well worth a browse before your appointment.
The falling-snow effect is one of the easiest winter nail designs to recreate, which makes it perfect for beginners. Paint your blue ombre first using a makeup sponge, blending a deep navy at the cuticle into a brighter blue at the tip. Then, using a dotting tool or the end of a bobby pin, scatter white dots in mixed sizes across each nail while the base is slightly tacky. Keep some dots tiny and a few larger for that natural snowfall feel. Let each layer dry fully before adding the dots, or the white may bleed into the blue. Two coats of glossy top coat will seal the dots smooth and boost the icy shine, and a matte top coat instead creates a soft, velvety mood like fresh powder. A final wipe of cuticle oil around each nail keeps the skin neat and frames the deep blues beautifully.
Glitter Snowflake Glamour

For maximum festive sparkle, this glitter snowflake set is pure celebration on ten nails. A sheer nude base is buried under holographic glitter that shifts between silver, pink and gold as the light moves, with delicate white snowflakes peeking through the shimmer and tiny gold star charms adding extra magic. The almond shape keeps the look elegant rather than gaudy, and the sheer background means the glitter never feels heavy. These are party-season snowflake nails at their best: joyful, eye-catching and guaranteed to collect compliments at every December gathering. They suit medium to long lengths where the glitter has room to dance. The holographic particles catch even low winter light, so your snowflake nails sparkle in daylight and candlelight alike, yet the sheer nude base keeps the overall effect surprisingly wearable for daytime festive events too.
Building glitter snowflake nails starts with a nude or sheer pink base, then layering holographic glitter while the polish is still tacky for maximum grip. Press the glitter on with a flat brush rather than brushing it, which keeps the coverage dense and even. Add your white snowflake decals or stamps next, placing them where they will not be swallowed by the sparkle, then tuck in tiny star charms with a dot of nail glue. Work over a piece of paper to catch fallout, tapping the excess back into the pot. Two coats of top coat will smooth the texture into a glassy finish. If a full glitter set feels like too much, try these snowflake nails as an accent on two nails with plain nude on the rest. Because glitter polish can be drying, massage cuticle oil around each nail daily to keep the surrounding skin soft.
Iridescent Snowflake Tips

Iridescent chrome takes these snowflake nails somewhere truly dreamy. Long almond nails wear a sheer nude base with frosty blue French tips burnished in an aurora chrome that shifts between ice blue, lilac and pearl as you move your hands. One accent nail carries a single crisp white snowflake, letting the chrome do most of the talking. The effect is futuristic yet frosty, like sunlight on fresh snow, and it is one of the most photographed winter nail designs for 2026. The long almond shape is essential here, giving the chrome gradient room to shift and glow. These snowflake nails feel thoroughly modern, bridging classic winter motifs and 2026’s love of futuristic finishes. If chrome finishes are your obsession, our pearl chrome nails edit has even more luminous ideas to try.
Achieving iridescent snowflake tips at home is simpler than it looks with chrome powder. Paint your French tips in a pale blue or white gel, cure, then burnish aurora chrome powder over the tips with a silicone applicator until the shift appears. Brush away the excess before sealing with a no-wipe top coat. Paint your snowflake on the accent nail with opaque white polish after the chrome step, so the flake stays crisp. Keep the base sheer nude to let the iridescence shine, and avoid regular top coat over chrome since it can dull the mirror effect. This design needs gel products for the best chrome finish, so consider a salon visit if you only own regular polish. Wipe the nail surface with alcohol before starting, as chrome adheres best to a perfectly clean, oil-free base.
Sweater Knit Snowflakes
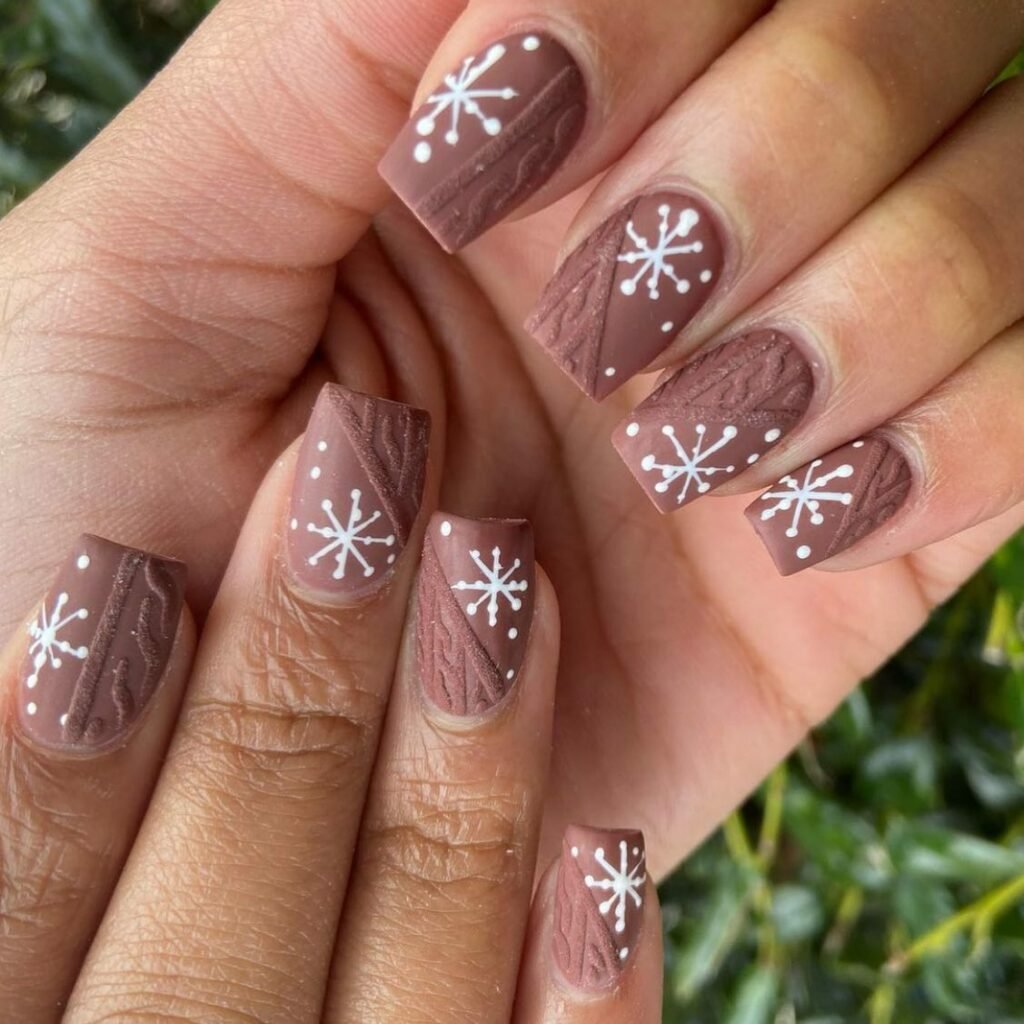
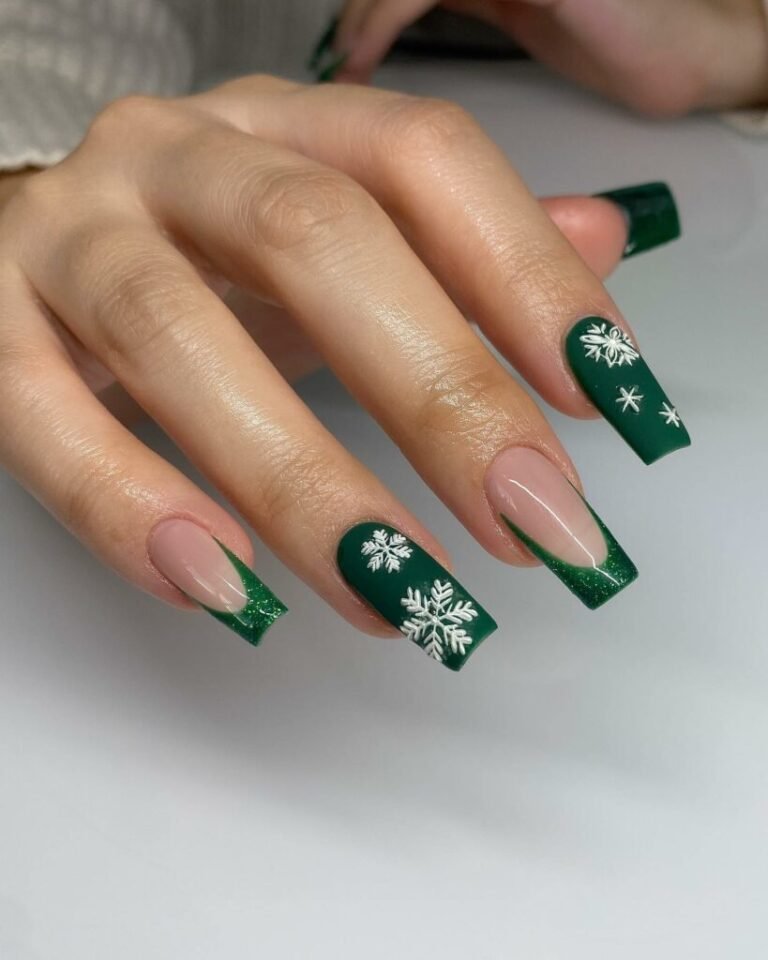
Cosy sweater knit texture meets crisp snowflake art in this wonderfully tactile design. Matte mauve square nails are piped with raised cable-knit patterns like your favourite winter jumper, while bold white snowflakes are painted across the textured base for striking contrast. The matte finish enhances the fabric-like feel, and the rich mauve shade feels modern and unexpected next to classic winter blues and whites. This is winter nail art with real dimension: the texture catches the light beautifully as you move. It suits medium to long square or coffin shapes, where the knit pattern has room to show its detail. These are snowflake nails with genuine texture you can feel, which makes them endlessly touchable, and the unusual mauve shade photographs beautifully against winter knits for your seasonal Pinterest board.
Creating sweater knit snowflakes requires a thicker product, such as a 3D gel or very opaque gel polish applied with a detail brush. Pipe the cable pattern in smooth, even lines and cure before painting your white snowflakes on top with a fine liner. Keep the flakes simple and bold, since fine detail gets lost over texture. A matte top coat over everything unifies the design and boosts the cosy knitwear effect. If freehand cables feel ambitious, practise the pattern on a nail tip first. The textured set pairs best with simple jewellery, letting the manicure be the star, and the result looks impressively professional for the modest effort involved. This cosy design also photographs wonderfully against knitwear, so style your hand shots with your favourite jumper, and keep a small brush handy for touch-ups since raised gel can catch on fabrics.
Azure Blue Snowflake Nails
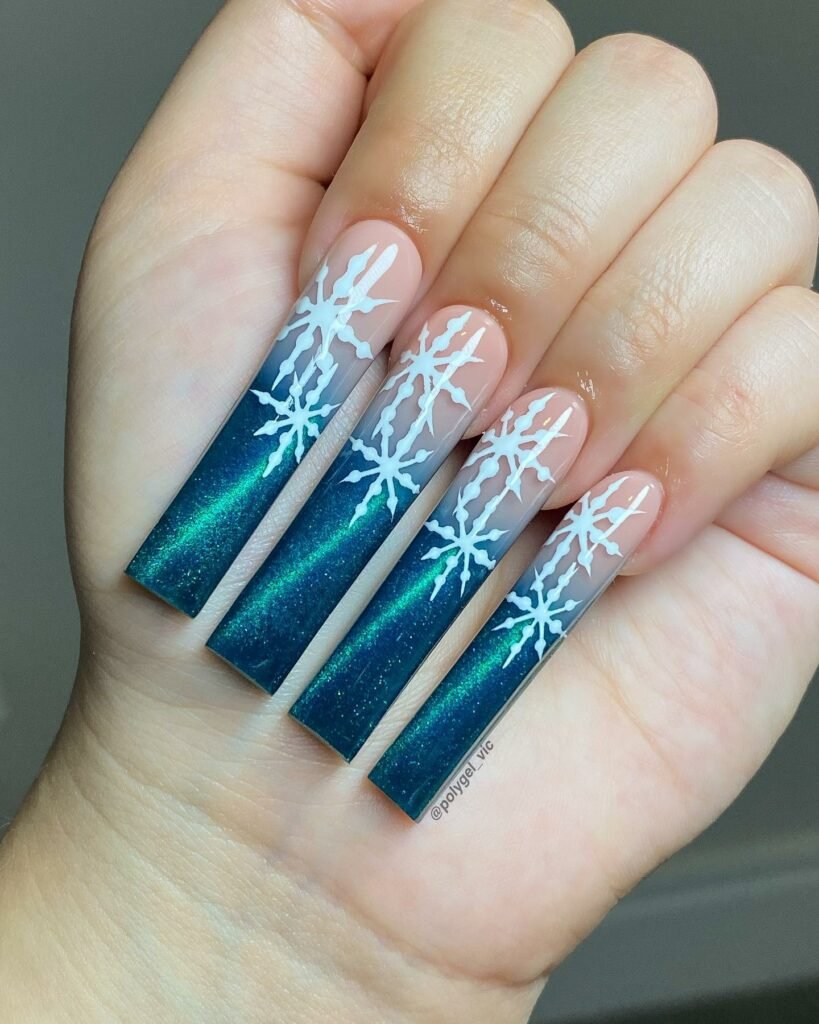
These azure blue snowflake nails are a love letter to frozen seas. Extra-long coffin nails wear a shimmering teal-blue base that fades to nude near the cuticle, decorated with bold white snowflakes in varying sizes. The cat-eye shimmer running through the blue adds incredible depth, like light moving under ice, while the long coffin shape gives the design a dramatic, editorial edge. This is a statement manicure for anyone who wants their winter nail designs to be noticed, perfect for parties and special occasions. The nude fade at the cuticle also helps regrowth look softer between appointments. The shimmer shifts as you move, keeping the design mesmerising from every angle, yet the classic flake motifs keep it unmistakably wintry rather than costumey. Pair the finished manicure with silver jewellery to echo the icy shimmer running through the blue.
To recreate azure blue snowflake nails, start with a magnetic cat-eye gel in teal or deep blue, holding the magnet to create that signature light band before curing. Fade the colour into a nude base near the cuticle using a sponge for a seamless transition. Paint your white snowflakes with an opaque gel paint and a detail brush, varying their sizes for a natural feel. Long coffin tips are essential for these dramatic proportions, so use extensions or sculpted acrylics if your natural nails are short. Take breaks during long sessions, as detailed snowflake nails like these demand patience, and seal with glossy top coat, capping the free edge since long nails take more daily knocks. Avoid using the sharp tips as tools, and book a fill every two to three weeks to keep the extensions strong.
Ombre Snowflake Fade

Soft, romantic and endlessly wearable, this ombre snowflake fade blends nude into snowy white tips like a winter sunrise. Each almond nail carries glittering white snowflakes that seem to dissolve into the gradient, creating a dreamy, seamless effect that flatters every skin tone. The ombre elongates the nails beautifully, making it a brilliant choice for shorter lengths that want to look longer. These frosty nails feel festive without any single bold colour, which means they coordinate with every outfit from office tailoring to party dresses. These snowflake nails are a safe bet for anyone nervous about bold nail art, offering festive spirit in the gentlest possible form. The gradient also disguises regrowth gracefully, making it one of the lowest-maintenance winter options in this roundup. It also suits every skin tone, since the nude half can be matched to your own complexion.
The ombre base is the heart of this look, and a makeup sponge is your best friend for a seamless blend. Apply nude near the cuticle and white towards the tip, then dab gently where they meet until no line remains. While the white is still tacky, press fine iridescent glitter over the tips for frost, then stamp or paint your snowflakes in white. Patience is everything with ombre snowflake nails: rushing the blend is the most common mistake beginners make. Two coats of top coat will smooth everything into a glassy finish and protect the delicate gradient. For extra longevity, wrap the tip with each coat and finish with cuticle oil. If the gradient looks streaky, add another sheer layer of white at the tip and blend again gently, then clean up around the cuticles with acetone for a crisp, salon-quality edge.
Sheer Nude Snowflakes
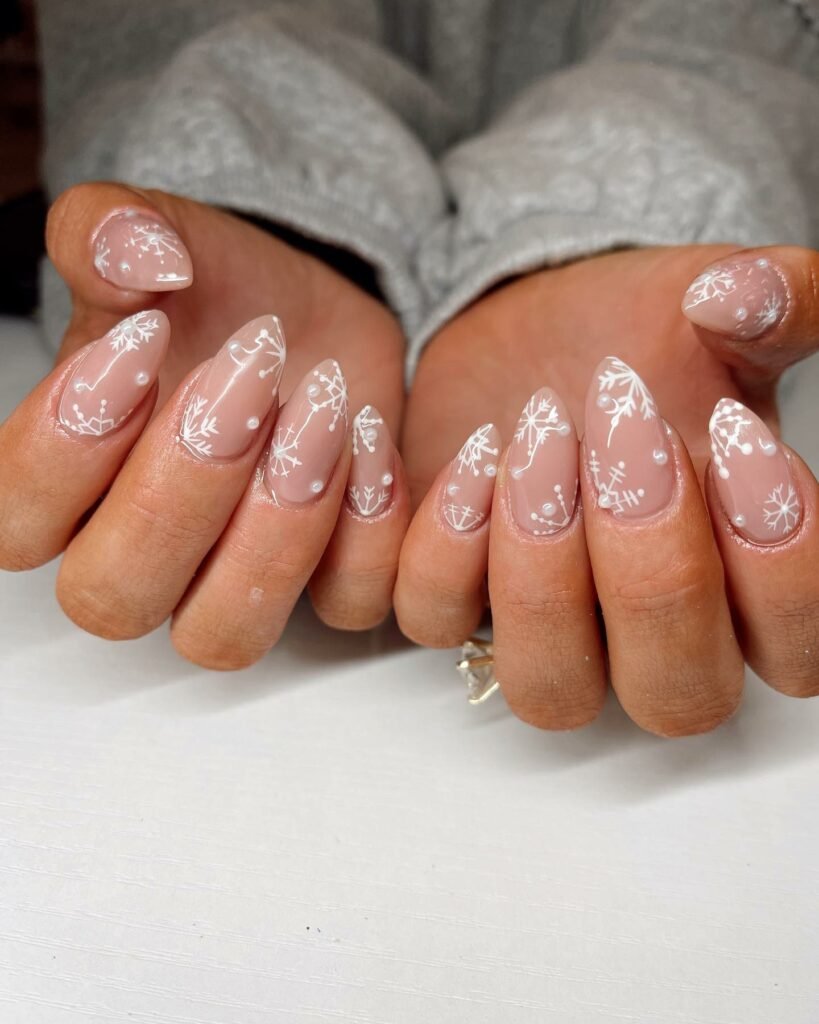
Sometimes the prettiest snowflake nails are the quietest, and this sheer nude set proves it. A barely-there nude base lets the natural nail show through, decorated with delicate white snowflake decals and scattered dots that feel like the first light dusting of snow. The almond shape keeps the look refined, and the transparency makes it one of the most office-friendly winter nail designs you can wear. It is also wonderfully low-maintenance: regrowth blends invisibly into the sheer base. If you love minimalist nail art that still nods to the season, this understated design belongs on your shortlist. These snowflake nails prove that restraint can be the most striking choice of all, and chips stay far less visible, so the manicure looks presentable even as it grows out. It also layers beautifully under a sheer glitter topper for evenings when you want extra sparkle.
Sheer nude snowflake nails are a dream for beginners, since snowflake water decals do the intricate work for you. Apply your sheer nude base in two thin coats, then slide the decals into place with tweezers and a drop of water for easy positioning. Scatter tiny white dots around the flakes with a dotting tool for that falling-snow feel. Press each decal firmly to avoid air bubbles, which can lift under top coat. Seal everything under two coats of glossy top coat, which melts the decal edges invisibly into the base. Keep the design sparse rather than crowded; negative space is what makes this look so elegant. Store any leftover decals flat in a cool drawer so they stay usable for next winter, and a peel-off base coat makes removal effortless when you are ready for a change.
Negative Space Snowflakes
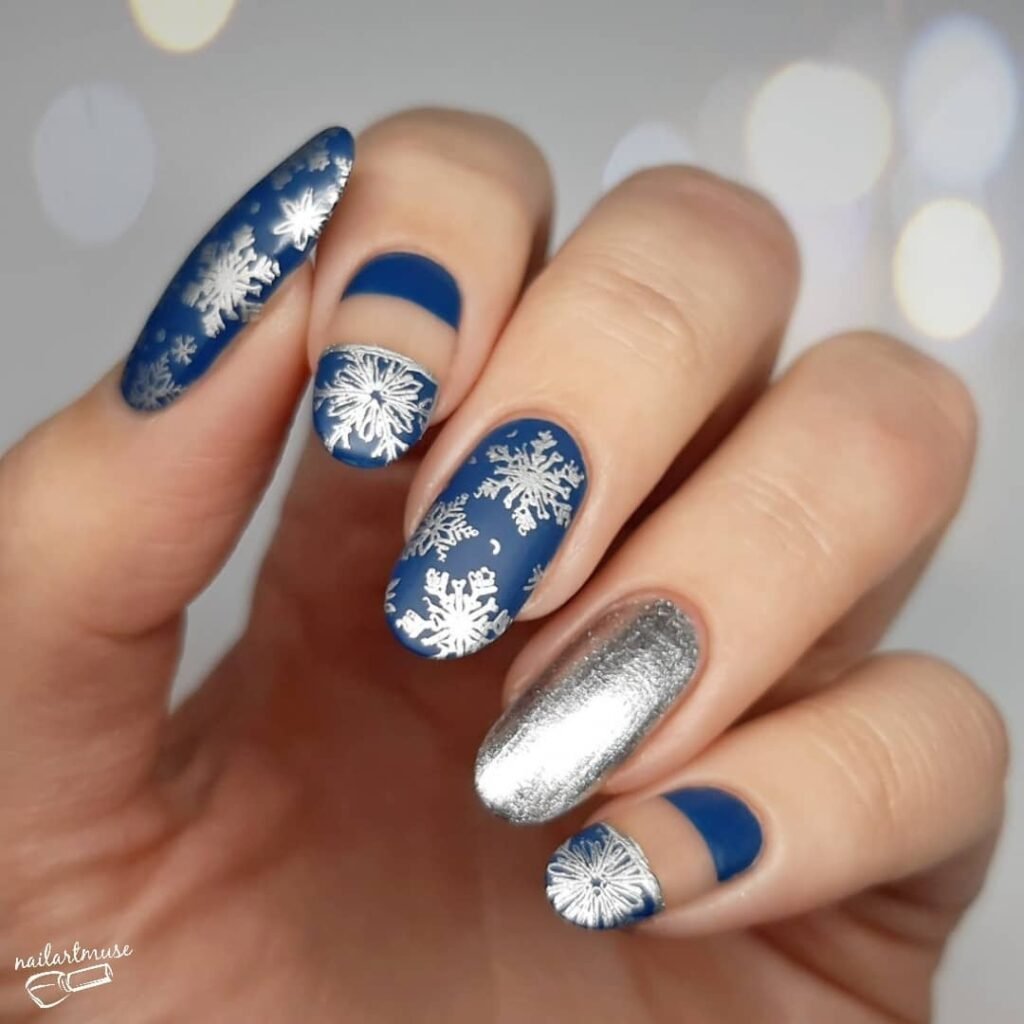
Modern and striking, these negative space snowflake nails play with contrast brilliantly. Royal blue nails are stamped with intricate white snowflakes, while one accent nail goes full chrome silver and the pinky wears a clever negative-space French in matching blue. The mix of finishes — glossy stamped art, mirror chrome and bare negative space — keeps the eye moving and the design feeling fresh and editorial. This is snowflake nail art for the fashion-forward: bold, graphic and unmistakably 2026. The stamping technique also means the flakes are perfectly crisp, which freehand can rarely match. These snowflake nails make a confident style statement without a single traditional red or green in sight, and the graphic stamped flakes give the design an almost jewellery-like precision. The royal blue base also flatters a wide range of skin tones, keeping the graphic design wearable for everyone.
A snowflake stamping plate is the secret weapon behind this negative-space design. Paint your blue base and let it dry completely, then stamp the flakes in opaque white stamping polish with a firm, quick press. For the chrome accent, burnish silver chrome powder over a cured gel base and seal with no-wipe top coat. The negative-space French is simply a blue tip painted over bare, base-coated nail — clean up the smile line with a flat brush dipped in acetone. Stamp with confident, even pressure, since hesitation causes patchy transfers. Finish everything with top coat, being gentle over the chrome so the mirror shine survives. Let everything dry fully before applying hand cream, as moisture can cloud fresh chrome, and store your stamping plates flat and clean to preserve their etched detail.
Snowflake Nails FAQ
How do you paint snowflakes on nails at home?
Start with a fine detail brush and opaque white polish over your chosen base colour. Paint six thin lines radiating from a central point, then add small branches and dots to build the crystalline detail gradually. Work slowly and keep the brush lightly loaded to avoid blobs. If freehand feels intimidating, snowflake stamping plates or water decals give crisp results with far less practice and look beautiful sealed under top coat. Practise on a nail tip first, and remember that varying the flake sizes across your nails creates the most natural finish.
What colours work best for snowflake nails?
White snowflakes pop most dramatically against deep or mid-tone bases such as navy, cobalt, teal and burgundy, which is why blue snowflake designs are perennial favourites. For a softer look, try milky white, sheer nude or baby pink bases with white flakes, or lean into frosty finishes like iridescent chrome and holographic glitter. Metallic silver and gold bases also frame white snowflakes beautifully for party season. Ultimately, choose a base with enough contrast that the delicate flake lines stay clearly visible.
Do snowflake nails suit short nails?
Absolutely — snowflake nail art works beautifully on short nails with a few small adjustments. Keep the flakes simpler and slightly larger so they read clearly on a smaller canvas, and consider placing one statement flake per nail rather than several small ones. Sheer nude bases with delicate decals, falling-snow dot designs and minimalist French tips with a single accent flake all flatter shorter lengths wonderfully. Short nails also make intricate designs easier to maintain, since there is less surface to chip.
How long will snowflake nail art last?
With proper application, snowflake nail art lasts as long as any manicure: around five to seven days with regular polish and two to three weeks with gel. The key is sealing the delicate white detailing under two coats of top coat and capping the free edge, since white art shows wear first. Avoid using your nails as tools and reapply top coat every two to three days to extend the design. Hand-painted flakes under gel are the most durable option for the festive season.
Final Thoughts
From frosty whites and deep blue snowfalls to glitter glamour and modern negative space, snowflake nails offer a winter design for every style and skill level. The beauty of this trend is its flexibility: go bold with long coffins and chrome, or keep it quiet with sheer nudes and delicate decals. Whatever your budget, there is a version here for you, from quick decals to full salon artistry.
Whichever of these snowflake nails you choose, screenshot it for your nail technician or gather your brushes for a cosy DIY session. Pin this roundup to your winter board for later, and let your fingertips do the talking all season long.