10 Easy Halloween Nail Designs 2026: Quick Spooky Manicures
Looking for easy Halloween nail designs you can actually do yourself before the party? This guide rounds up ten beginner-friendly Halloween manicures for 2026 that take minimal tools, little time, and zero professional skill. Halloween nails do not have to mean complicated nail art or expensive salon visits; the ideas below use simple techniques like dotting, striping, and accent nails so anyone can pull them off at home. Each design comes with a full breakdown of why it works plus a short step-by-step so you can recreate it tonight. Whether you want cute ghosts, creepy spiderwebs, or classic pumpkin tips, these easy Halloween nail designs deliver maximum spooky impact with minimum effort. Grab your polish, a toothpick, and a little patience — by the end of this list you will have at least one of these easy Halloween nail designs you love. Let us dive into the simplest scary-cute manicures of the season.
Easy Halloween Ghost Accents
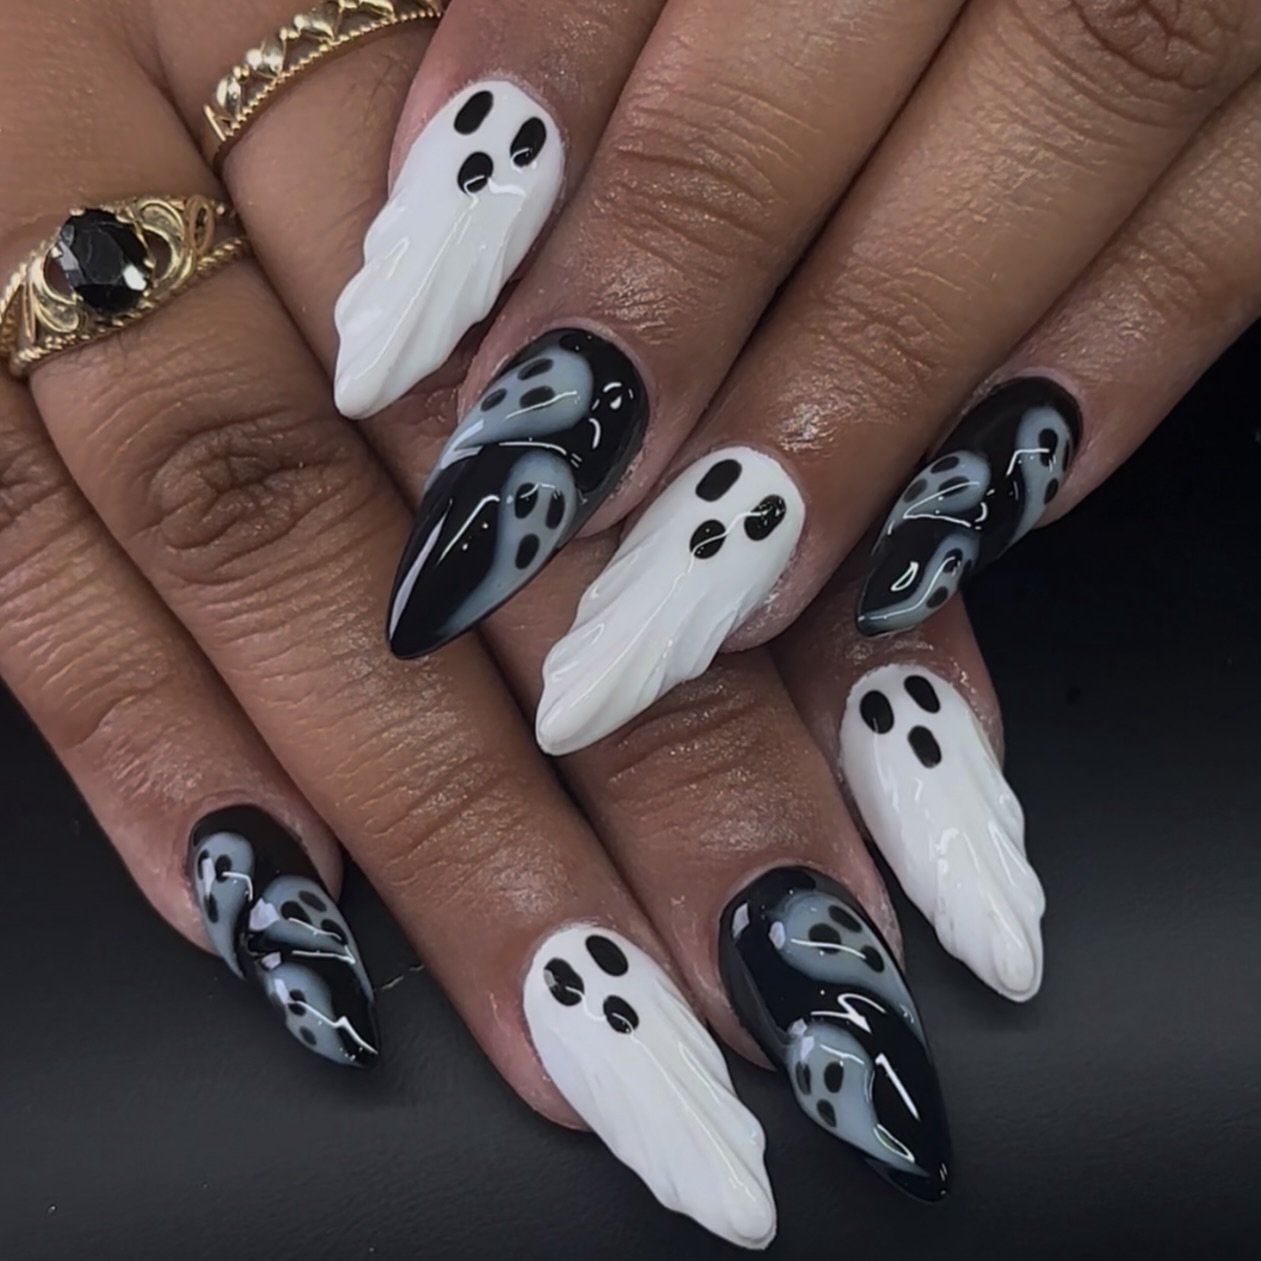
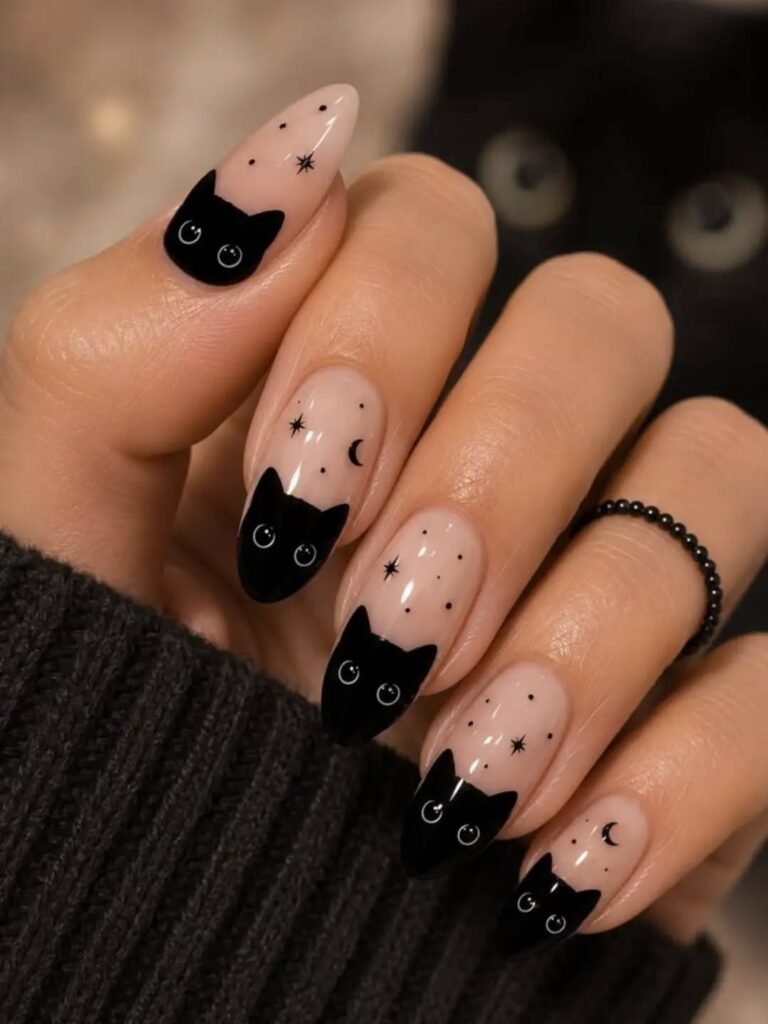
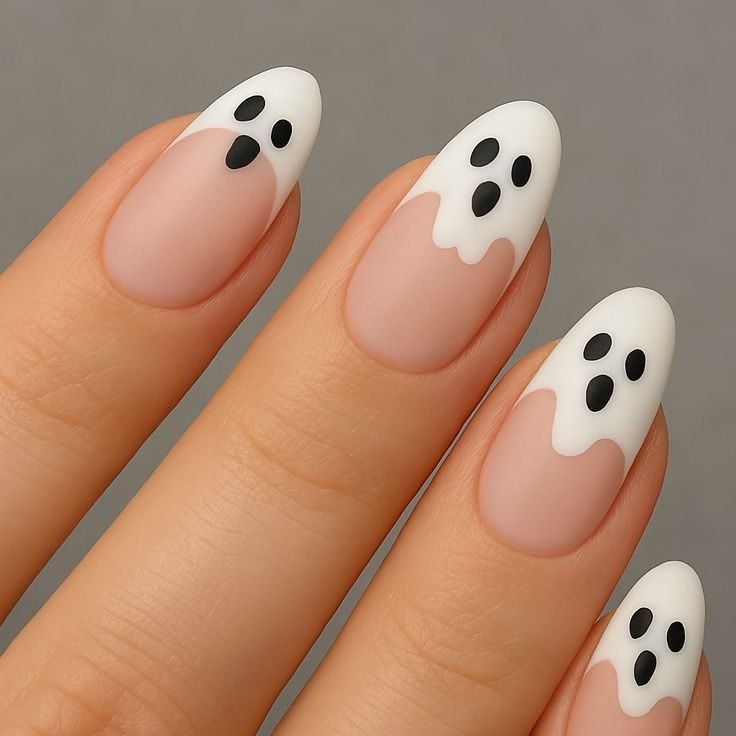
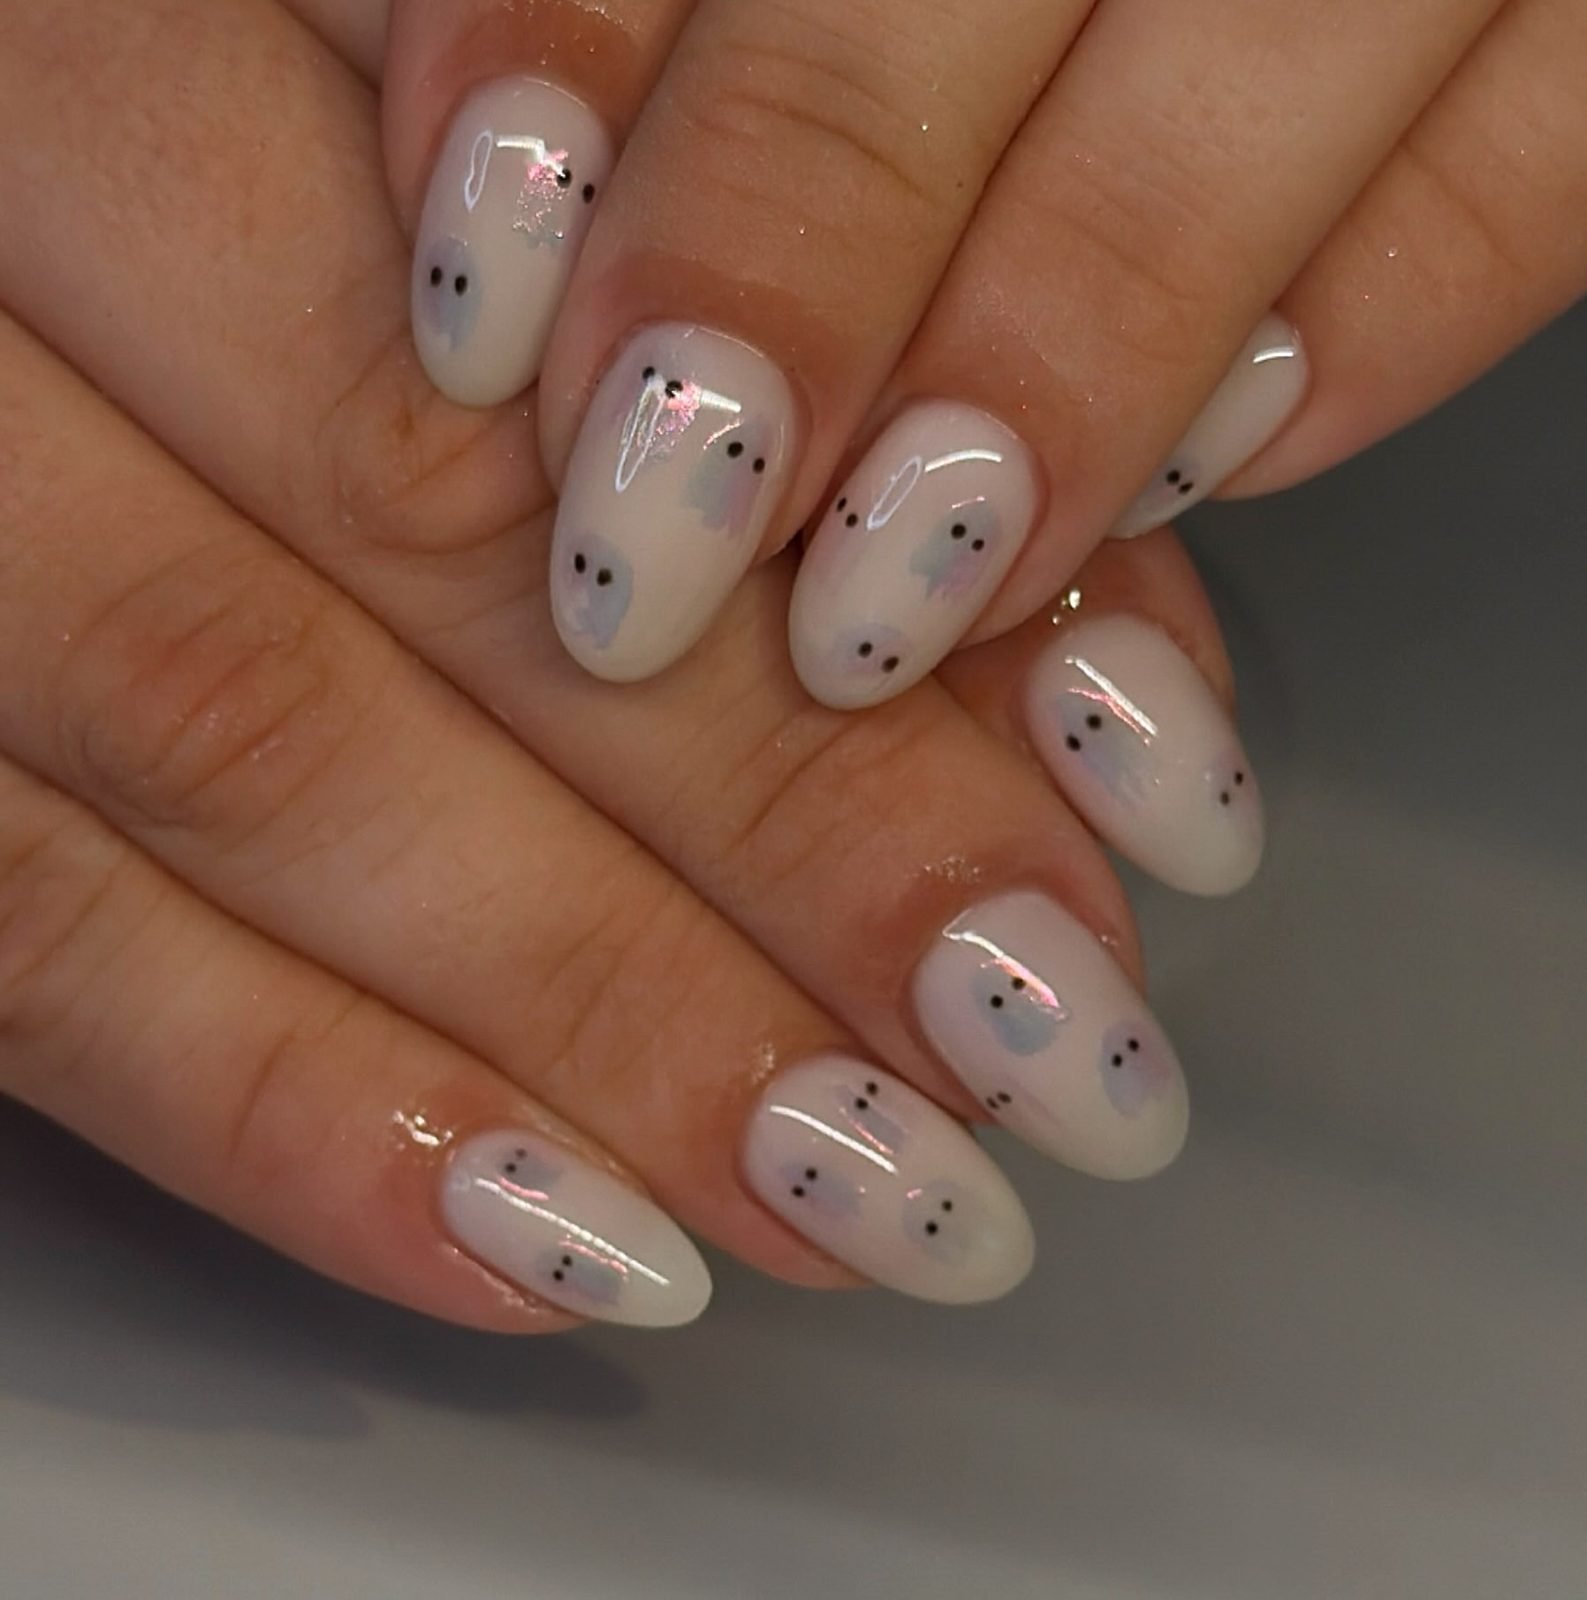
Ghost faces are the sweetest of the easy Halloween nail designs because they ask almost nothing of you: a pale base, two black dots, and one tiny oval mouth. That is genuinely the whole recipe, making this look perfect for total beginners who have never tried nail art. Paint most nails soft white or cream, then turn one or two accent nails into little ghosts with a dotting tool or the tip of a bobby pin. The charm here is imperfection — slightly wobbly eyes only make the ghosts more adorable. This style suits short nails too, since the tiny faces need little surface area. If you prefer cute over scary, ghost accents are your answer; they read instantly as Halloween without a drop of blood-red polish. Find more cute-first inspiration in our roundup of cute Halloween nails, which leans fully into the adorable side of spooky season.
To paint ghost faces at home, start with two coats of opaque white polish and let them dry completely — patience here prevents smudging. Dip the round end of a bobby pin into black polish, wipe off the excess, and press it onto the nail twice for eyes, spacing them evenly in the upper half. For the mouth, use the same tool with slightly more polish to create a taller oval, or drag the dot downward for the classic “boo” shape. Let the black dry for at least ten minutes before sealing with a quick-dry top coat. Common mistakes include loading too much black polish, which creates blobs, and skipping the base dry time, which drags white into the black. Fix blobs by wiping the tool and redotting rather than painting over them. Finish with cuticle oil, and your tiny ghost crew is ready to haunt.
Pumpkin French Tips
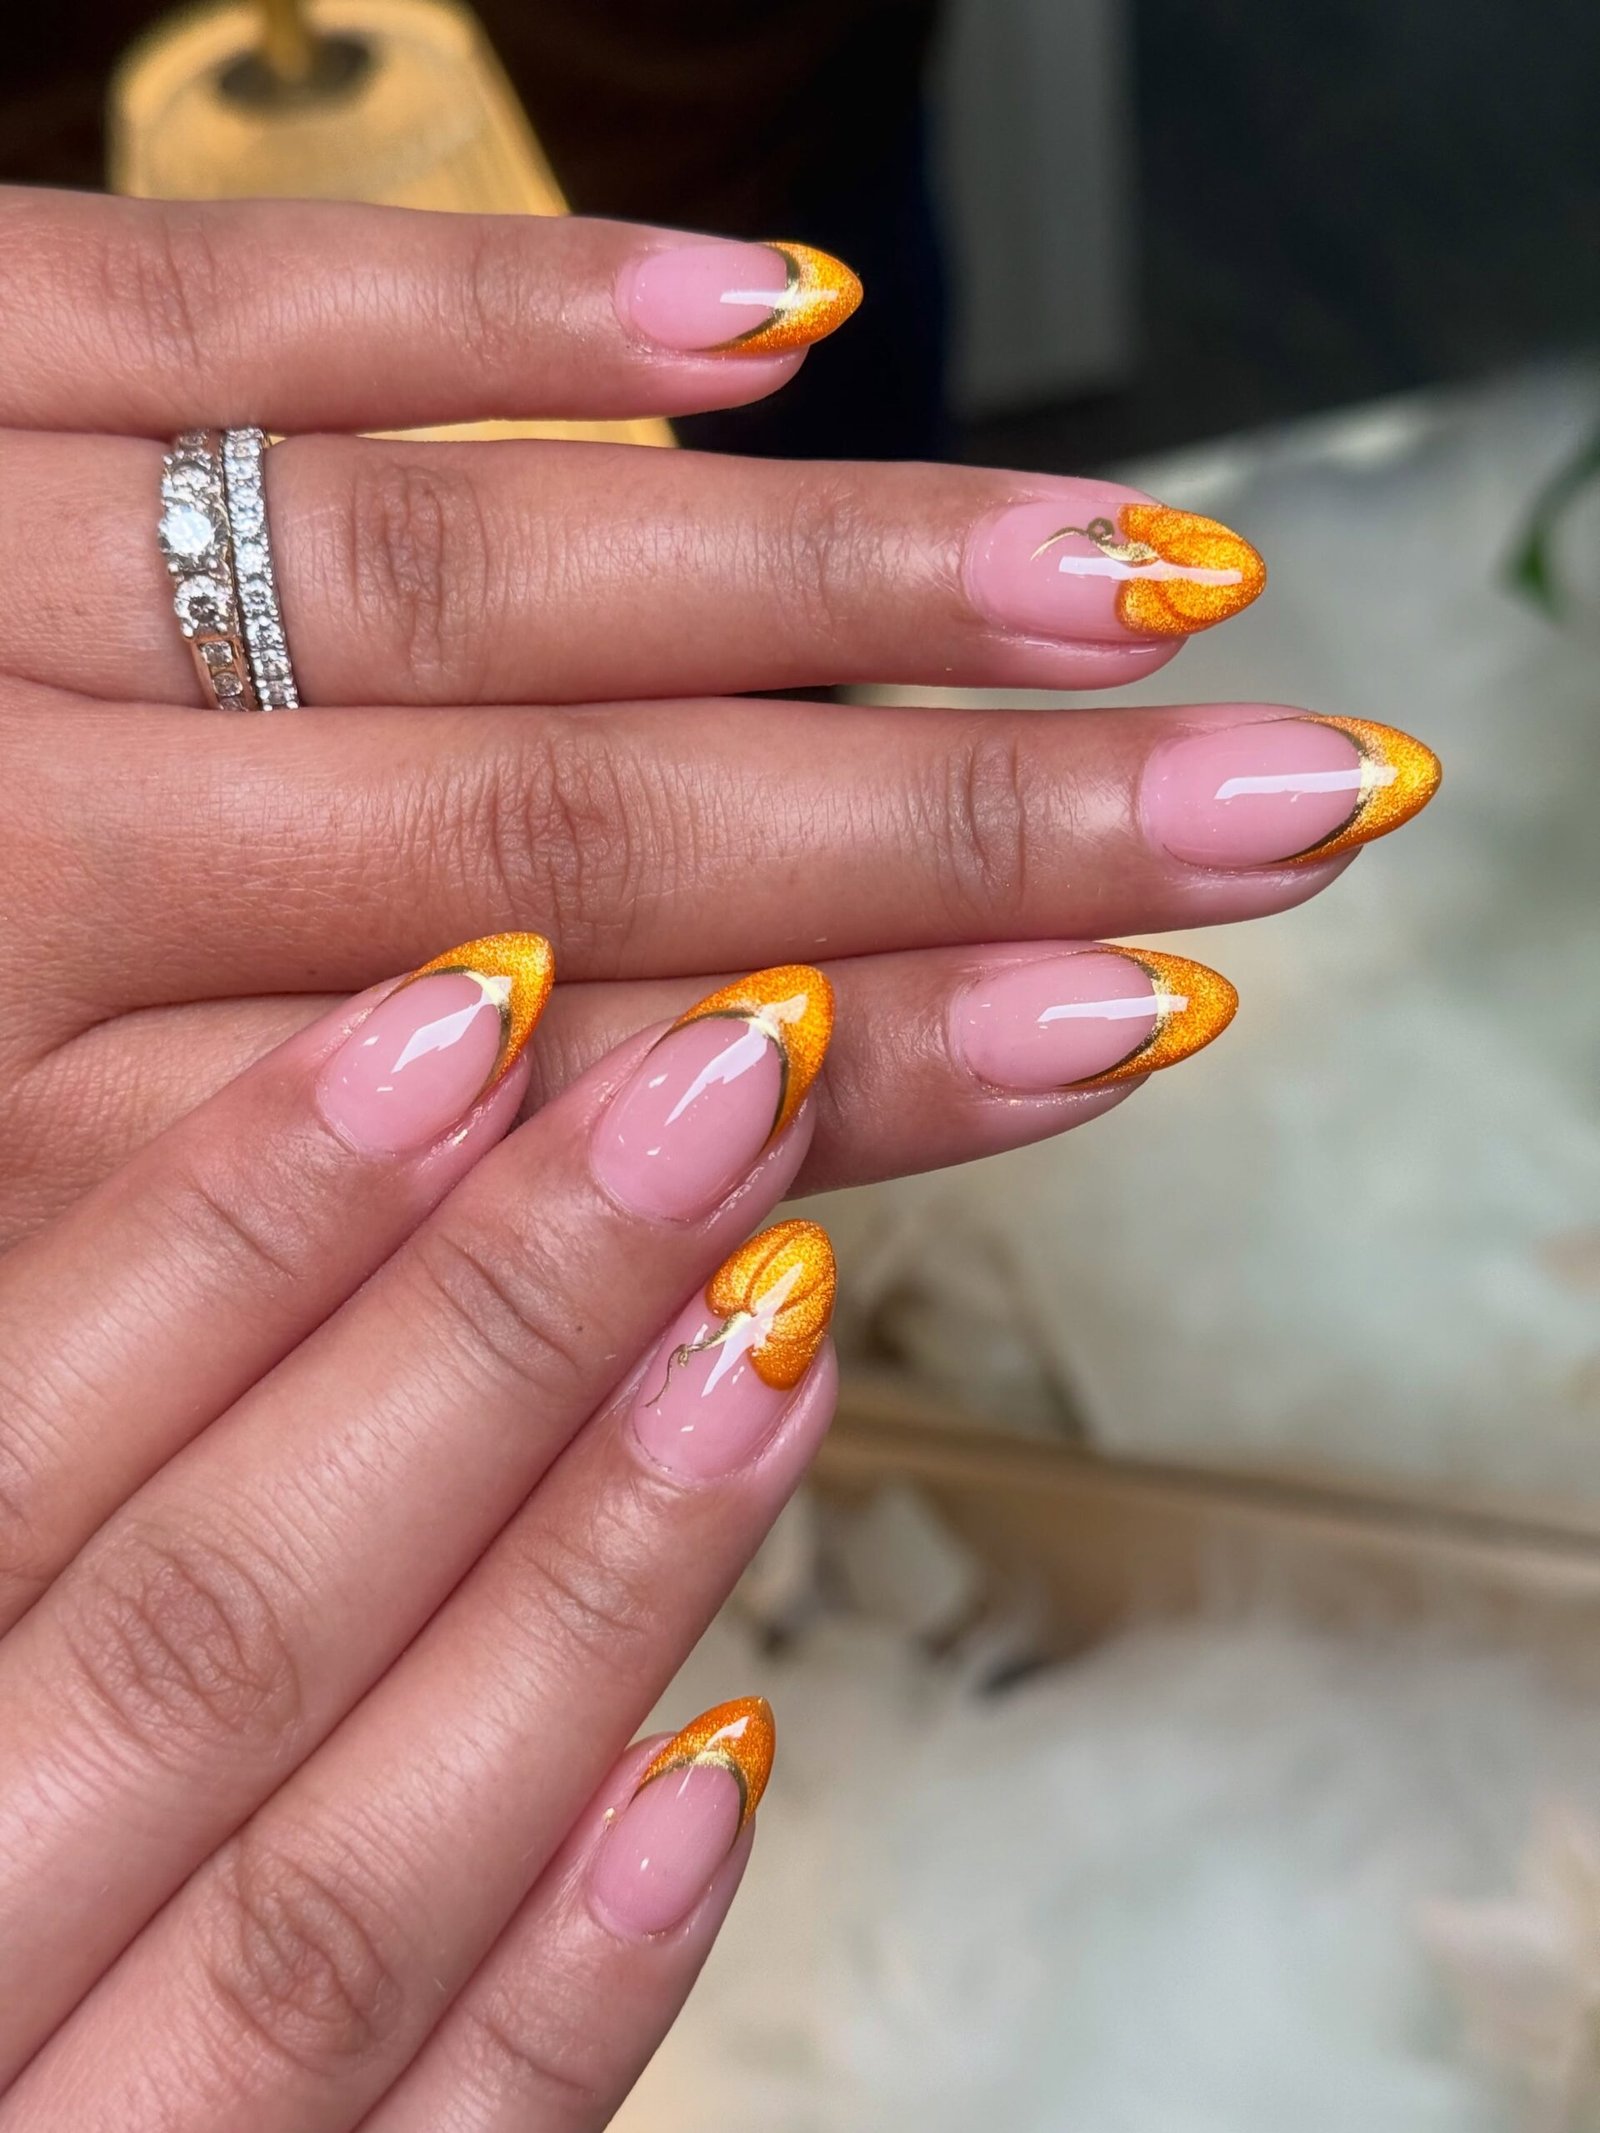
If you already know how to paint a French tip, you are halfway to these easy Halloween nail designs with a pumpkin twist. Instead of the classic white tip, swap in a rich pumpkin orange and paint the smile line rounder and fuller, mimicking the plump curve of a real pumpkin. Keep the base a sheer nude or milky pink so the orange pops, and you have a festive manicure still polished enough for the office. This design is endlessly customisable: paint every tip orange for full commitment, or do orange tips on just the ring fingers for a subtler nod to the season. A thin gold line along the smile edge adds a premium touch, while a tiny green triangle at one corner of a tip can suggest a pumpkin stem. These easy Halloween nail designs prove that seasonal nails do not have to scream to be noticed.
Start with your usual French manicure prep: shape, buff, and apply a ridge-filling base coat so the sheer nude goes on smoothly. Paint the sheer base with one thin coat and let it dry fully. For the tips, use an angled nail art brush or a striping brush dipped in orange polish, and follow your natural smile line but exaggerate the curve slightly for that pumpkin roundness. If your hand shakes, place small guide stickers along the smile line first and peel them off while the orange is still slightly tacky. Two coats of orange give full coverage; let the first dry before adding the second. Clean up any wobbles with a flat brush dipped in acetone, then seal with top coat. These easy Halloween nail designs take about twenty minutes once your base is dry, making them ideal for last-minute plans.
Spiderweb Accent Nails
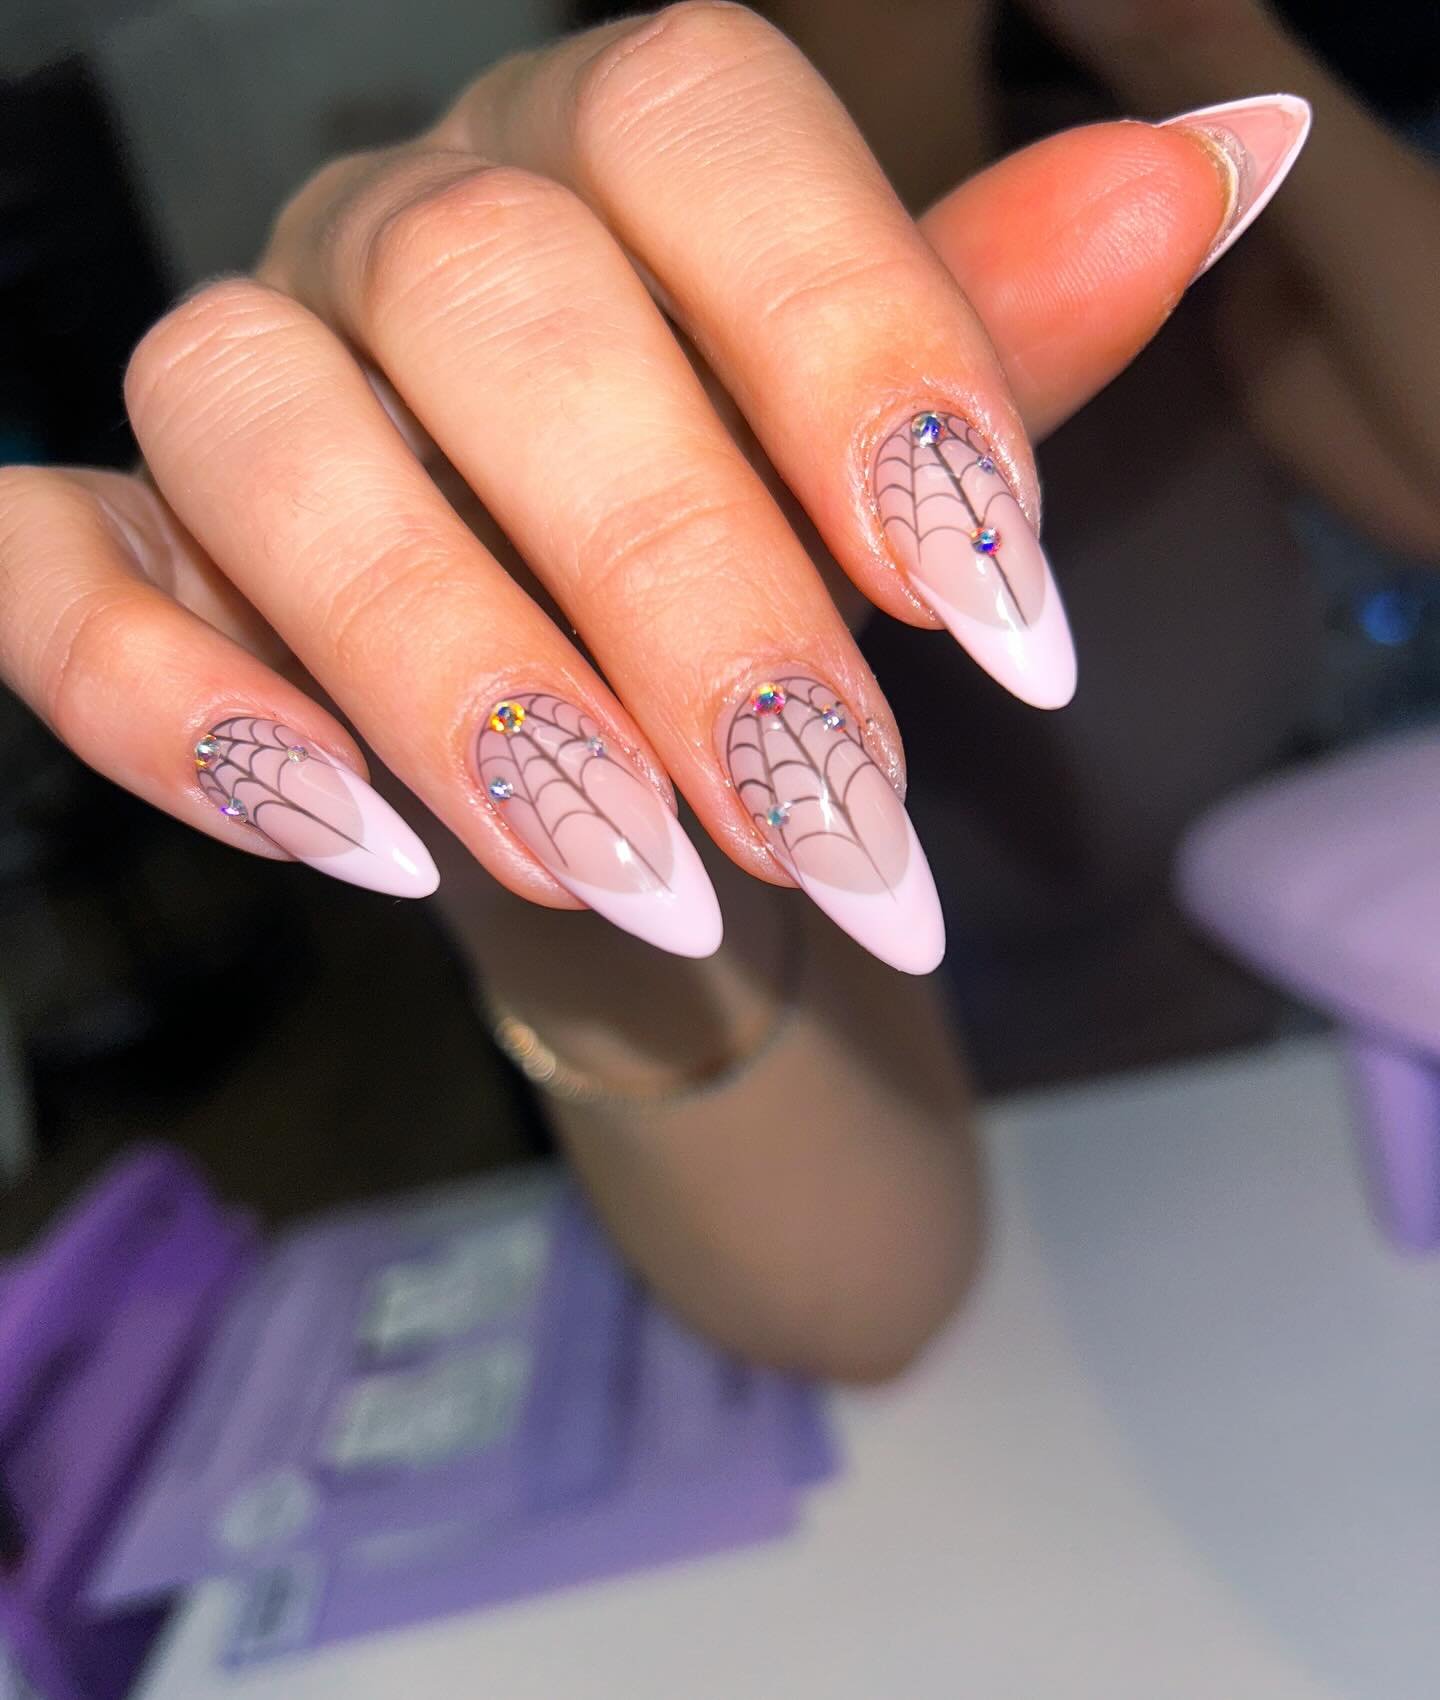
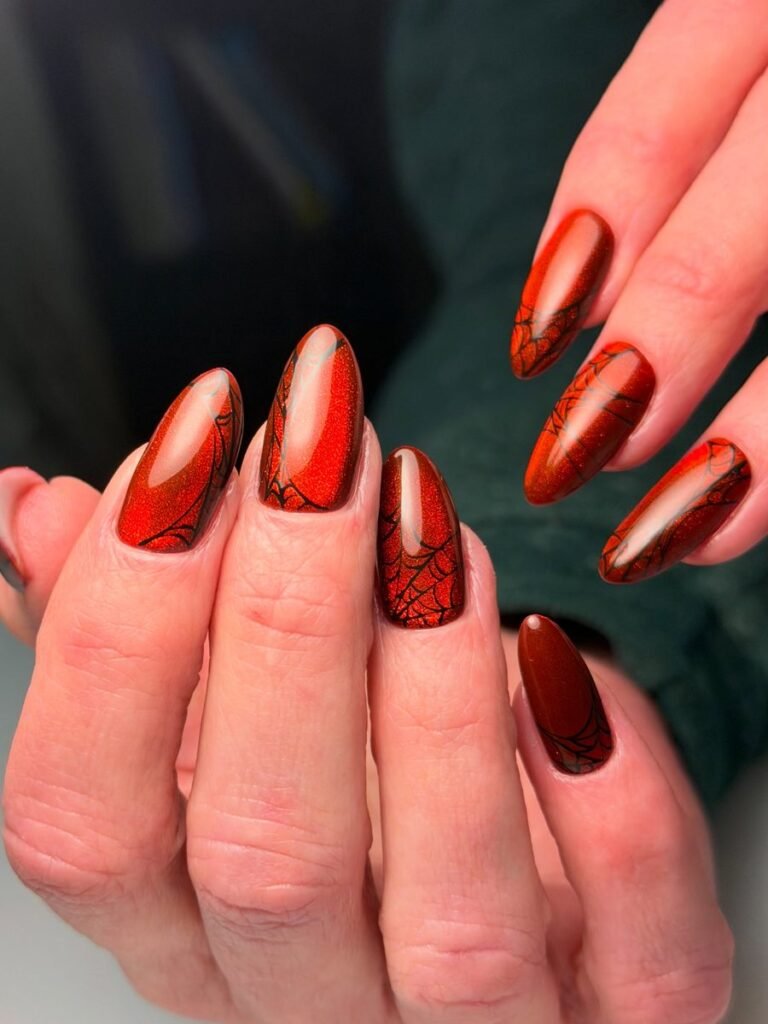
Spiderweb accent nails look intricate, yet they rank among the easiest easy Halloween nail designs because the web is just a few straight lines and curved connectors. Paint all your nails a milky nude, soft grey, or deep black, then add a white or black web to one or two accent nails — the contrast does all the visual work. On a light base, use black webs for a graphic pop; on a dark base, white webs glow like moonlight. The beauty of this design is that spiderwebs are supposed to look organic, so uneven lines read as realistic. Keep the other nails solid so the webs take centre stage, or add a tiny spider dot on a second nail for storytelling. This is the design to choose when you want people to ask “where did you get those done?” knowing you did them on your sofa.
To draw a web, start with your accent nail painted and fully dry. Using a thin striping brush or a nail art pen, paint one small dot near a corner of the nail, then draw four to six straight lines radiating outward from that dot like spokes. Next, connect the spokes with shallow curved arcs, working from the centre outward and letting the arcs sag slightly between lines for realism. A nail art pen gives the most control for beginners, but a striping brush dipped in polish works if you keep the brush nearly dry. Do not overthink symmetry — real webs are imperfect. If a line goes astray, wipe it with a pointed cotton bud dipped in remover and redraw just that section. Seal with top coat once everything is dry, and these easy Halloween nail designs will survive the whole Halloween week.
Candy Corn Tips
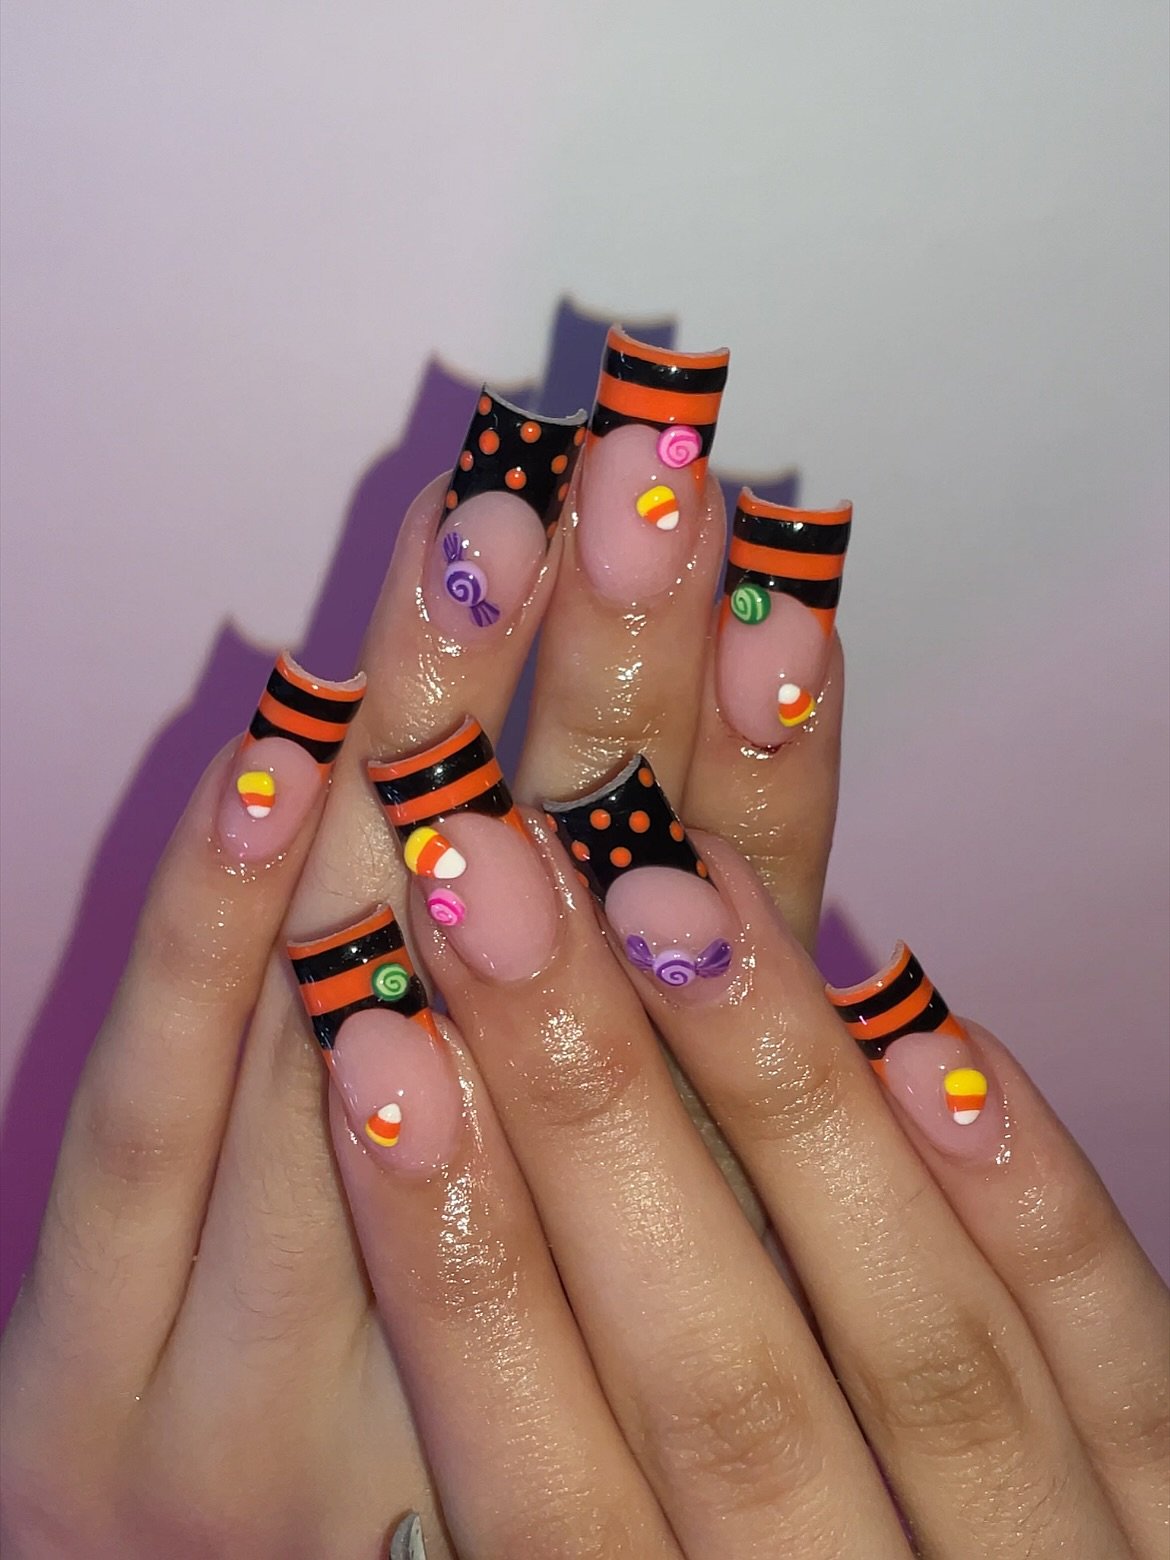
Candy corn tips are the nostalgic pick among easy Halloween nail designs, recreating the iconic orange, yellow, and white stripes of the classic sweet. The trick is painting horizontal bands across the tip of each nail: white at the very tip, orange in the middle, and yellow nearest the base, with a nude or clear base underneath. Because the bands are simple straight lines, this design is beginner-friendly — no steady curves or tiny details needed. It works on any nail length, though longer nails show the stripes best. For a playful twist, make one accent nail a full candy corn with a pointed tip shape painted in the three colours from base to tip. These easy Halloween nail designs are a guaranteed conversation starter at any October gathering, and the bright colours photograph beautifully. If candy motifs are your thing, they pair well with other sweet-inspired looks.
Paint a clear or nude base coat and let it dry completely. Using striping tape or a steady hand, paint the tip third of the nail white with one clean horizontal line — tape gives the crispest edge, so apply two thin strips to mark the white zone, paint, then peel while tacky. Repeat for the orange middle band and the yellow band closest to the cuticle, letting each colour dry for five minutes before moving on to avoid dragging. A small flat brush helps keep the bands even on curved nail edges. If your bands bleed, wait until everything is fully dry, then neaten the edges with a clean-up brush and acetone rather than repainting. Two thin coats per colour prevent streaks. Finish with a glossy top coat to make the stripes look like real candy, and add cuticle oil to keep the whole manicure fresh.
Bat Silhouette Nails
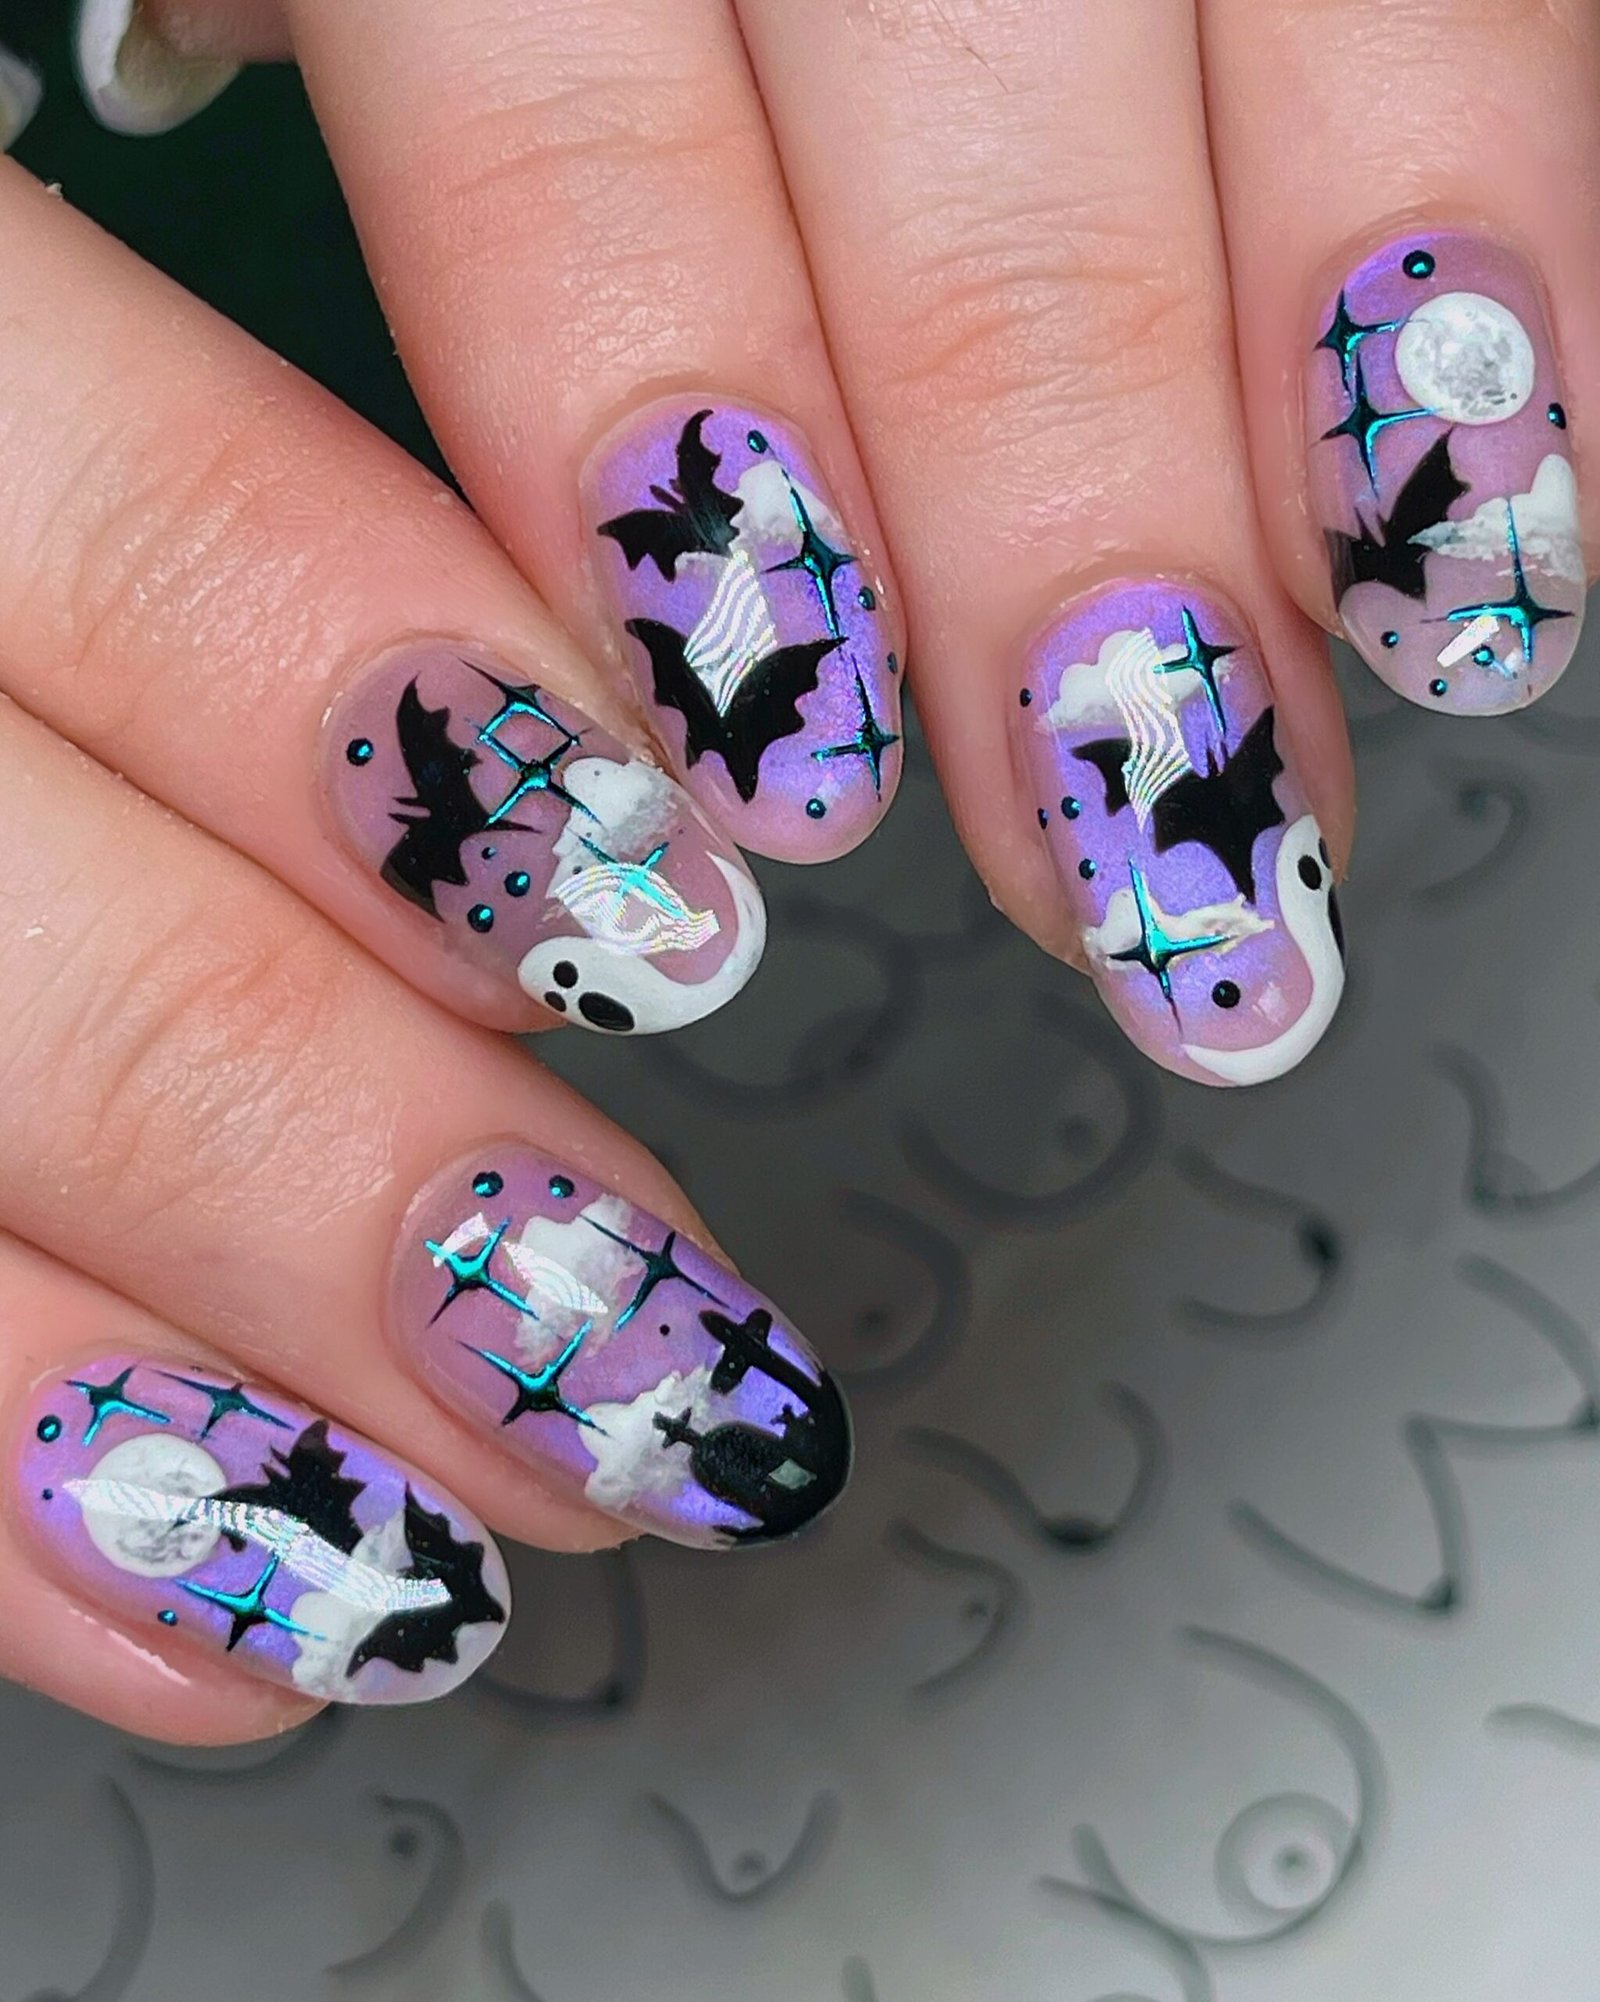
Bat silhouettes bring instant Halloween drama to your nails, and they earn their place among easy Halloween nail designs because a bat is essentially two scalloped wings joined at the middle. Paint your nails a dusky purple, midnight blue, or classic black, then stamp or paint simple black bat shapes on one or two accent nails over a lighter moon-like base for maximum contrast. The design reads as spooky from across the room, yet each bat takes under a minute once you know the motion. Vary the sizes — one large bat with two smaller ones trailing behind creates a lovely sense of movement, like bats flapping across a night sky. This look is perfect if you want something moodier than cute ghosts but still totally doable without artistic talent. Pair it with matte top coat for a velvety night-sky finish that feels extra seasonal.
The simplest way to paint bats is the “m” method: using a thin brush or nail art pen, draw a wide lowercase m shape, then fill it in solid black — the two humps become the wings and the dip in the middle becomes the body. Add two tiny triangle ears at the top centre if you like detail. Practice on paper first to get the wing curve right; you want plump, rounded wings rather than sharp spikes. Paint your base colour, add a pale circle for the moon on accent nails if desired, let everything dry, then paint the bats in black. Mistakes wipe away easily with a pointed cotton bud before the black dries. Once you are happy, seal with top coat — or matte top coat for that night-sky effect. Three bats per accent nail is plenty; restraint keeps them elegant rather than cluttered.
Blood Drip Tips
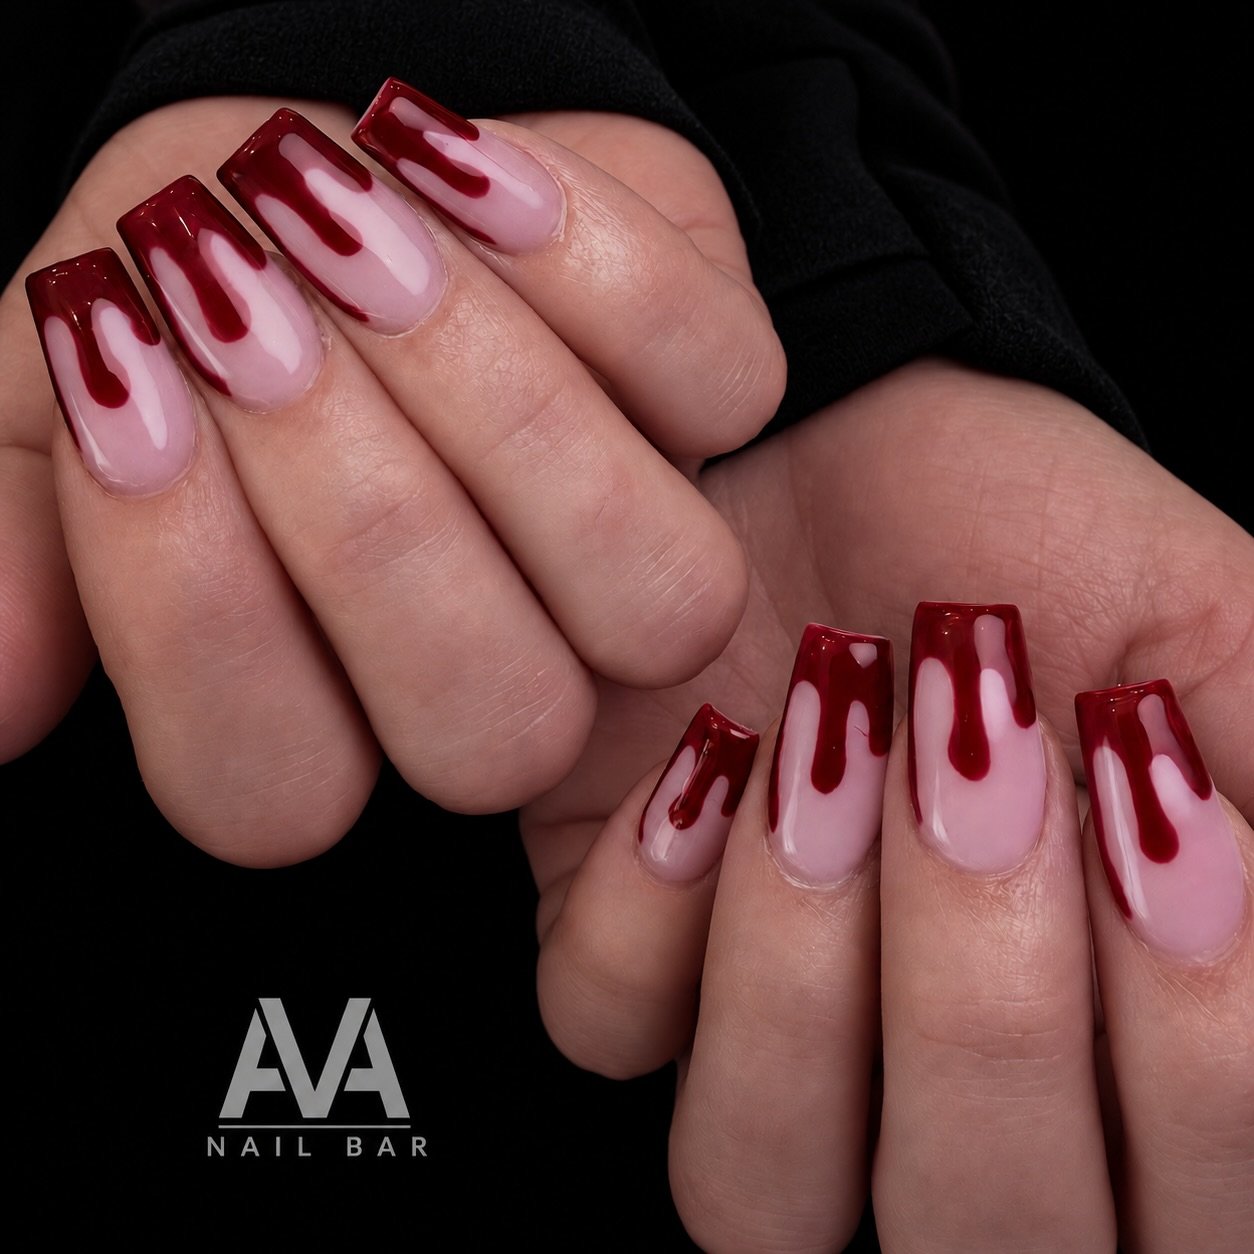
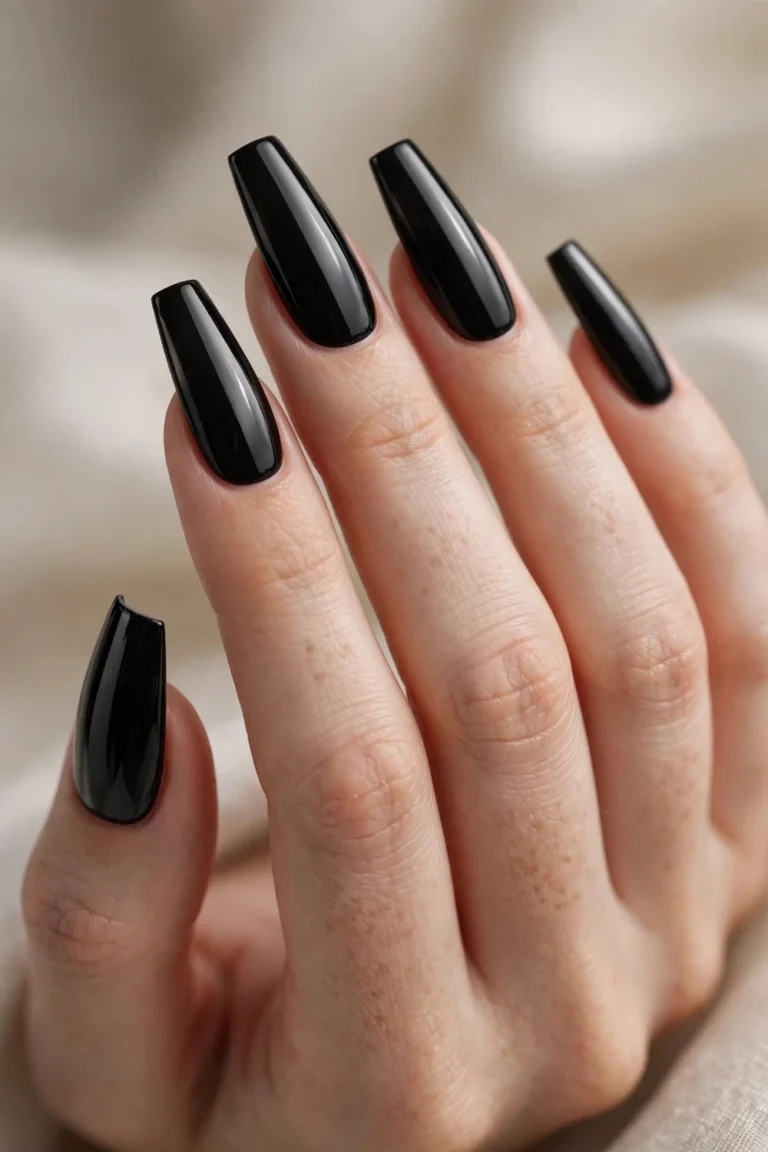
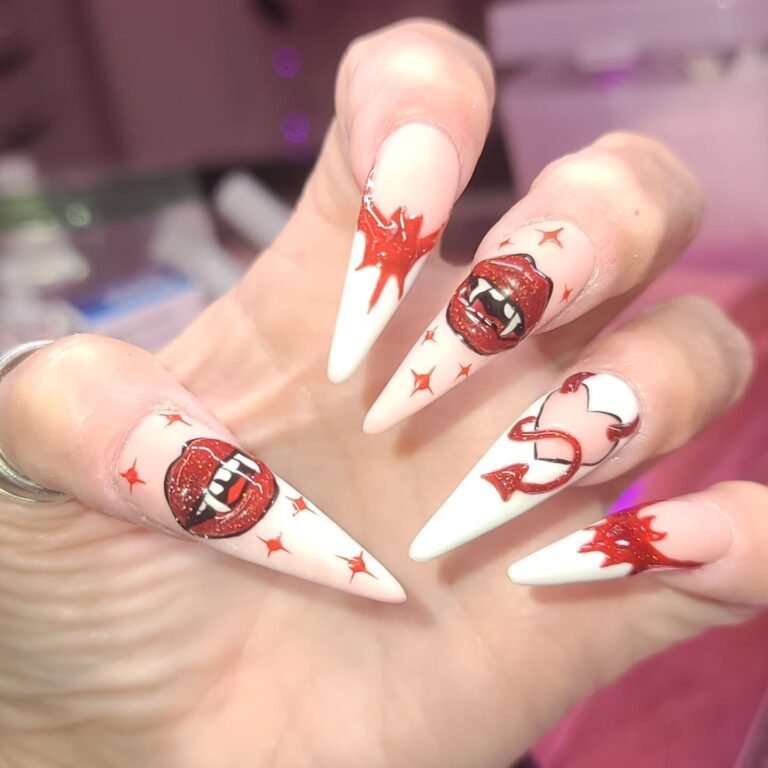
Blood drip tips are the boldest of these easy Halloween nail designs, turning a simple dark manicure into something deliciously creepy with just a few red drips. Paint all nails a deep oxblood, burgundy, or glossy black, then add bright red “blood” dripping down from the cuticle on one or two accent nails. The contrast between the dark base and the vivid red creates instant horror-movie vibes with almost no technique required — drips are meant to look messy. This design is a favourite for Halloween parties because it photographs dramatically and pairs perfectly with vampire or gothic costumes. If full horror feels like too much, try the drips in a softer cranberry red or keep them to a single statement nail. Fans of darker aesthetics will also love our gothic coffin nails guide, which explores the full range of moody, dramatic manicures in the same vein.
To create the drip effect, paint your dark base with two coats and let it dry fully. Dip a dotting tool or the tip of an orangewood stick into a bright, glossy red polish, place a generous dot near the cuticle, and gently drag it downward toward the free edge — the polish will naturally form a drip tail. Vary the lengths so the drips look organic rather than uniform. For extra realism, add a smaller dot at the end of a drip to suggest a droplet about to fall. Work one nail at a time, because the red needs to be wet to drag properly. If a drip goes wrong, wipe the nail and restart rather than fixing a wet drip. Seal with a high-gloss top coat — shine is what sells the “wet blood” illusion — and avoid matte finishes here, which would dull the effect.
Black Cat-Eye Nails

Black cat-eye nails deliver a hypnotic, magnetic shimmer that looks salon-expensive, yet they are genuinely among the easiest easy Halloween nail designs because a special magnet does the artistry for you. Cat-eye gel polish contains metallic particles that shift under a magnet wand, creating a glowing stripe or curved “cat eye” effect across the nail. In black or deep charcoal with a silver or green shimmer line, the result is pure Halloween magic — like a black cat’s eye gleaming in the dark. This design needs no drawing, no dotting, and no steady hand whatsoever, making it the ultimate choice for anyone who wants maximum impact with minimum skill. It also lasts beautifully, since the effect is in the polish itself rather than delicate painted details that can chip. Choose it when you want spooky elegance rather than literal Halloween imagery.
You will need a magnetic cat-eye gel polish and its matching magnet wand, plus a UV or LED lamp to cure gel — or look for magnetic regular polish if you prefer no lamp. Apply base coat, then one coat of the cat-eye polish, and immediately hold the magnet close to the nail (without touching) for ten to fifteen seconds to pull the shimmer into a sharp line or curve. Experiment with the magnet angle: holding it vertically creates a straight stripe, while tilting it gives a curved, smoky effect. Cure under the lamp once you like the pattern, then apply top coat and cure again. As with all easy Halloween nail designs, work one nail at a time so the magnetic particles stay responsive. If the line looks faint, the polish was too thin — add a second coat and repeat the magnet step before curing.
Easy Halloween Mummy Wraps
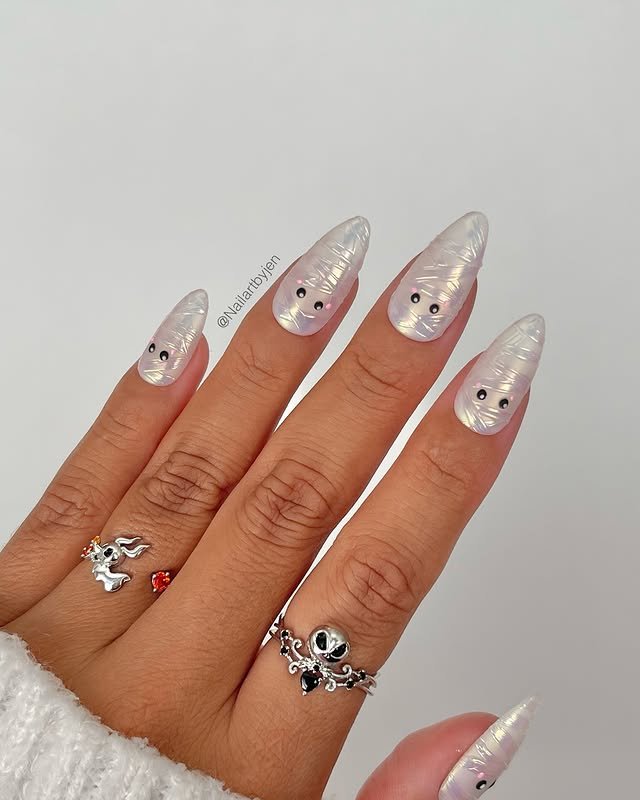
Mummy wraps are a clever play on negative space and rank high among easy Halloween nail designs because uneven white stripes over a nude base are the entire concept. Paint your nails a warm beige or soft nude, then crisscross them with thin white lines at random angles, leaving gaps of nude showing through like bandage wrappings. Add two tiny black dots on one accent nail to create a peeking mummy face, and suddenly the design tells a story. The brilliance of this look is that messy is the point — perfectly straight, even stripes would actually look less like mummy bandages. It works wonderfully on short nails and suits anyone who finds drawing faces or webs intimidating. These easy Halloween nail designs are also office-safe, since from a distance they read as a chic neutral manicure with a fun secret.
Start with two coats of your nude base and let it dry completely — this is essential, because the white stripes go on top and any dragging will ruin the clean contrast. Using a striping brush or nail art pen loaded with opaque white polish, draw thin diagonal lines across each nail, varying the angle and spacing randomly. Overlap a few lines to suggest layered bandages, and leave some nude gaps wider than others for realism. On your accent nail, add two small black dots near the top for the mummy’s eyes before adding the white stripes around them. Let the white dry for ten minutes, then seal with top coat. If a stripe is too thick, thin it by dragging a clean dry brush along its edge. The whole manicure takes about fifteen minutes of actual painting time.
Spider Accent Nails
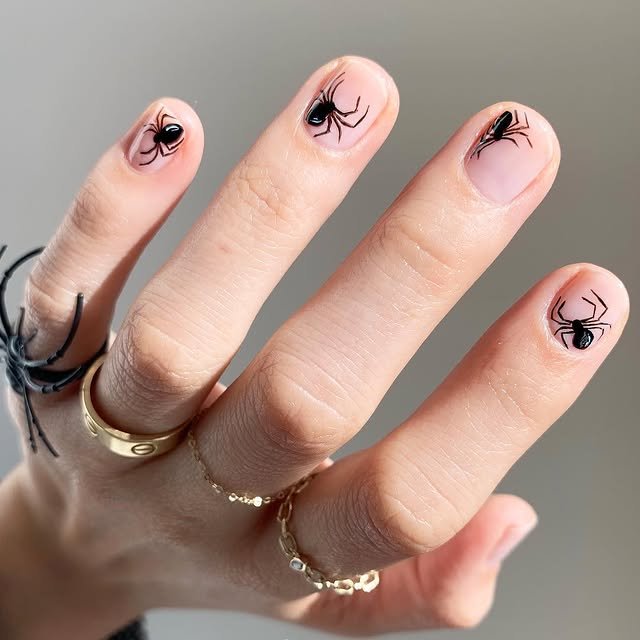
A single spider accent nail adds just the right amount of creepy to an otherwise simple manicure, making it one of the most wearable easy Halloween nail designs on this list. Keep nine nails in a solid seasonal shade — deep purple, burnt orange, or classic black — and turn one ring finger into a spider showcase: a small black body with eight thin legs on a contrasting base. The spider itself is just a dot with lines, so do not let the leg count intimidate you; even slightly wonky legs look convincingly spidery. This design is perfect for anyone who wants Halloween nails that are more “cool” than “cute,” and the single accent keeps it subtle enough for everyday wear through October. For maximum effect, place the spider on a pale or glittery base so the dark silhouette stands out sharply against it.
Paint your solid nails and your accent nail base, letting everything dry fully. For the spider, place a medium black dot slightly above the centre of the accent nail for the body, then add a smaller dot touching it for the head. Using a striping brush or the tip of a toothpick dipped in black polish, draw four thin curved legs on each side, bending them at a little “knee” angle for realism. Keep the legs thin — thick legs read as blobs. A nail art pen is the easiest tool for beginners here, giving consistent thin lines without brush control. If a leg wobbles, wipe just that line with a pointed cotton bud and redraw. Let the spider dry completely, then add two microscopic white dots on the head for eyes if you like a friendlier look. Seal everything with top coat.
Starry Night Nails
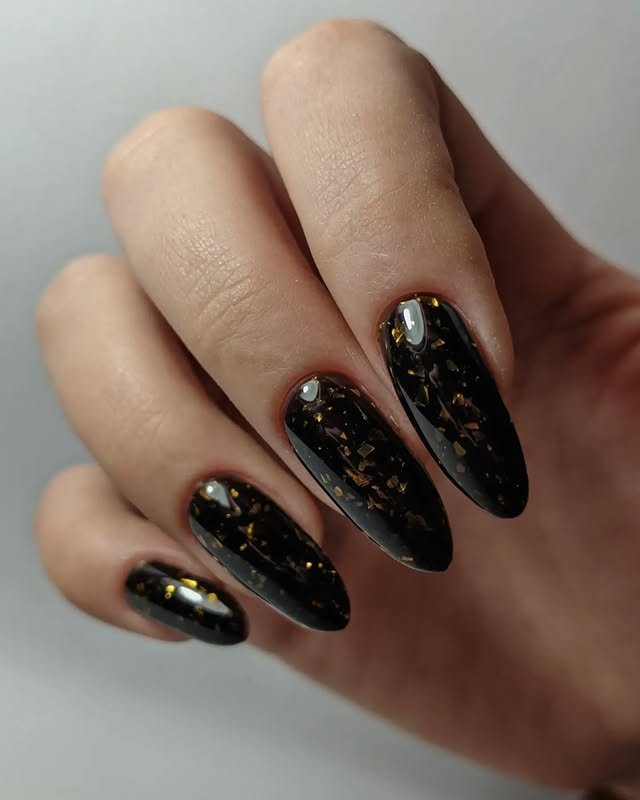
Starry night nails capture the magic of an October sky, and they deserve their spot among easy Halloween nail designs because stars are just dots and tiny crosses scattered over a dark base. Paint your nails deep navy, midnight black, or dark plum, then add stars in white, silver, or gold using a dotting tool — vary the sizes for a natural constellation effect. A few larger “statement” stars with tiny cross sparkles around them create depth, like a real night sky. This design is beautifully versatile: it works as a full Halloween manicure, but it is also subtle enough to wear all autumn long. Add a tiny crescent moon on one accent nail for extra charm, or keep it pure stars for a minimalist celestial look. It is the perfect choice when you want seasonal nails without any literal spooky imagery.
Paint two coats of your dark base colour and let it dry completely. Using a dotting tool with white or metallic polish, place dots of varying sizes randomly across each nail — cluster a few together in places and leave other areas sparse, mimicking real star distribution. For sparkle crosses, paint a tiny plus sign with a striping brush over a few of the larger dots. A toothpick works for the smallest stars; the fine tip creates perfect pinpricks of light. Resist the urge to make the pattern symmetrical — randomness is what makes it look like a sky. Once dry, seal with a glossy top coat to make the stars shine, or try a holographic top coat for an extra-galactic shimmer. This forgiving design takes about twenty minutes and looks different — in a good way — on every single nail.
How long do easy Halloween nail designs take to do at home?
Most of the easy Halloween nail designs in this guide take fifteen to thirty minutes of painting time, plus drying between coats. Simpler looks like ghost faces and starry nights are fastest, while layered designs like candy corn tips take longer because each colour band needs time to set. A quick-dry top coat between steps cuts total time significantly, and working on fully dry base coats prevents the smudging behind most DIY frustration. Plan about an hour start to finish for your first attempt — you will get faster with practice.
What tools do I need for DIY Halloween nail art?
You need far less than you think: your regular polishes, a base coat, a top coat, and one or two simple tools. A dotting tool (or a bobby pin) handles dots, eyes, and stars; a thin striping brush or nail art pen covers lines, webs, and spider legs; a toothpick works for tiny details. Striping tape helps with crisp bands like candy corn tips but is optional. That is the whole toolkit — every one of these easy Halloween nail designs was chosen because it needs nothing more specialised.
Can I do Halloween nail designs on short nails?
Absolutely — most of these easy Halloween nail designs look best on short nails. Ghost faces, spider accents, mummy wraps, and starry nights need very little surface area, and short nails make dots and webs easier to control. If a design feels crowded, simplify it: use one accent nail instead of all ten, or enlarge the elements slightly. Short, well-shaped nails with a glossy top coat look polished no matter which design you choose.
How do I make my Halloween manicure last longer?
Longevity comes down to prep and sealing: push back cuticles, lightly buff the nail surface, and always use a base coat so polish grips. Apply thin coats rather than thick ones, letting each dry fully — thick coats trap solvents and chip faster. Cap the free edge by running polish along each nail tip, and finish with a quality top coat, reapplying every two to three days. With good prep, these easy Halloween nail designs should last through Halloween week and beyond.
In conclusion, these ten easy Halloween nail designs prove that you do not need professional skills or expensive tools to get festive nails for spooky season. From adorable ghost faces and pumpkin French tips to creepy spiderwebs, blood drips, and magnetic cat-eye shimmer, there is a DIY-friendly look here for every style and every comfort level. The real secret is choosing simple techniques — dots, lines, and accent nails — and letting high-contrast colour combinations do the heavy lifting. So pick your favourite of these easy Halloween nail designs, gather your polishes, and set aside an hour this weekend. Your Halloween manicure is closer than you think, and it will look like you spent far more effort than you did. If you loved these ideas, save this guide for next year too — most of these looks work just as well for costume parties, office dress-up days, and autumn get-togethers beyond Halloween night itself.