
10 Red Christmas Nails 2026: Festive Shades & Sparkle
Nothing says Christmas like a perfect red manicure. From timeless cherry shades to sparkling glitter, deep wine tones to playful candy-cane stripes, red Christmas nails are the ultimate festive accessory — they match every holiday outfit, glow under fairy lights, and never go out of style. This guide rounds up ten stunning red Christmas nail ideas for 2026, each with a real Instagram inspiration photo (credited to the original artist) and a full breakdown so you can recreate the look at home or show it to your nail tech. Whether you love classic elegance or bold festive art, these red Christmas nails will carry you through every party, dinner, and cozy winter moment of the season.
Classic Red Christmas Nails

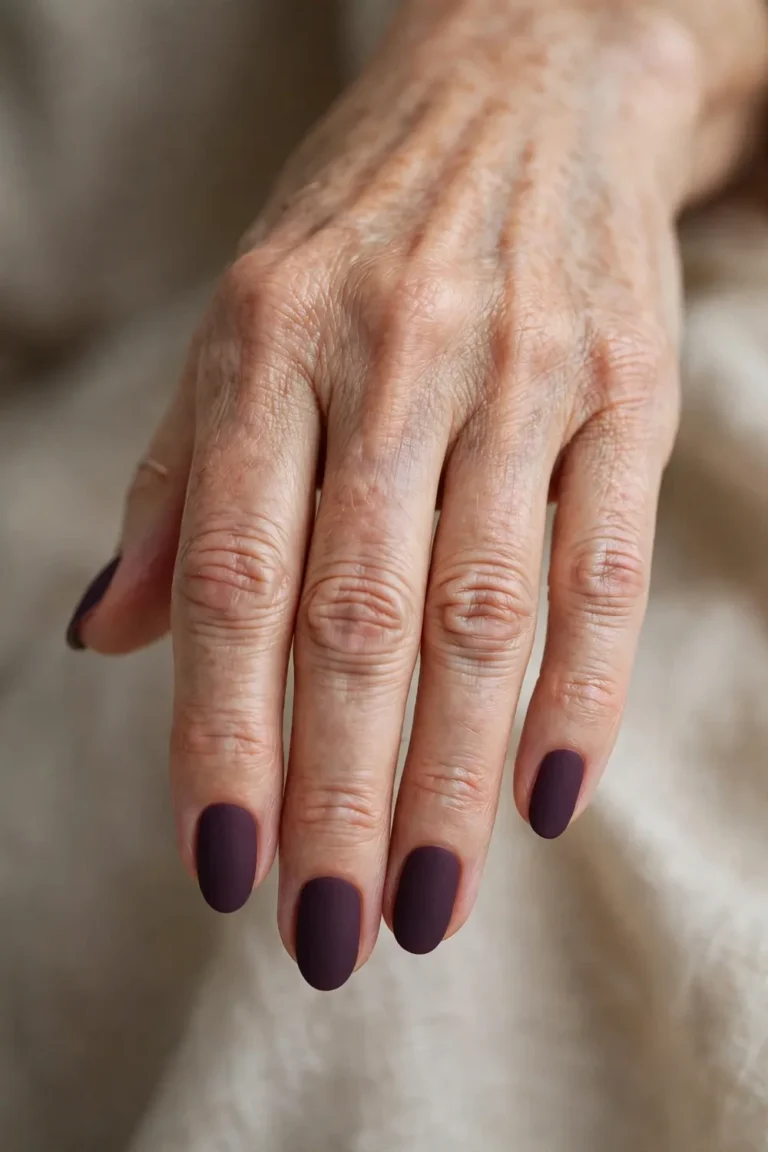
There is a reason classic red Christmas nails never leave the festive rotation: a glossy cherry-red manicure reads instantly as Christmas without needing a single motif or embellishment. This is the shade of holiday movie premieres, office parties, and New Year’s Eve countdowns — polished, confident, and endlessly wearable. Choose a true blue-red or a warm cherry depending on your skin tone; blue-reds flatter cool undertones while warm cherries glow on golden skin. The application is beautifully simple, which makes this the perfect starting point if you want festive nails with zero nail-art skill. Two careful coats plus a high-shine top coat give you that glassy, candy-apple finish that catches Christmas lights. It pairs with everything in your December wardrobe, from Fair Isle knits to sequin dresses, and it photographs gorgeously against fairy lights and wrapping paper.
Start with a ridge-filling base coat to create a smooth canvas, since classic red shows every imperfection. Apply your red in two thin, even coats rather than one thick one — thin coats self-level better and resist chipping at the tips. Let each coat dry for at least two minutes before adding the next; patience here is the difference between a salon-smooth finish and visible streaks. Seal with a glossy quick-dry top coat, capping the free edge by running the brush along each nail tip to lock in color. For extra longevity through weeks of gift-wrapping and cooking, reapply top coat every two to three days. If you chip a nail, a tiny dab of matching polish blended with top coat makes the repair invisible. This timeless look takes about thirty minutes and suits every nail length and shape.
Deep Oxblood Wine
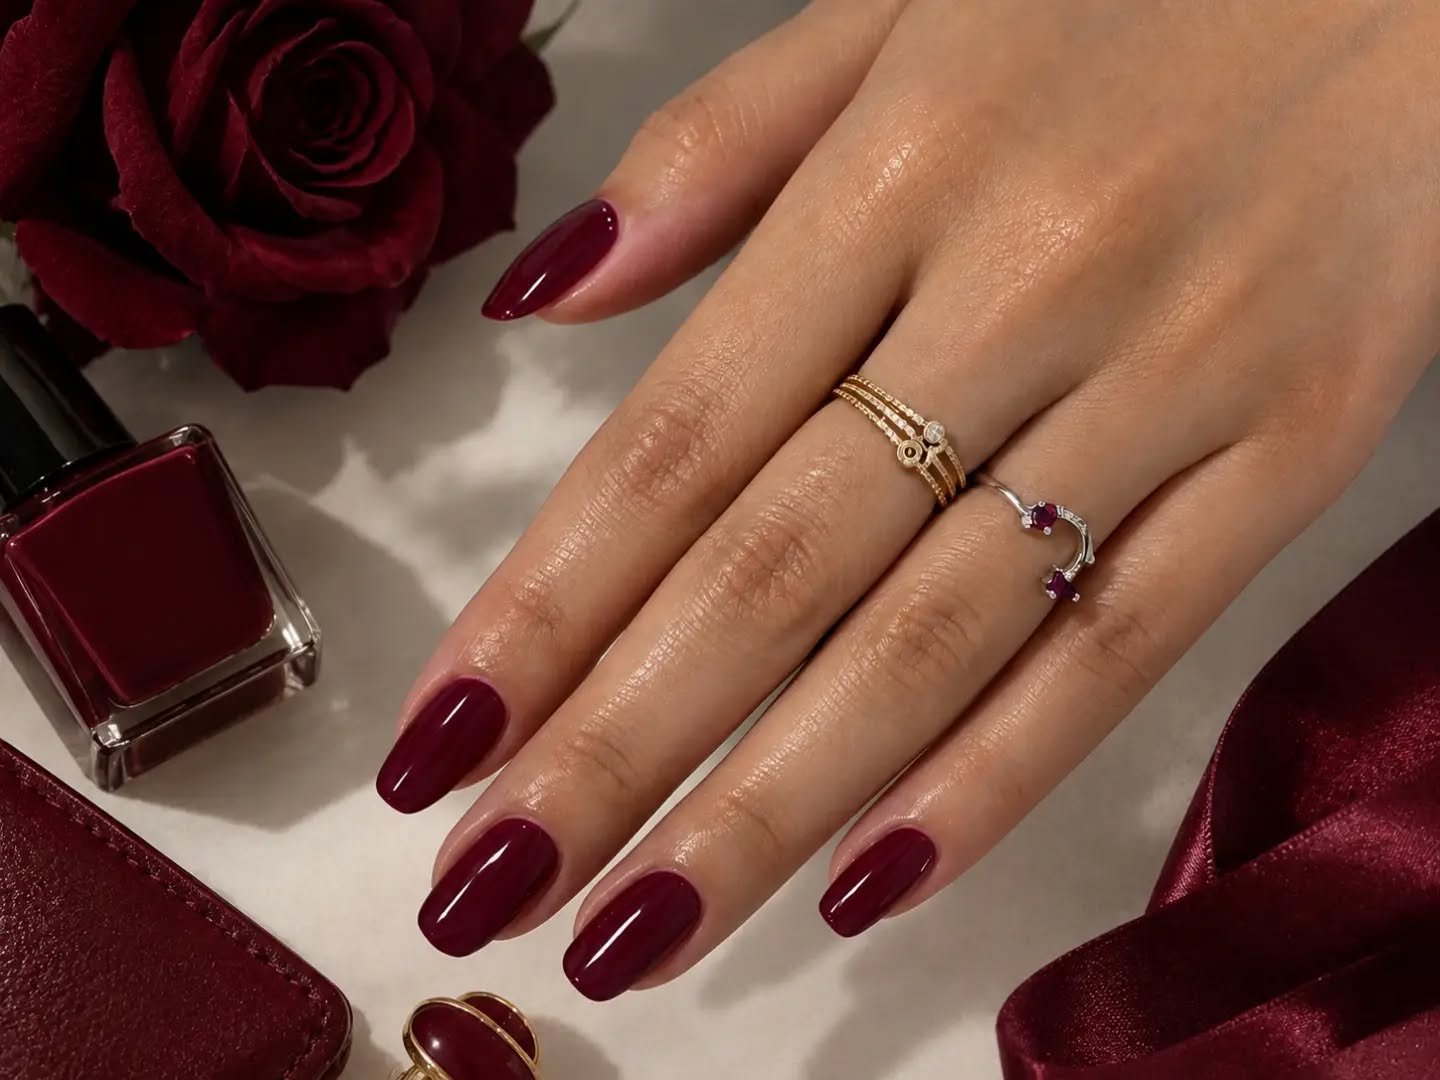
Deep oxblood wine takes the red Christmas story somewhere moodier and more grown-up — think candlelit dinners, velvet dresses, and mulled wine rather than tinsel and candy canes. This near-black red is endlessly sophisticated, reading almost black in low light and revealing its rich wine depths when it catches the glow. It is the shade for anyone who finds bright cherry red a little too sweet but still wants unmistakably festive nails. Oxblood flatters every skin tone and makes short nails look expensive, since the dark color creates a sleek, elongating effect. Pair it with gold jewelry and a dark lip for a full old-Hollywood holiday mood, or let it stand alone as quiet luxury against cozy winter knits. It also hides tiny chips better than bright reds — a practical bonus during the busiest party weeks of December.
Dark shades like oxblood demand careful prep because they stain and show flaws mercilessly. Always use a stain-blocking base coat — two thin layers if your nails tend to yellow — and paint slightly inside your cuticle line rather than flooding it, since cleanup is harder with dark polish. Two thin coats give full opacity; a third is rarely needed and only adds drying time. A glossy top coat is essential here because it deepens the wine tones and gives that wet, lacquered look. For a modern twist, try one matte accent nail among glossy ones, or add a single gold micro-stud at the base of each ring finger. Removal needs patience: soak a cotton pad in remover, press it on each nail for ten seconds, then swipe toward the tip to avoid staining your skin.
Sparkling Red Glitter

Sparkling red glitter nails are pure holiday joy in manicure form — they catch every strand of Christmas light and turn your hands into the most festive accessory in the room. Glitter reds range from fine, dense shimmer that reads almost metallic to chunky holographic particles that throw rainbows across the room. This is the manicure for Christmas parties, New Year’s Eve, and anyone whose holiday aesthetic is unapologetically maximalist. The beauty of glitter polish is how forgiving it is: the texture hides imperfect application, making it genuinely beginner-friendly despite its high-impact look. Wear it on all ten nails for full disco-ball energy, or use it as an accent over classic red for a more balanced festive manicure. A single glitter accent nail keeps office looks professional, and a glitter top coat over red you already own gives the same effect.
Glitter polish applies best over a matching solid base — paint one coat of regular red first so the glitter has depth and any sheer spots disappear. Apply glitter polish with a dabbing, patting motion rather than long strokes; this packs the particles densely instead of dragging them thin. Two coats of glitter usually give full coverage, though chunky glitters may need three. The crucial step is top coat: glitter feels rough and dull without it, so apply two generous layers of glossy top coat to seal everything smooth and glassy. Removal is the known downside — soak cotton pads in pure acetone, wrap each fingertip in foil for ten minutes, then the glitter slides off. Alternatively, use a peel-off base coat under glitter for painless removal after the party.
Velvet Red Cat-Eye
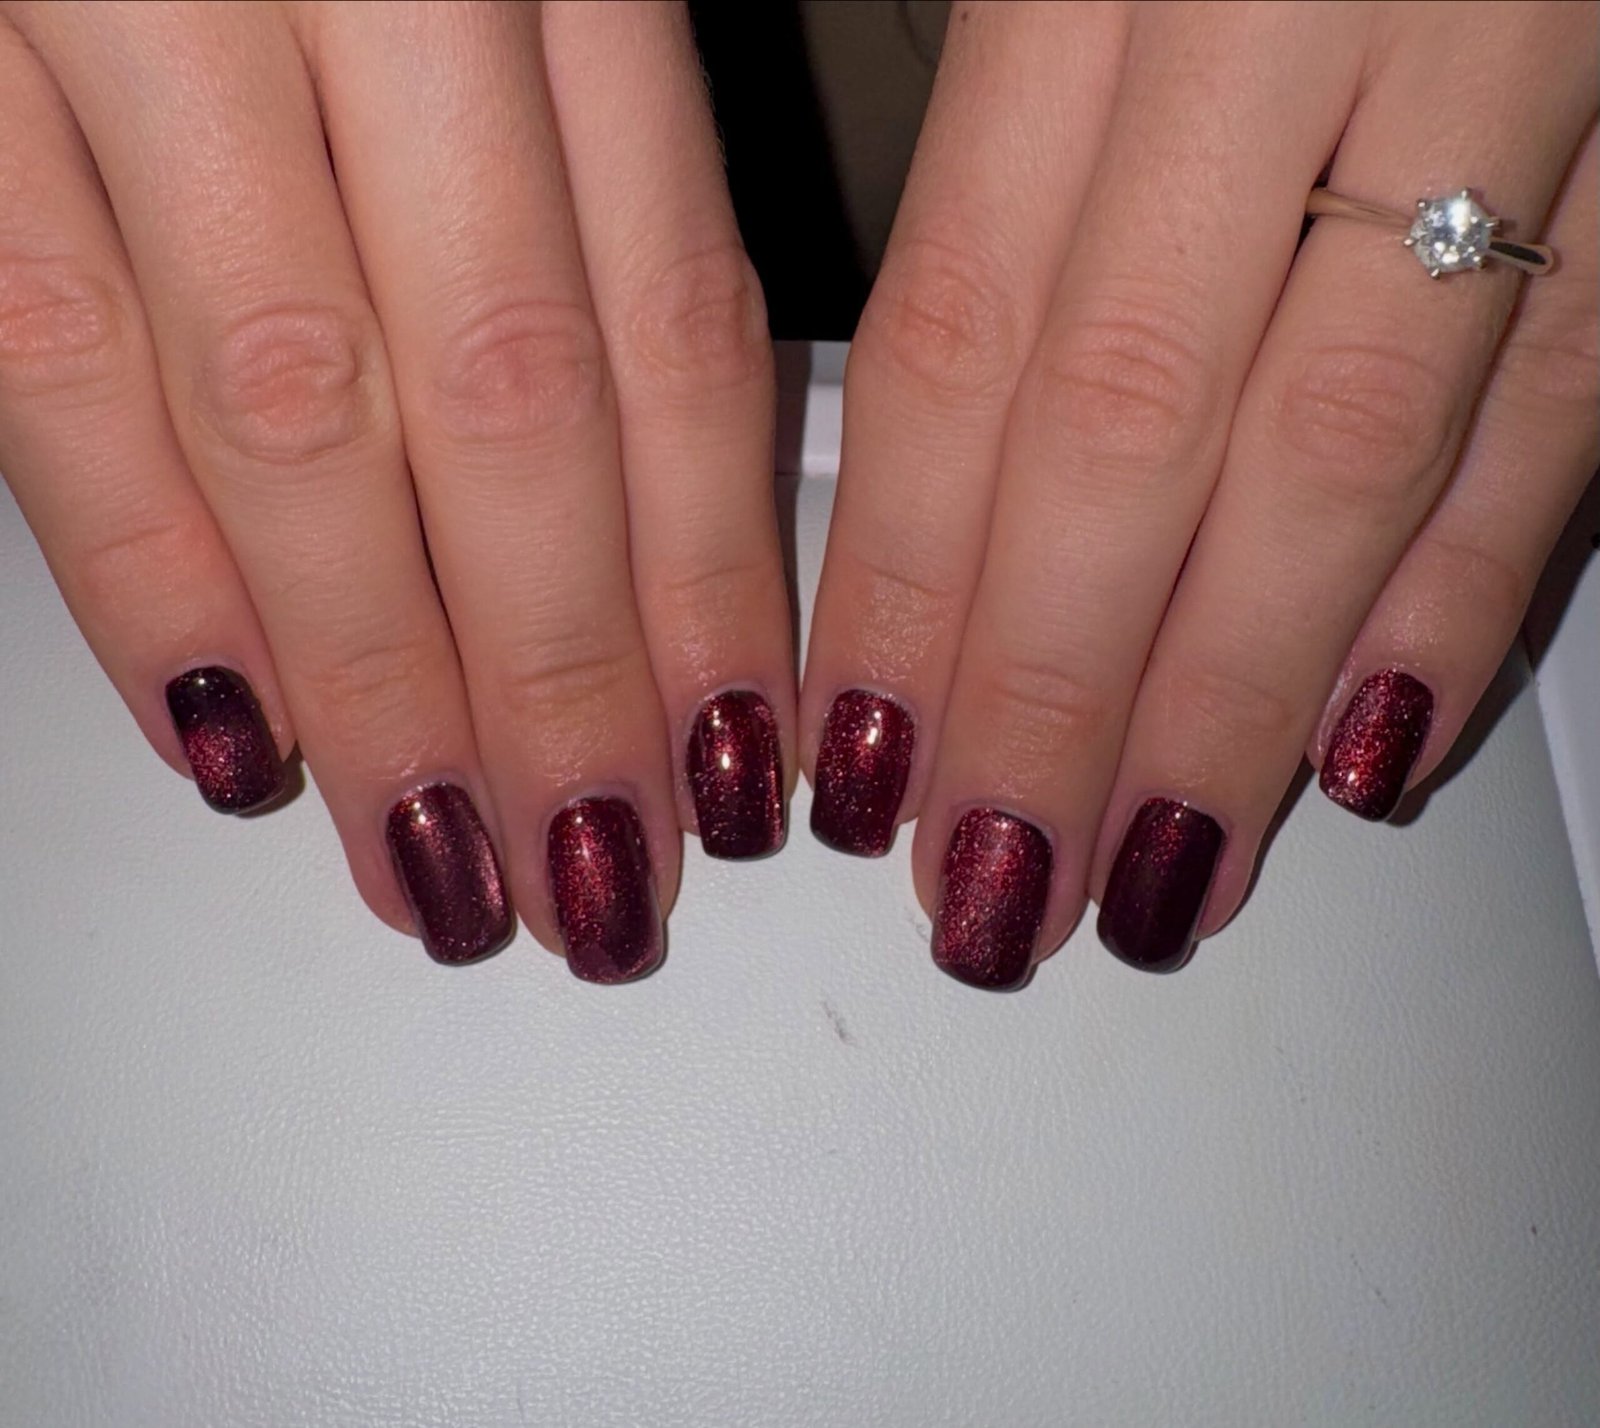
Velvet red cat-eye nails use magnetic polish to create a soft, shifting band of light that moves across the nail as your hand turns — like crushed velvet or the glow inside a Christmas bauble. This effect feels made for the holidays: dimensional, luxurious, and just a little bit magical. Unlike flat red polish, cat-eye reds have depth that photographs beautifully and draws compliments from across the room. The magnetic shimmer works on almond, coffin, and square shapes alike, and it is surprisingly wearable for everyday December life, not just parties. Choose a true red magnetic polish for classic festive impact, or a deeper oxblood magnetic shade for that moody velvet-rose effect trending this season. The effect glows under evening lighting, mimicking candlelight on glass ornaments — subtle by day, dramatic after dark.
Cat-eye polish needs its magnetic wand to work — hold the magnet close to the wet polish for ten to fifteen seconds per nail without touching the surface. Work one nail at a time: paint it, magnetize it, then move on, because the effect sets as the polish dries and you cannot re-magnetize a dry nail. For the sharpest velvet line, hold the magnet steady and parallel to the nail; angling it creates a softer, diffused glow. Most magnetic polishes look best over a dark base or on their own in two coats — check your bottle’s instructions. Seal with top coat, but note that thick top coat can slightly soften the magnetic pattern, so use one thin, careful layer. The result is a hypnotic, light-chasing manicure that takes about forty minutes.
Candy Cane Stripes
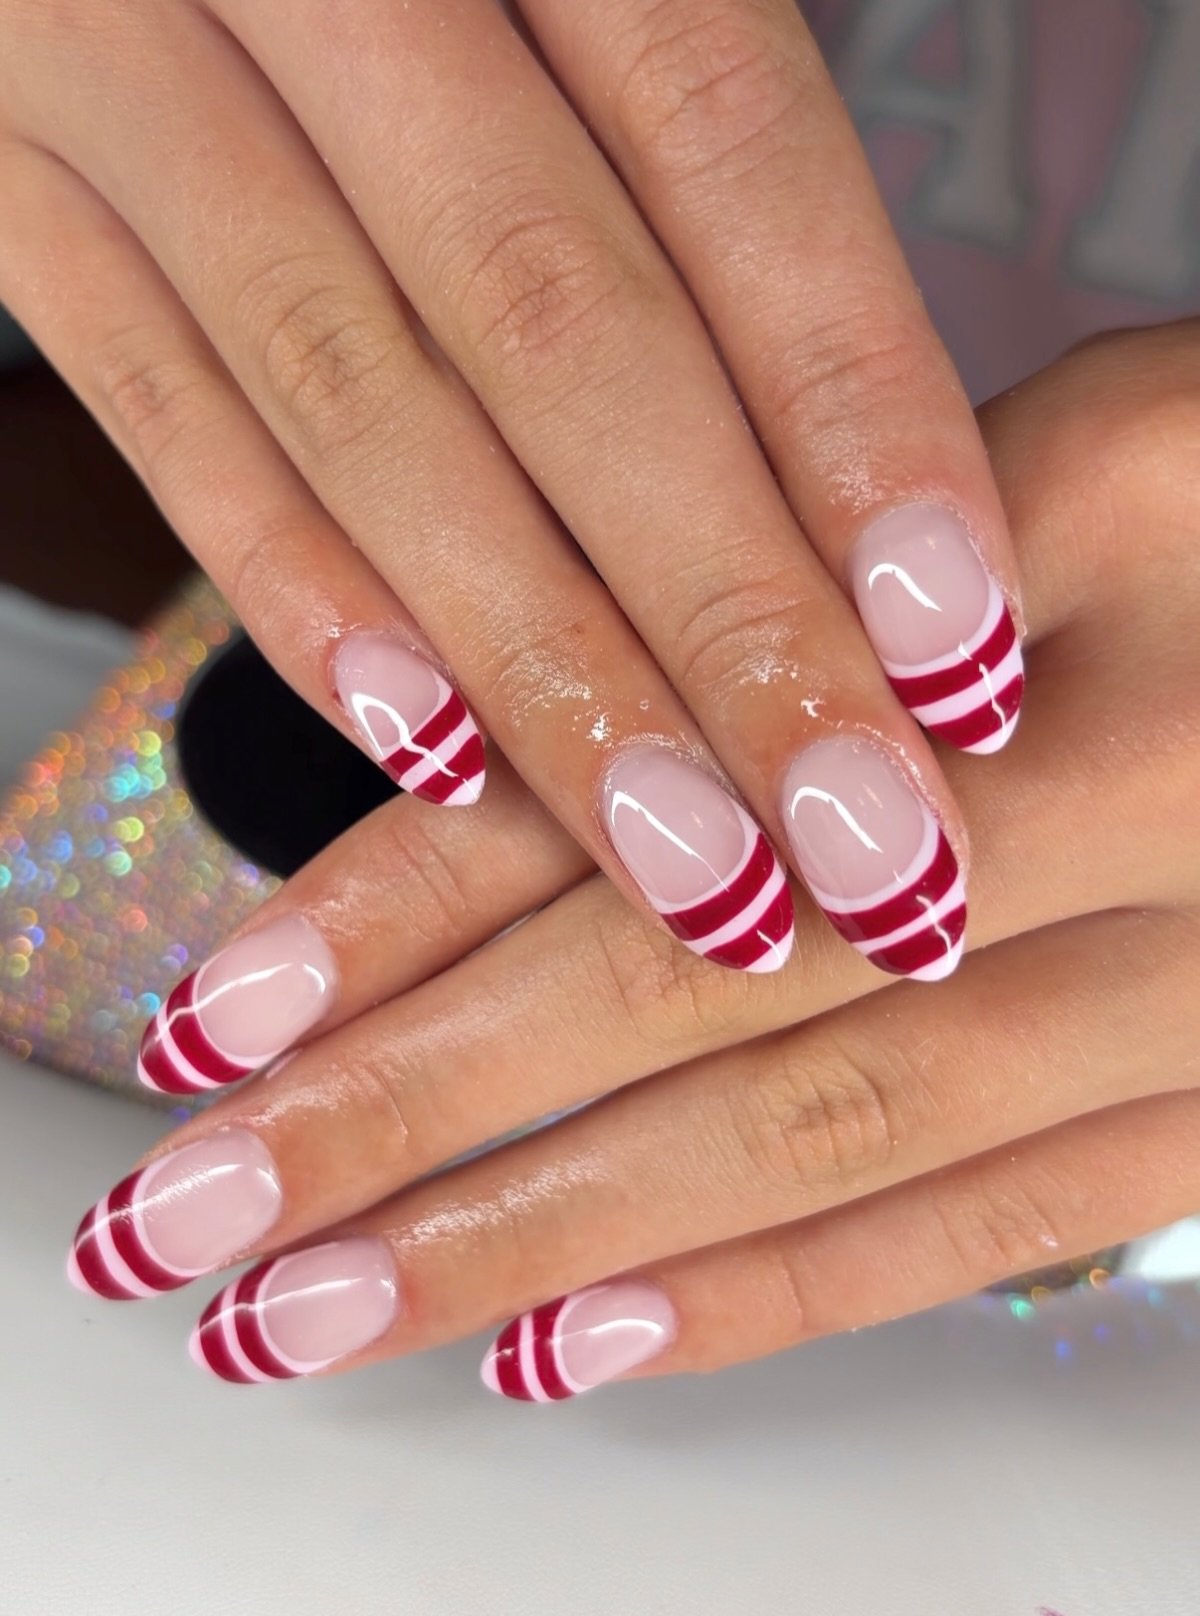
Candy cane stripes are the most literal Christmas nail art, and that is exactly their charm — crisp red and white diagonal stripes that look good enough to eat. This design works beautifully as an accent nail paired with solid red, or go full peppermint with stripes on every nail for maximum holiday whimsy. The diagonal direction matters: stripes angled toward the tip elongate the nail and feel dynamic rather than static. Keep the stripes thin and even for an elegant candy-cane look, or vary their widths for a playful, hand-drawn feel. This is a wonderful design for short nails too, since the bold graphic pattern needs no length to make an impact and reads clearly even on the tiniest canvas. They also photograph beautifully for holiday cards and party posts, and the red-white palette matches every Christmas table setting imaginable.
Start with a clean white base — two coats for full opacity — and let it dry completely, since any tackiness will drag when you add stripes. Using a thin striping brush or nail-art pen, paint diagonal red stripes from one side of the nail to the other, keeping even spacing. A clever shortcut: apply red striping tape in diagonal lines over the white base, seal with top coat, and you get razor-crisp stripes with zero brush skill. Work slowly and reload your brush often; dry brushes create scratchy, uneven lines. Once the stripes are dry to the touch, apply a generous glossy top coat to smooth the texture and fuse the design. Clean up edges with a small brush dipped in acetone for that crisp, professional finish. Keep a reference photo nearby — matching stripe angles across nails is easier at a glance.
Mirror Red Chrome
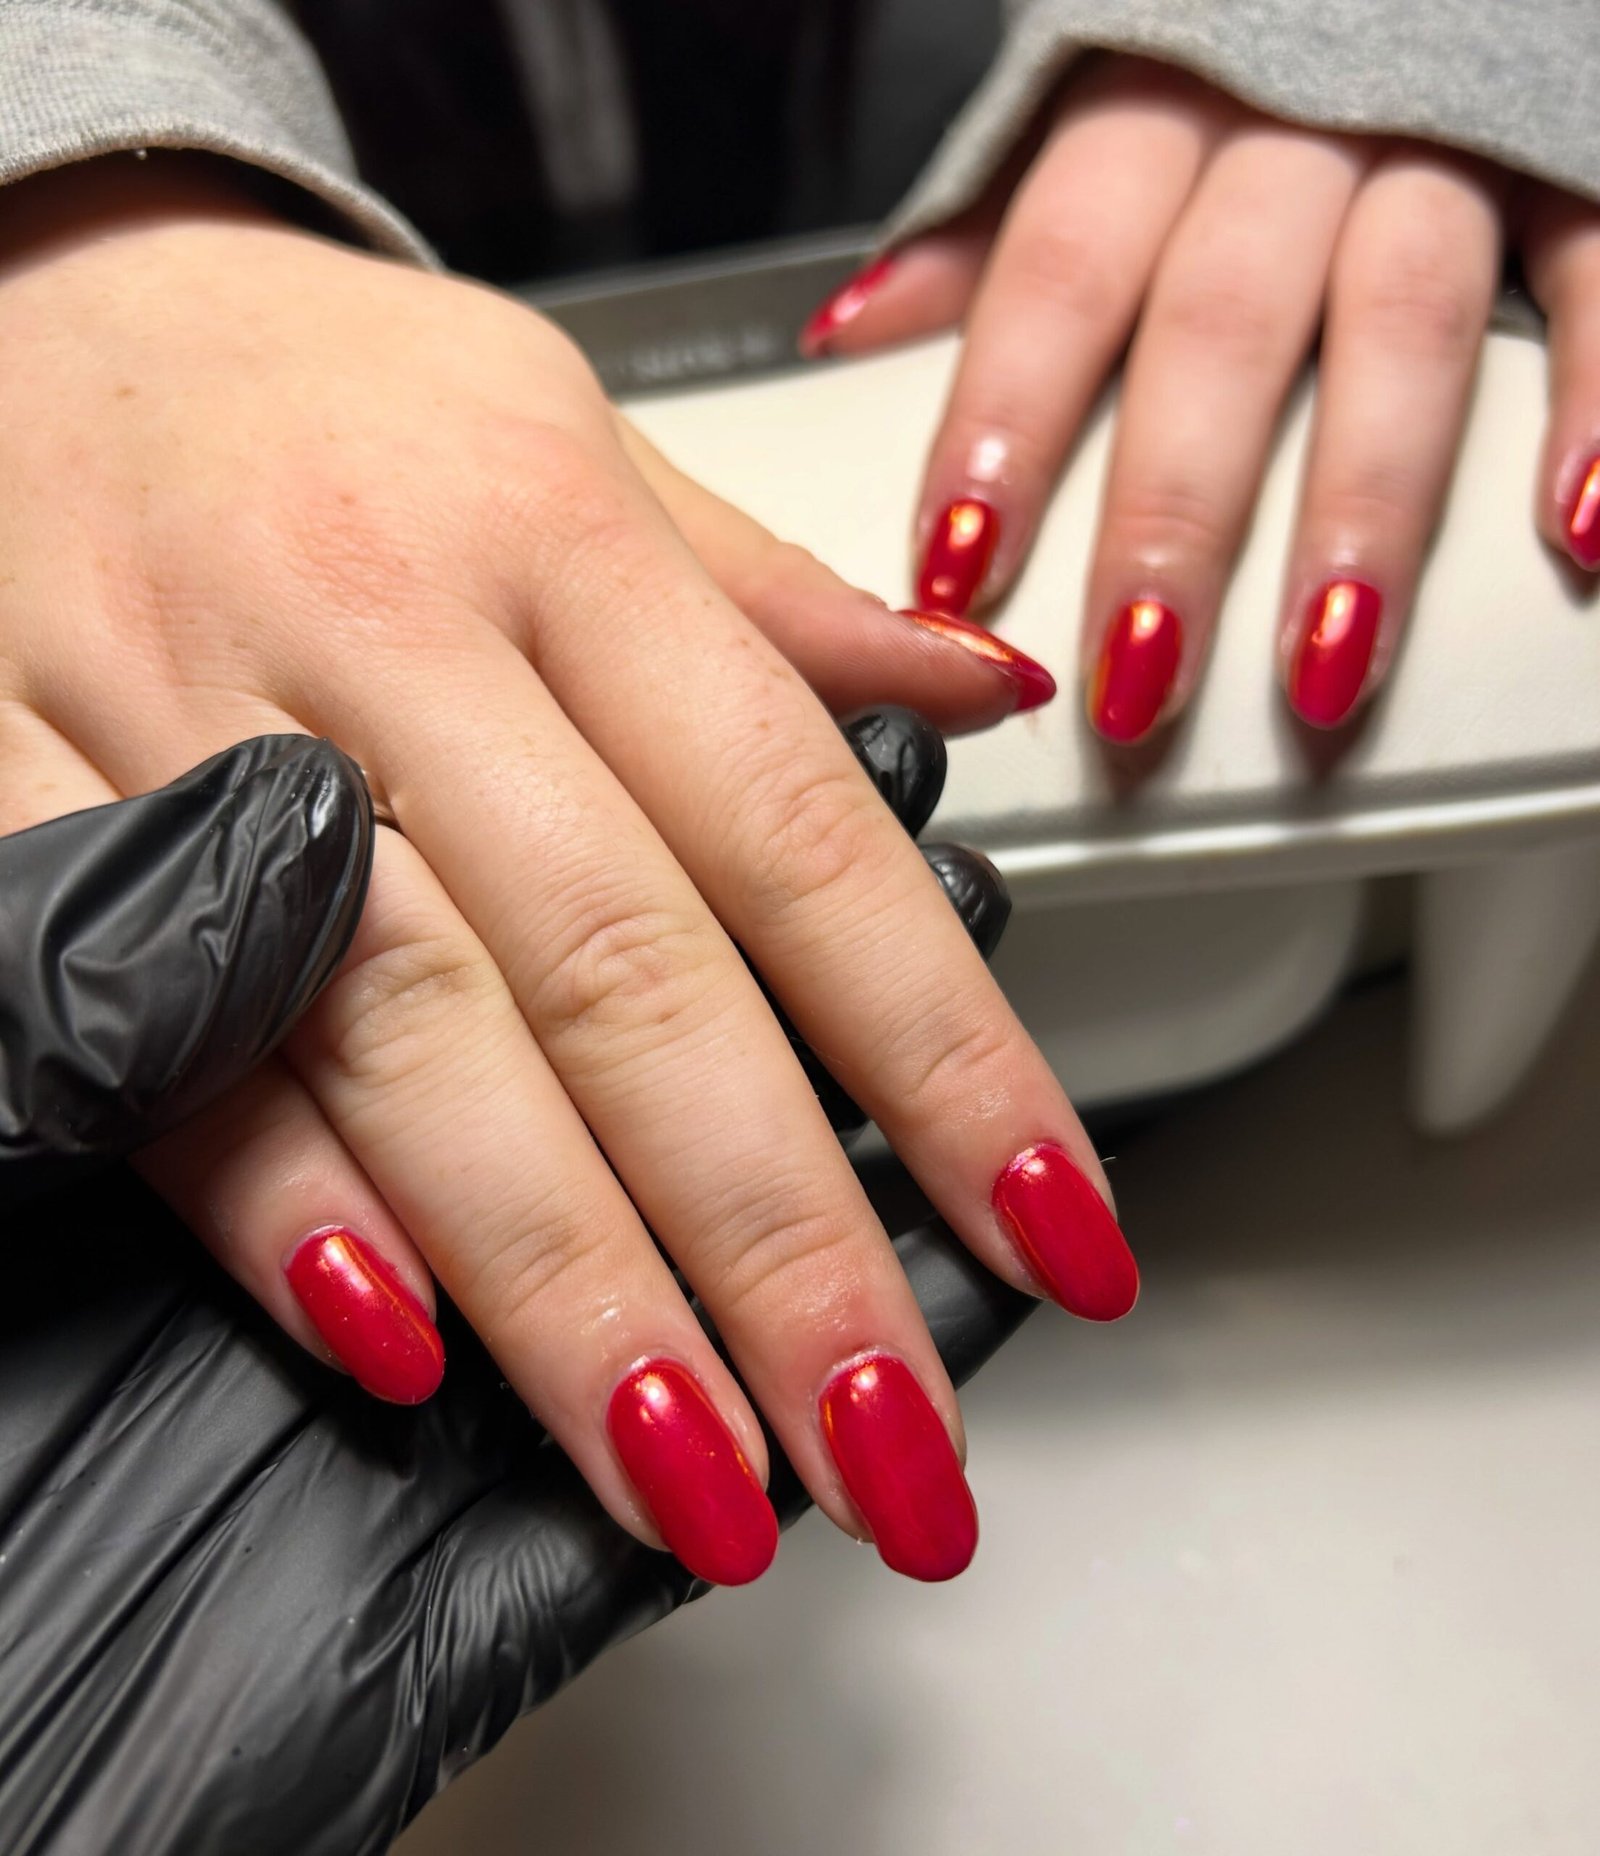
Mirror red chrome nails deliver the most futuristic take on Christmas red — a liquid-metal, mirror-shine finish that looks like molten holiday magic poured over your nails. Chrome powder over a red base creates depth that flat polish cannot touch: the color shifts from scarlet to deep crimson as light moves across the curve of each nail. This is a true statement manicure, the kind people notice from across the Christmas market. It pairs spectacularly with minimalist winter outfits, letting your nails be the entire accessory, and it photographs like a dream against snow and fairy lights. If your holiday style leans modern and bold rather than traditional, red chrome is your festive power move. The powder layer also adds durability, resisting the tip wear that dulls regular polish — a welcome bonus through weeks of festivities.
Chrome needs a specific base to work: apply a red gel or regular polish, then while it is still slightly tacky (or over a no-wipe gel top coat, depending on your powder), buff the chrome powder on with a silicone applicator using firm circular motions. The magic happens in the buffing — keep going until the powder melts into a seamless mirror. Dust off excess with a soft brush, then seal with two thin layers of top coat to lock the chrome in; unsealed chrome rubs off within hours. For regular polish users, chrome-effect polishes exist that approximate the look in one bottle, though the true mirror needs powder. Avoid thick top coats, which can dull the reflective finish — thin and even is the rule. Store chrome powder sealed and dry; moisture clumps the particles and ruins the mirror effect on your next use.
Gold Foil Touches

Red nails with gold foil touches are Christmas elegance distilled — the rich warmth of red paired with the luxe glint of gold feels like the inside of a beautifully wrapped gift. Gold foil adds texture and light without the full commitment of glitter, and each nail ends up unique since foil tears organically. This combination suits every December occasion, from formal holiday dinners to casual festive gatherings, because it reads refined rather than loud. Apply foil as scattered accents over solid red, or go bolder with a full gold-foil feature nail among red ones. The red-and-gold pairing also flatters warm skin tones gorgeously, echoing the season’s classic color story in the most wearable way. Foil catches light beautifully in photos, giving nails a jewelry-like quality — an easy upgrade when you want polish with minimal effort.
Apply your red base — two coats, fully dry — then add a thin layer of foil adhesive or slightly tacky top coat where you want the gold. Press small torn pieces of gold foil onto the tacky areas with tweezers or a silicone tool, then lift away; the foil adheres in beautiful irregular patches. Less is more: three to five small foil fragments per nail create an expensive, scattered effect, while covering the whole nail can look heavy. Once you are happy with placement, seal with two coats of top coat, pressing gently on the first coat so you do not drag the foil. The top coat melds everything into a smooth, glassy finish. Foil edges may lift after several days — a top-coat refresh reseals them instantly. Foil also makes a lovely hidden accent under the nail tip for a secret flash of gold.
Snowflakes on Red
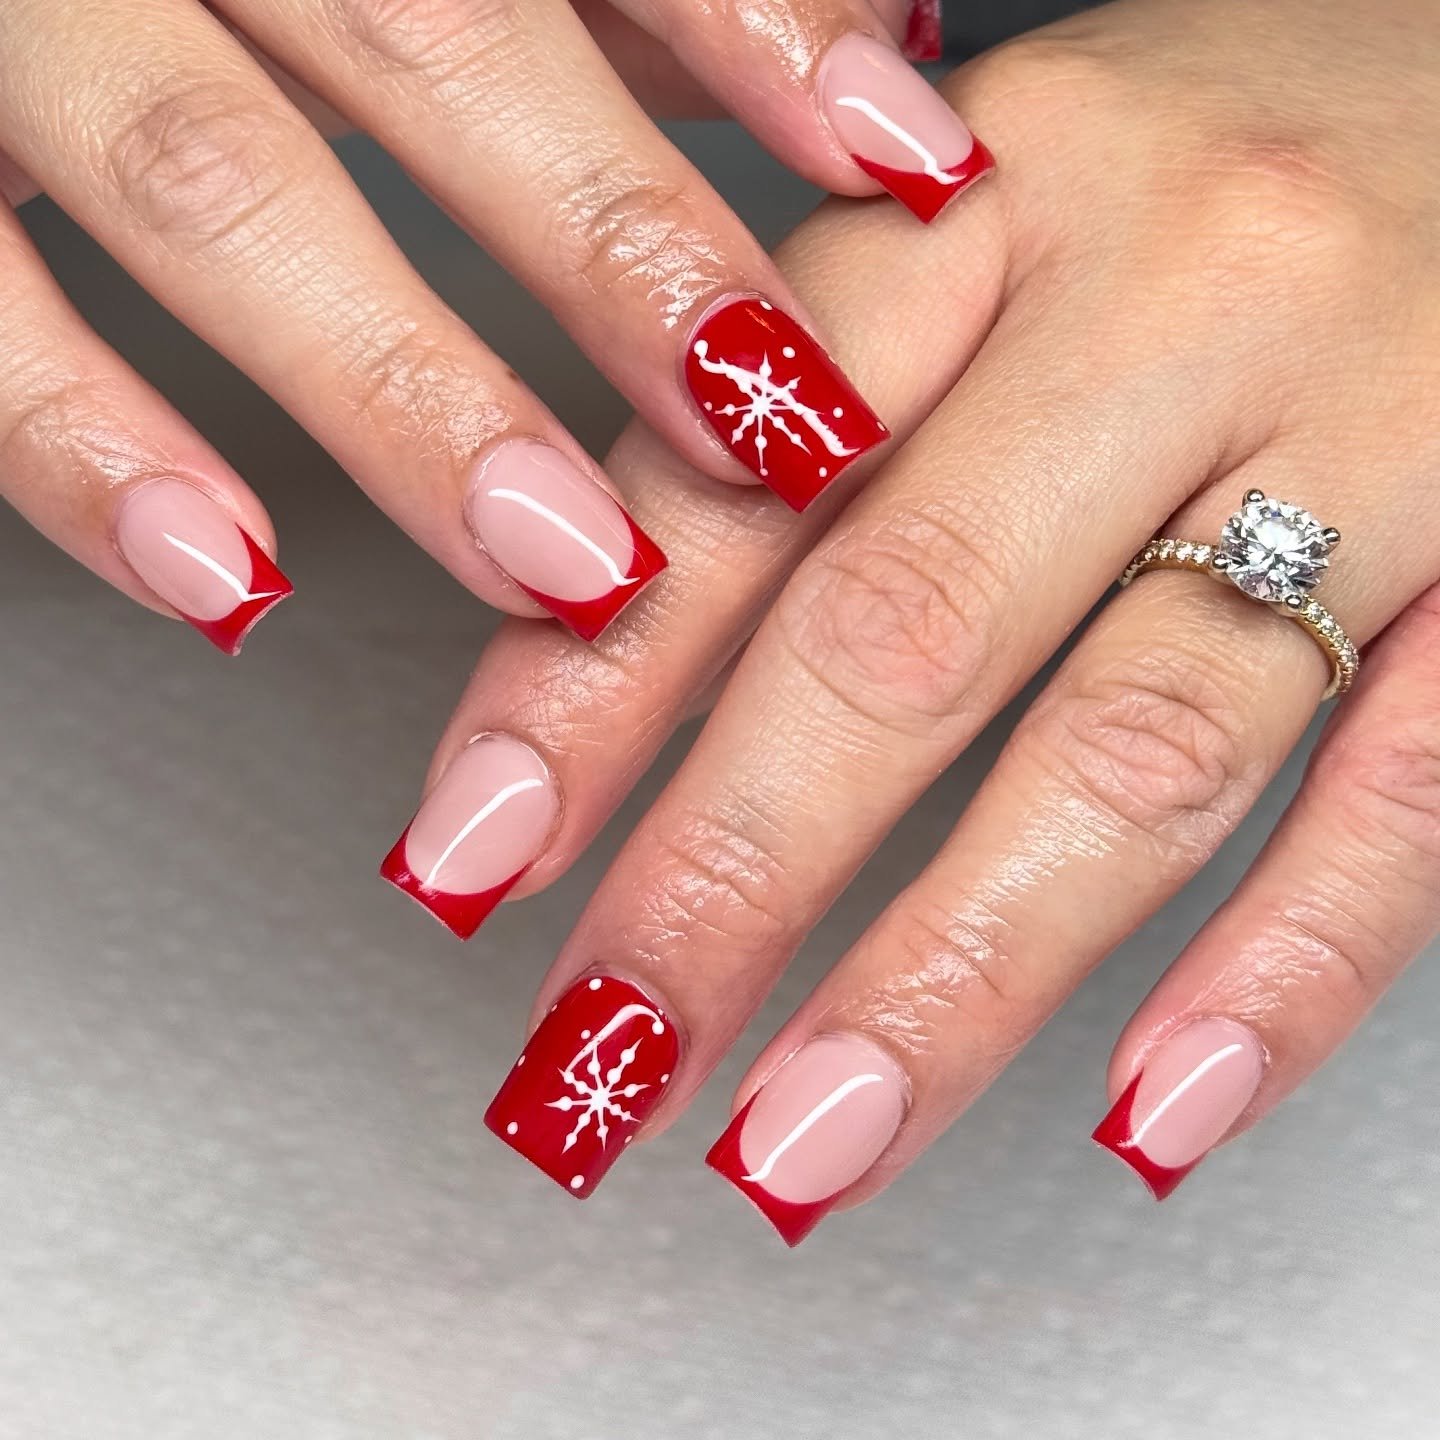
White snowflakes scattered over a rich red base are the quintessential Christmas nail art — wintry, delicate, and unmistakably seasonal. The high contrast of crisp white against deep red makes even simple snowflake designs look intricate and special. This is a perfect design for accent nails: paint most nails solid festive red, then turn one or two into snowy feature nails with hand-painted or stamped flakes. Each snowflake is naturally unique, so slight wobbles in your lines only add handmade charm. This look bridges Christmas and the whole winter season beautifully — it stays appropriate well into January, long after the tree comes down, making it one of the hardest-working festive manicures. The design suits every nail shape, since flakes scale to the space they get. For a softer take, try silver flakes on deep burgundy — still festive, less contrast.
Paint your red base first and let it dry completely — white over tacky red will bleed pink. For hand-painted flakes, use a fine dotting tool or toothpick: start with a central dot, then draw six thin lines outward like an asterisk, adding tiny branches to each arm. Keep your white polish thin; thick polish blobs instead of drawing fine lines. If freehand feels daunting, snowflake nail stamps or stickers give perfect results in seconds — just seal them well. Place one larger statement flake per nail with a few tiny dots around it for a natural snowfall effect. Finish with a glossy top coat, which makes the white pop against the red. The whole design takes about forty-five minutes including drying time. Work near good lighting — white on red needs precision, and shadows make fine lines harder to judge.
Holly Berry Accents

Holly berry accents bring a touch of botanical Christmas charm to red nails — deep green leaves and bright berry dots that look like a tiny wreath on each fingertip. This design feels traditional and cozy, echoing the natural decorations of the season: garlands, wreaths, and mistletoe. It works wonderfully as an accent over solid red or deep green bases, with the holly motif on one or two feature nails. The combination of red, green, and a touch of gold (for berry highlights) hits every classic Christmas color note at once. Holly designs suit medium to long nails best, since the leaves need a little room to spread, but simplified versions with just berries and dots work on short nails too. The motif also pairs beautifully with gold jewelry and warm candlelight, making it ideal for Christmas dinner photos.
Start with your chosen base color — classic red or deep forest green both work — applied in two coats and fully dried. Paint holly leaves with a small flat brush or toothpick: two curved strokes meeting at a point create a simple leaf, or use a striper for sharper holly points. Add berries as clusters of three tiny red dots (or gold dots on a red base) with a dotting tool, placing a minuscule white highlight dot on each berry for dimension. Keep the design to one or two accent nails per hand; holly on every nail can feel busy. A glossy top coat unifies the design and makes the berries look juicy and fresh. This detailed design rewards patience — allow a full hour. Keep cotton pads and remover handy — holly leaves are easiest to perfect when you can wipe and retry a stroke.
Tartan Plaid Reds

Tartan plaid in festive reds is Christmas pattern at its most sophisticated — the woven checks of classic holiday tartan translated onto nails, rich with crimson, burgundy, and thin gold or white cross-lines. Plaid nails feel both traditional and fashion-forward, like a Burberry scarf shrunk to fingertip scale. This design makes a stunning full manicure, with the check pattern on every nail, or use it as a feature-nail accent against solid oxblood. The intersecting lines create visual texture that looks far more complex than it is to execute. Tartan reds pair perfectly with winter tailoring — camel coats, black turtlenecks, leather boots — making this the fashion editor’s Christmas manicure. The pattern also works in non-traditional palettes — navy and silver for a winter twist, or forest green and gold. Because the eye reads the overall check first, small imperfections disappear, making plaid forgiving for beginners.
Begin with a red base in your chosen shade — cherry, oxblood, or classic true red — two coats, fully dry. Using a thin striping brush, paint vertical lines in a contrasting shade (gold, white, or darker burgundy), then horizontal lines crossing them to form the grid. Vary line weights: two thick bands with thin pinstripes between them mimics authentic tartan best. Let each direction dry before adding the crossing lines to prevent smearing. For precision without freehand stress, use striping tape: lay vertical strips, paint over them, remove, then repeat horizontally. Seal with a glossy top coat to meld the layers. The geometric pattern is forgiving of small wobbles — the busy check hides imperfections beautifully. Let the base color show through in a few thin gaps for an authentic woven look, and finish edges with cleanup so the checks look crisp against skin.
Red Christmas Nails FAQs
What is the most popular red shade for Christmas nails?
Classic cherry red remains the most popular Christmas nail shade year after year because it suits every skin tone and matches the full holiday palette. For 2026, deep oxblood wine and sparkling red glitter are close runners-up — oxblood for elegant evenings, glitter for parties. If you can only pick one festive manicure, a glossy true red is the safest, most versatile choice.
How long do red Christmas nails last?
With proper prep — cuticle care, base coat, thin polish layers, and a quality top coat — red Christmas nails typically last seven to ten days without chipping. Glitter and chrome finishes tend to last even longer since their texture hides minor wear. Reapply top coat every two to three days and wear gloves for dishes and cleaning to maximize wear time through the holiday season.
Do red Christmas nails suit short nails?
Absolutely — red is one of the most flattering shades for short nails. Solid reds like classic cherry and oxblood make short nails look neat and polished, while designs like snowflakes, holly berries, and candy-cane stripes read clearly even on a small canvas. If a design feels crowded, use it on one or two accent nails and keep the rest solid red.
What nail shapes work best with red Christmas designs?
Almond and oval shapes are the most popular for red Christmas nails because their elongated curve makes red look elegant and festive. Square and squoval shapes give a modern, bold edge — especially striking with chrome and glitter finishes. Coffin and stiletto shapes turn dramatic designs like tartan plaid and cat-eye velvet into true statement manicures.
In the end, red Christmas nails are the one festive manicure that truly never fails — ten ideas, one perfect shade family, endless ways to wear it. From the timeless glow of classic cherry red to the drama of mirror chrome and the coziness of tartan plaid, there is a red Christmas look here for every style and every December plan. Pick your favorite, save the Instagram inspiration, and book that nail appointment (or break out your own polishes). Your most festive manicure of 2026 is one red shade away.