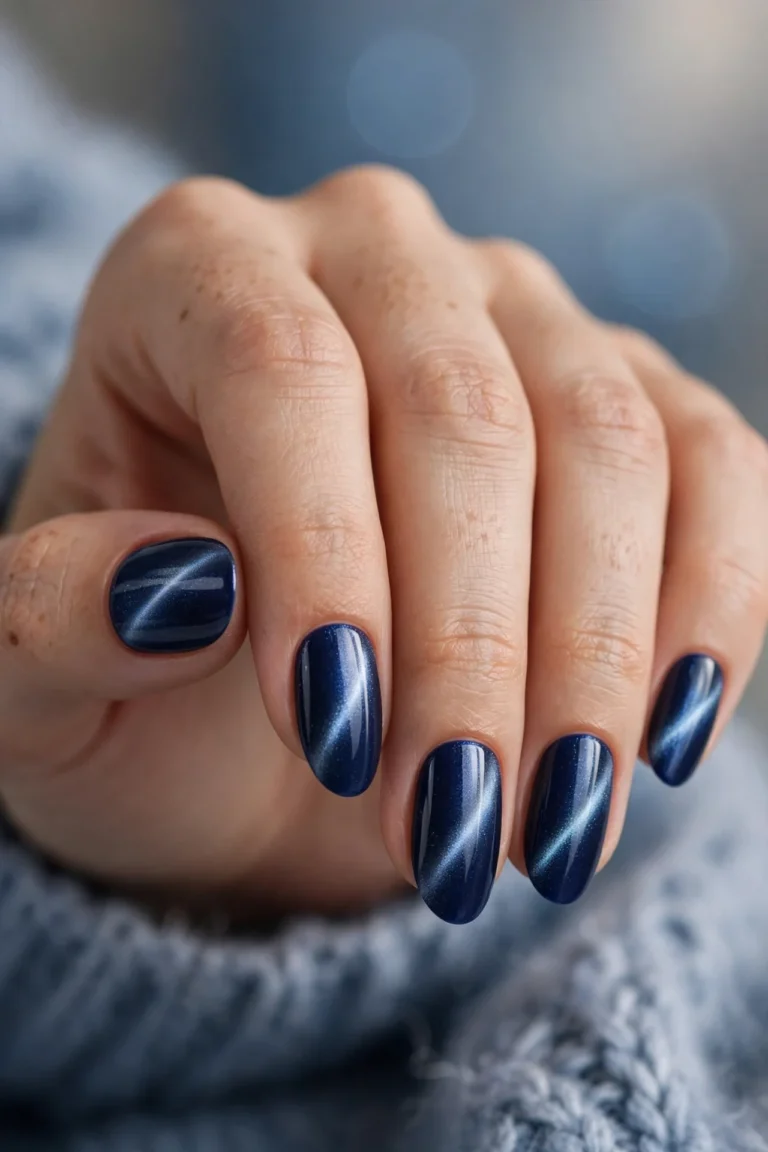
15 Matte Plum Nails for Mature Hands: Elegant 2026 Winter Colour
Introduction
You have earned the right to wear colour with intention, and matte plum nails for mature hands are one of the most flattering choices you can make this winter. A soft-matte plum finish — deep, velvety and never shiny — visually smooths the look of skin, keeps the eye on a tidy shape rather than fine lines, and looks expensive in every light, from office fluorescents to candlelit dinners. The 15 ideas below pair a rich plum palette with the details that matter most for elegant hands: shorter, kinder lengths, gentle almond and oval shaping, and cuticle-first care that keeps every manicure looking fresh for weeks. If you love deep berry tones, our Moody Plum Nail Ideas are a natural companion read.
Matte Plum Almond Nails for Mature Hands
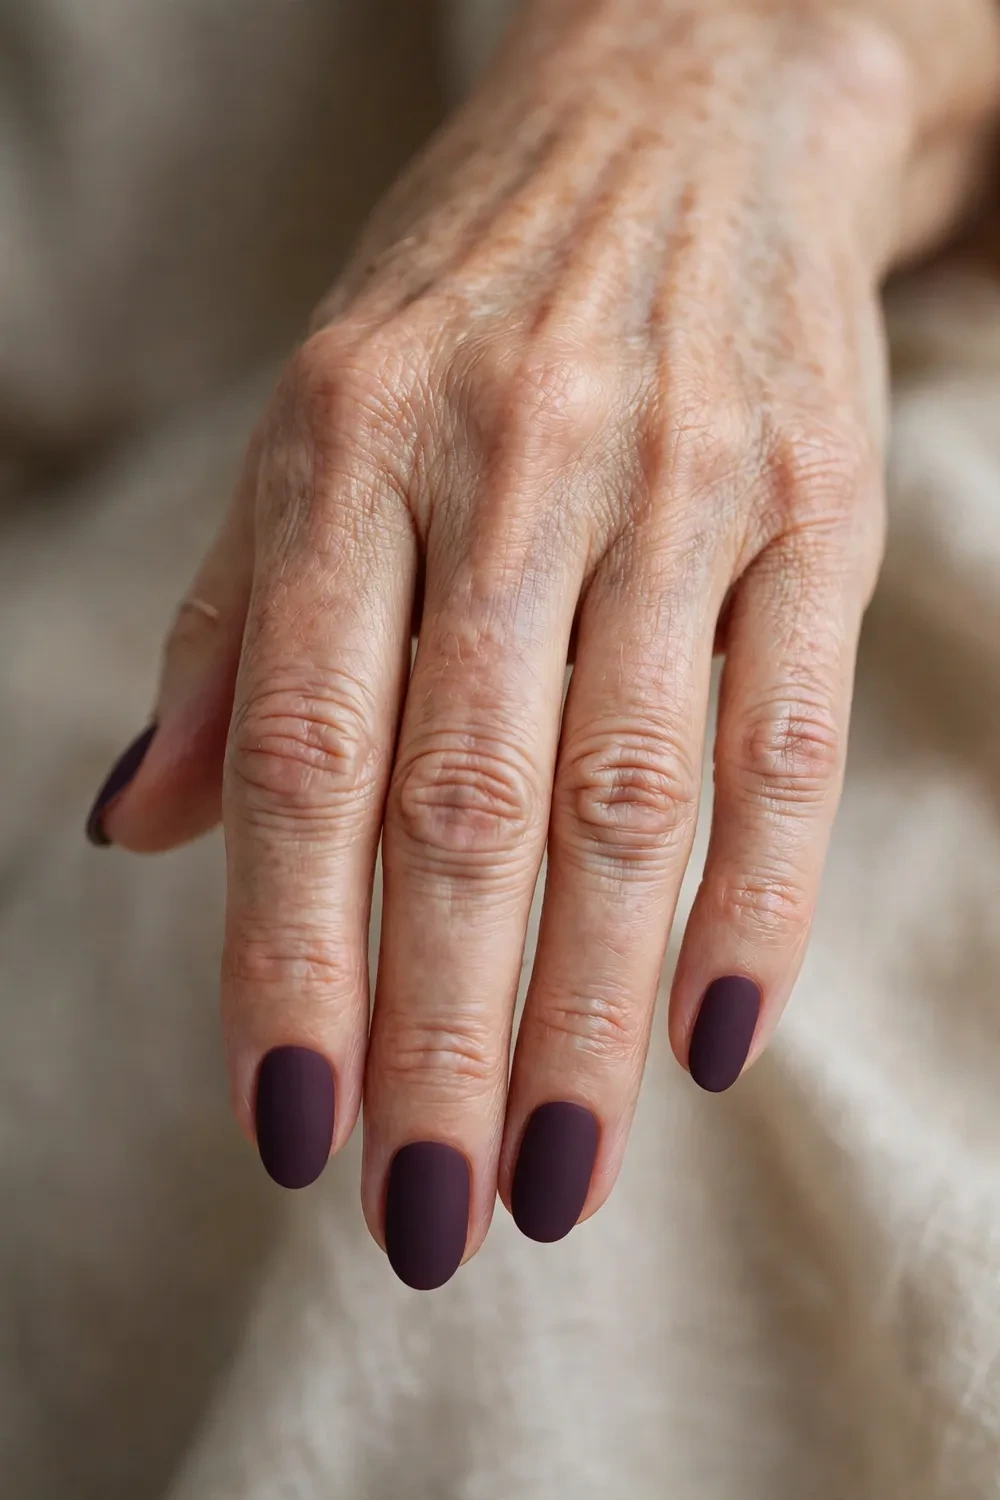
Nothing flatters mature hands quite like a short, softly tapered almond nail painted in deep matte plum. The almond shape draws the eye lengthwise, making fingers look longer and more slender without the fragility of a sharp point, while the matte finish drinks in light instead of reflecting it — a small trick that softens the look of skin and keeps attention on your polished shape. Plum sits beautifully between red and burgundy: rich enough to feel wintry and festive, yet muted enough for everyday wear. It suits cool skin tones especially well, but warmer complexions glow beside it too, especially when the shade leans slightly toward berry rather than purple.
- Pick a plum two shades deeper than your natural nail bed for the most flattering contrast.
- File to a short almond — gently tapered sides ending in a softly rounded tip.
- Apply two thin coats of colour rather than one thick layer to prevent streaking.
- Finish with a velvety matte top coat so the surface stays even and glare-free.
At the salon, ask for a “short almond manicure in matte plum gel with a neat cuticle tidy” — most technicians will know exactly what you mean, and gel gives you three to four weeks of chip-free wear. For a DIY version, push back cuticles gently after a warm soak, shape with a fine-grit file in one direction, then layer base coat, two thin colour coats and a matte top coat, capping the free edge each time. Nightly cuticle oil is non-negotiable with matte finishes, which show dryness more readily than glossy ones. Wear gloves for washing up and your manicure will stay elegant for a fortnight or more.
Shimmer Accent Nail over Matte Plum
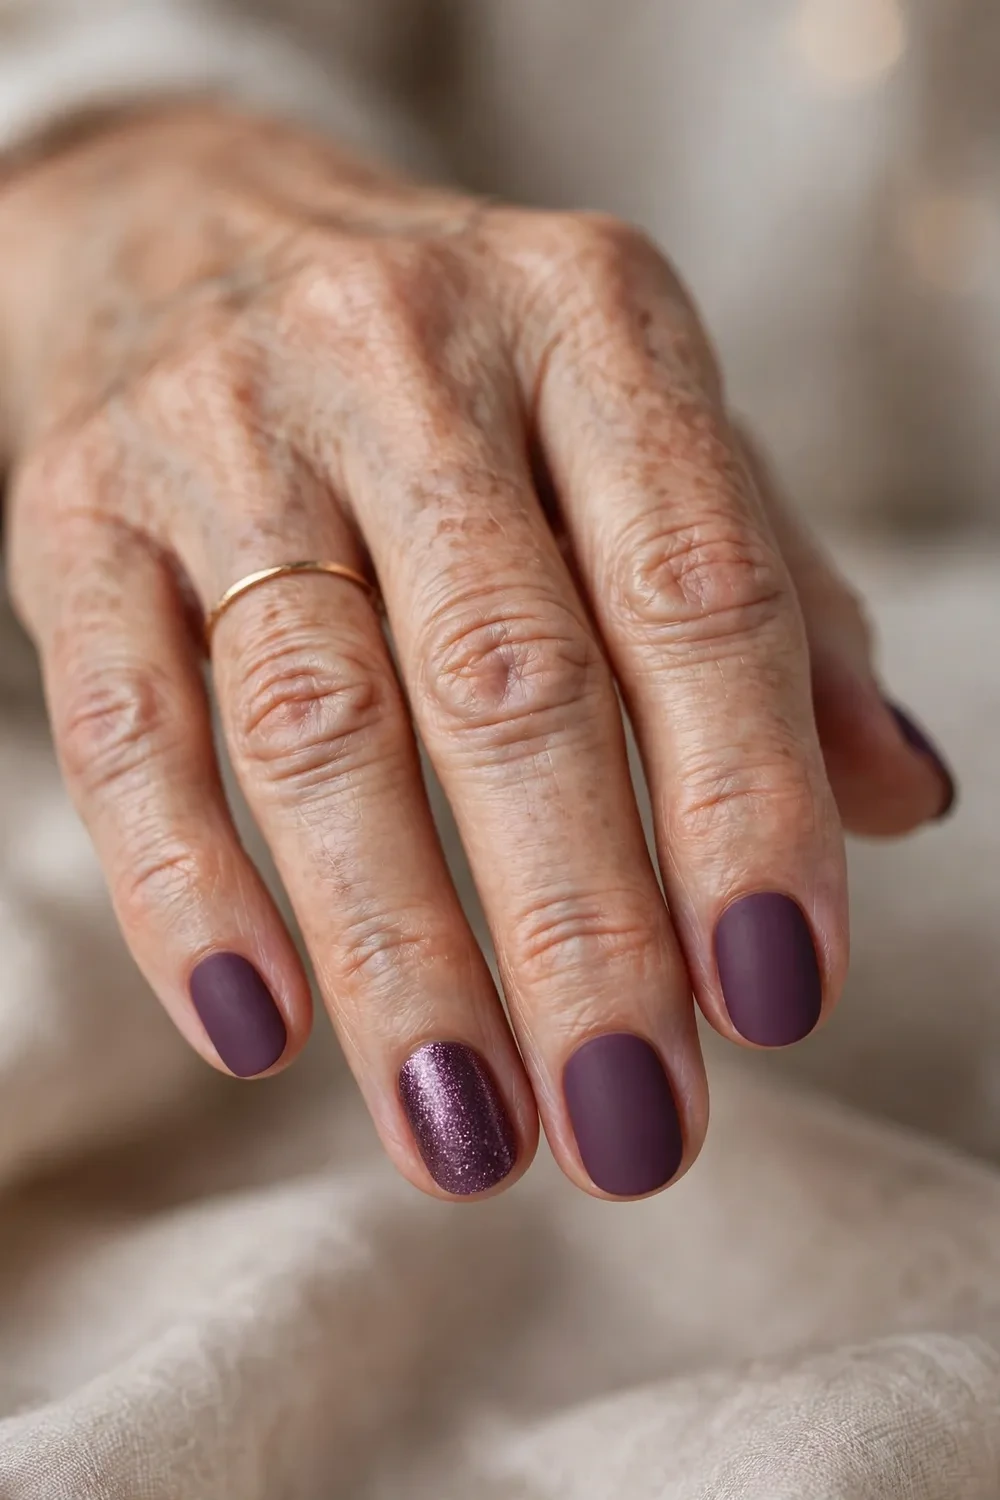
If a full matte set feels a touch severe, let one nail carry a whisper of shimmer. Keeping four nails in velvety matte plum and painting the ring finger in a fine plum-toned shimmer adds just enough light to lift the whole manicure — and on mature hands, a single luminous accent reads as jewellery rather than glitter. The shimmer catches candlelight beautifully at winter dinners while the matte majority keeps the look grounded and sophisticated. Choose a shimmer in the same plum family, not a contrasting silver or gold, so the effect stays tonal and grown-up rather than party-season loud.
- Reserve the shimmer for the ring finger — one accent reads elegant, two can look busy.
- Match the shimmer’s base tone to your plum so the pair looks intentional, not random.
- Keep the shimmer formula fine-milled; chunky glitter can emphasise texture around the nail.
- Seal both finishes with their own top coats — matte on the matte nails, glossy on the shimmer.
Ask your technician for “matte plum with one shimmer accent in a matching tone” and let them blend the two formulas so the transition between nails looks seamless. At home, paint all ten nails in your plum base first, apply the matte top coat to eight of them, then layer the shimmer polish on both ring fingers and finish those with a glossy top coat for contrast. A hidden advantage of this design is practical: shimmer disguises tip wear beautifully, so your accent nails will look fresh even as the matte nails age. Refresh the matte top coat once a week to keep the velvet effect even.
Matte Plum French Tips on a Nude Base
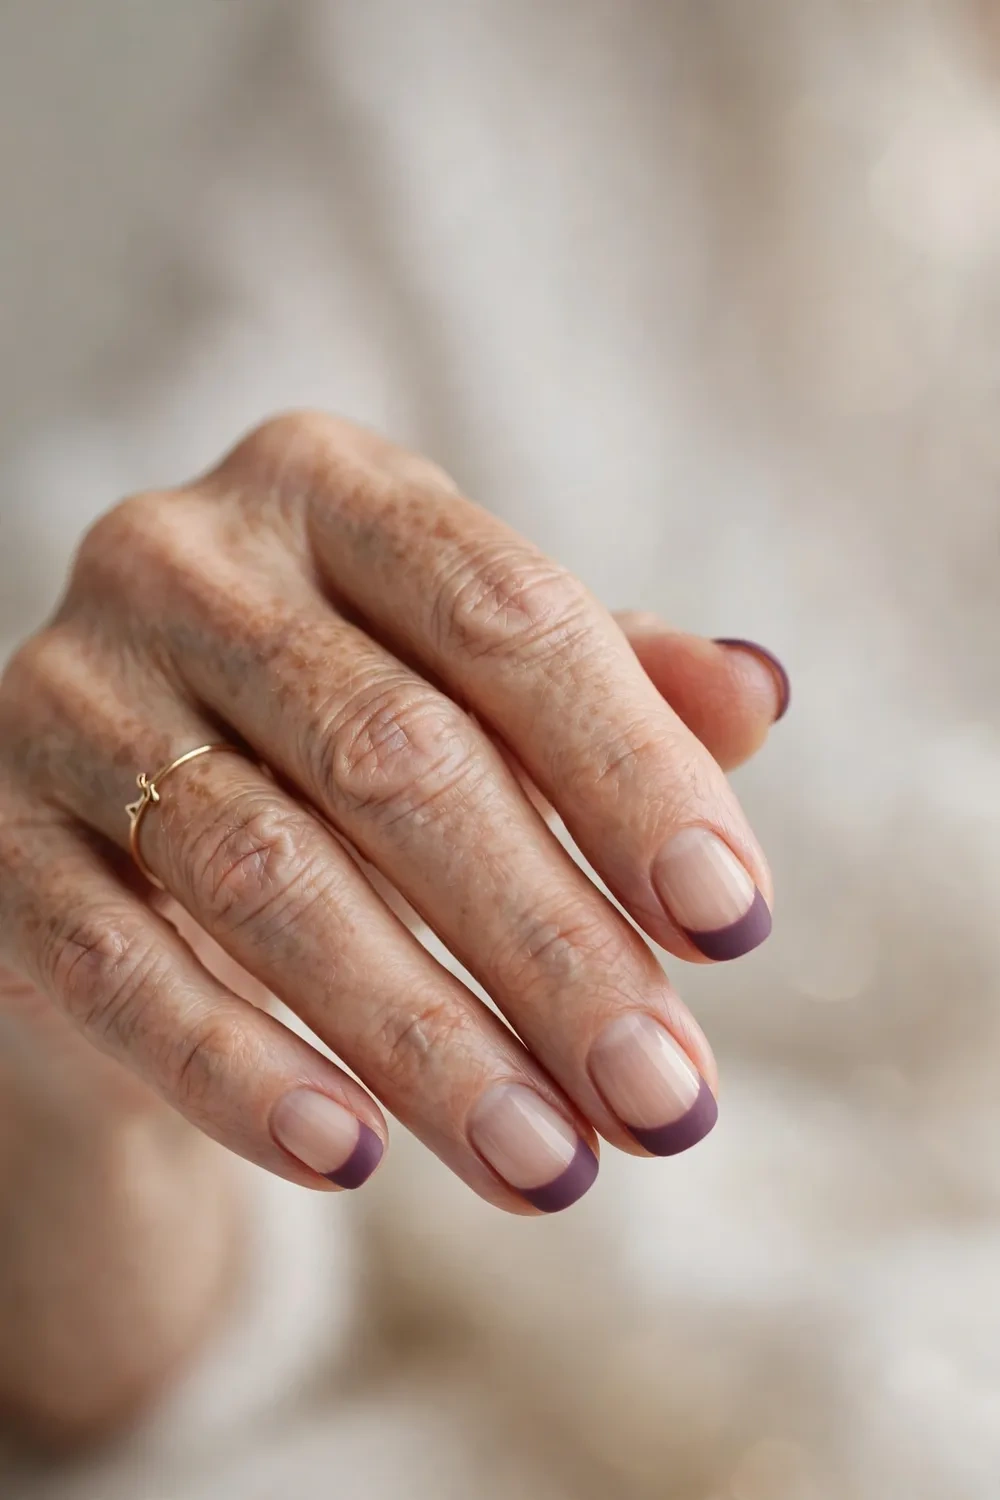
The French manicure grows up beautifully in plum. A sheer nude base that matches your skin tone keeps hands looking natural and neat, while matte plum tips add a wintry depth that feels modern rather than bridal. This design is especially kind to mature hands because the nude base blurs the boundary between nail and skin, making nails appear longer without adding actual length, and any regrowth at the cuticle is far less visible than with a full-colour manicure. The matte finish on the tips keeps the whole effect soft and contemporary.
- Choose a sheer nude that disappears into your skin tone — test it against your knuckles.
- Paint the plum tip as a gentle smile line, no wider than a third of the nail.
- Ask your technician for a matte top coat over the whole nail to unify both finishes.
- Keep the free edge short; long French tips can look severe on mature hands.
In the salon chair, the wording is simple: “sheer nude base with matte plum French tips, short length.” For a DIY attempt, apply two coats of your sheer nude, then use French tip guides or a steady freehand to paint the plum smile line — a small angled brush dipped in remover cleans up any wobbles. Once both layers are dry, a single matte top coat melts the two finishes together. Because tips take the most daily abuse, cap the free edge carefully with every layer. Expect a solid two weeks of wear, and keep a plum pen or polish nearby for tiny tip touch-ups.
Gold Foil Kissed Matte Plum Nails
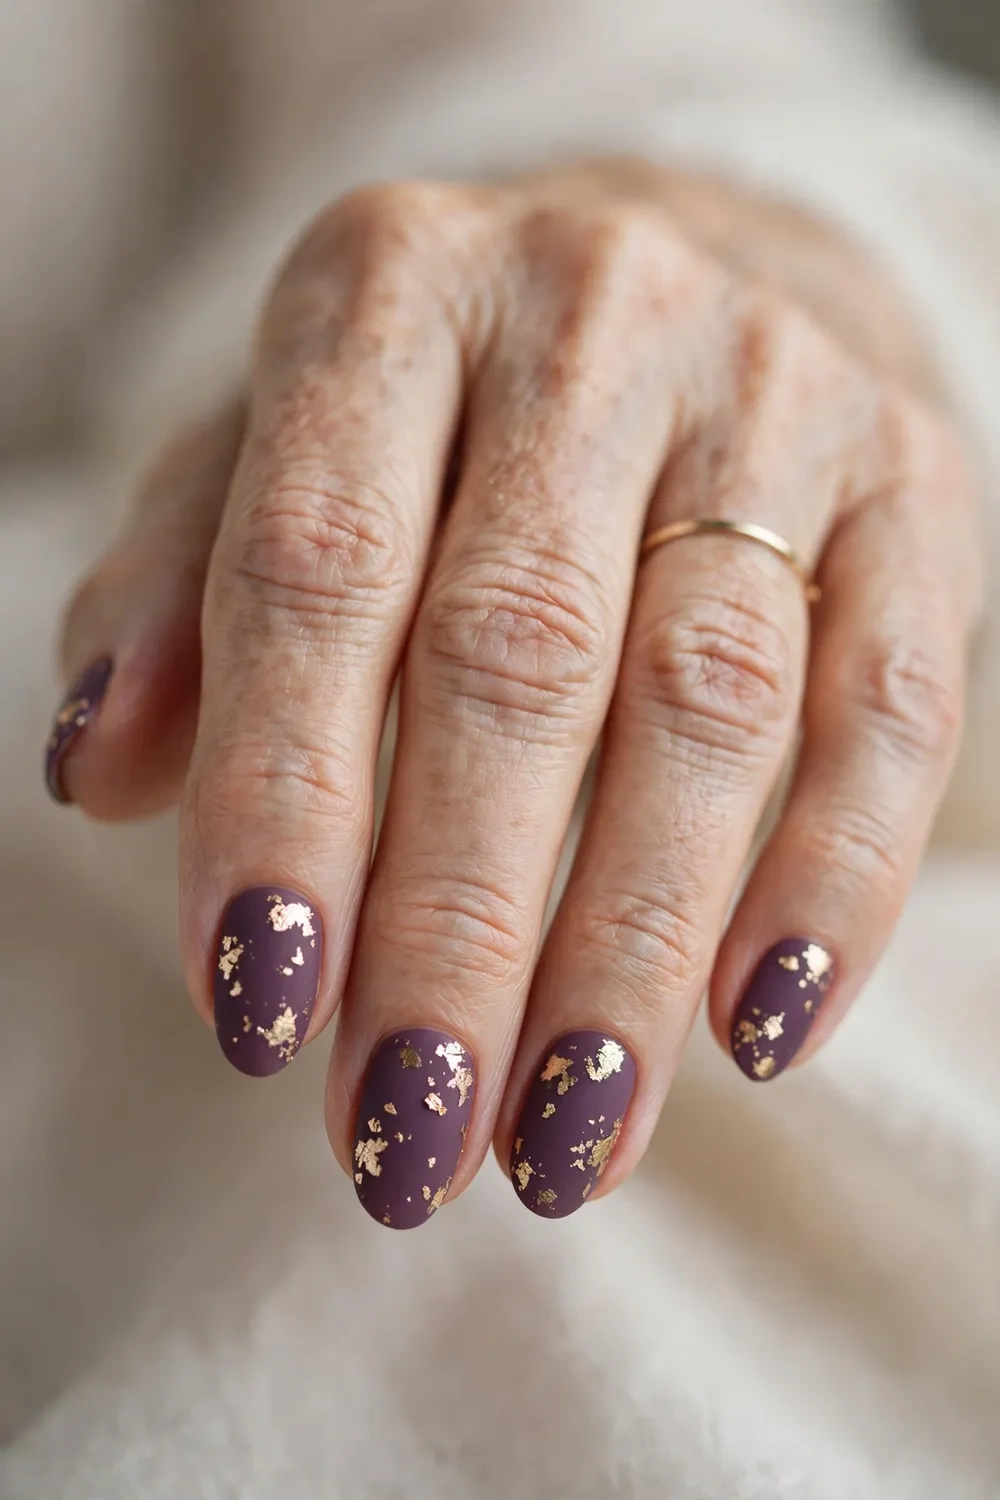
A few flakes of gold foil scattered over matte plum is winter luxury in miniature. The matte surface acts like dark velvet in a jeweller’s case, making every fleck of gold glow brighter than it ever could on a glossy base. On mature hands this pairing is magic: gold warms the skin’s tone, the irregular foil edges feel artisanal rather than fussy, and because no two nails match exactly, tiny imperfections simply disappear into the design. If you love jewel-toned drama, our Burgundy Cat-Eye Nails offer a glossier take on the same winter mood. Keep the foil concentrated near the cuticle or scattered sparsely, and the look stays festive enough for December parties yet restrained enough for the office the next morning.
- Place gold foil on one or two accent nails, or scatter it sparsely across all ten.
- Press foil flakes into a tacky colour layer, then seal well so edges cannot lift.
- Choose warm, champagne-toned foil rather than brassy gold to flatter mature skin.
- Keep the plum base short and neat — the foil is the star, not the length.
Ask for “matte plum with gold foil accents, encapsulated under top coat” and your technician will layer foil between colour coats so it sits perfectly flat. At home, paint two coats of plum, and while the second coat is still tacky, pick up foil flakes with tweezers and press them gently into place with a silicone tool. Let everything set, then float a matte top coat over the top without dragging, which can shift the flakes. Encapsulated foil wears as long as the manicure itself — just resist the urge to pick at any edge, and seal promptly if one lifts.
Two-Tone Matte Plum Ombré Nails for Mature Hands
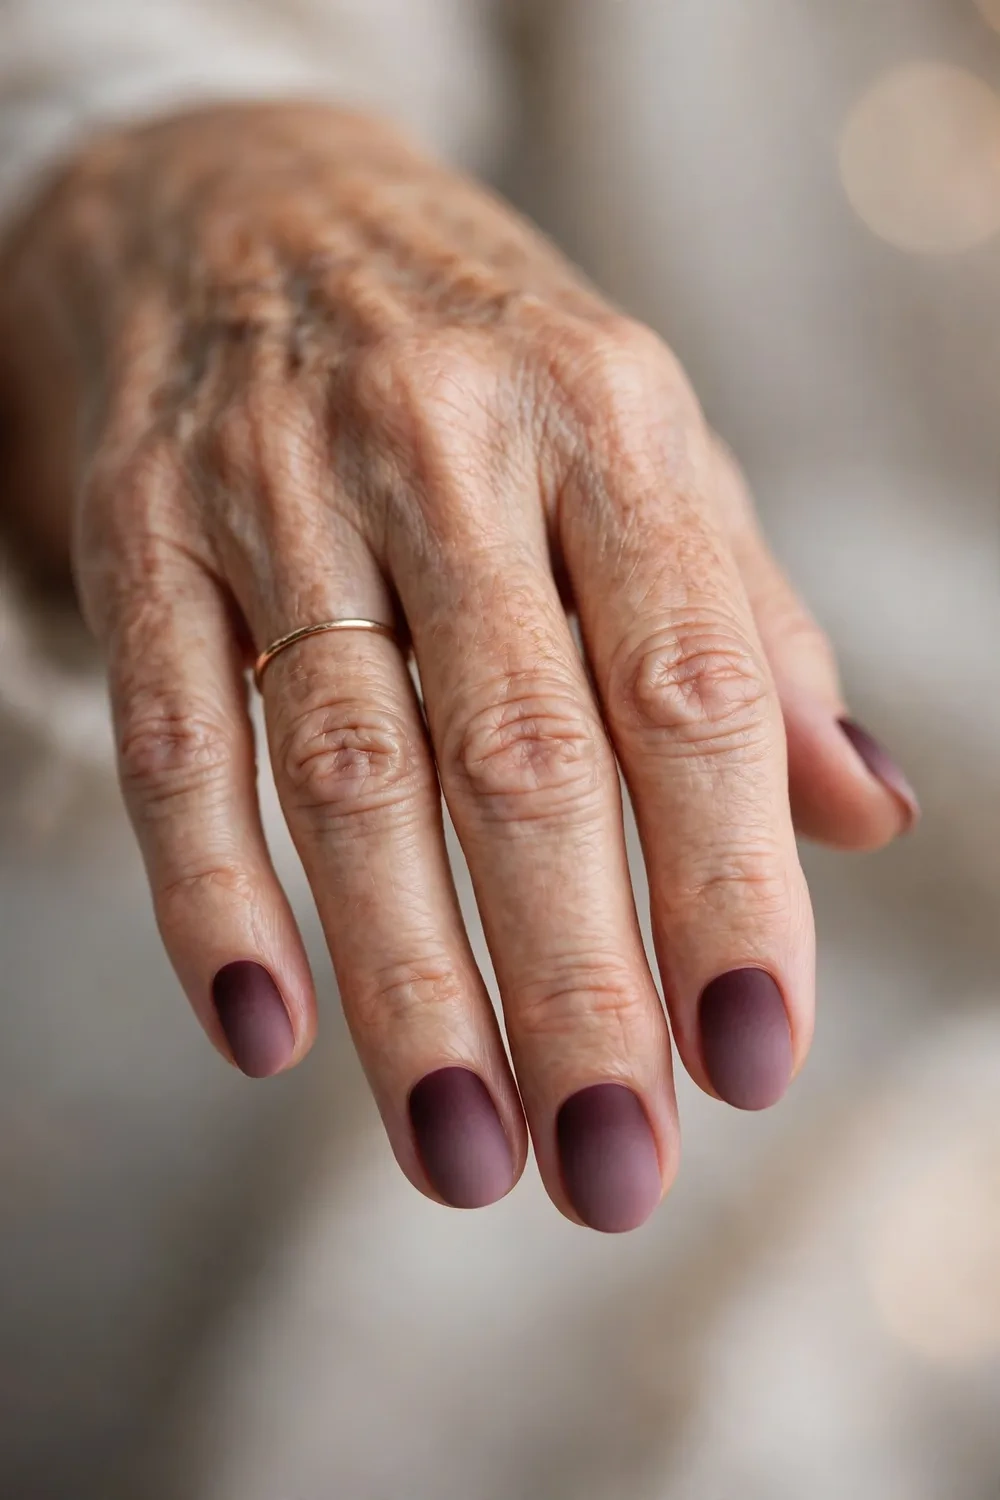
An ombré that melts from deep aubergine at the cuticle to a soft mauve-plum at the tip gives you the dimension of nail art without a single harsh line. Gradients are wonderfully forgiving on mature hands: the darker colour at the base visually anchors the nail, while the lighter tip draws the eye outward, creating an impression of length that flatters shorter nails. In a matte finish the blend looks like watercolour rather than airbrush — soft, expensive and quietly artistic. It also grows out gracefully, since the cuticle area is already the darkest part of the design, so regrowth simply reads as part of the gradient.
- Sponge the gradient with a makeup wedge, dabbing rather than dragging for a seamless melt.
- Work with two plums from the same colour family — aubergine into mauve works beautifully.
- Blend while the polish is still wet, then clean the surrounding skin with a precise brush.
- Lock the gradient under a matte top coat to soften any remaining sponge texture.
Ask your technician for “a matte plum ombré, dark at the cuticle fading to light at the tip” — most salons achieve this with an airbrush or layered sponging in under ten minutes. For a DIY version, paint the darker plum as your full base, then sponge the lighter shade over the outer half, building in two or three whisper-thin layers rather than one heavy pass. Finish with matte top coat and tidy the cuticle line with an angled brush dipped in remover. Because chips show least on gradients, this is one of the longest-wearing designs in this collection — expect a full two to three weeks before it needs attention.
Delicate Stamped Florals on Matte Plum
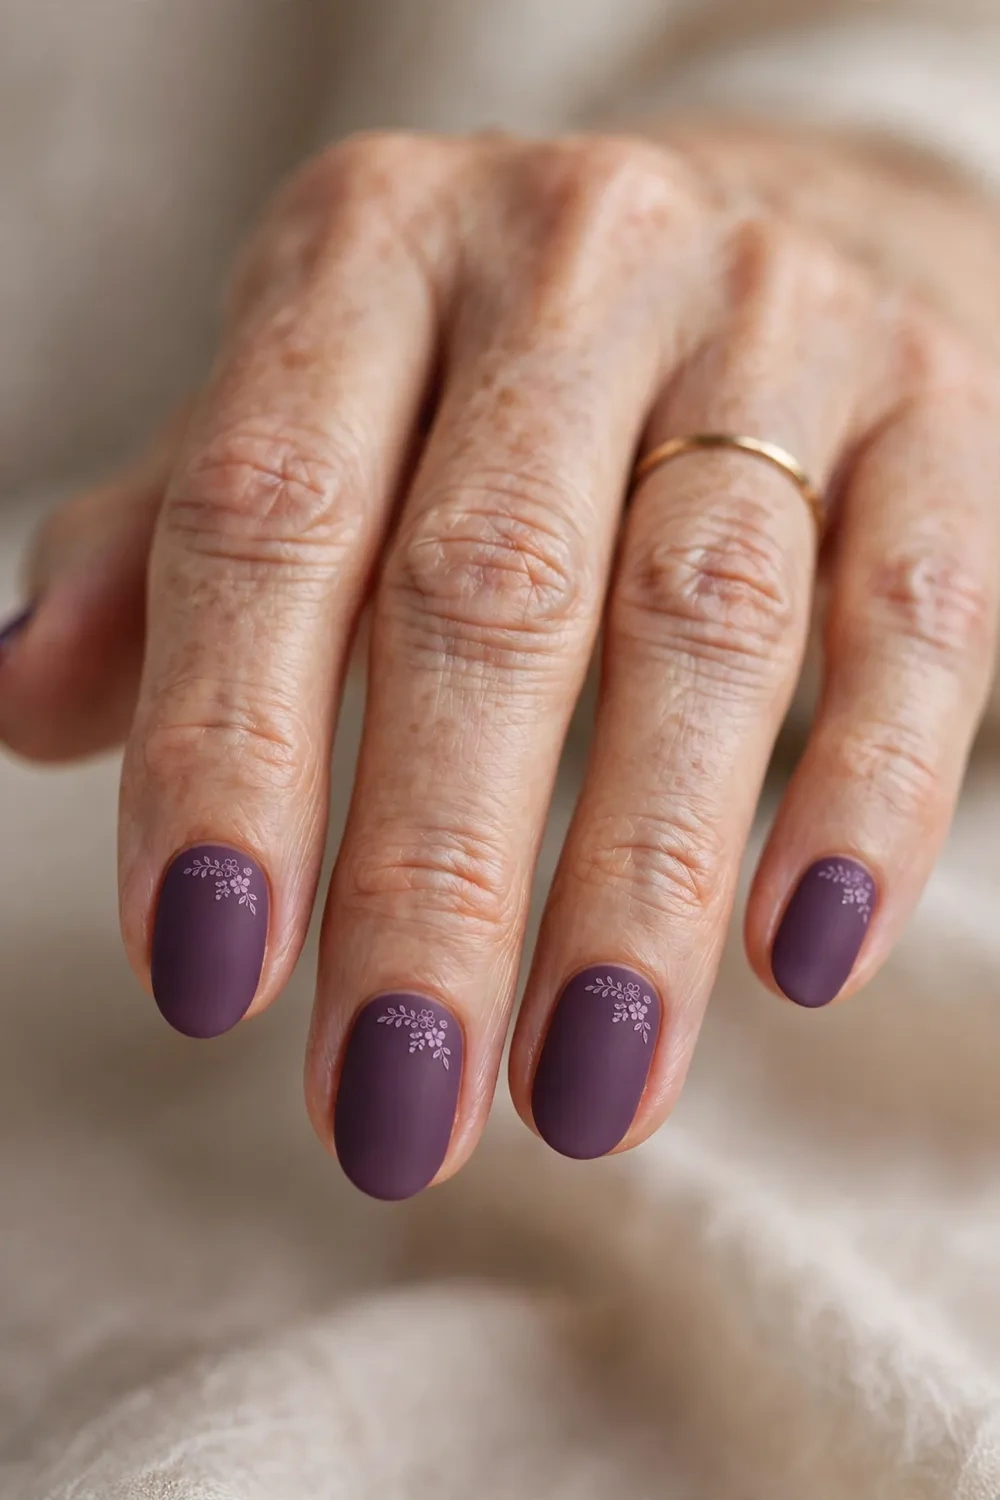
Tiny stamped blossoms in a tone just one shade lighter than your plum base add romance without reading young or fussy. Stamping keeps the artwork crisp and miniature — think a single sprig near the cuticle or a fine trailing vine along one side of the nail — which is exactly the scale that suits mature hands. Because the design sits flat on the nail with no texture to catch or lift, it wears as well as a plain manicure. The matte base makes the stamped motif look like a pressed flower on velvet paper: detailed, delicate and quietly luxurious.
- Stamp with a polish one shade lighter than your base so the motif whispers rather than shouts.
- Limit the design to one or two nails per hand to keep the look refined.
- Use a clear stamper head so you can place each blossom with precision.
- Seal stamped art with a matte top coat applied in one smooth, non-dragging stroke.
In the salon, request “matte plum with a subtle stamped floral accent on the ring fingers” and bring a reference photo of the scale you like — technicians appreciate the guidance. At home, you will need a stamping plate with small floral images, a scraper and a clear stamper; practise the pick-up on paper first, because the trick is a firm, quick roll rather than a press. Stamp onto fully dry plum base coats, let the motif set for a minute, then float your matte top coat over it. Sealed under top coat, stamped art lasts the full life of the manicure with no extra maintenance beyond your usual cuticle oil.
Matte Plum Half-Moon Manicure
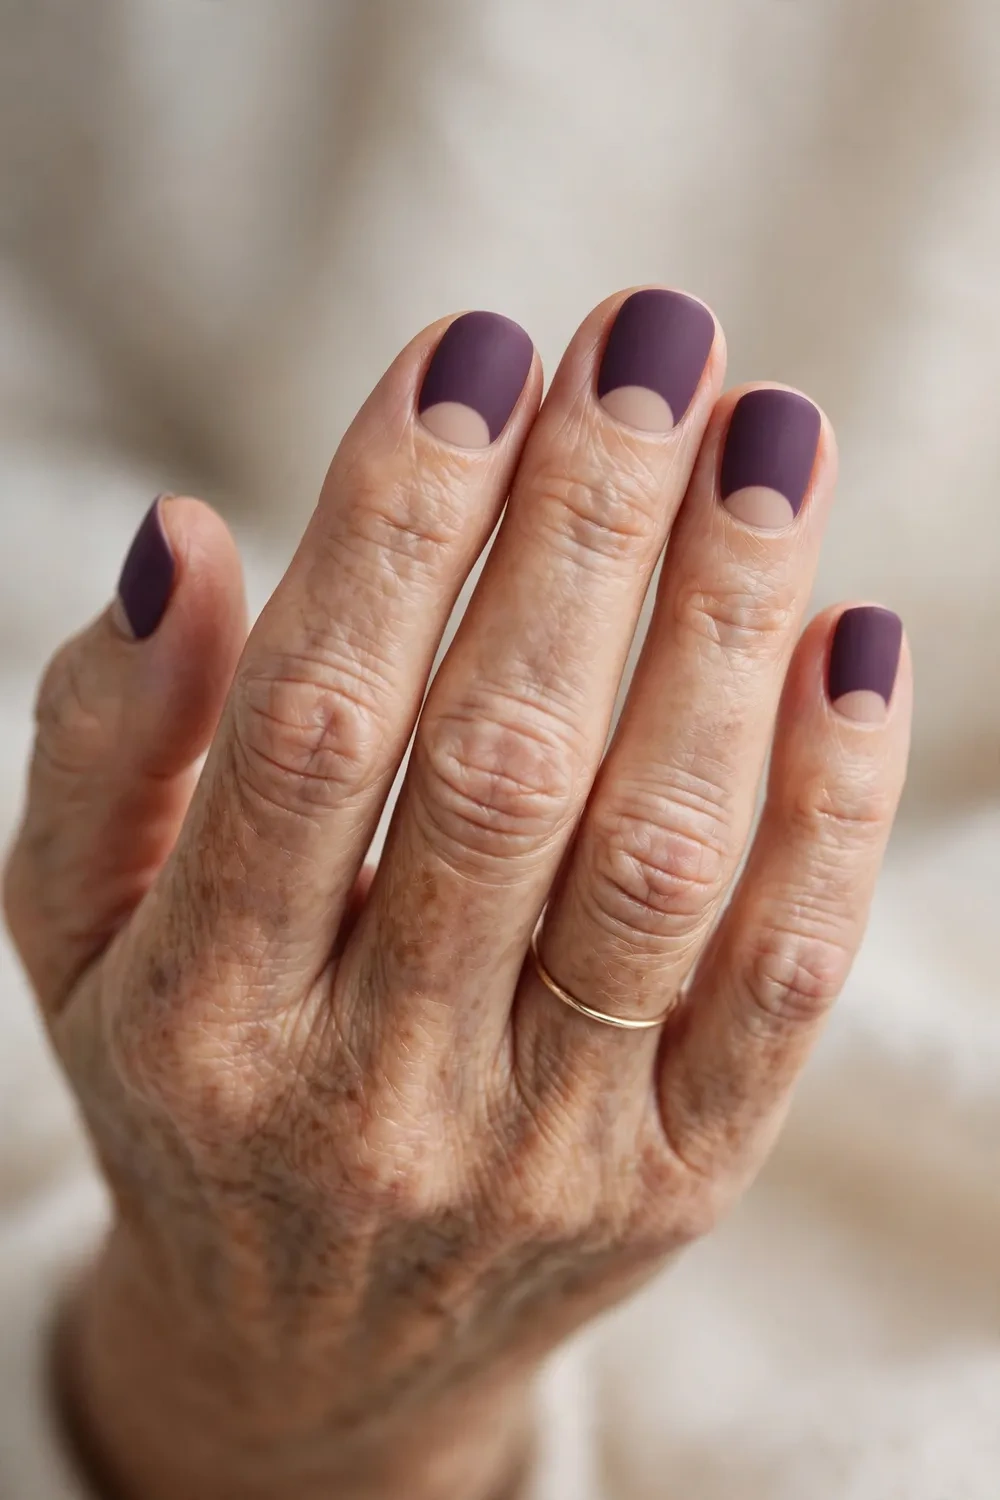
The half-moon — a neat crescent of bare or nude nail left at the cuticle — is one of the kindest designs for mature hands. Leaving the lunula area exposed elongates the visible nail, and because regrowth blends into the bare crescent, this manicure looks freshly done for longer than almost any other style. Against matte plum the contrast is striking in the most elegant way: a soft nude moon rising over deep velvet colour. It nods to vintage glamour without feeling costume-like, and the geometry suits short, practical lengths perfectly.
- Leave a clean crescent at the cuticle in sheer nude or bare, well-moisturised nail.
- Keep the moon small and precise — oversized moons can look retro in the wrong way.
- Use reinforcement stickers or a steady hand to get a crisp curved edge.
- Finish everything, moon included, with a matte top coat for a unified velvet surface.
Ask for “a matte plum half-moon with a nude crescent” and specify how large you want the moon — a conservative crescent suits everyday wear. For a DIY version, apply your sheer nude base first, place a hole-reinforcement sticker over each cuticle area, paint the plum over the exposed nail, then peel the sticker away while the polish is still slightly wet for the cleanest curve. Once dry, one matte top coat unifies both zones. The genius of this design is its grow-out: because the cuticle area is already bare, two weeks of regrowth barely registers. Keep the crescent hydrated with cuticle oil and it stays the prettiest part of the manicure.
Squoval Matte Plum for the Office

The squoval — square sides with softly rounded corners — is the working woman’s shape: strong enough to look deliberate, gentle enough to avoid snags on keyboards and knitwear. In matte plum it becomes the definitive office nail for winter 2026: polished and authoritative without shouting, deep enough to read as a neutral alongside tailoring, yet far more interesting than beige. Shorter squovals are also the most practical shape for mature hands, resisting the corner chips that plague longer squares, and the matte finish hides the micro-scratches of daily life far better than gloss.
- File straight across the tip, then soften just the corners — that is the whole squoval.
- Keep the length short to medium; this shape looks sharpest when it is practical.
- Choose a mid-depth plum rather than near-black so it reads professional, not severe.
- Buff the surface smooth before colour — matte finishes reveal every ridge.
The salon wording could not be simpler: “short squoval, matte plum, office-appropriate.” At home, the shaping is the skill to master: file the free edge straight across, check it against a flat surface, then round each corner with three or four gentle strokes — no more, or you will drift into oval territory. Buff lightly with a fine block, then apply base, two thin colour coats and matte top coat. For office durability, consider gel, which survives typing and filing cabinets for three weeks. A weekly once-over with a fine file keeps the corners from snagging on winter fabrics.
Glitter Fade at the Cuticle over Matte Plum
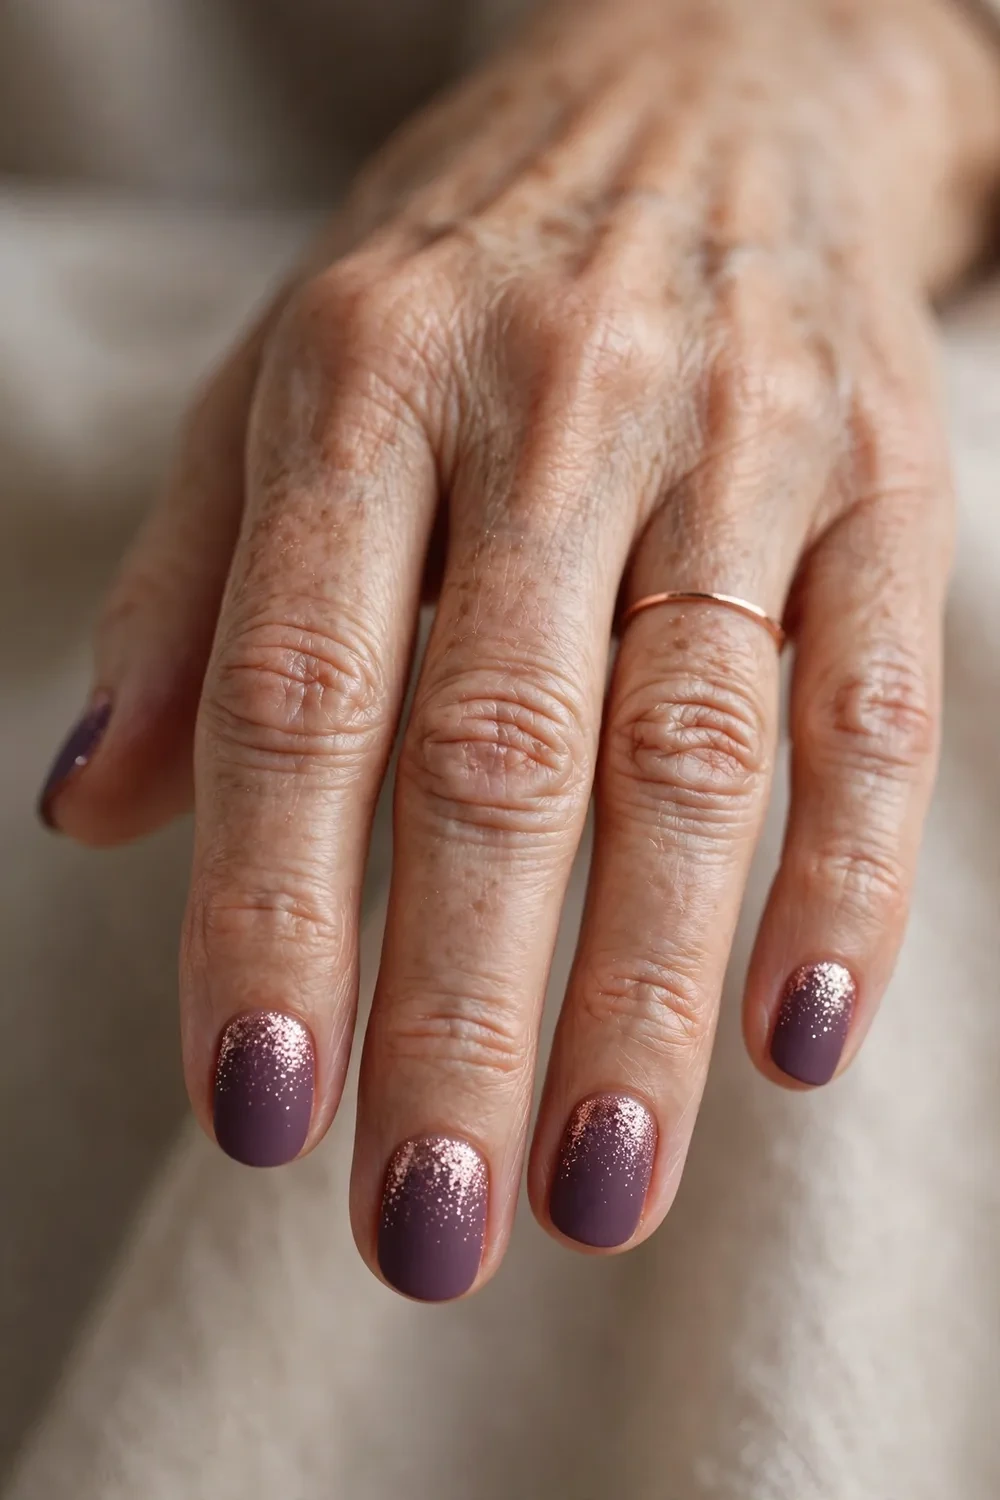
A fine glitter that is densest at the cuticle and fades toward the tip does two clever things at once: it disguises regrowth so your manicure looks newer for longer, and it frames each nail with light exactly where mature hands benefit most. Over matte plum, use a glitter in a matching plum or soft rose-gold tone so the sparkle melts into the base rather than sitting on top of it. The effect is like candlelight caught at the base of each nail — festive, flattering and far more sophisticated than an all-over glitter bomb.
- Concentrate glitter at the cuticle and fade it to nothing by the midpoint of the nail.
- Choose fine, tonal glitter — plum or rose-gold — never chunky holographic pieces.
- Dab the glitter on with a sponge for control rather than brushing it from the bottle.
- Seal with a matte top coat to keep the fade soft, or glossy if you want more sparkle.
Request “matte plum with a glitter fade at the cuticle” and your technician will likely use a loose fine glitter pressed into a tacky layer for the smoothest transition. For a DIY version, paint your plum base and let it dry fully, then dab glitter polish onto a makeup sponge and press it gently at the cuticle, fading the pressure as you move toward the tip. Two light passes beat one heavy one. Seal with top coat, wrapping the free edge. Glitter is famously stubborn at removal, so soak with remover-soaked cotton under foil for ten minutes rather than scraping — your nails will thank you.
Single Pearl Accent on Matte Plum
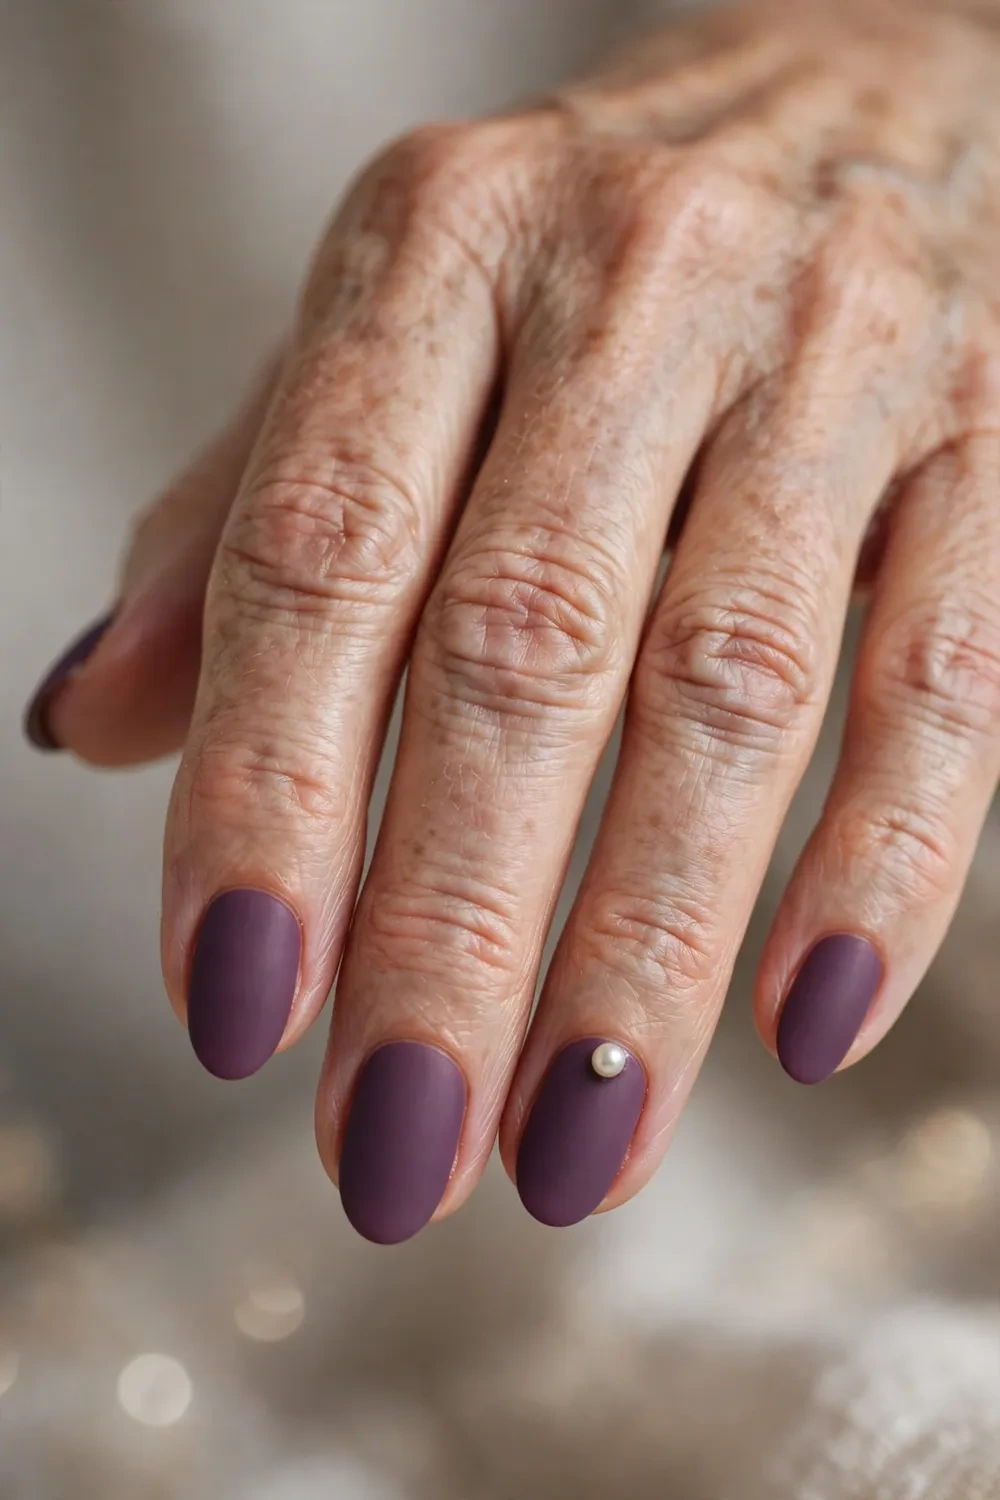
One small pearl on each ring finger, set against matte plum, is the quietest kind of luxury. Pearls and mature hands have a natural affinity — both are about lustre rather than shine — and against a velvety matte background a single pearl reads as intentional jewellery rather than decoration. Keep the pearls small and flat-backed so they sit flush with the nail, and choose genuine-looking ivory tones over bright white. This is a beautiful choice for winter weddings or milestone birthdays, elegant enough for photographs yet comfortable enough to wear for weeks.
- Place a single small, flat-backed pearl near the cuticle of each ring finger.
- Embed the pearl in a bead of clear builder gel or nail glue, then seal its edges.
- Match pearl size to nail width — petite pearls suit shorter nails best.
- Remove pearls carefully with an orangewood stick to avoid damaging the nail surface.
Ask your technician for “matte plum with a single pearl accent, encapsulated” — in a salon the pearl is usually set into uncured builder gel and sealed, which keeps it secure for the full manicure. At home, paint and matte-top your plum base, then place a tiny dot of nail glue just above the cuticle and set the pearl with tweezers, holding it for ten seconds. Once secure, trace a thin ring of clear top coat around its base to lock it down. Pearls can catch on knitwear, so save this design for occasions rather than heavy housework weeks, and with gentle wear it will last a fortnight.
Reverse French in Dark-to-Light Plum

Flip the French on its head: a deep, almost-black plum at the tip melting back into a lighter plum at the cuticle. The reverse French is a modern classic that suits mature hands because the lighter colour at the base keeps the cuticle area looking soft and fresh, while the dark tip gives nails definition and a sense of length. In matte finishes the transition looks seamless and smoky rather than stark. It is a brilliant choice if you love dark nails but find solid near-black shades a little harsh against your skin — the gradient does all the softening work for you.
- Start with the lighter plum as your base, then deepen toward the free edge.
- Keep the dark tip band narrow — a third of the nail at most — for the most flattering effect.
- Blend the meeting point with a dry brush or sponge while the polish is workable.
- Unify the whole nail with a matte top coat to melt the transition.
The salon request is “a reverse French in matte plum, dark tip fading to a lighter base.” At home, paint two coats of your lighter plum and let them dry completely — this patience is what keeps the gradient clean. Then, with a sponge or a dry fan brush, work the deep plum over the outer third of each nail, feathering inward with a light hand. Two thin passes give a smokier blend than one heavy one. Finish with matte top coat, capping the edge well since dark tips show wear first. This design photographs beautifully and carries you from office days to evening events without missing a beat.
Grey-Blue Accent Nail with Matte Plum

Pairing matte plum with a single grey-blue accent nail is the confident move that works at any age. The slate-blue tone sits on the cooler side of plum, so the two shades make each other look richer — plum appears warmer and more luscious, blue appears deeper and more mysterious. On mature hands this unexpected pairing reads as fashion-aware rather than trend-chasing. Keep the accent to the ring finger, and choose a dusty, muted blue-grey rather than a bright navy, so the overall mood stays soft and wintry. It is the kind of detail that earns compliments from women who notice such things.
- Limit the grey-blue to one accent nail per hand — restraint is what makes it chic.
- Choose a dusty slate tone with grey in it, not a primary blue.
- Keep both finishes matte so the two colours sit as equals, not rivals.
- Try the accent on the ring finger first; it is the classic, most balanced placement.
Ask for “matte plum with a grey-blue accent nail, both matte” and let your technician help you choose the slate shade — held against your plum in the bottle, the right one will look smoky rather than bright. At home, paint the accent nails first (they are easier to redo if you change your mind), then the plum, finishing everything with matte top coat for a unified surface. This pairing is wonderfully versatile: it sits happily beside silver jewellery, grey tailoring and denim alike. Wear time matches a standard matte manicure — two weeks in regular polish, three to four in gel — with cuticle oil keeping both colours rich.
Velvet-Texture Matte Plum Nails for Mature Hands
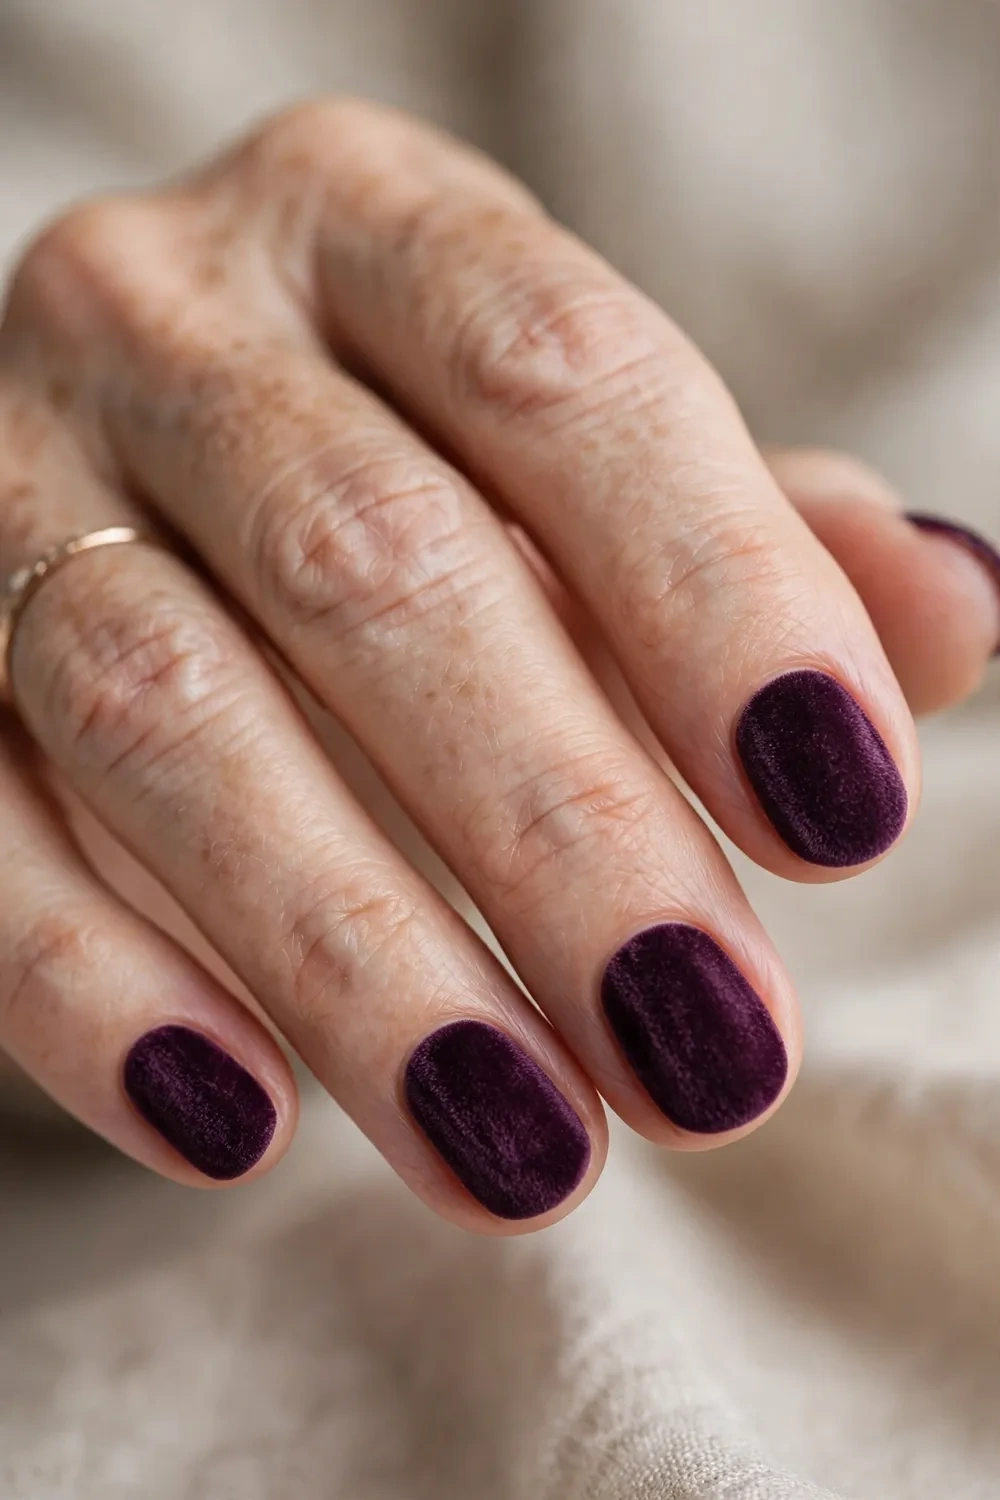
Velvet nails — created with magnetic polish or a fine flocking powder — give matte plum a soft, dimensional pile that looks like actual fabric. This texture is extraordinarily flattering on mature hands because it scatters light in every direction, softening the appearance of the nail surface and drawing the eye with touchable depth rather than shine. In deep plum, velvet reads as pure winter opulence: the inside of a jewellery box. Moody, light-absorbing finishes are firmly in step with the season — Coveteur’s experts note that deep, moody shades like black cherry and oxblood are defining fall 2026 nails — and plum’s velvet incarnation is the most tactile way to wear the trend.
- Use a magnetic velvet polish and hold the magnet close for ten seconds per nail.
- Alternatively, press velvet flocking powder into a tacky gel layer and cure it.
- Keep nails short — texture plus length can overwhelm smaller nail beds.
- Expect slightly shorter wear than a standard manicure; treat velvet nails gently.
This is a salon-star design: ask for “velvet-effect plum using magnetic polish” and watch the pattern bloom under the magnet — it never gets old. For a DIY attempt, magnetic velvet polishes are widely available; the technique is all in the timing, holding the magnet steady and close immediately after application. Flocking powder gives a truer fabric feel but needs a gel base and lamp. Velvet surfaces dislike water and friction, so wear gloves for chores and skip the long soaks. With care you will get ten days to two weeks of that extraordinary soft-focus finish.
Short Oval Matte Plum with Gentle Cuticle Care
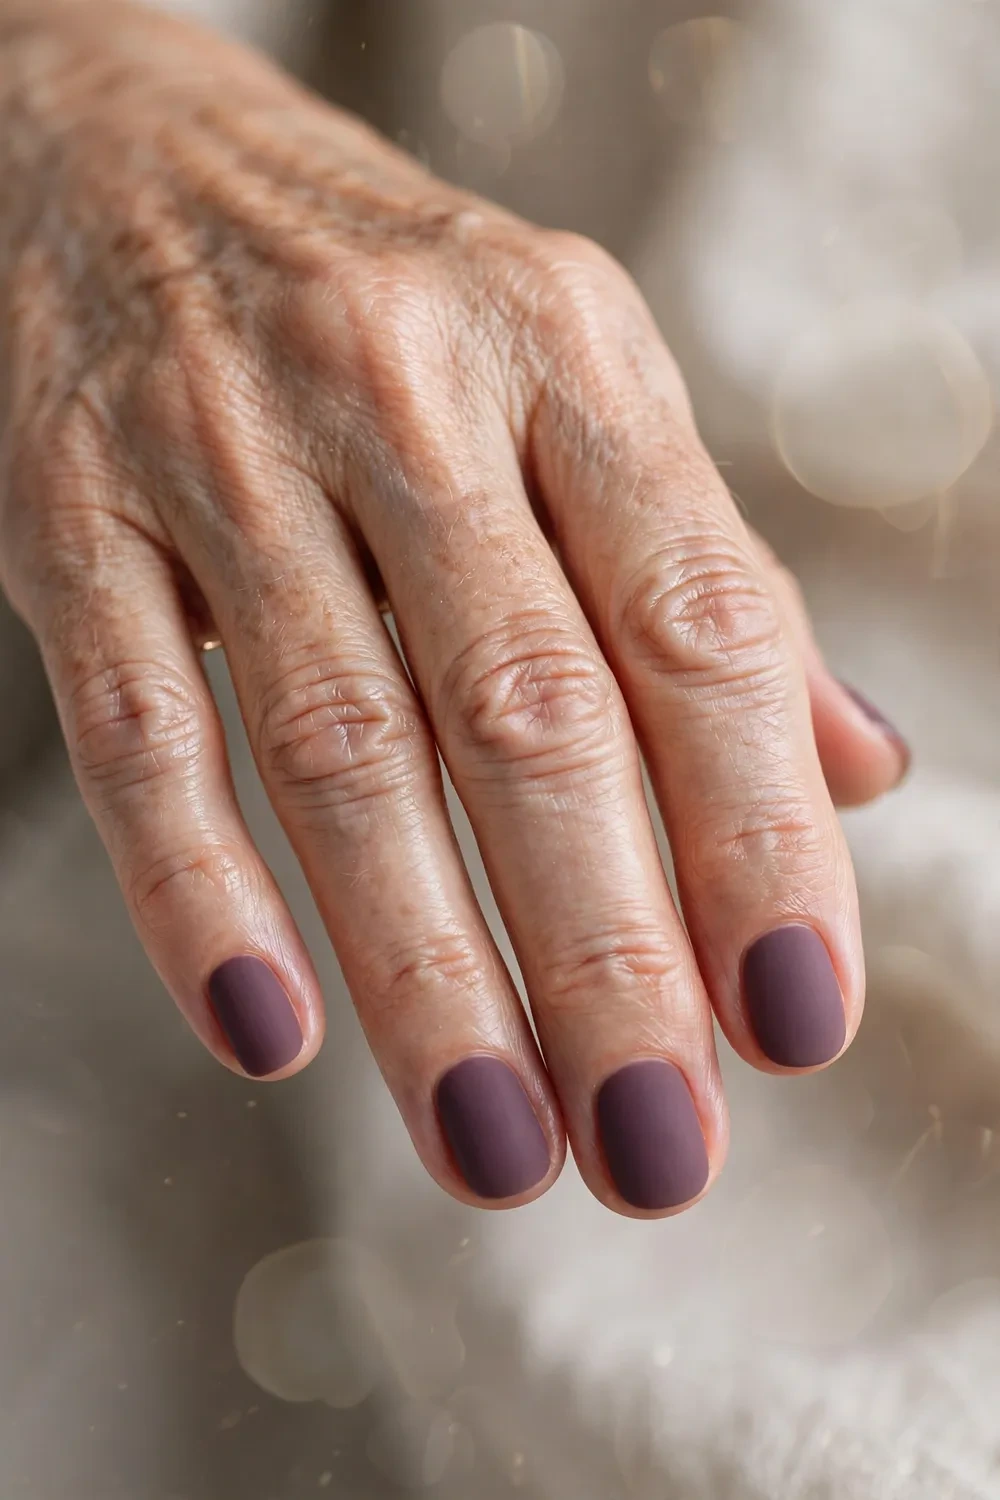
Sometimes the most beautiful manicure is simply healthy nails in a beautiful colour — and the short oval is the shape nature intended. Filing to follow your natural nail curve keeps stress off the corners, which means fewer breaks and splits, a real consideration for nails that become more brittle with age. In matte plum, this unfussy shape looks deliberate and chic rather than plain. The real secret of this look is not the polish at all but the cuticle care beneath it: well-hydrated, gently maintained cuticles make even the simplest manicure look expensive.
- File in one direction following your natural curve to avoid weakening the nail.
- Soak cuticles in warm oil for five minutes, then push back gently — never cut living skin.
- Massage cuticle oil into each nail nightly; matte polish shows dryness quickly.
- Keep this shape short enough that the free edge never extends far past the fingertip.
Ask for “a short oval manicure in matte plum with a full cuticle treatment” and enjoy the small luxury of a proper soak, gentle push-back and nourishing oil massage — it is the closest thing to a facial for your hands. At home, make cuticle care a Sunday ritual: warm oil soak, gentle push-back with an orangewood stick, a light buff of the nail plate, then your usual base, colour and matte top coat routine. Nails that are filed, hydrated and neatly kept rarely break, which means this simplest of designs often ends up being the longest-lasting. Two to three weeks of quiet elegance is entirely realistic.
Plum-to-Black Matte Gradient Nails

For evenings when you want drama, a gradient from rich plum at the cuticle to true black at the tip delivers maximum impact with minimum fuss. The dark tip elongates the nail dramatically, making even short nails look sculpted, while the plum base keeps the look rooted in colour rather than severity. In a matte finish this gradient looks like dusk settling — moody, velvety and intensely chic. It is the boldest look in this collection, yet the softness of matte keeps it wearable well past sixty: drama in the colour, gentleness in the finish.
- Blend plum into black with a sponge, working in thin layers to avoid muddiness.
- Protect the surrounding skin with liquid latex or tape before sponging.
- Keep the black portion to the outer third so the gradient stays elegant, not heavy.
- Seal with a matte top coat — gloss would make this look harsh rather than smoky.
Request “a matte plum-to-black ombré, darkest at the tips” and your technician will build the blend with an airbrush or layered sponging. For a DIY version, paint two coats of plum as your base and let them dry fully, then sponge black over the outer third in light dabbing motions, building depth gradually — rushing this step is what creates muddy, uneven blends. Peel away your skin protection, tidy the cuticle line, and seal with matte top coat, capping the free edge carefully since dark tips reveal chips first. Bold, yes — but the matte finish keeps it sophisticated enough for any winter evening.
Conclusion
Matte plum proves that the most elegant winter manicure is not about length or loudness but about the right colour in the right finish. Whether you choose the timeless short almond, a whisper of shimmer, or the quiet luxury of a single pearl, each of these fifteen ideas is designed to flatter mature hands — with kinder lengths, gentle shaping and cuticle-first care built in. Pick the design that matches your week ahead, book the salon visit or set out your polishes, and enjoy nails that feel entirely, confidently you. For more seasonal colour inspiration as the weather turns, explore our November Nail Colors — and wear your plum with pride all winter long.