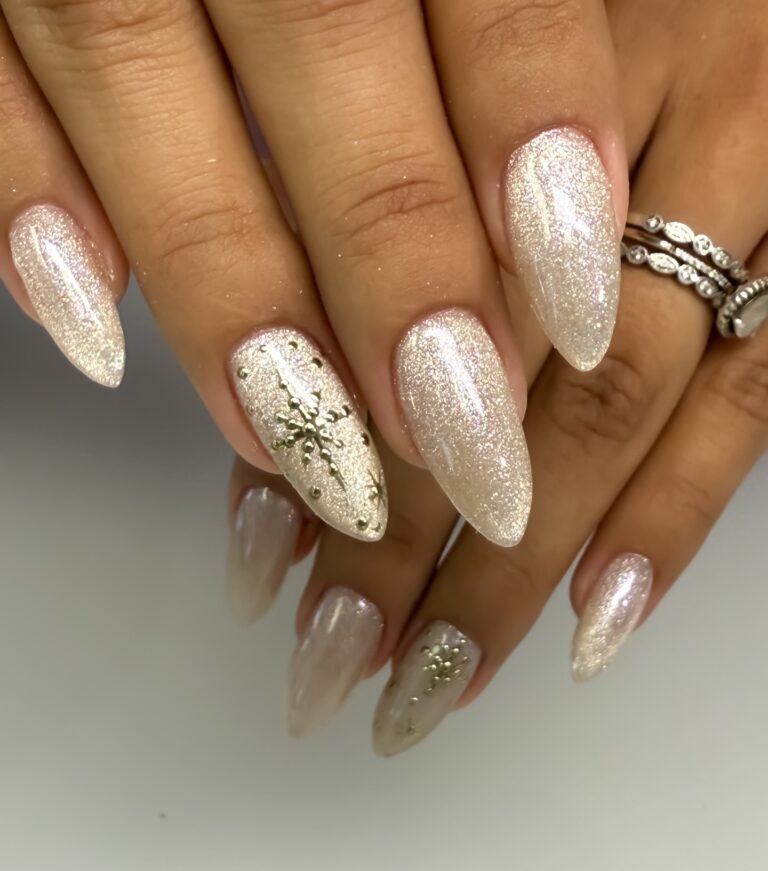
15 Christmas Nail Art: Classic Holiday Designs
Introduction
If you are searching for the perfect christmas nail art before the holiday rush, you are in the right place. This roundup gives you 15 classic holiday designs — snowflakes, candy canes, velvet reds, gold baubles, and cozy plaids — each with a design breakdown and how-to steps so you can show the exact photo to your nail tech or recreate the look at home. Classic designs matter at Christmas: they photograph beautifully, match everything from brunch to a formal dinner, and never feel dated by New Year. If you loved dressing your nails for the fall holidays, you will also enjoy our 15 Thanksgiving Nail Designs: Warm and Grateful for more seasonal inspiration.
Classic Red-and-Gold Christmas Nail Art

Nothing says Christmas like glossy true red paired with shimmering gold. Red stars on most nails while one or two accents go full gold foil or glitter — the classic holiday palette without the effort of intricate art. It works on every nail length and flatters every skin tone, since true red has warm undertones that glow against winter skin. It suits every December occasion, from the office party to Christmas morning photos, and pairs beautifully with any outfit. The secret here is shine: a glassy top coat makes the color look expensive and freshly applied for days.
- Apply two coats of a true holiday red gel or polish on eight nails, letting each coat cure or dry fully.
- Add gold to two accent nails with foil flakes pressed into a tacky base or a full-coverage glitter polish.
- Seal every nail with a glossy top coat to lock in the foil and boost the jewel-tone shine.
- Ask your tech for “classic Christmas red with gold foil accent nails” and bring a reference photo for the exact red tone.
At the salon, this is one of the quickest festive upgrades — no more time than a standard gel manicure plus a few minutes for foil. For DIY, press gold flakes onto a still-tacky layer with a silicone tool, then seal generously so nothing lifts. Use cuticle oil daily and wear gloves for dishes, since hot water is gel’s main enemy. If a foil accent starts to lift, a dab of top coat repairs it invisibly in seconds.
Snowflake Accent Christmas Nail Art

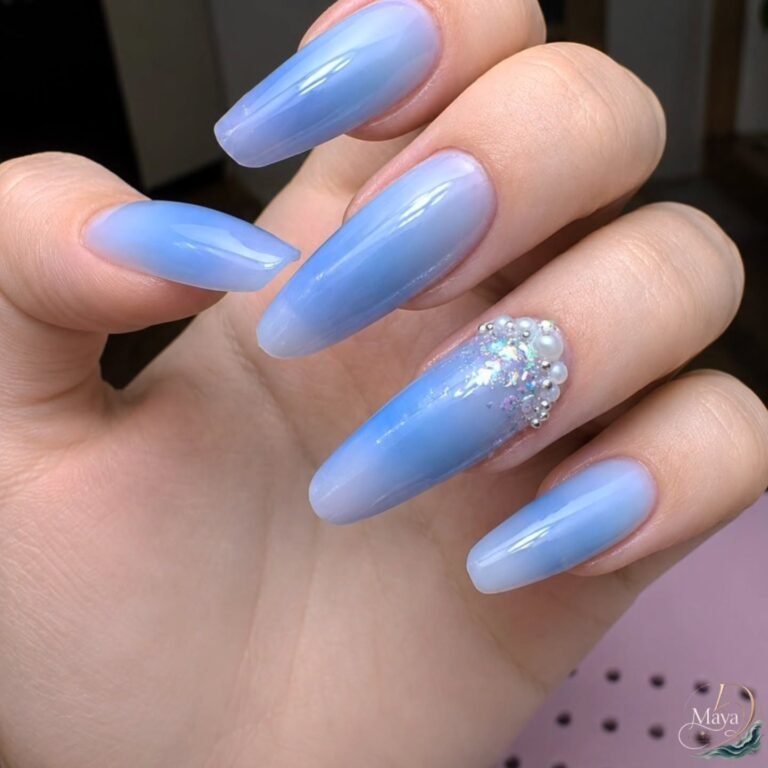
Delicate white snowflakes hand-painted over icy blue or deep navy are the most requested winter art for a reason. The contrast of crisp white linework against cool-toned color instantly reads as Christmas without a single literal ornament. This design flatters medium to long nails, where the snowflake has room to bloom, but a single small flake on short nails looks just as chic. Cool skin tones love the icy palette; warm skin tones can swap the base for soft periwinkle. It suits quiet-luxury holiday looks perfectly — cashmere sweaters, silk blouses, candlelit dinners.
- Paint all nails in a milky ice-blue or deep midnight navy base, two coats for full opacity.
- Draw snowflakes on two accent nails with a fine detail brush and crisp white polish.
- Add a tiny rhinestone or silver micro-glitter dot at the center of each flake for sparkle.
- Seal with a glossy top coat so the fine white lines stay sharp and smudge-free.
Book a “winter snowflake accent” manicure and expect about fifteen extra minutes of art time. Snowflake stamping plates are a great DIY shortcut — stamp in white over your dried base, or use small stickers sealed under top coat. The base color does the heavy lifting, so even imperfect flakes look charming. Wear time is standard gel, two to three weeks, and the navy base hides tip wear better than pale colors.
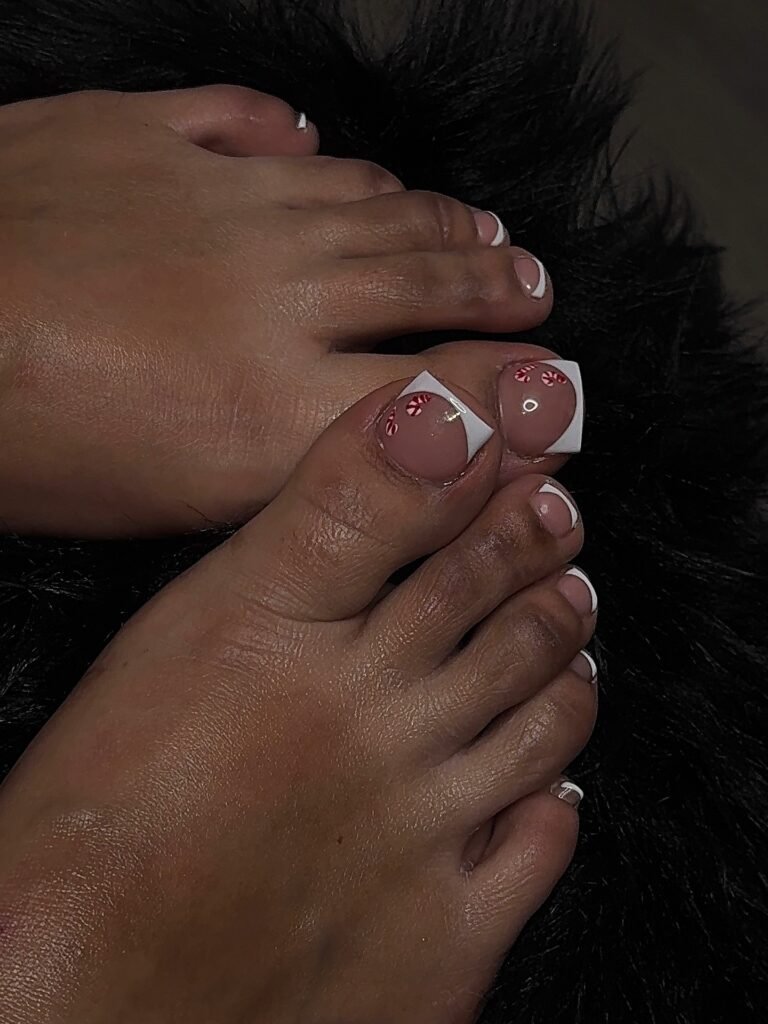
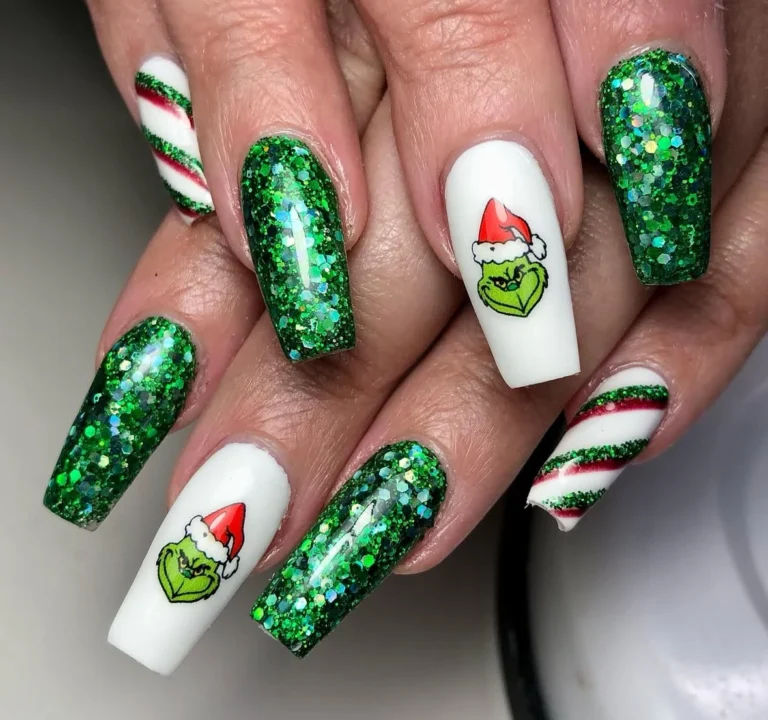
Candy-Cane Striped French Tips

This design takes the timeless French manicure and gives it a Christmas twist: crisp white tips with thin diagonal red stripes, like a peppermint candy cane curled around your fingertips. The base stays sheer nude or milky pink, so the look stays elegant rather than costume-like. It works beautifully on almond and oval shapes, and flatters every skin tone since the nude base can be matched to yours. It is the ideal pick if you want nails that read “festive” in a Christmas photo but still look professional at the office holiday lunch.
- Start with a sheer nude or milky pink base on all nails for a clean canvas.
- Paint classic white French tips, slightly thicker than usual to fit the stripes.
- Add thin diagonal red stripes across each tip with a striping brush or nail art pen.
- Seal with top coat to smooth the stripe edges and keep the look crisp for weeks.
Ask your tech for “candy-cane French tips — white tips with diagonal red pinstripes.” For a DIY approach, French tip guides (those little smile-line stickers) keep the white edge neat, and a thin nail art brush or even a toothpick can paint surprisingly clean red stripes once the white is fully dry. Patience is the product here: let each layer dry completely before striping, or the red will drag. In gel this lasts three weeks easily, and the nude base camouflages regrowth. Finish with cuticle oil so the tips photograph glossy in every close-up.
Christmas Tree Silhouette Art
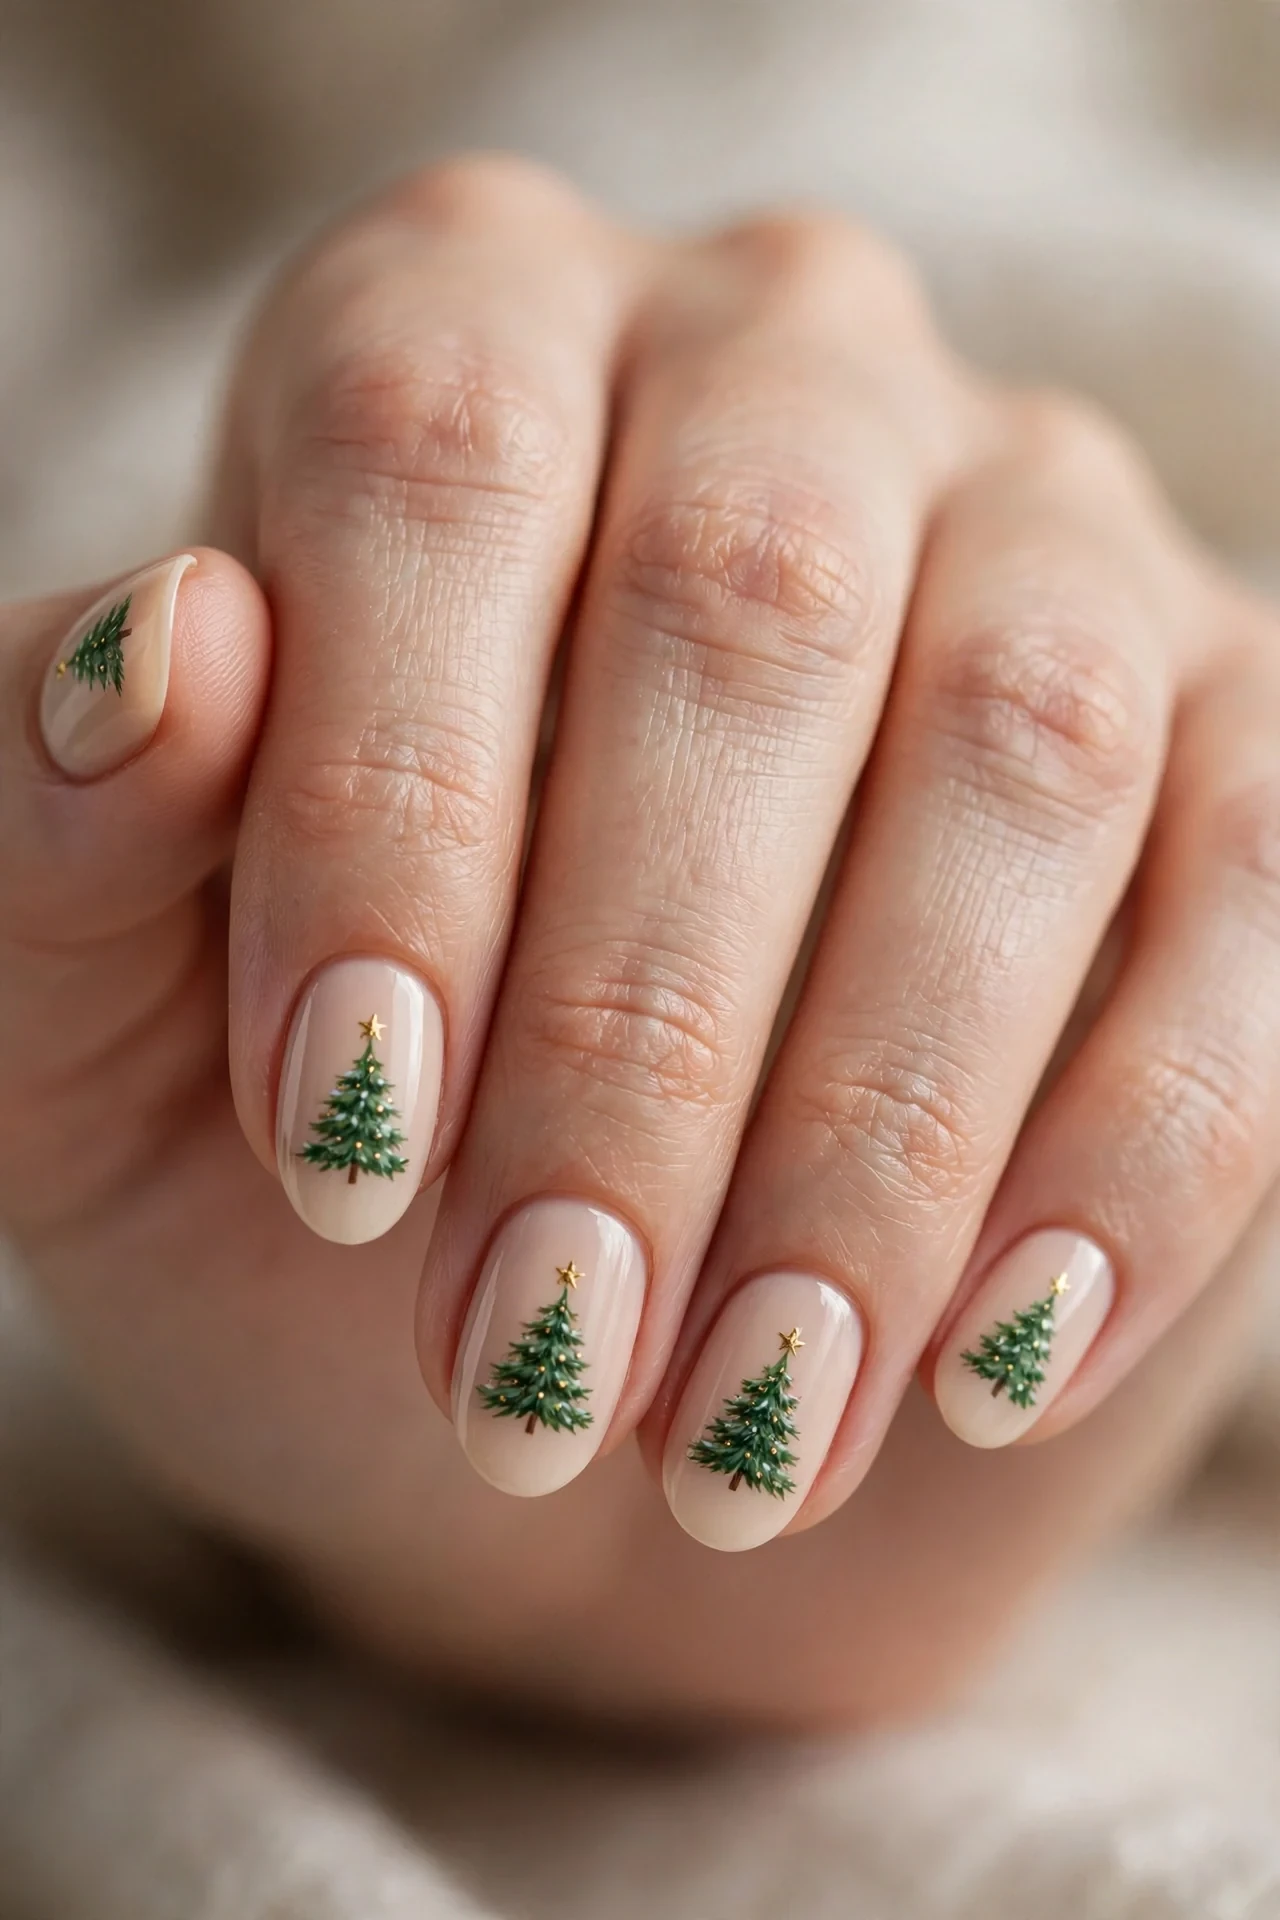
A tiny hand-painted Christmas tree on an accent nail is the most charming kind of literal holiday art. The trees are usually painted in deep green over a creamy nude, champagne, or soft white base, topped with a gold star dot and a few glitter “ornaments.” Keep the art to one or two accent nails and the rest in solid coordinating color so the look stays tasteful. Short to medium nails suit this best — the trees need a little room but look sweetest at modest sizes. This is the design for the person who decorates their tree the day after Thanksgiving.
- Paint the base in creamy nude, soft white, or champagne shimmer on all nails.
- Freehand small Christmas trees on two accent nails with a detail brush and deep forest green.
- Dot a gold star at the top of each tree and tiny colored dots as ornaments.
- Seal everything with top coat to protect the tiny painted details from chipping.
In the salon, ask for “Christmas tree accent nails” and expect twenty minutes of hand-painting time. For DIY, a triangle made of three stacked green strokes reads instantly as a tree — don’t overthink it. Gold nail-art pens make the stars effortless, and multicolor dotting tools create perfect round ornaments. Keep a steady hand by resting your wrist on a table edge. This design looks best for the two weeks around Christmas since it is so specifically seasonal. A glossy seal is essential — matte would dull the glitter ornaments and hide the sparkle.
Emerald and Gold Holiday Party Nails
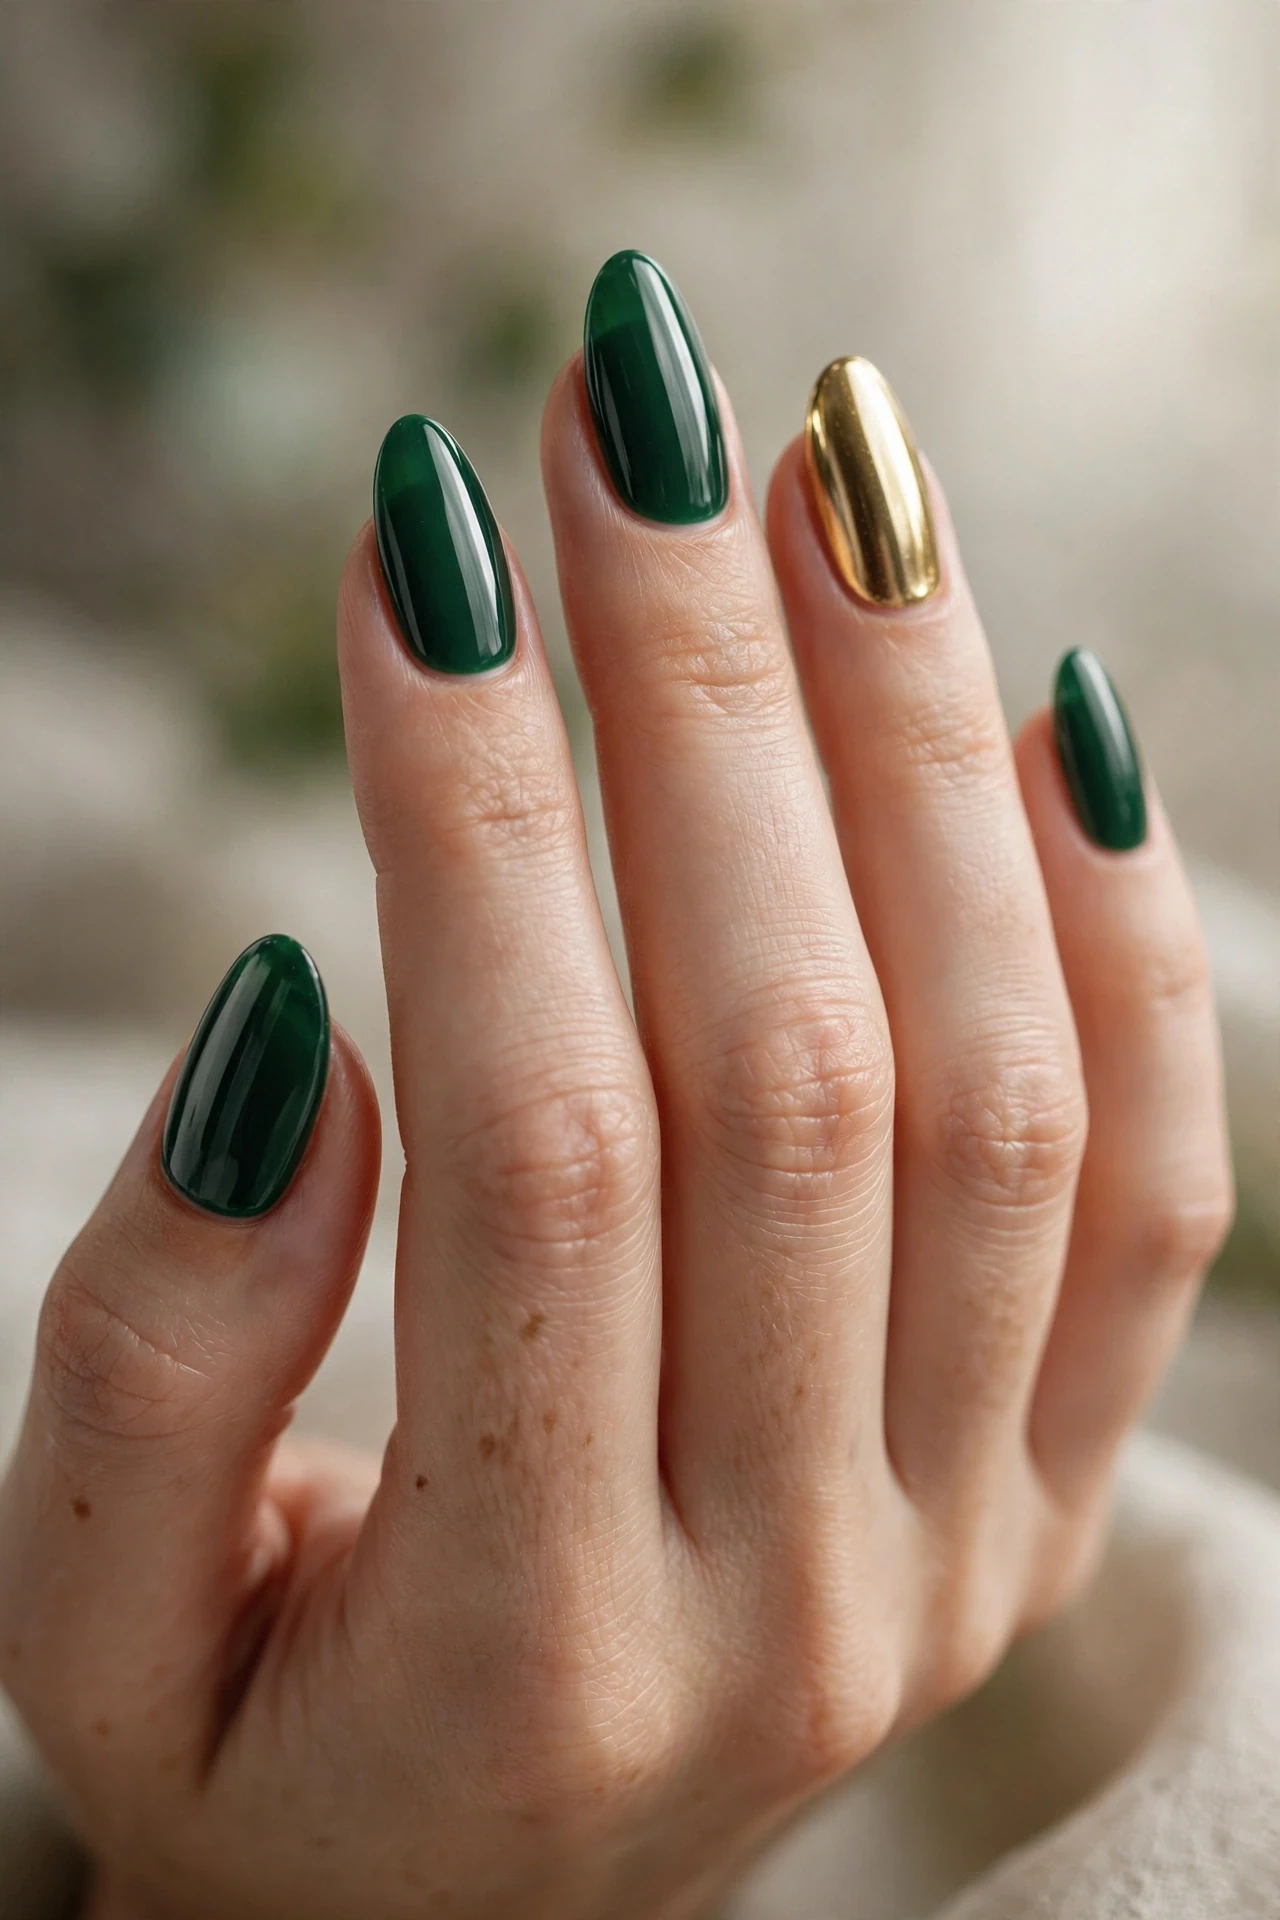
Emerald green is Christmas’s most sophisticated color, and paired with gold it looks straight out of a holiday cocktail party. This design layers deep emerald on most nails with gold chrome tips on accents — jewel tones flatter deeper skin tones beautifully and make fair skin look luminous. Medium to long almond or coffin shapes carry the drama best, but a short square in emerald with one gold accent is pure elegance. Choose this when your December calendar is full of evening events and you want nails that hold their own next to statement jewelry.
- Apply two coats of deep emerald gel on eight nails for a rich, opaque jewel finish.
- Create gold chrome tips on the two accent nails using chrome powder over a cured base.
- Clean the cuticle line carefully so the dark color looks crisp and expensive.
- Seal with a glossy top coat — the wet-look finish is what makes jewel tones glow.
Ask your tech for “emerald green nails with gold chrome accents.” DIY chrome tips need no-wipe top coat and loose chrome pigment buffed on with a silicone applicator, then sealed. The key to emerald is opacity: cheaper polishes need three coats, so invest in a quality formula or go gel. Wear time is three weeks in gel. Gold chrome is delicate, so add an extra top-coat layer on those nails and re-seal once mid-wear to keep the mirror shine.
Frosty Silver Icicle Nails
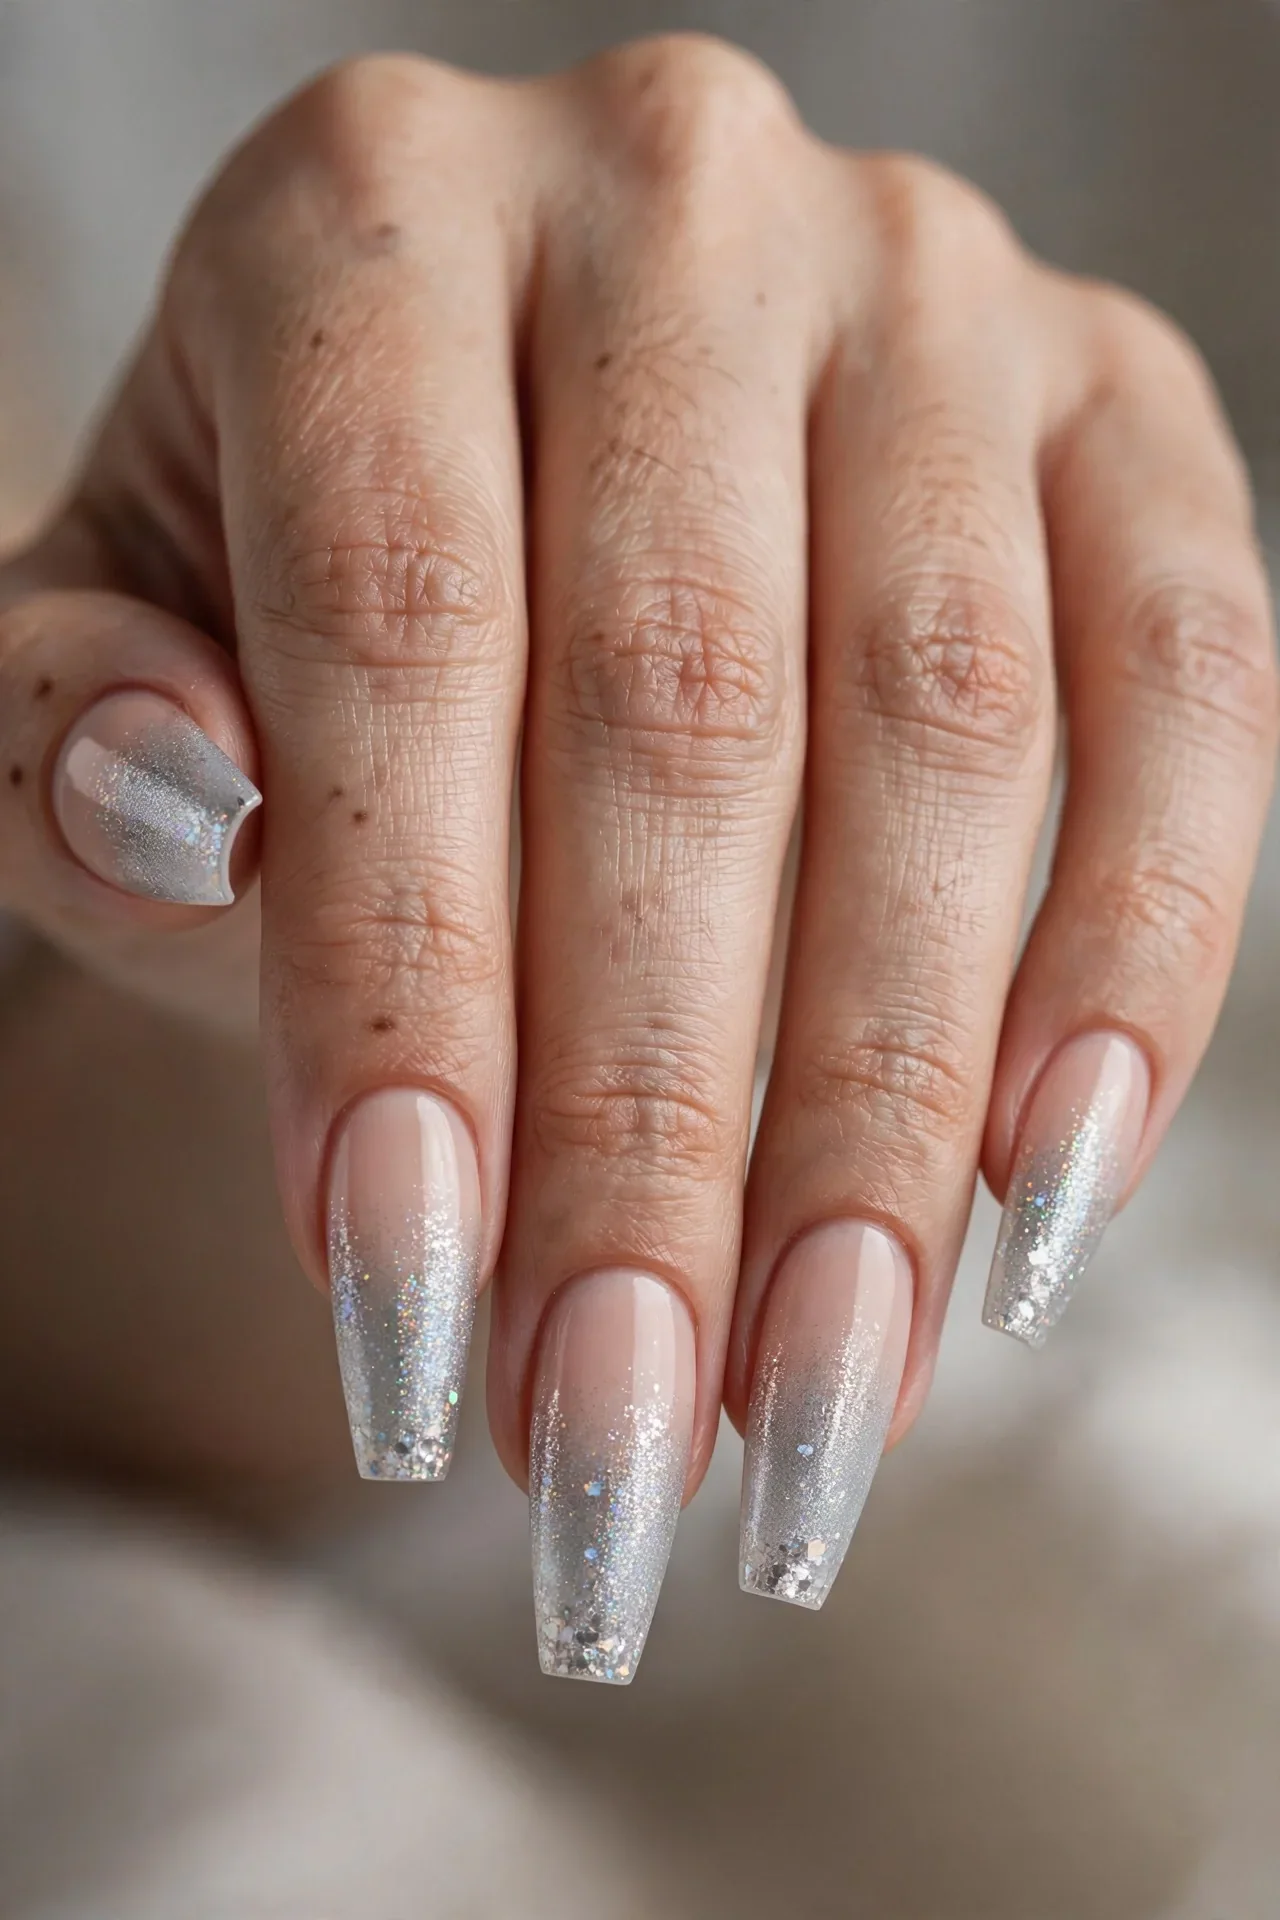
For a cool, modern take on Christmas nails, icy silver with icicle-drip tips or full frosted shimmer feels like a winter morning. Pale silver, holographic glitter, or icy blue chrome shifts in the light — festive without a single literal Christmas symbol. Perfect if your holiday style is minimalist or you want nails that carry from December straight through January. Light and cool skin tones shine in this palette; anyone else can wear it if the silver leans slightly warm champagne. Long almond or coffin shapes show off the frosted gradient best, catching light at every angle.
- Lay down a pale nude or sheer white base so the silver reads bright, not grey.
- Apply holographic or silver glitter polish from mid-nail to the tip in a soft gradient.
- Add thin vertical silver lines near the tips on accent nails to suggest icicles.
- Seal with a glossy top coat to melt the gradient into a smooth, glassy finish.
Request “frosted silver icicle gradient” at the salon — the sponged-on gradient adds almost no extra time. For DIY, dab silver glitter polish along the tip edge with a makeup sponge and blend downward while wet; two thin layers beat one thick one. This look is forgiving — glitter hides every imperfection — and it lasts two to three weeks. The holographic finish is so eye-catching that simple outfits suddenly look intentional, which is a gift during the busiest month of the year.
Santa Hat Accent Nails
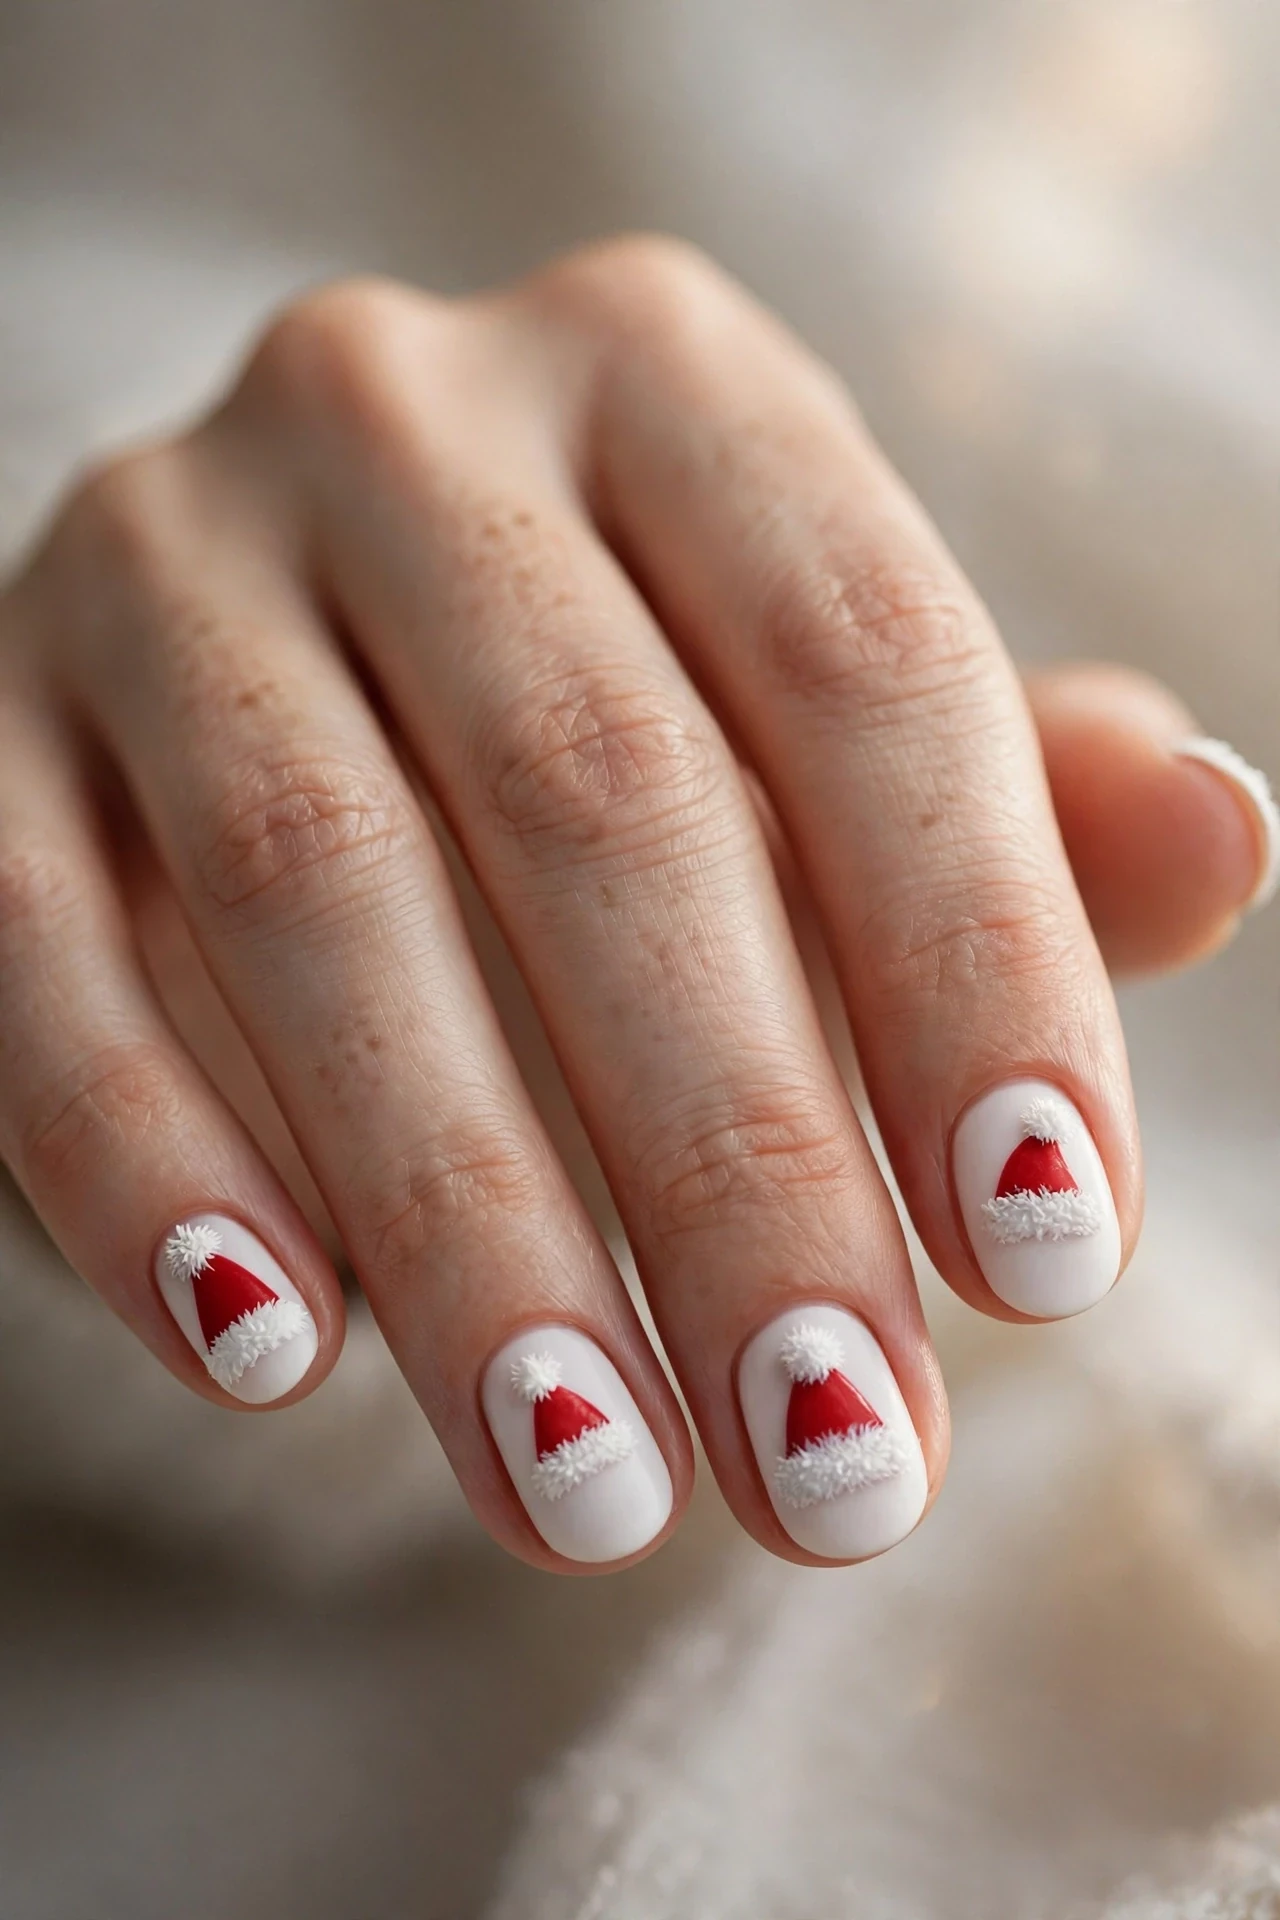
A red Santa hat painted on an accent nail is pure Christmas joy in manicure form. The classic design shows a red triangle with a fluffy white brim and pom-pom, usually on a snowy white or pale blue base. It is playful rather than elegant — the perfect pick for holiday parties, family gatherings, and anyone whose December personality is more “festive” than “formal.” Keep it to one or two accent nails so it reads as a charming detail instead of a costume. It is a guaranteed conversation starter at every holiday event.
- Paint the base in snowy white, pale blue, or sheer nude on all nails.
- Freehand a red triangle on two accent nails and add a thick white brim along its base.
- Dot a fluffy white pom-pom at the triangle’s peak with dotting tools or a bobby pin.
- Seal with top coat, being careful not to drag the brush across the wet white details.
Ask your nail tech for “Santa hat accent nails” — most experienced techs can freehand this in about fifteen minutes. For DIY, the shapes are simple geometry: a red triangle, a white rectangle brim, and a round white dot, all easily done with basic dotting tools. White polish needs to be fully opaque, so use a quality white or double up. Wear time is a full gel cycle, though this is such a December-specific design you’ll probably want it fresh for Christmas week itself. Pair with cozy sweaters for maximum holiday charm in photos.
Cranberry Plaid Christmas Nails
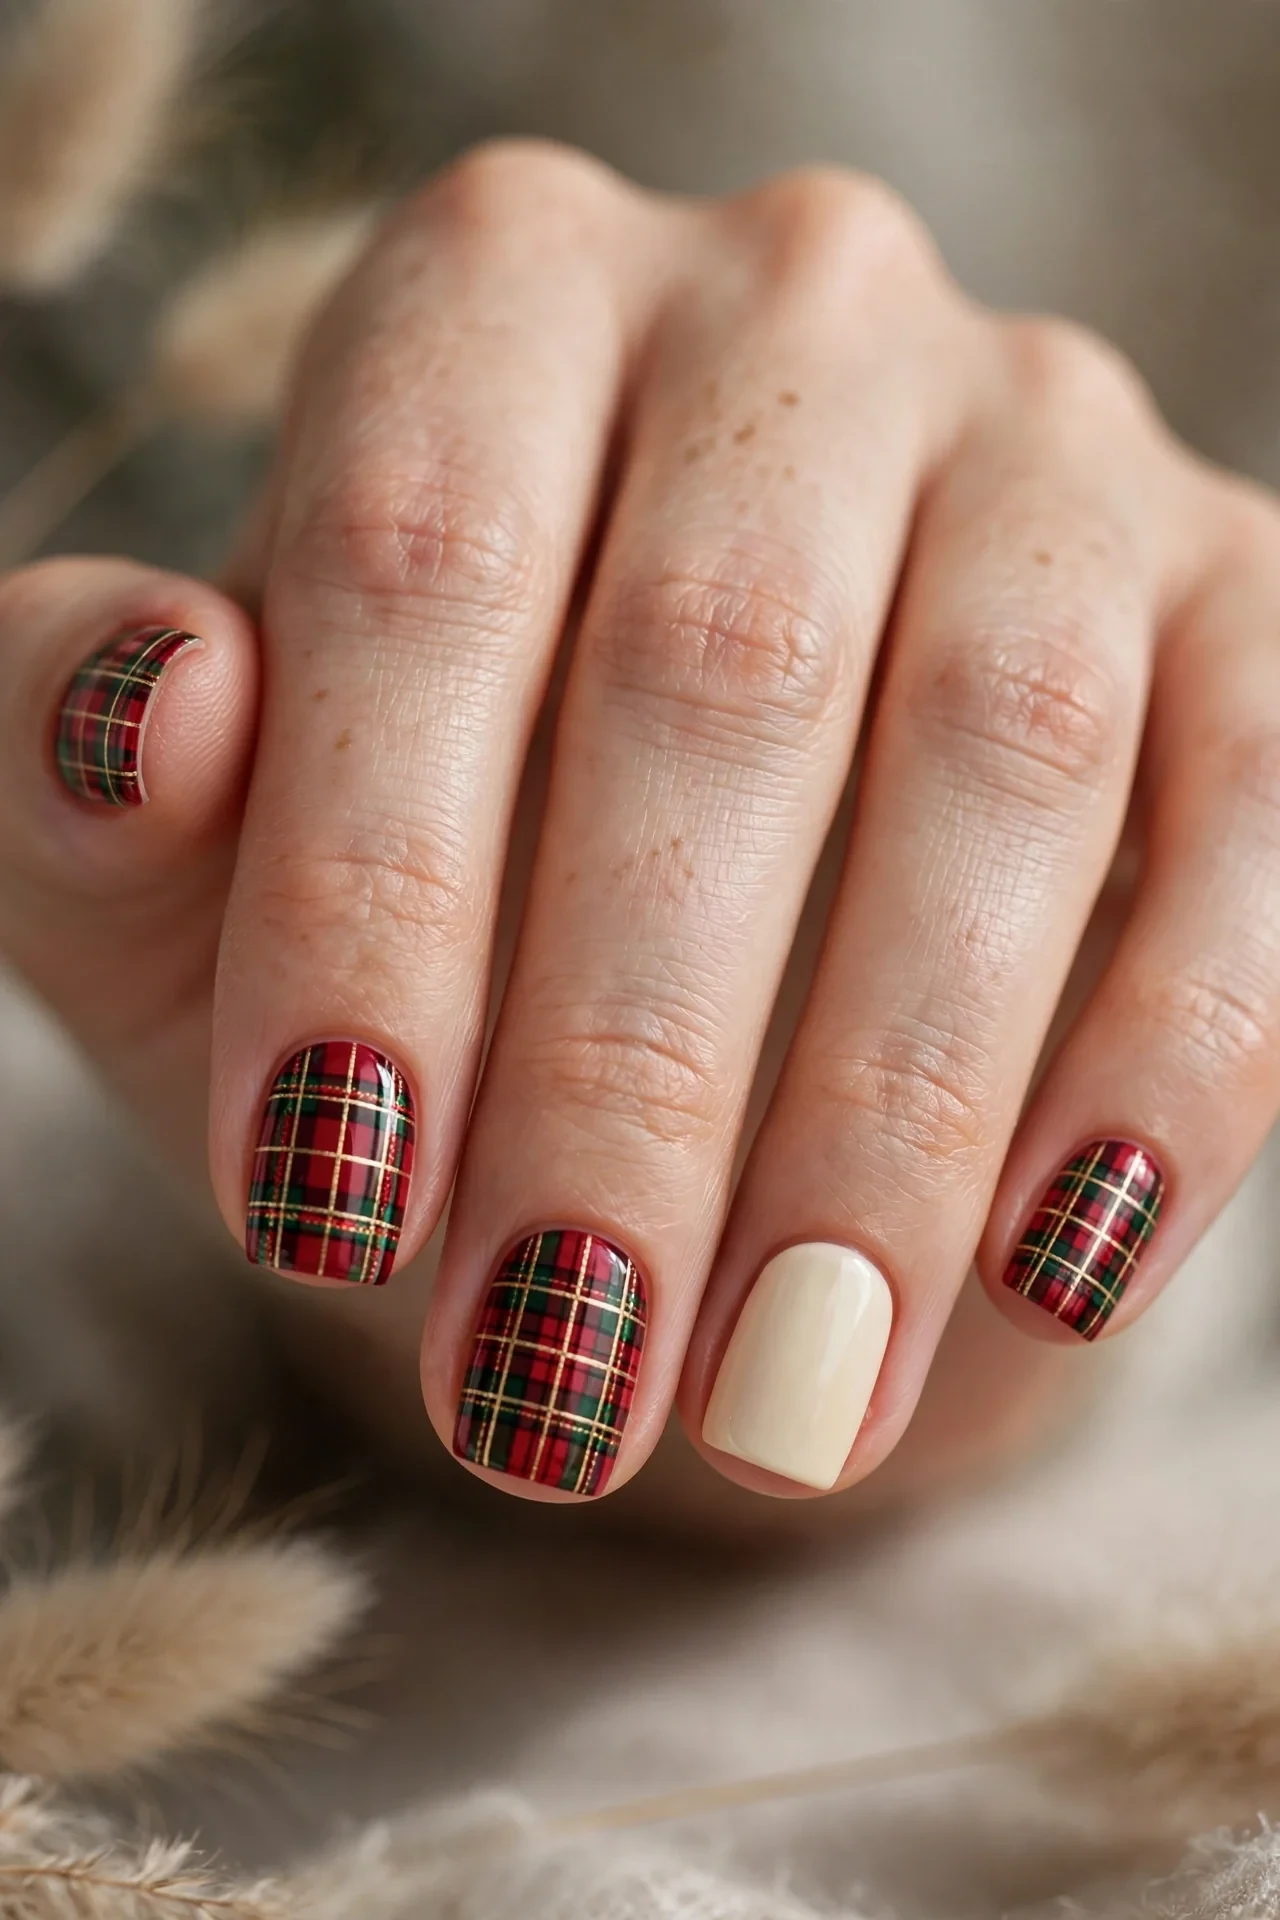
Tartan plaid in cranberry, forest green, and gold lines is Christmas cabin-chic in nail form. The pattern usually covers two to four accent nails over a cream or nude base while the rest go solid cranberry — cozy, nostalgic, and incredibly photogenic against knit sweaters. Plaid suits short to medium nails especially well, since the lines need a compact canvas to look tidy. It flatters every skin tone because deep cranberry is universally wearable. Choose this if your holiday aesthetic is fireplace, flannel, and hot cocoa.
- Apply a cranberry or deep red base on most nails, keeping two to four accent nails nude or cream.
- Paint thin vertical and horizontal stripes in green, gold, and white on the accent nails.
- Keep lines fine and evenly spaced — delicate plaid looks expensive, chunky plaid looks crafty.
- Seal with a glossy top coat to sharpen the lines and give the set a polished finish.
Request “tartan plaid accent nails in Christmas colors” and allow about twenty extra minutes of art time. DIY plaid is very doable with striping tape or a thin striping brush; map your grid lightly first and keep the brush steady. The secret is restraint: two to three stripe colors maximum, or it gets busy. Cranberry polish in gel lasts three weeks, and the cream base on accents hides regrowth. This is one of the most complimented holiday designs.
Gold Ornament Bauble Nails

Inspired by the glass baubles on a Christmas tree, this design puts shimmering metallic gold spheres on select nails — hand-painted round ornaments with tiny highlight dots, or actual 3D half-pearl embellishments. The base is usually deep red, emerald, or midnight navy, so the gold pops like ornaments against a tree. This is high-glamour holiday nail art for formal events and New Year’s Eve crossover. Medium to long nails give the baubles room to shine, and metallic gold flatters all skin tones.
- Paint the base in deep red, emerald, or navy — a dark backdrop makes the gold glow.
- Freehand round gold baubles on accent nails with metallic gold polish and a dotting tool.
- Add a tiny white highlight dot on each bauble to create the glass-ornament shine.
- Seal with top coat, or ask for 3D bauble charms glued on for a bolder effect.
At the salon, ask for “gold bauble ornament nails” and choose between painted art or 3D embellishments — charms add cost and a slightly higher snag risk but photograph spectacularly. For DIY, metallic gold polish plus a dotting tool is all you need; the highlight dot is what sells the round glass effect. Keep baubles to one per nail maximum for elegance. Painted versions last the full gel cycle; 3D charms need gentle handling and may need re-gluing. Remove charms carefully at soak-off to avoid nail damage.
Mistletoe Berry Christmas Nail Art
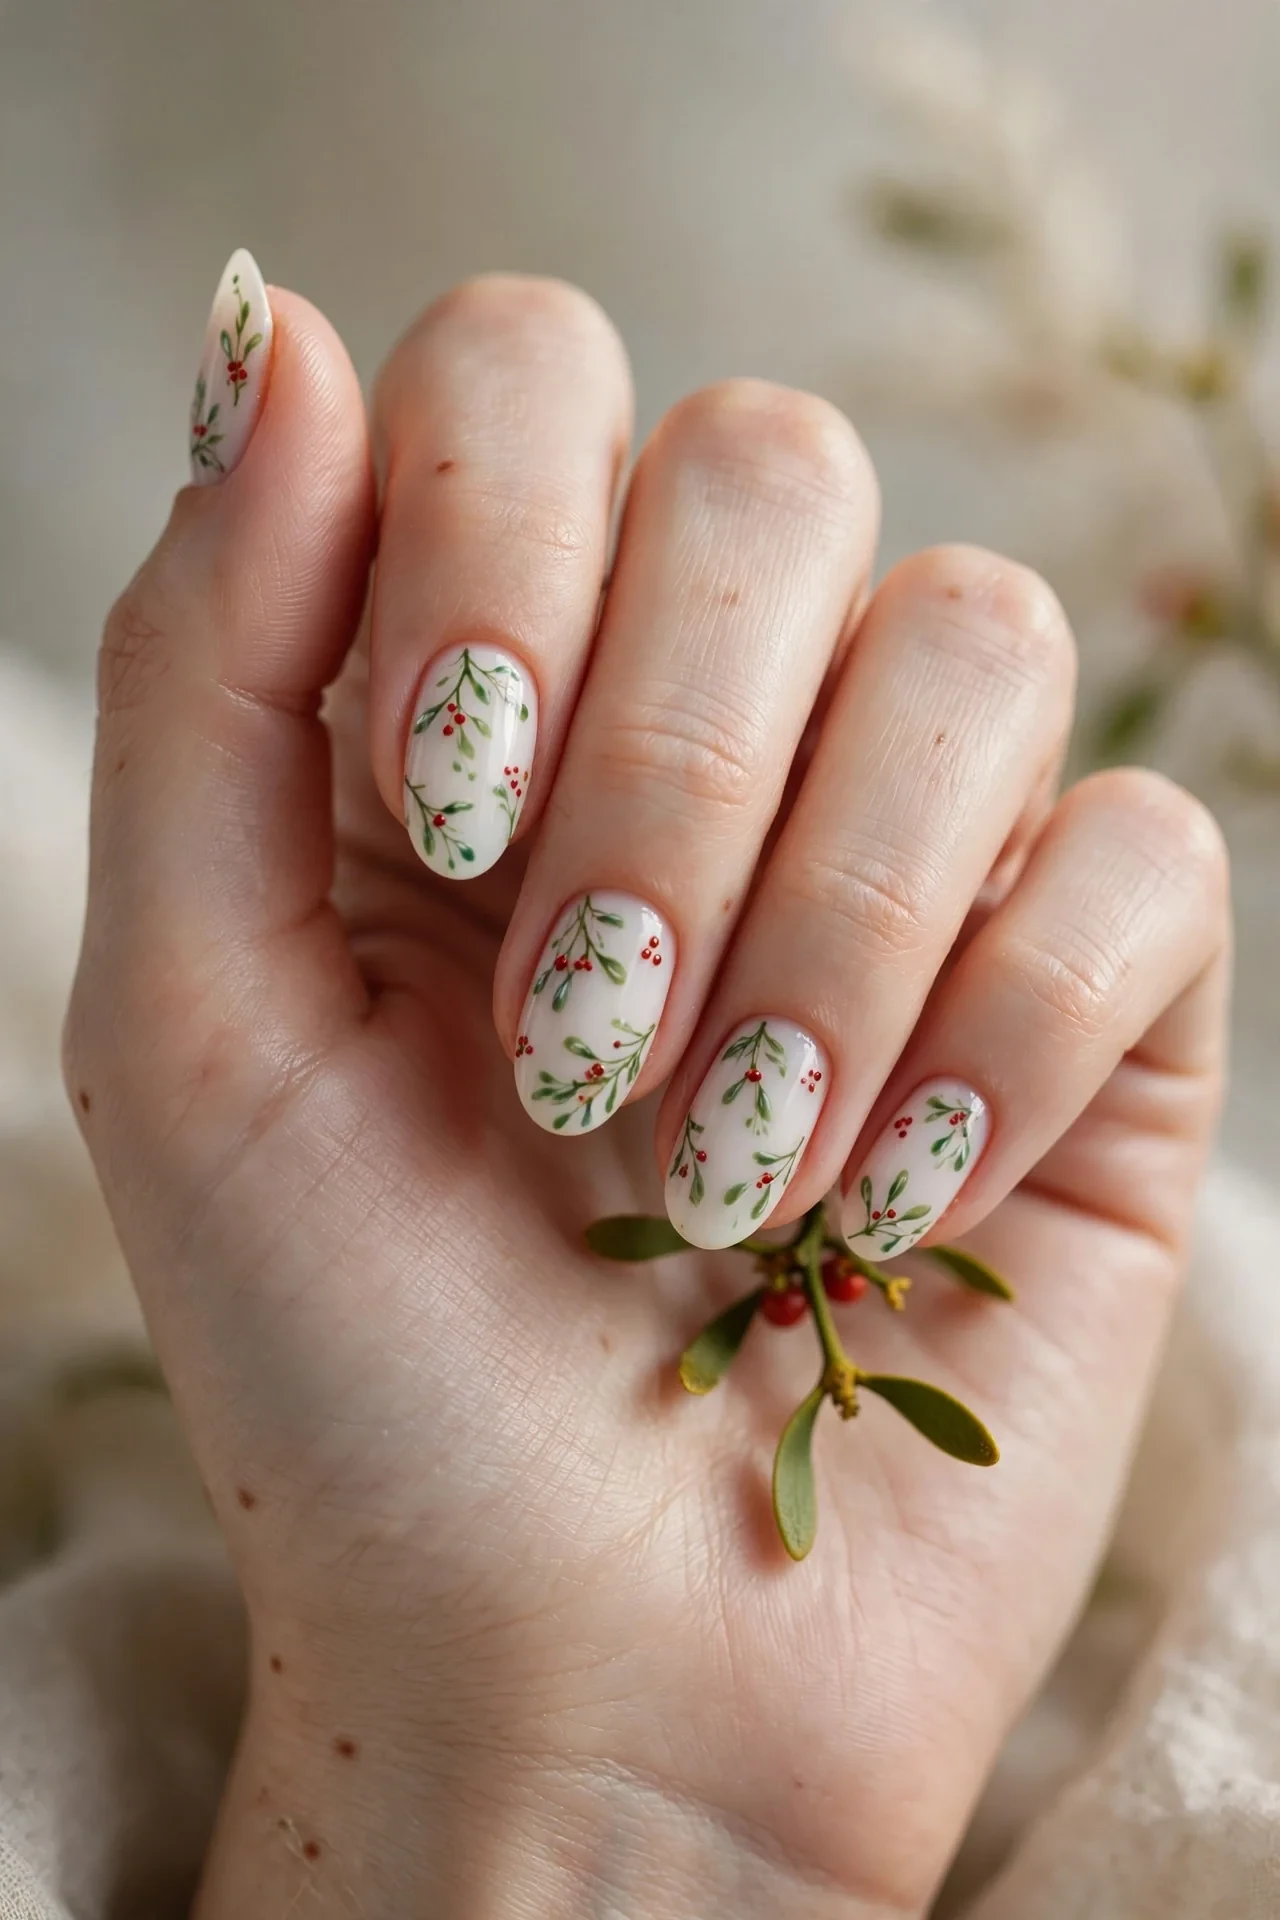
Deep green leaves with tiny red berries painted as mistletoe sprigs make for a sweet, botanical Christmas design. The art usually sits on a sheer nude or milky white base, with one or two sprigs per accent nail — delicate, feminine, and timeless. This suits short to medium almond or oval nails where the sprig can curve gracefully along the nail. It is the perfect understated holiday look for minimalists who still want a festive nod, and it works for every occasion from family dinner to a winter wedding. The red-on-green contrast is Christmas in its purest color story.
- Start with a sheer nude or milky white base on all nails for a soft canvas.
- Paint small green leaf sprigs on accent nails using a detail brush and deep green polish.
- Dot clusters of tiny red berries along the sprigs with a dotting tool.
- Seal with a glossy top coat so the botanical details look fresh and dimensional.
Ask for “mistletoe sprig accent nails” — a skilled tech paints these freehand in about fifteen minutes. For DIY, mistletoe stickers or water decals over a nude base give a nearly identical result with zero painting skill, sealed under top coat. If freehanding, keep the leaves simple teardrop shapes and cluster three to five berries — restraint is what keeps it elegant. This design is beautifully low-maintenance: the pale base hides chips and regrowth. It lasts two to three weeks and transitions gracefully into early January as a winter botanical.
Gingerbread Cookie Accent Nails

Warm brown gingerbread-man motifs with white icing details are the coziest Christmas nail art there is. The design paints little cookie shapes — gingerbread people, stars, or hearts — in warm tan or caramel over a cream or white base, outlined in white “icing.” It is playful, nostalgic, and smells like December in visual form. Best on short to medium nails where the cookie shapes stay proportionally cute, and it suits everyone — this is a mood, not a color story. Pick it if your Christmas revolves around baking, and expect compliments every time your hands are near the cookie tray.
- Paint the base in warm cream, soft white, or a milky nude on all nails.
- Freehand gingerbread shapes in caramel or tan polish on two to four accent nails.
- Outline each cookie with thin white lines and add icing dots for faces and buttons.
- Seal with top coat to protect the tiny icing details through holiday baking sessions.
Request “gingerbread cookie accent nails” at the salon — the art takes about twenty minutes and most techs find it fun to paint. For DIY, gingerbread nail stickers are widely available and look adorable sealed under top coat; freehanding needs only a dotting tool and a steady hand. Warm caramel polish is the make-or-break shade — too dark and it reads as chocolate, too light and it washes out. Wear time is a standard gel cycle. This design pairs perfectly with every ugly Christmas sweater you own.
Starry Midnight Christmas Nails

A deep midnight-blue base scattered with tiny gold and silver stars captures Christmas Eve sky magic. The stars can be hand-painted, stamped, or applied as decals, with a few rhinestones for extra twinkle. This is the most elegant of the literal holiday designs — moody, celestial, and quietly festive. It suits medium to long nails where the star field has room to spread, and flatters all skin tones since the dark base is rich rather than stark. It also bridges Christmas and New Year’s Eve, so one manicure can cover both holidays.
- Apply two coats of midnight navy or deep indigo gel for a rich night-sky base.
- Scatter tiny gold and silver stars across all or accent nails using decals or a dotting tool.
- Add two or three small rhinestones as “bright stars” for dimensional sparkle.
- Seal with a glossy top coat to lock the stars flat and give a glassy night-sky finish.
Ask your tech for “starry night Christmas nails” — stamping plates make the star scatter quick and even. For DIY, star nail stickers over a dark base are the easiest path to this look; place them while the base is fully dry, then seal generously. Vary the star sizes for a natural constellation effect rather than a uniform pattern. This design lasts the full gel cycle and the dark base hides wear beautifully. It also bridges Christmas and New Year’s Eve perfectly, so one manicure can cover both holidays.
Holly Berry and Pine Details
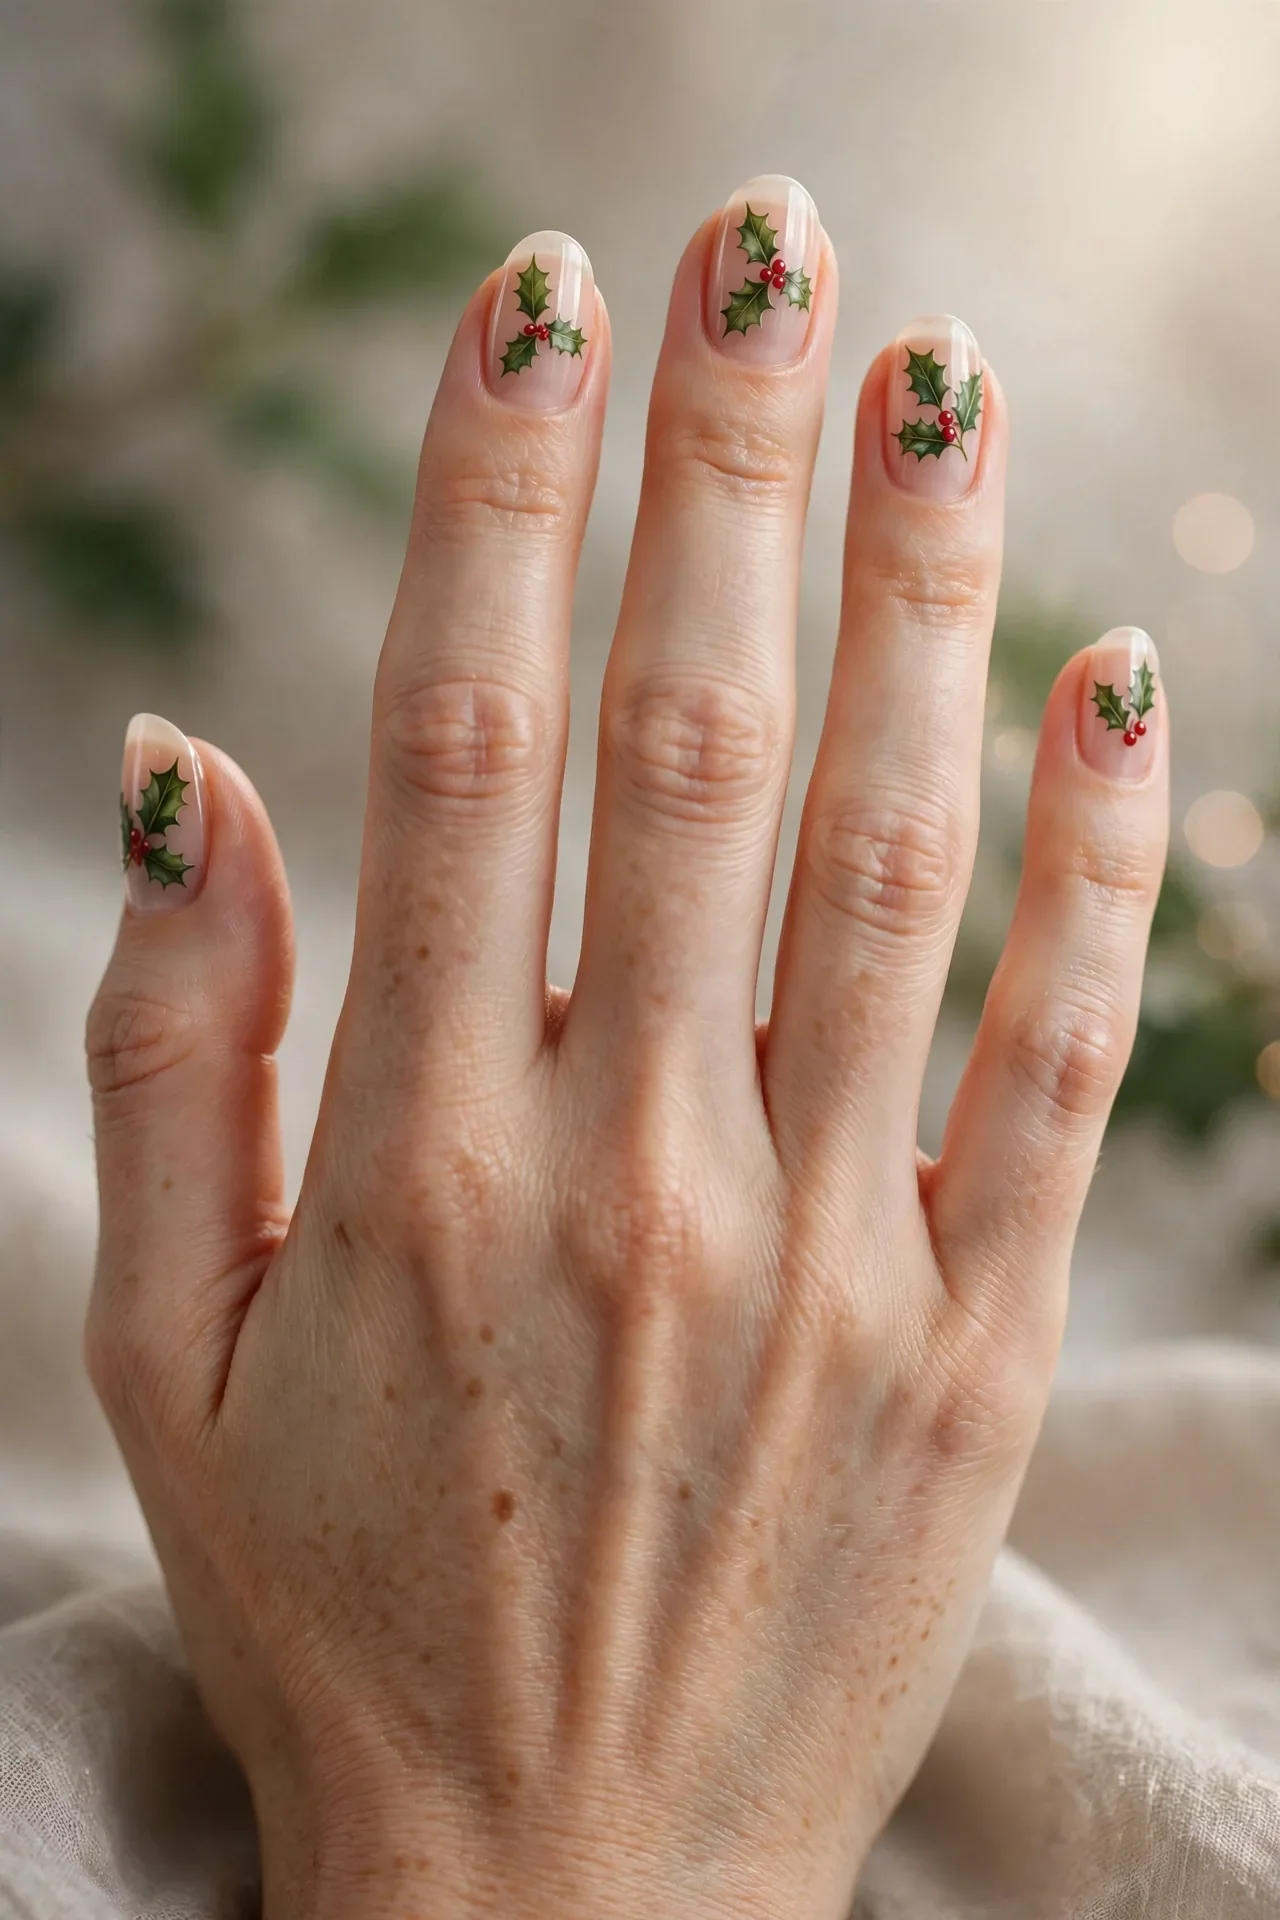
Classic holly leaves with red berries and tiny pine sprigs is heritage Christmas nail art — traditional and timeless, less “party” and more “Christmas card.” It works on any nail length, though longer nails allow fuller sprig compositions. This suits anyone whose holiday decor is real pine garlands and beeswax candles. The green-on-nude version is subtle enough for conservative offices; the version on deep green with gold berries is pure evening glamour.
- Choose a sheer nude base for daytime subtlety or deep green for evening richness.
- Paint small holly leaves in deep green and cluster red berry dots along the stems.
- Add thin gold lines or tiny pine needles between the holly for extra detail.
- Seal with a glossy top coat to give the botanical art a fresh, dewy finish.
Request “holly and pine botanical nails” and expect about twenty minutes of art time. For DIY, a fine detail brush and dotting tool are enough — holly leaves are simple pointed ovals, and berries are just dots. Layer the green leaves first, berries second, gold accents last. The nude-base version is very forgiving for beginners since sparse placement looks intentional. Wear time is two to three weeks in gel. Daily cuticle oil keeps the green looking rich rather than dull, especially on the darker base version.
Red Velvet Matte Christmas Manicure

Velvet nails — the magnetic cat-eye finish that looks like crushed velvet fabric — in deep Christmas red is the season’s most luxurious texture. The magnetic polish creates a soft, light-shifting shimmer that reads as plush fabric rather than glitter. A matte or satin top coat deepens the velvet effect even further. This design needs no art at all: the finish is the statement. It suits every nail length and shape, flatters all skin tones, and works for every December occasion. If you want maximum impact with minimum fuss, velvet red is the answer — it looks expensive in every photo and every light.
- Apply a deep red magnetic velvet polish in two coats on all nails.
- Hold the magnet over each nail for ten seconds before curing or drying to form the velvet pattern.
- Keep the magnetic stripe centered and consistent across nails for a uniform look.
- Seal with a velvet-matte top coat for the plushest finish, or glossy for a jewel-like glow.
Ask your tech for “red velvet magnetic nails” — any salon with cat-eye polishes can do this, and it takes no longer than a standard gel manicure. For DIY, magnetic polishes are widely available; the trick is holding the magnet close and still, about two millimeters above the wet polish. According to Coveteur’s 2026 nail trend roundup, rich velvet textures remain a defining finish of the season, which makes this both classic and current. Wear time is a full gel cycle, and the finish hides minor imperfections beautifully.
Christmas Morning Glitter Fade

A soft glitter fade — dense sparkle at the tips melting into a nude or blush base — is the easiest Christmas nail art that still looks like you tried. Gold, champagne, or holographic glitter gives that Christmas-morning glow with no drawing or stamping required. This is the design for busy Decembers: it takes minutes, suits every nail length and skin tone, and matches everything. It is also the most forgiving festive look for beginners and the longest-wearing, since glitter camouflages both chips and regrowth. When in doubt, glitter fade is never the wrong Christmas answer.
- Apply a nude or blush pink base on all nails and let it dry or cure fully.
- Sponge or dab glitter polish densely at the tips, fading it lighter toward the cuticle.
- Build two thin glitter layers rather than one thick one for a seamless gradient.
- Seal with two coats of top coat to bury the glitter texture into a smooth, glossy finish.
Ask for a “gold glitter fade” — the sponging technique takes only minutes at the salon. For DIY, a cheap makeup sponge is your best tool: paint glitter polish onto the sponge, dab it along the tip, and bounce it downward for the fade. Loose glitter pressed into wet top coat gives even more sparkle. Double top coat is non-negotiable with glitter — it prevents the gritty texture and extends wear to three weeks. This is also the perfect design to refresh mid-month: one more glitter layer at the tips and it looks brand new.
Conclusion
These 15 classic christmas nail art designs prove that holiday manicures never need to be overcomplicated to be unforgettable — a true red, a touch of gold, a hand-painted snowflake, or a velvet finish is all it takes to make your nails feel like Christmas. Pick the design that matches your December: playful Santa hats for family days, emerald and gold for party nights, or a simple glitter fade when the calendar is too full for fuss. Bring a reference photo to your appointment and book a few days before the holiday rush. For more seasonal nail inspiration, browse our 15 November Nail Colors: Transitioning Into Winter to plan your January refresh, and keep the festive spirit going with our 15 Halloween-Themed Nail Designs.