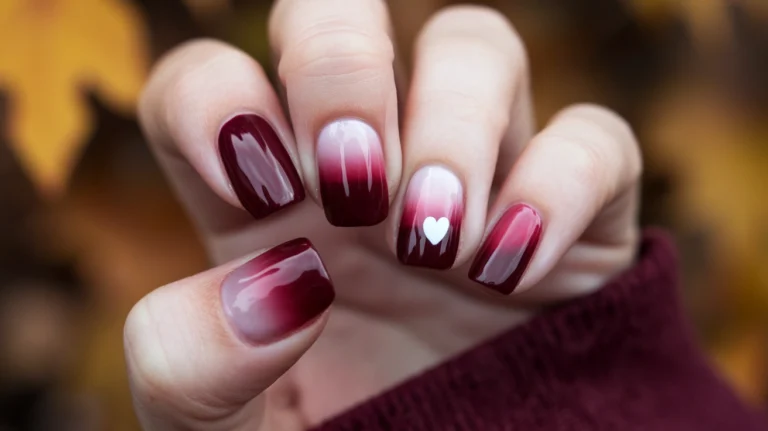
15 Tortoiseshell Nail Designs: Fall 2026’s Warmest Trend
Introduction
If one manicure owns fall 2026, it is tortoiseshell nails. Swirls of amber, honey, deep brown, and glossy black melt together like caramel in a latte, giving you a look that feels expensive, cozy, and completely effortless. Whether you visit a salon or paint at home, this pattern flatters every skin tone and works on short squares, almond, or coffin shapes — and it pairs beautifully with the rest of this season’s lineup, including the moody shades in our 10 Fall Nails 2026 Trends roundup. In the next three minutes you will find fifteen fresh ways to wear the trend, from a classic amber set to French-tipped tortoise and gold-foil accents, each with salon-ready tips so you can walk in knowing exactly what to ask for.
Classic Amber Tortoiseshell Nails
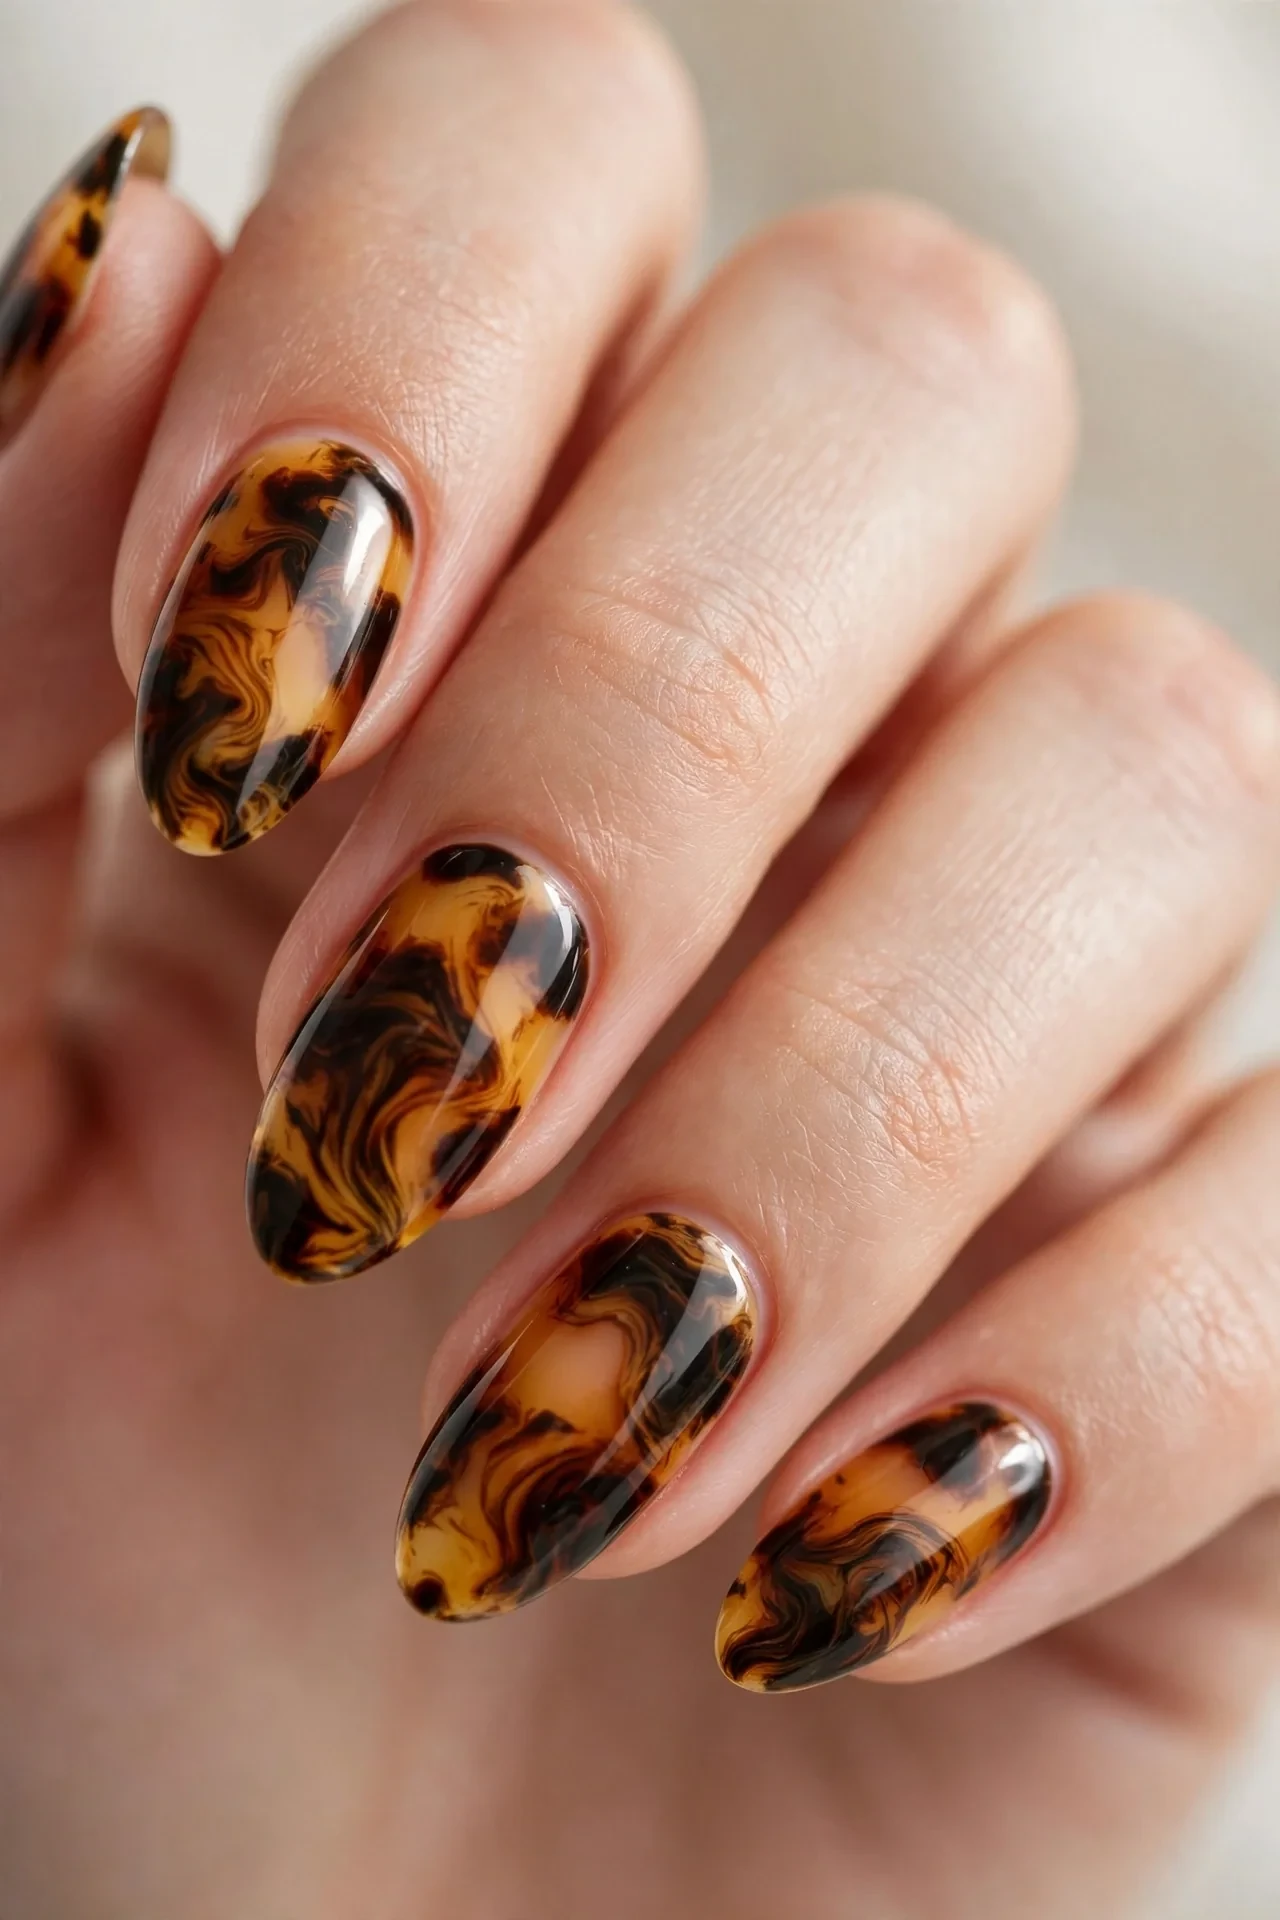
The original tortoiseshell manicure never misses. A warm amber base melts into golden honey and deep espresso blotches, sealed under a glassy top coat so the colors look lit from within. Almond-shaped nails show off the marbling best, since the tapered tip lets the darker spots drift and blur like real tortoise shell. This design suits every skin tone — the golden warmth brightens fair skin and looks rich and luxe against deep skin. It is the ultimate transitional look: polished enough for the office, cozy enough for a pumpkin-patch weekend, and it photographs beautifully for fall outfit photos.
- Ask your tech for a translucent amber gel base as the foundation color.
- Layer irregular blobs of dark brown and black with a dotting tool or detail brush.
- Smudge the edges with a small amount of amber jelly to create the marbled blur.
- Seal everything with two coats of high-gloss top coat for that wet, glassy depth.
For a DIY version, start with a sheer amber jelly polish, then dot on dark brown and near-black gel (or regular polish) in random clusters while the base is still tacky. Use a clean brush dipped in a drop of the amber shade to feather each blob outward — imperfect is perfect here. Cure between layers if you use gel; with regular polish, let each layer dry five minutes. Finish with a glossy top coat and cuticle oil. A full set takes about an hour and lasts two to three weeks in gel.
French-Tipped Tortoise Nails
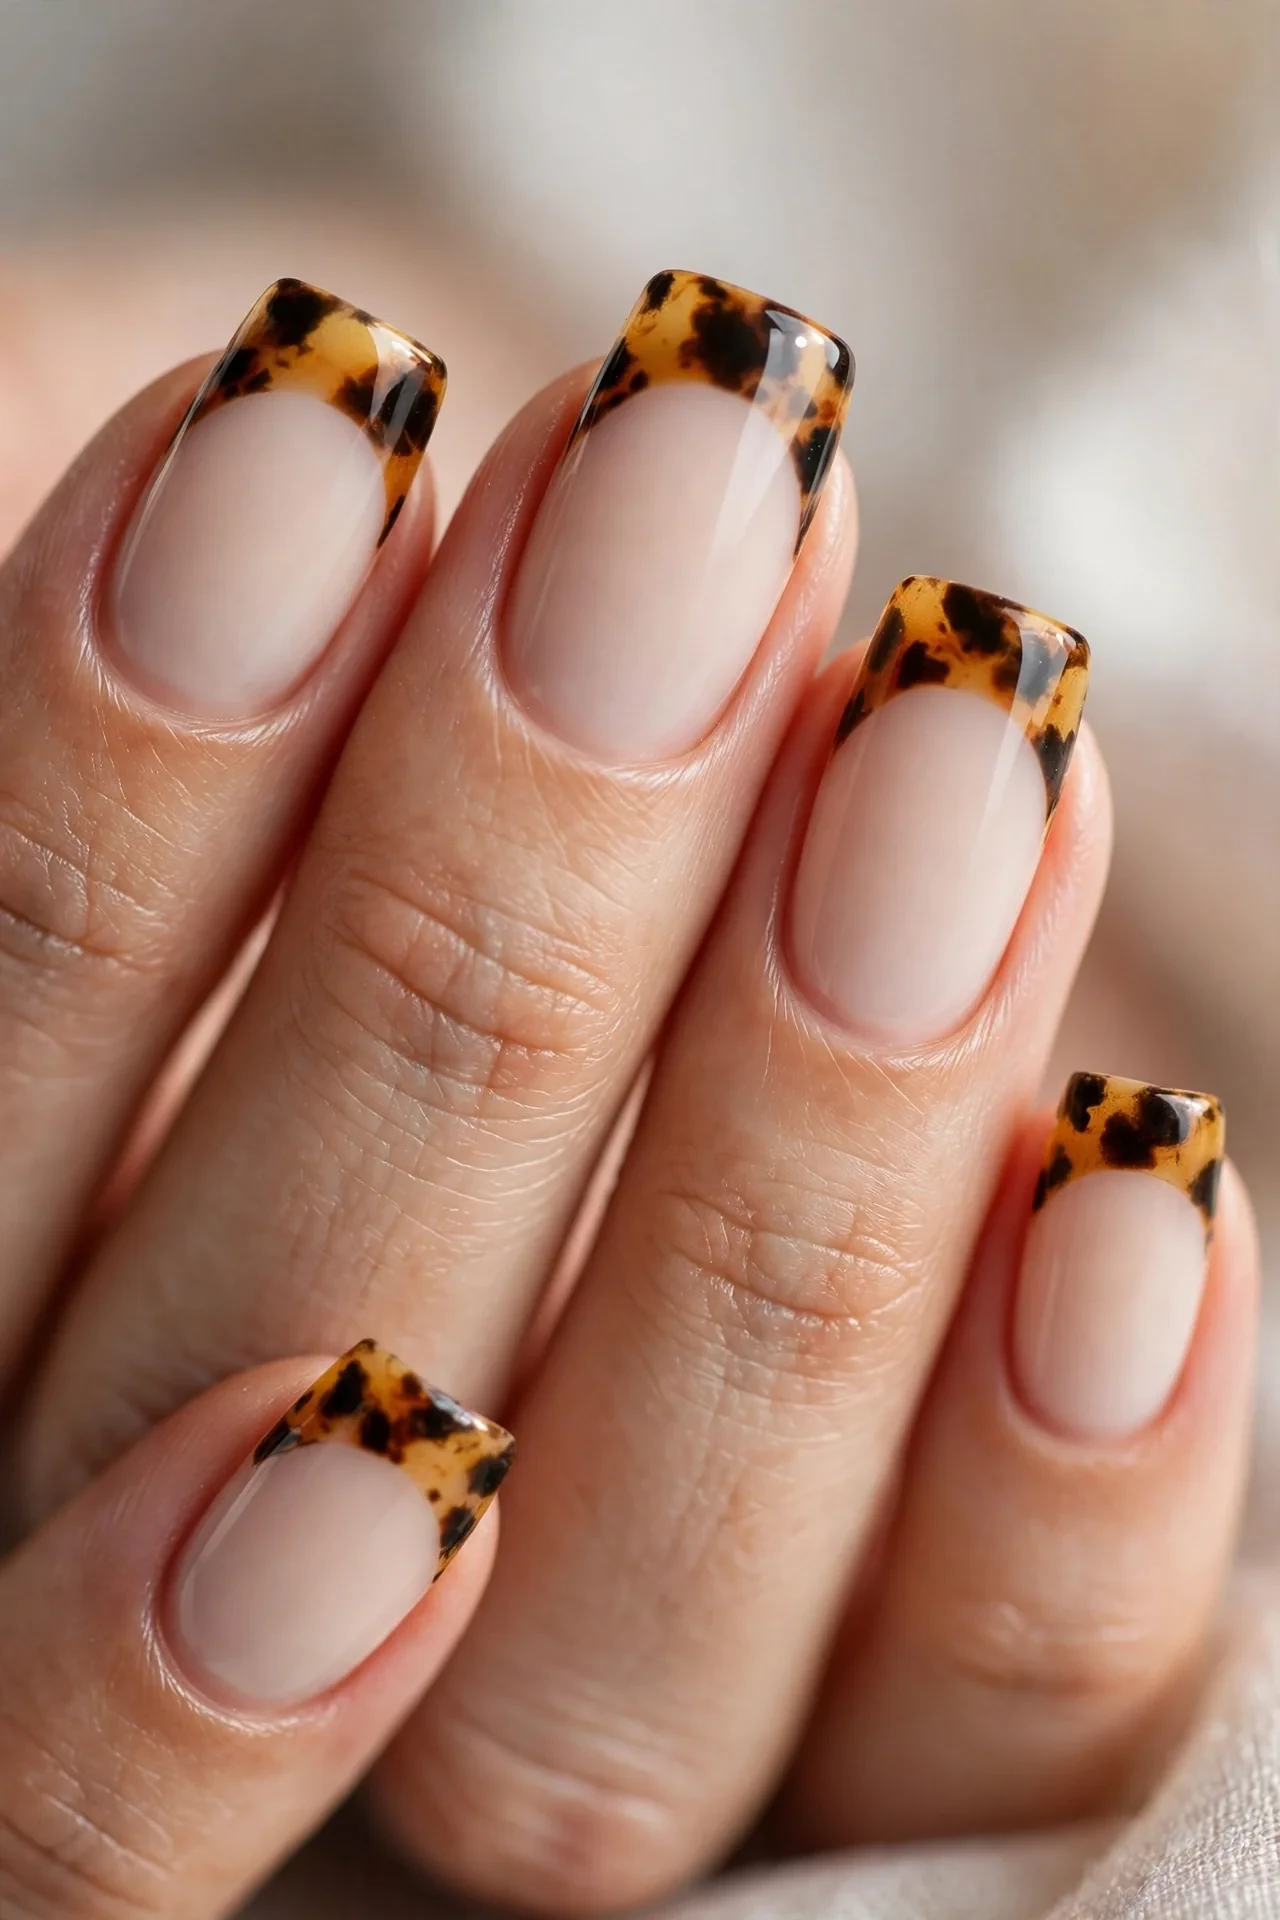
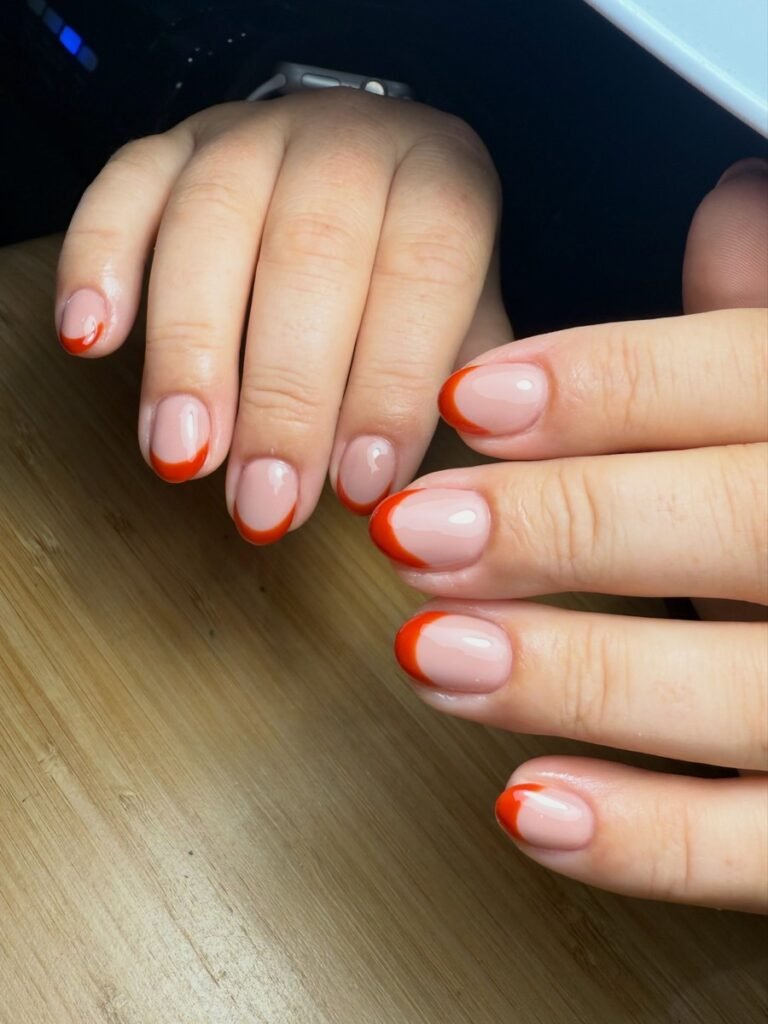
This design gives you the best of both worlds: a clean nude base with just the tips dipped in tortoiseshell marbling. The result is fresh, modern, and a little less commitment than a full tortoise set, which makes it ideal if your workplace leans conservative or you are testing the trend for the first time. A milky or soft beige base keeps the look airy, while the patterned tips add that warm fall richness. Square or squoval shapes make the French line crisp, but soft almond works too for a more romantic feel.
- Apply a milky nude or sheer beige base across the full nail and cure.
- Paint the marbled tortoise pattern only on the free edge in a French-tip arc.
- Keep the smile line slightly deeper than a classic French for a fashion edge.
- Seal with glossy top coat and sharpen the smile line with a clean-up brush.
At the salon, say: “milky nude base with tortoiseshell French tips, medium almond.” The tech will likely freehand the tips with gel and a detail brush — ask to see one nail before they do all ten so you can approve the color balance. At home, use French-tip guides or a steady hand, marbling amber, brown, and black jelly polishes only on the tip area. This style grows out gracefully since the base is near your natural nail color, buying you an extra week between fills.
Espresso-Edged Tortoiseshell Manicure
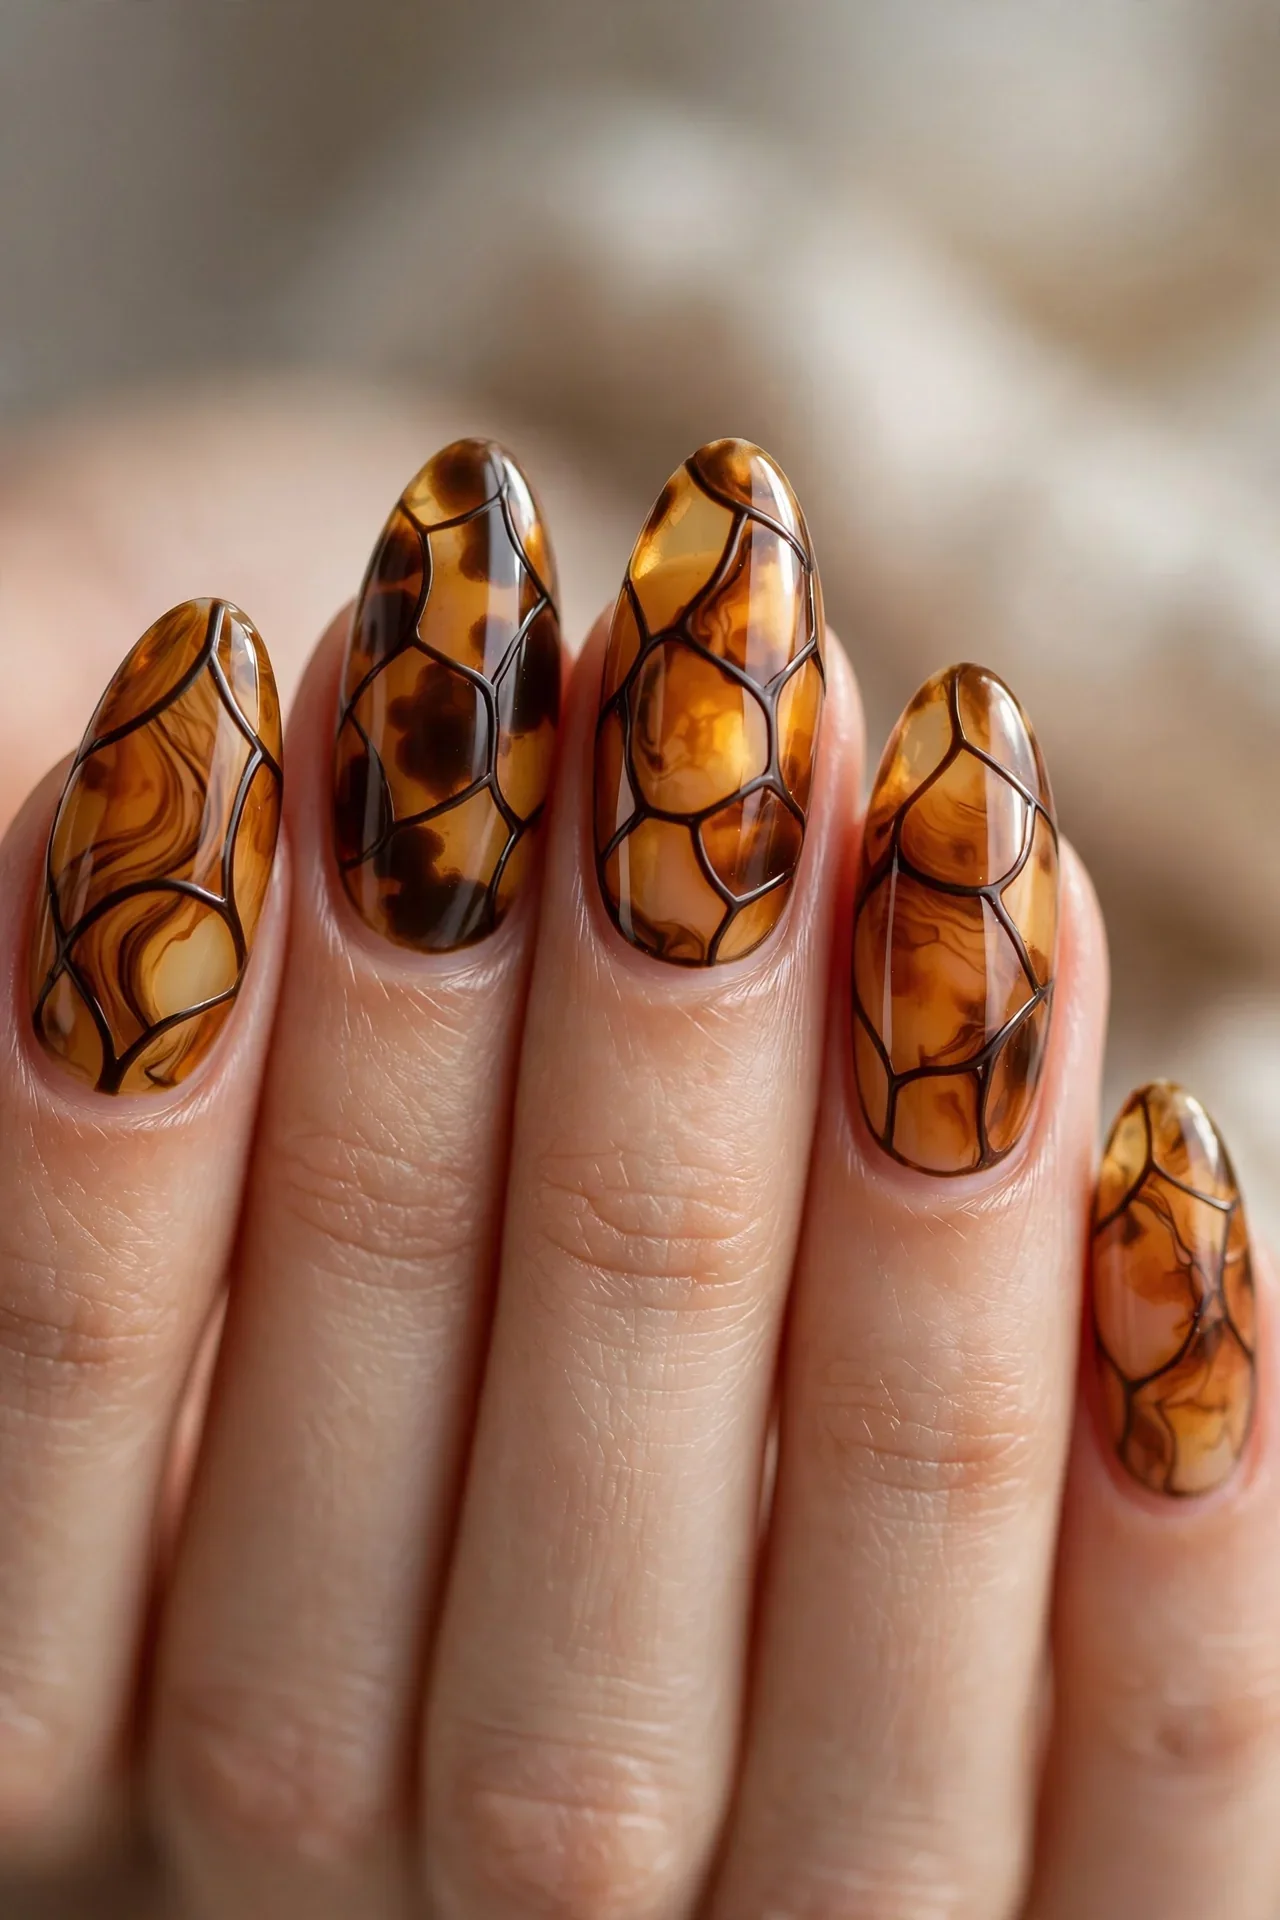
Want your tortoise nails with extra drama? This version outlines the classic amber marbling with thin, dark espresso lines — like the pattern has been traced in ink. The dark edging adds definition and makes the amber sections glow brighter by contrast, giving the whole manicure a richer, almost stained-glass quality. It is a fantastic choice for medium to long nails, where there is enough surface for the marbling and the lining to both show. Pair it with gold jewelry and dark knits and you are the whole fall mood.
- Build the classic tortoise marbling on an amber jelly base first.
- Trace fine espresso-brown lines around the darkest blotches with a striping brush.
- Keep lines wispy and uneven — precision ruins the organic effect.
- Finish with a glossy top coat to melt the lines softly into the design.
Ask your nail tech for “tortoiseshell with dark brown outline detailing” and show a reference photo if you have one. The outlining takes an extra ten minutes, so book a full art appointment rather than a quick fill. DIY tip: wait until your tortoise base is fully dry, then use a long striping brush and very little polish so the lines stay hair-thin. Mistakes wipe away easily with a cleanup brush before top coat. This set looks best with a fresh glossy top coat reapplied at day seven to keep the shine.
Honey-Glass Tortoise Nails
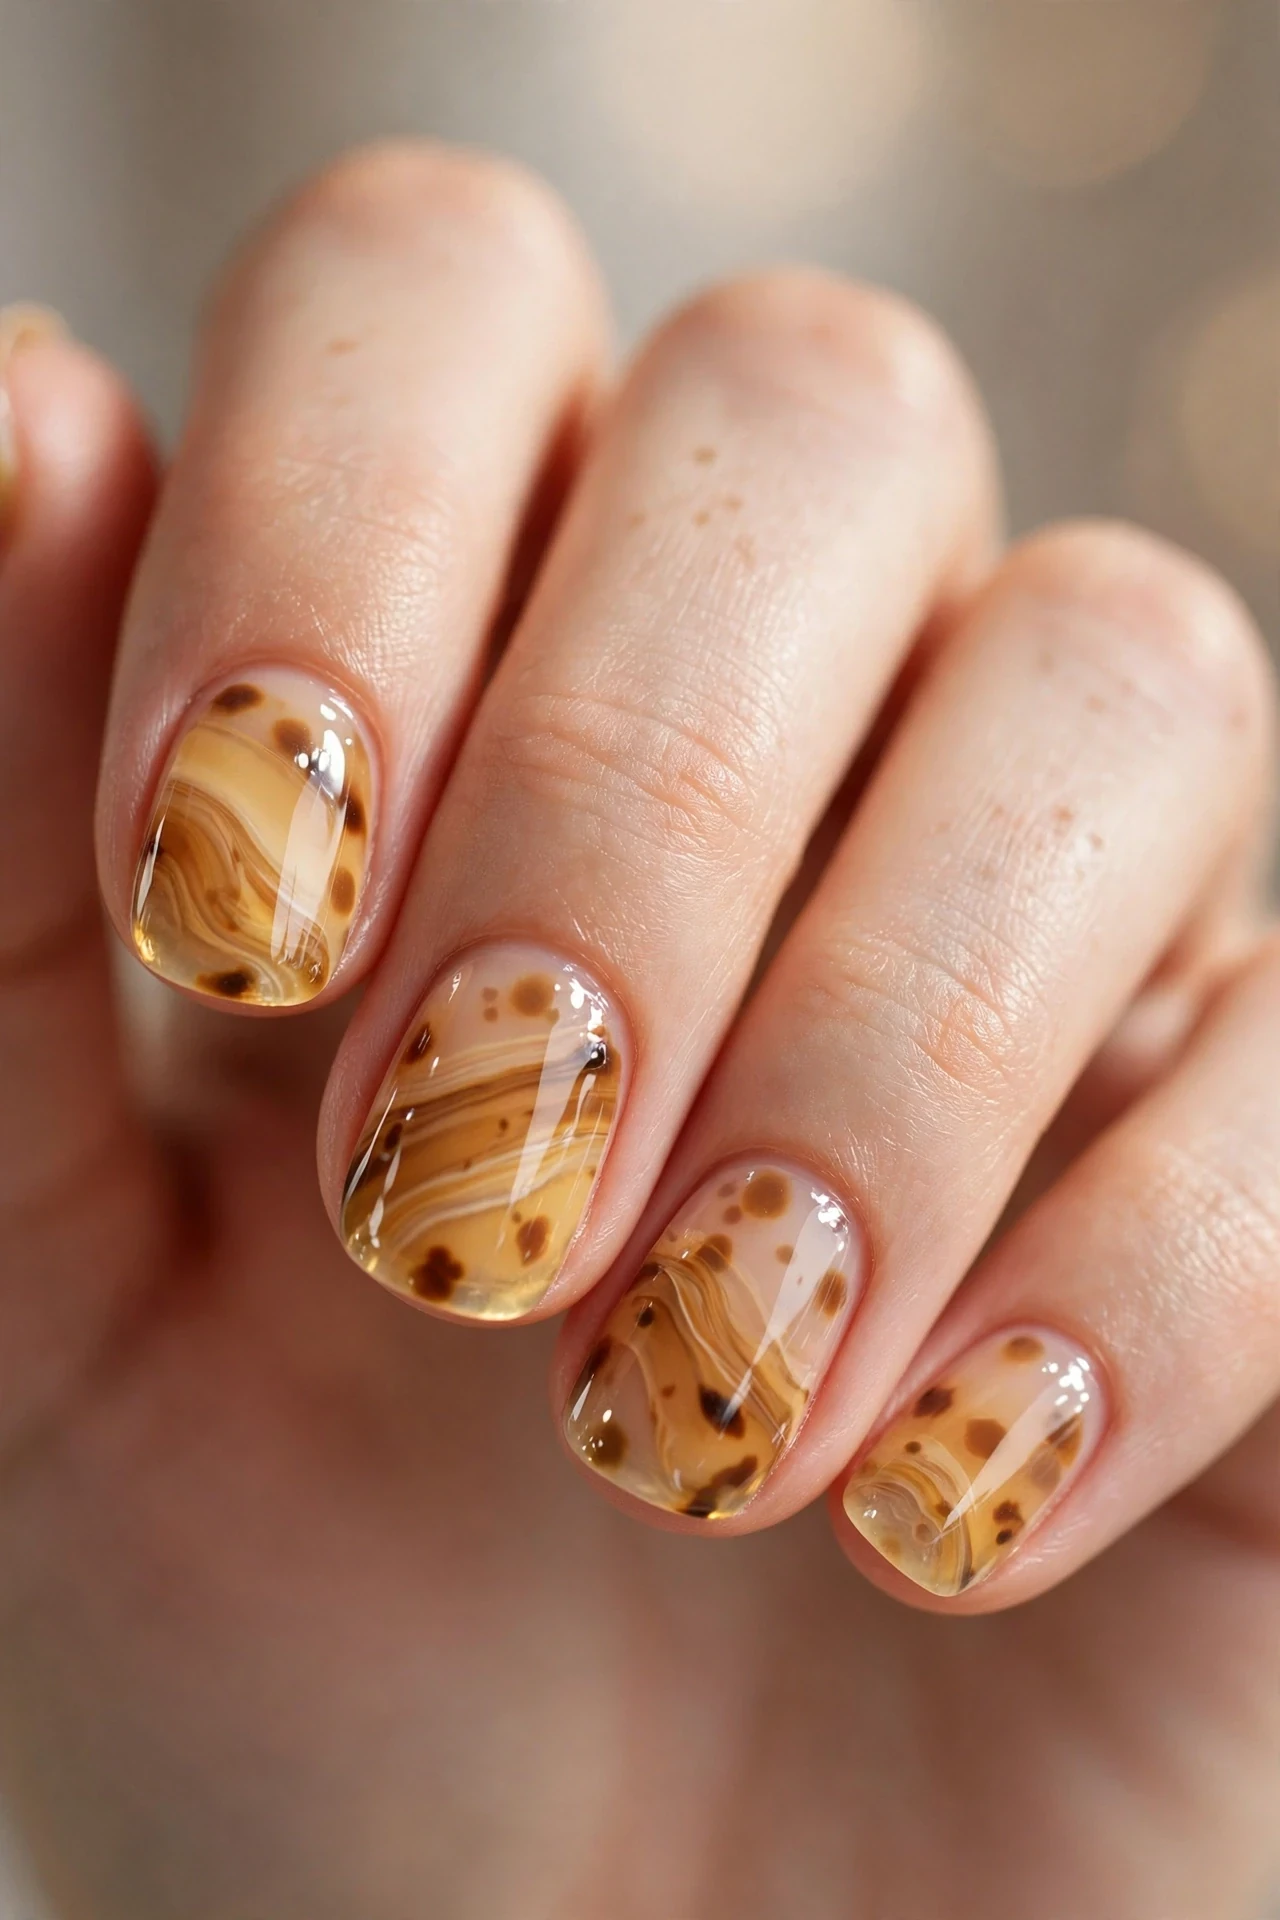
Honey-glass tortoise is the softer, glowier sister of the classic look. Instead of heavy dark blotches, translucent layers of honey, caramel, and soft brown are built up like glass, letting light pass through the nail for a juicy, three-dimensional effect. The finish is so luminous it almost looks wet from across the room. This design is universally flattering and especially gorgeous on short to medium nails, where the translucency keeps the look delicate rather than heavy. It is also one of the easiest tortoise styles to DIY because the sheerness forgives mistakes.
- Start with a clear or sheer nude base coat on clean, prepped nails.
- Layer sheer honey and caramel jelly polishes in soft, overlapping clouds.
- Add just a few small dark-brown dots, keeping most of the nail light.
- Build three thin translucent layers, then seal with an ultra-glossy top coat.
In the salon, request “sheer honey tortoise, glass finish” — most techs will use jelly gels and may add a thin layer of builder gel for that plump, glassy dome. For at-home regular polish, work in very thin coats and give each two to three minutes to dry; jelly polishes are naturally sheer so streaks disappear as you layer. Expect about two weeks of wear in gel. This is the tortoise look to choose if you want compliments from people who “don’t usually notice nails.”
Tortoise Accent with Espresso Solids
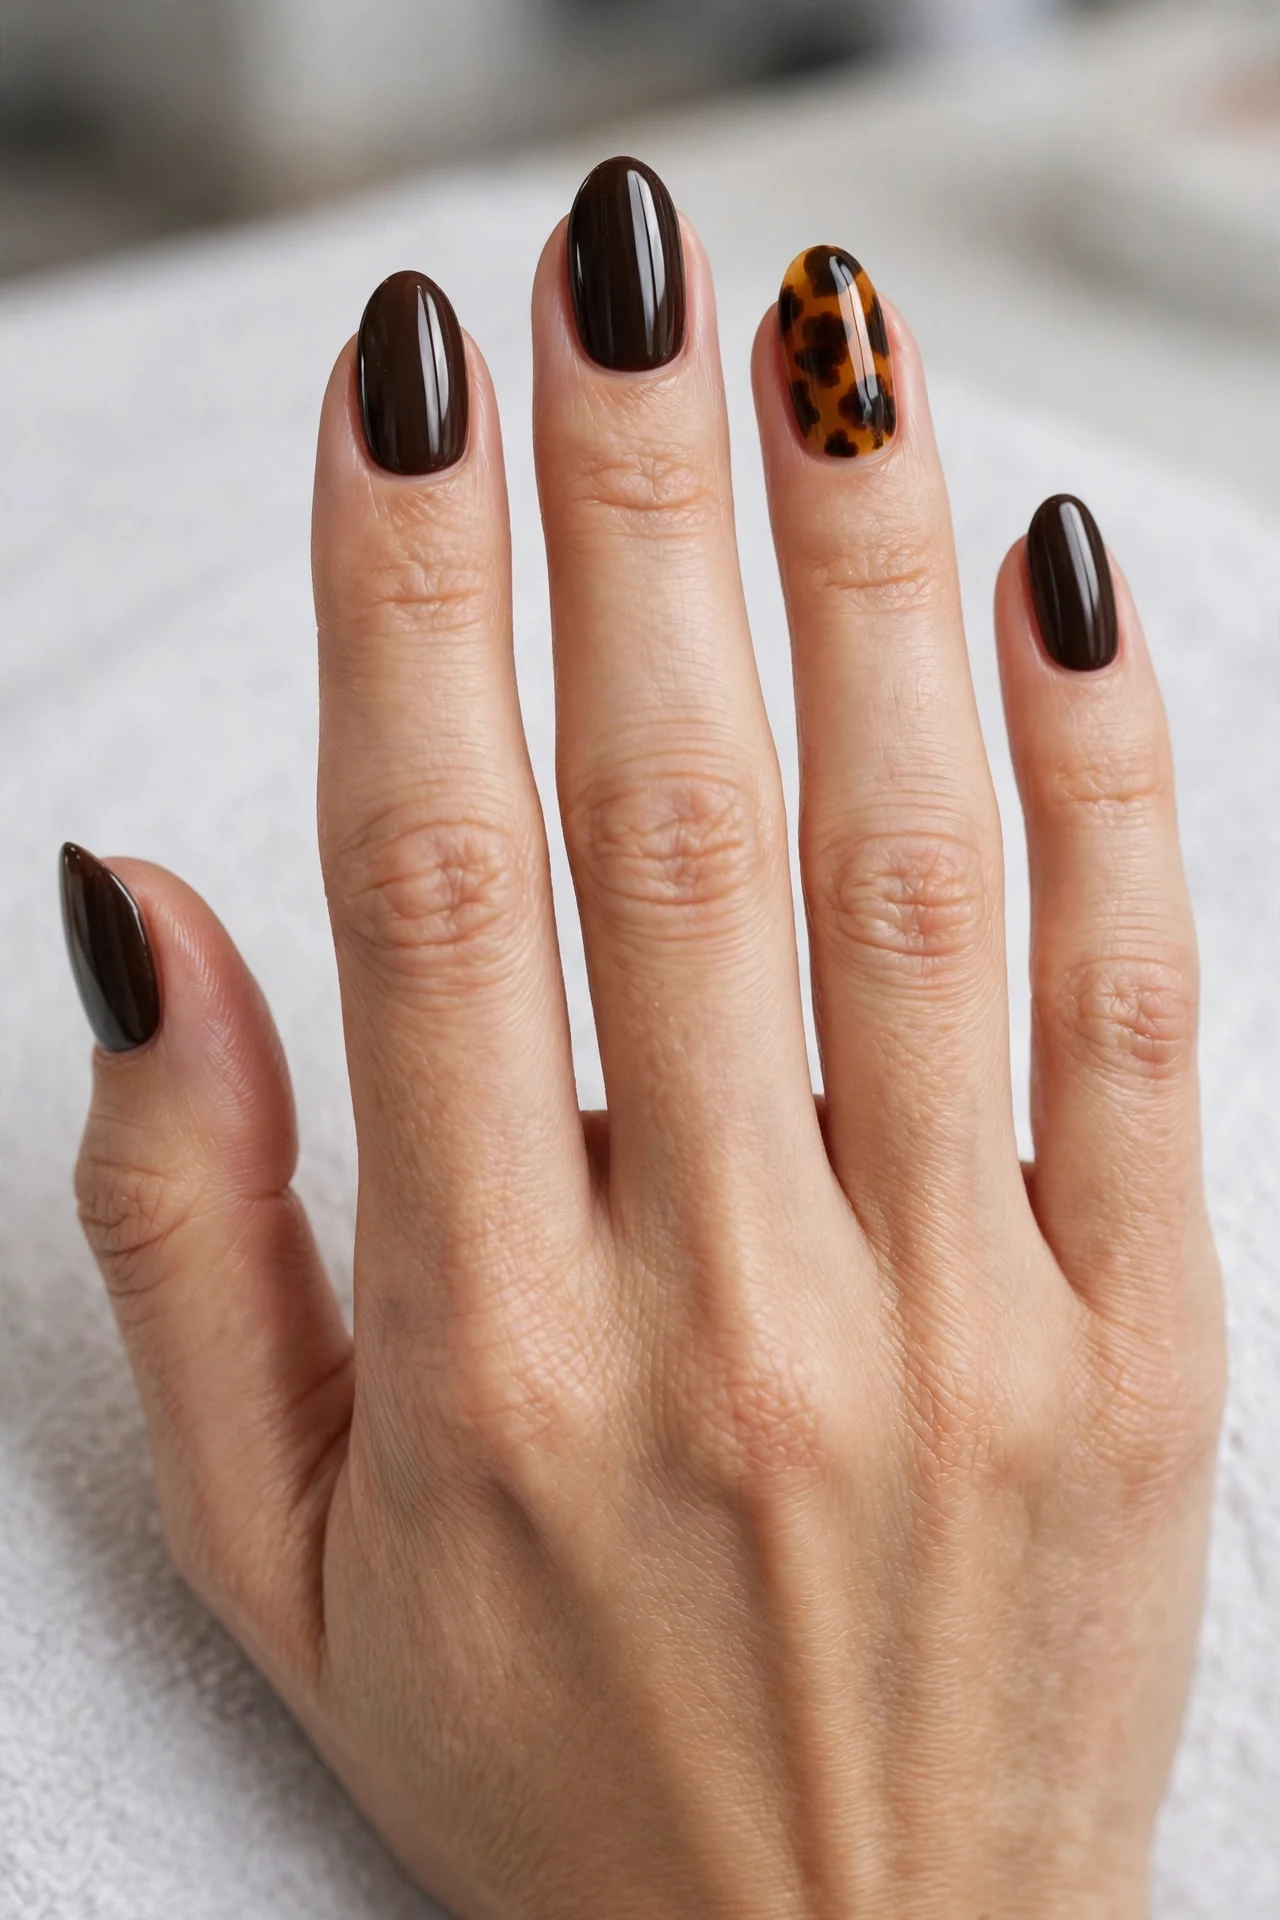
If a full set of pattern feels like too much, try tortoiseshell nails as the accent. Paint eight nails in a rich solid espresso or chocolate brown and let the ring fingers (or middle fingers) carry the full amber tortoise marbling. The solid nails ground the design and make the patterned accents look like jewelry — intentional and chic rather than busy. This combo is office-friendly, works beautifully on short nails, and is the fastest tortoise option in the salon since only two nails need detailed art.
- Paint all nails with two coats of deep espresso or chocolate brown.
- Choose ring fingers for the tortoise accent — or go bold with both ring and middle.
- Marble amber, honey, and black on the accent nails over a sheer amber base.
- Seal the whole set with the same glossy top coat for a unified finish.
Tell your tech: “solid espresso set with tortoise accent on the ring fingers.” Because only two nails need art, this often costs less than a full patterned set — ask about accent pricing. At home, paint the solids first and let them dry completely before starting the accent marbling so you don’t smudge them. The espresso shade is very forgiving on cuticles, and chips show less on dark polish. Refresh the top coat weekly and this manicure easily stretches to three weeks.
Matte and Gloss Tortoiseshell Mix
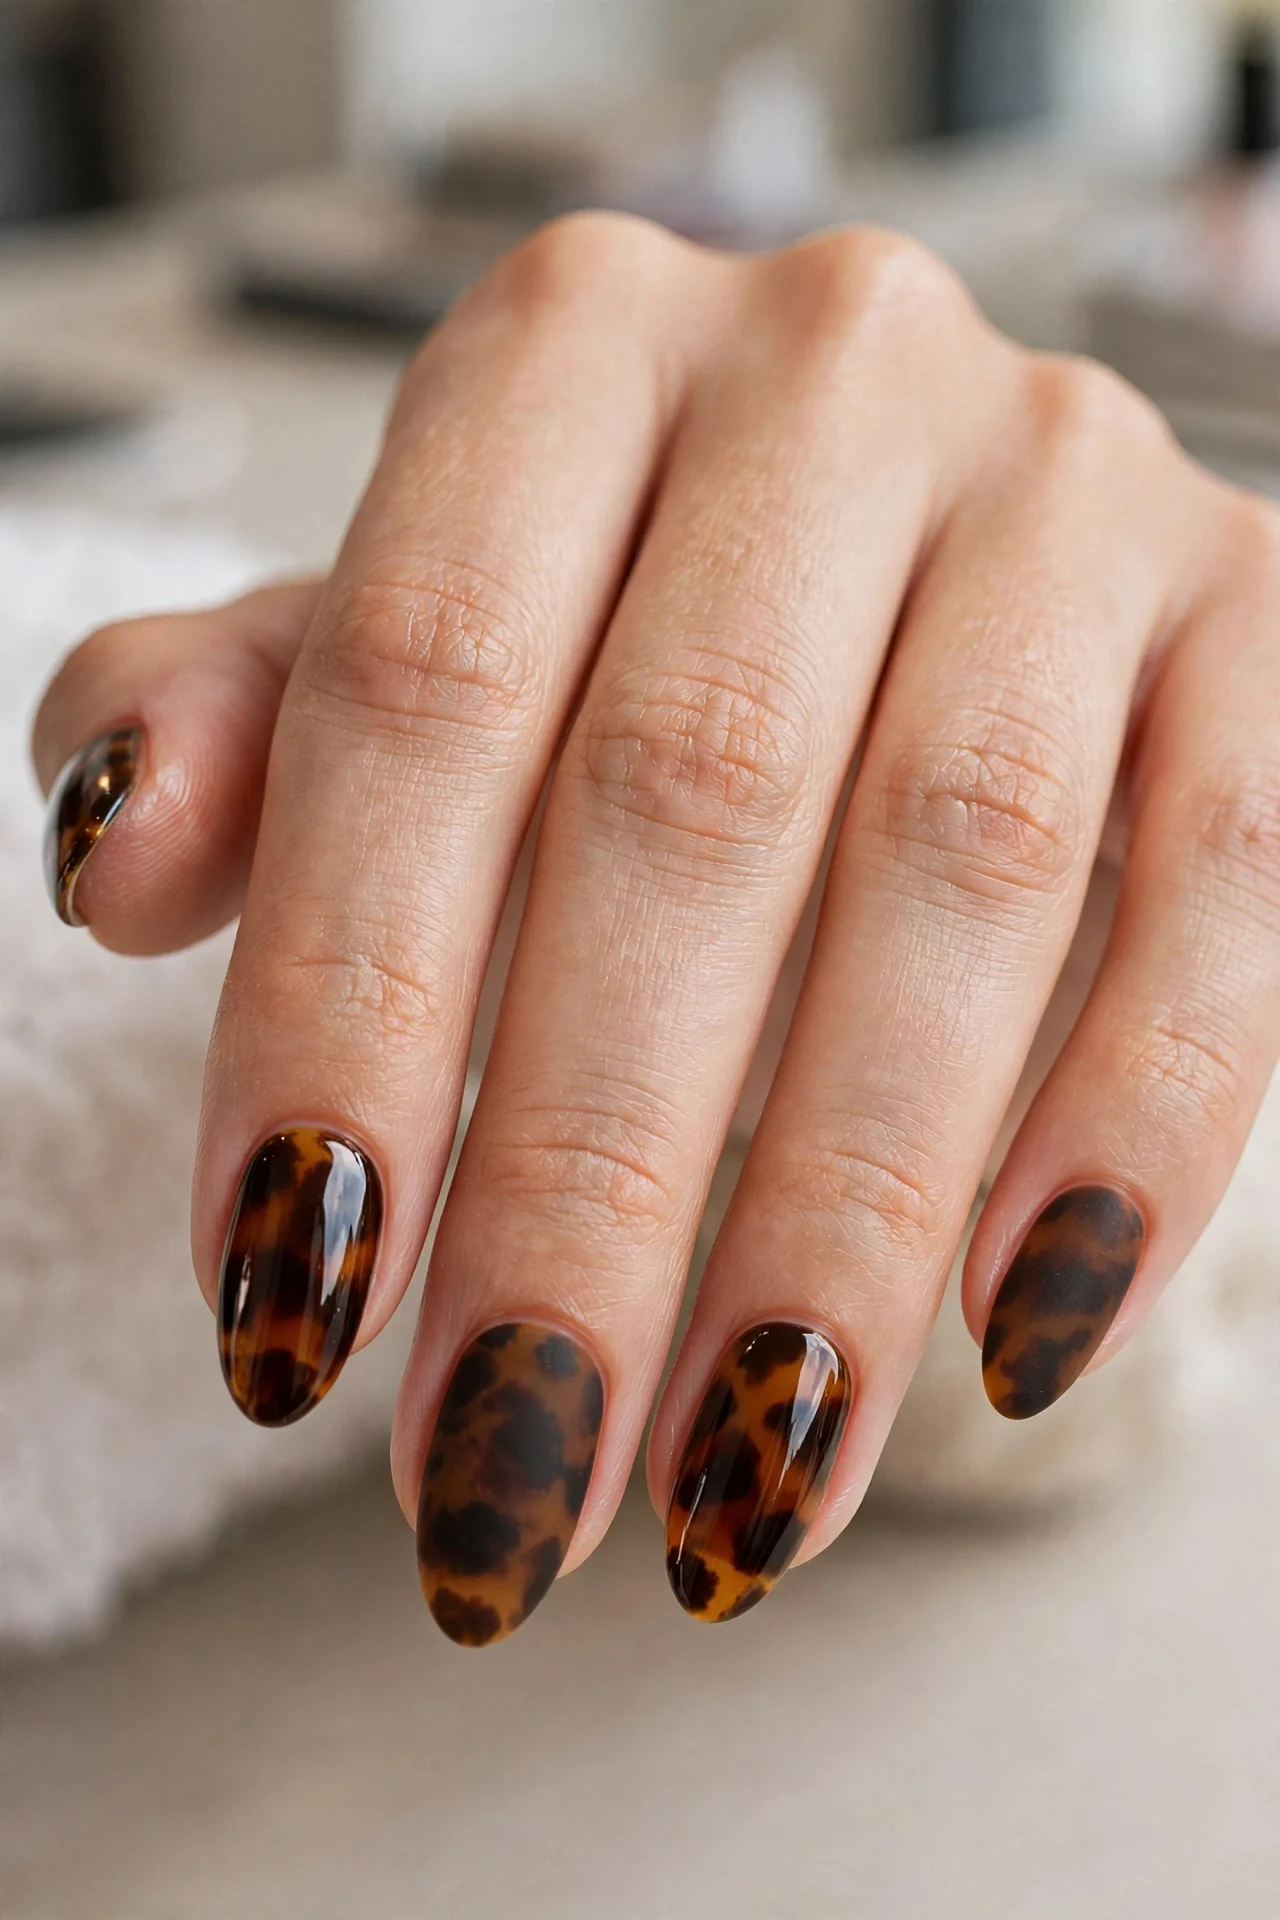
Texture contrast takes tortoiseshell nails from pretty to editorial. In this design, most nails wear the classic amber tortoise under a velvety matte top coat, while one or two accent nails keep the high-gloss finish — or the pattern itself alternates matte and shiny sections. The matte version looks like brushed suede and feels incredibly autumnal, while the glossy accents catch the light as you move. It is a fashion-forward choice that pairs perfectly with leather jackets and chunky knits, and it stands out in a season full of shine.
- Complete the full tortoise marbling and cure as usual first.
- Apply matte top coat to all nails except your chosen glossy accents.
- For extra artistry, ask for matte tortoise with glossy black outline details.
- Avoid oils on matte nails — they can create shiny patches over time.
Salon wording: “tortoiseshell set, matte finish, with two glossy accent nails.” Note that matte top coats show every ridge, so ask your tech for an extra smoothing layer or a ridge-filling base if your nails are uneven. At home, matte top coat goes over fully dry (or cured) tortoise art — apply it thinly and don’t touch up, since rebrushing causes streaks. Matte finishes typically show wear a few days earlier than glossy ones, so this is a two-week look; keep a matte top coat on hand for mid-wear refreshes.
Gold-Flecked Tortoise Nails
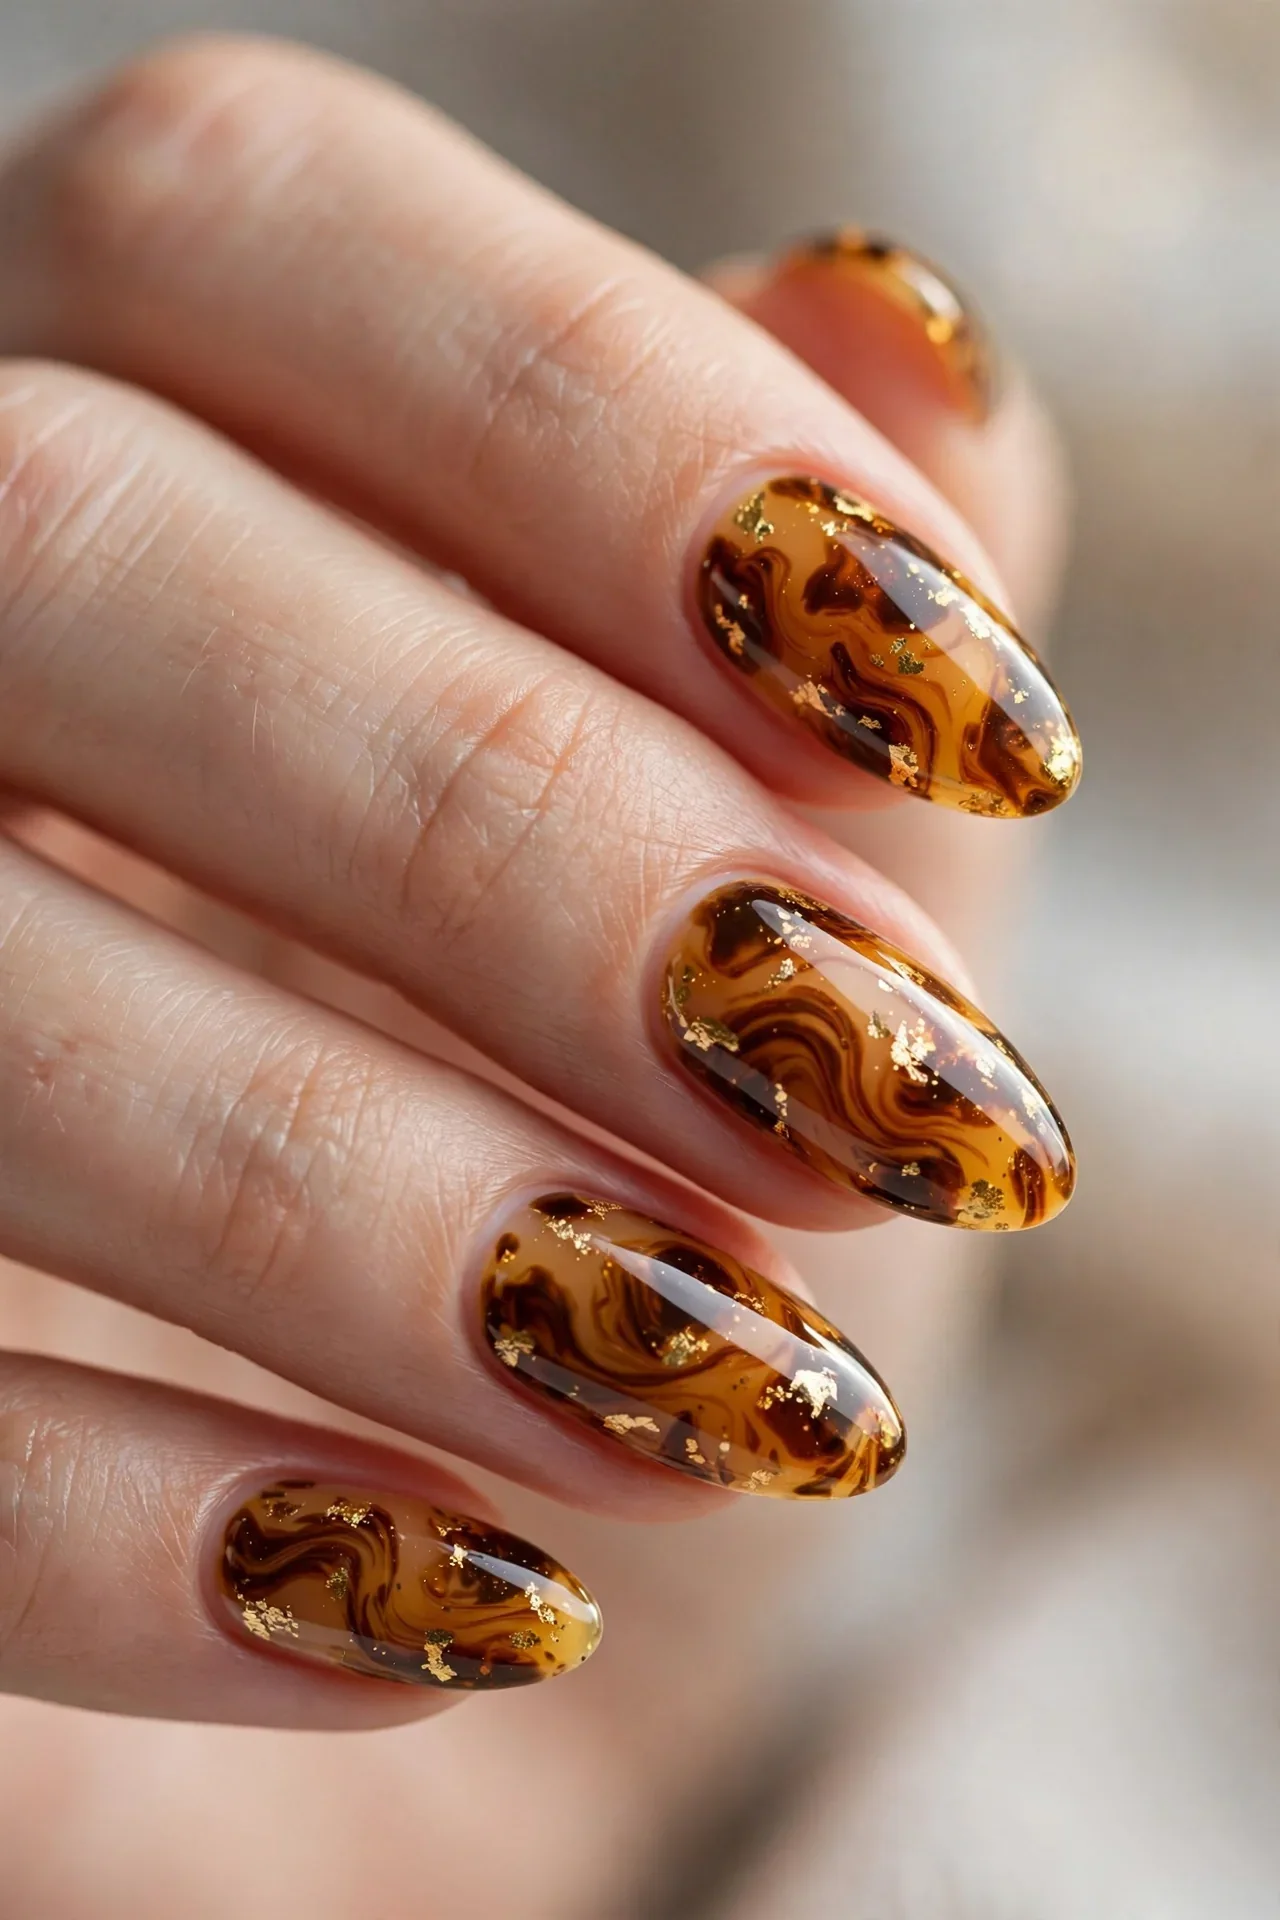
Gold flecks scattered through tortoiseshell marbling look like sunlight caught in amber — pure fall luxury. Tiny pieces of gold foil or metallic flakes are pressed into the still-tacky tortoise layers, then sealed under gloss so they sit flush and catch light from every angle. The gold elevates the design from casual-cozy to evening-ready, making it perfect for holiday parties, weddings, or any night you want your nails to do the talking. It works on any nail length and flatters warm and neutral skin tones especially well.
- Marble your tortoise base and leave the final color layer slightly tacky.
- Press tiny gold foil pieces onto random spots with tweezers or a silicone tool.
- Focus flecks near the cuticle and center — avoid the free edge where lifting starts.
- Encapsulate with builder gel or two thick top coats so edges never catch.
Ask for “tortoiseshell with gold foil accents, encapsulated.” Encapsulation matters: loose foil edges cause lifting, so make sure your tech seals them fully — this is worth paying the nail-art upcharge for. DIY with regular polish: apply foil to tacky polish, press gently with a fingertip, then float two coats of top coat over the top without pressing the brush down. Keep nails away from harsh chemicals the first 24 hours while the seal fully hardens. This is a two-to-three-week showstopper.
Olive-Tinted Tortoise Nails
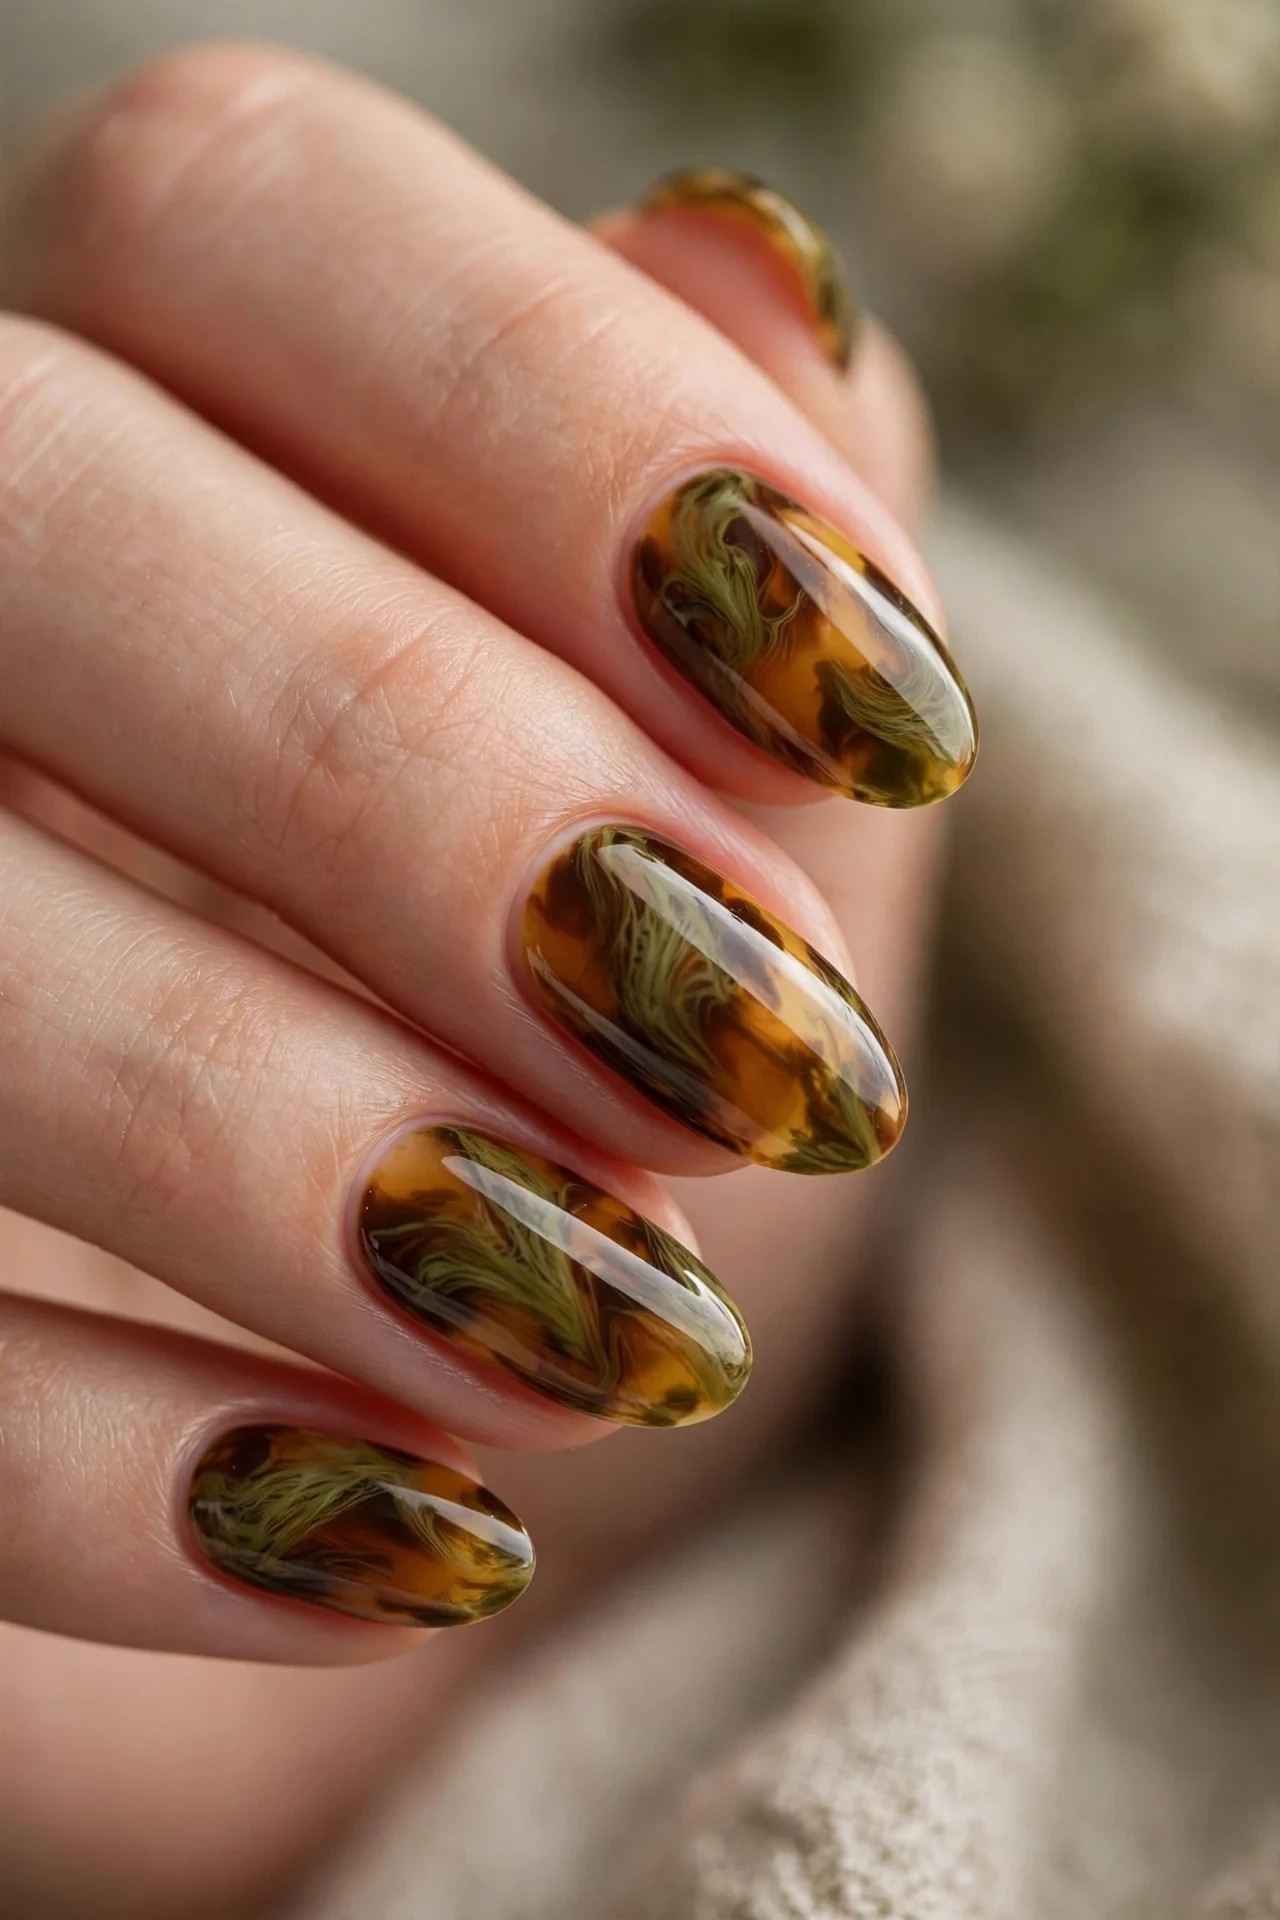
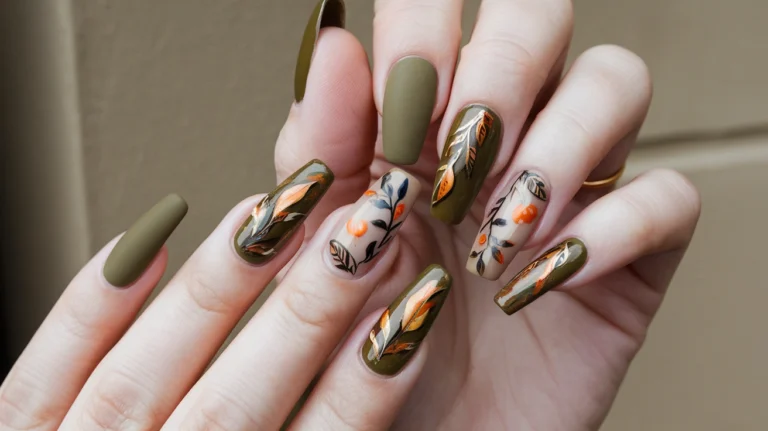
Here is the unexpected twist: tortoiseshell nails with an olive-green tint woven through the amber. The mossy green peeks between the honey and brown marbling like forest light, giving the classic pattern an earthy, fashion-editor feel. It is still unmistakably tortoise, but the green undertone makes it cooler, moodier, and perfect if standard amber feels too warm for your style. This shade story loves deep skin tones and looks stunning against cream, camel, and forest-green outfits — peak autumn palette.
- Marble the usual amber, honey, and dark brown tortoise base.
- While tacky, blend small amounts of olive or moss-green jelly into select areas.
- Keep green to about a third of the nail so the tortoise identity stays clear.
- Seal with glossy top coat to unify the tones into one marbled flow.
Salon request: “tortoiseshell with olive-green marbling mixed in.” Bring a reference photo, since the green-to-amber ratio is a matter of taste — most techs will start subtle and build up. At home, sheer olive jelly polish layered over the amber base gives the most natural blend; opaque olive will look painted-on instead of marbled. Because green pigments can stain slightly, don’t skip the base coat. This design also layers beautifully with the deep green shades trending this season, as seen in roundups of fall 2026 nail trends from fashion editors.
Tortoise with Black Half-Moons
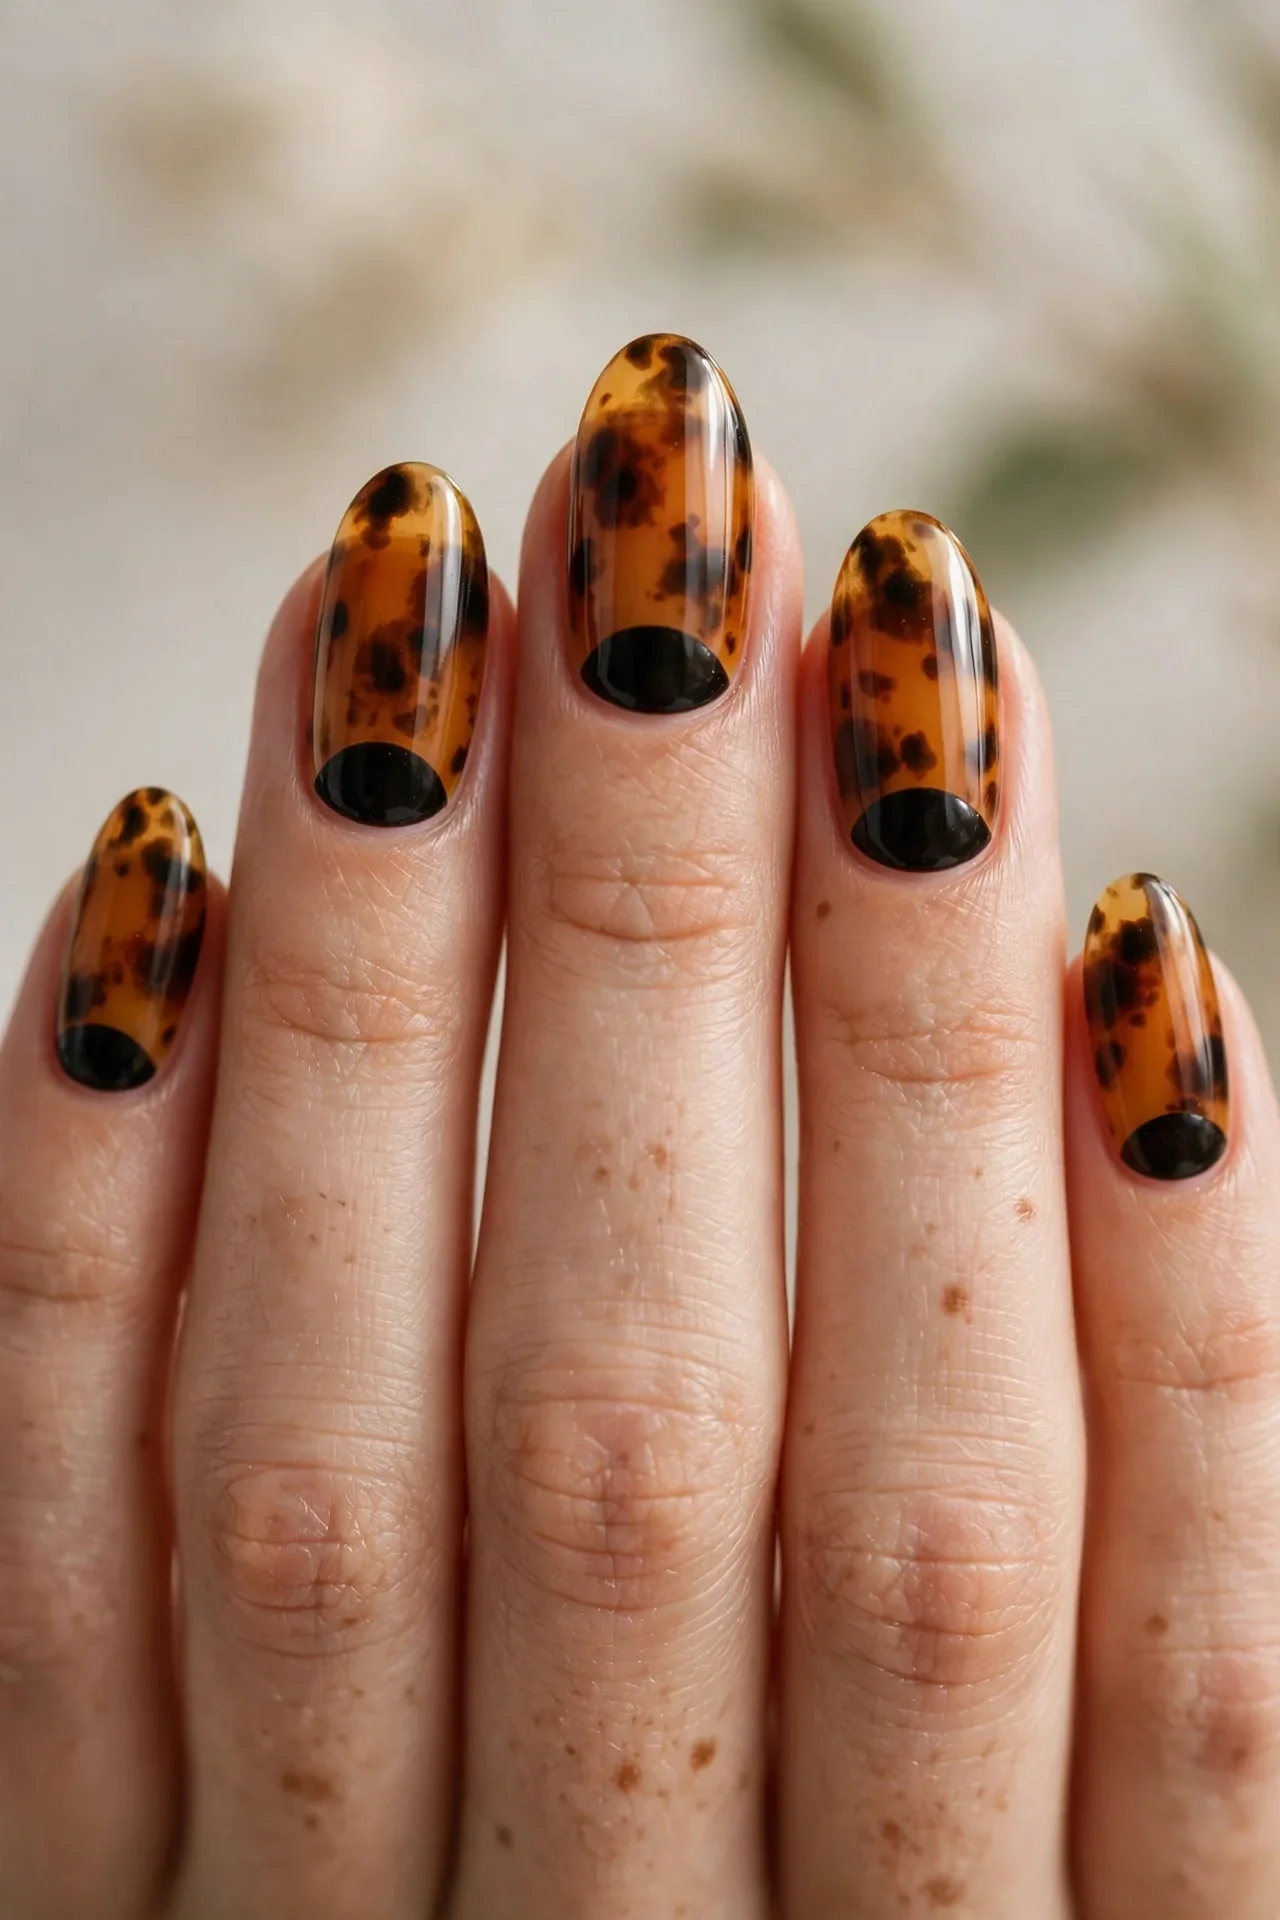
Half-moon details give tortoiseshell nails a vintage-glam edge. The nail wears full amber tortoise marbling, but the half-moon at the cuticle is painted solid black (or left as a crisp negative-space crescent) for a striking frame. The contrast makes the tortoise pattern pop and gives the manicure a deliberate, designed feel — like the pattern was set inside a frame. This look suits medium to long nails best, where the half-moon has room to read clearly, and it is a gorgeous choice for evening events.
- Apply the tortoise marbling across the full nail and let it set.
- Paint a clean half-moon at the cuticle in solid black or deep espresso.
- Use a small curved brush or half-moon guides for a crisp edge.
- Seal with glossy top coat, capping the free edge to prevent chips.
Tell your tech: “full tortoise with black half-moons at the cuticle.” The half-moon is painted after the marbling, so book art time accordingly. DIY trick: stick half-moon guides (or hole-reinforcement stickers) at the cuticle, paint the tortoise over the whole nail, then peel the guides and fill the crescent with black — or leave it bare for negative space. Grow-out is graceful because the cuticle area is the last place to show regrowth lines. Expect a solid two to three weeks of wear.
Burgundy-Melt Tortoise Nails
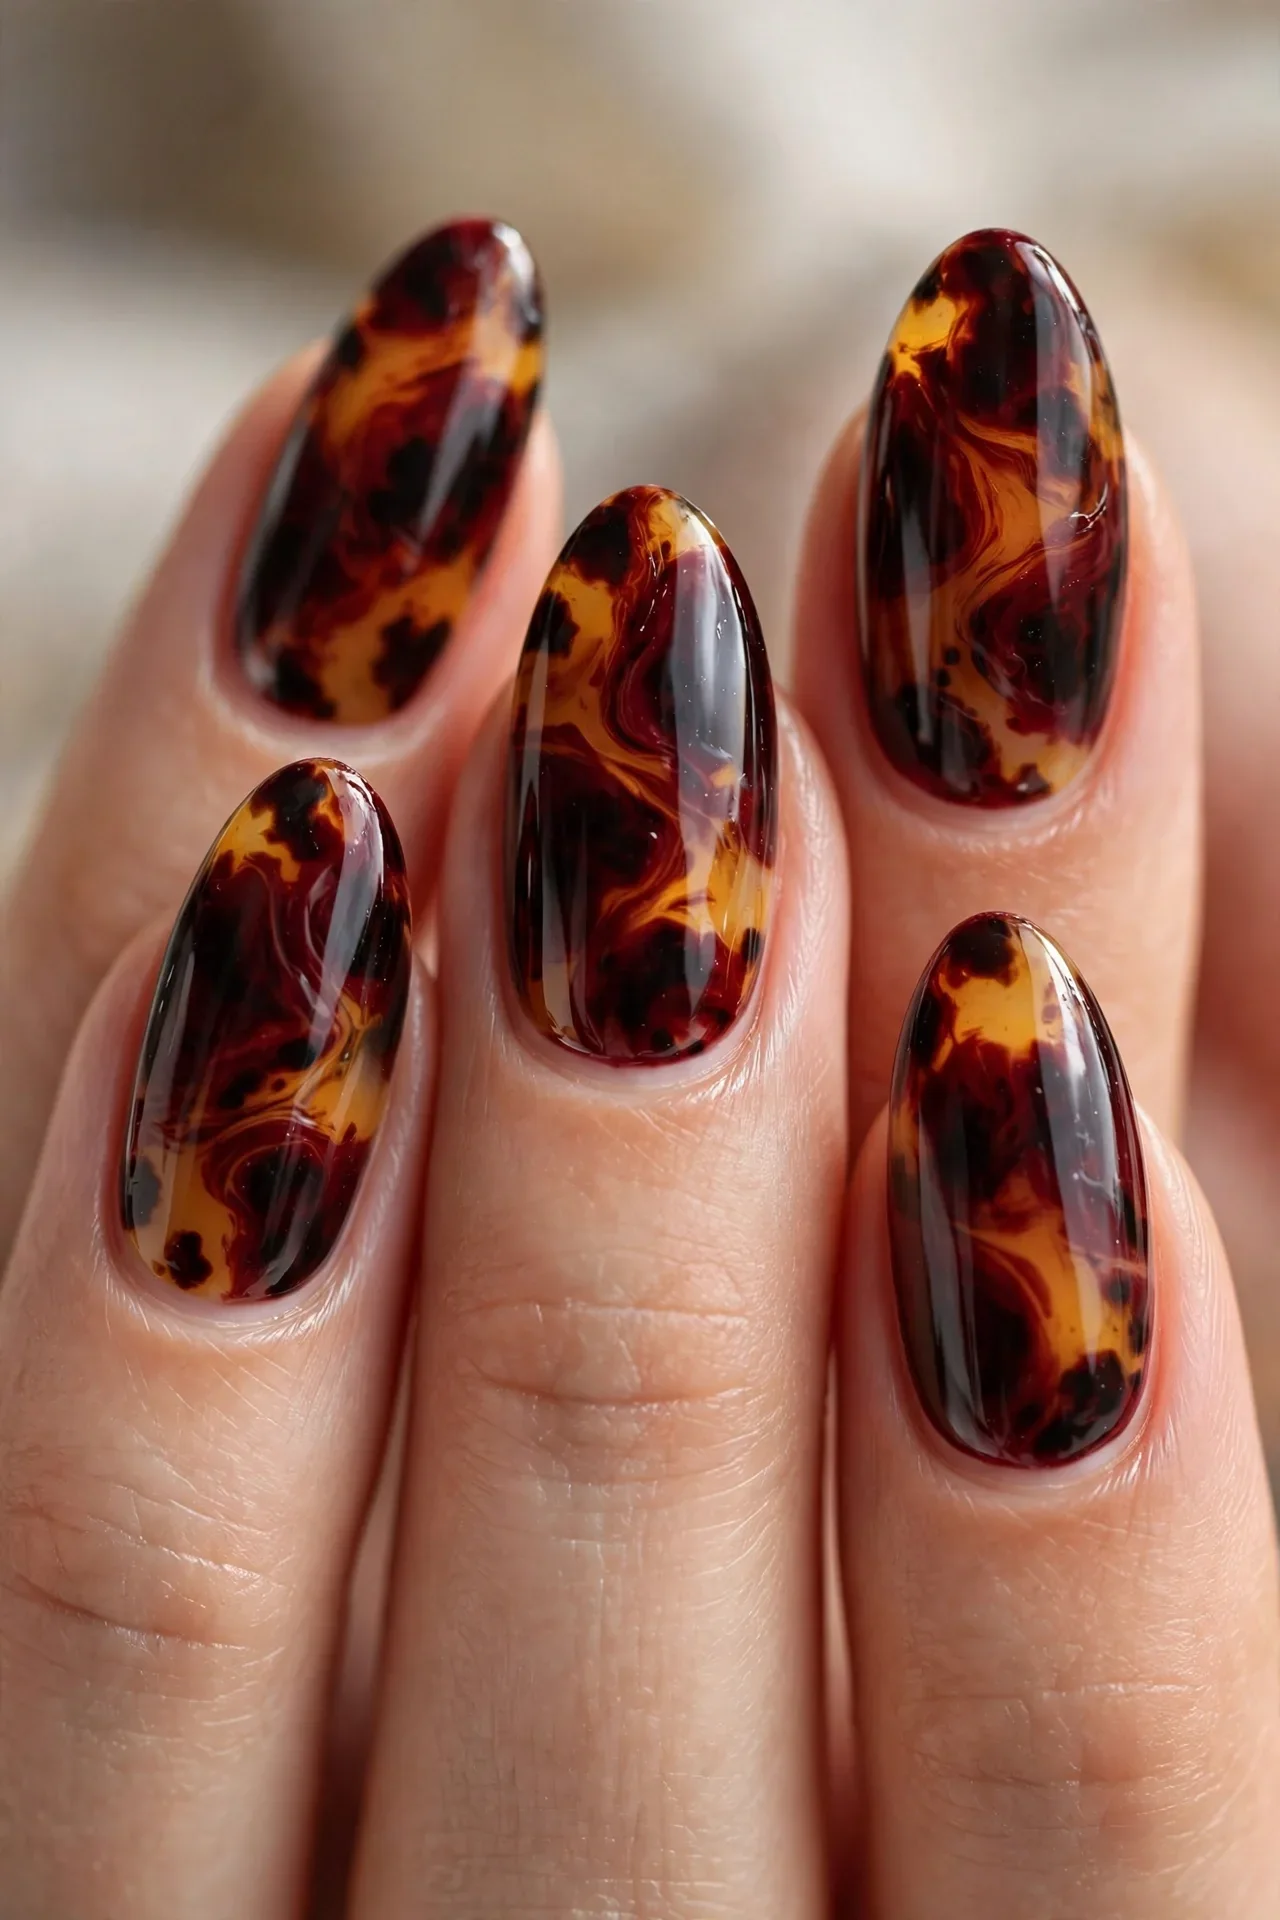
The final design melts deep burgundy into the classic tortoise palette, creating a wine-dark marbling that feels made for fall nights. Oxblood and black-cherry tones swirl through the amber and honey, giving you a manicure that reads tortoiseshell from a distance but reveals its berry depth up close. It is romantic, a little dramatic, and pairs flawlessly with the season’s burgundy fashion moment — think leather boots, wool coats, and dark lipstick. If you love deep reds, this is your tortoise.
- Lay down a sheer amber base as the warm foundation.
- Marble in burgundy, oxblood, and black-cherry alongside the usual browns.
- Feather the burgundy edges into the amber so the colors melt, not stripe.
- Finish with high-gloss top coat to deepen the wine tones.
This design sits right at the intersection of two huge fall trends, so if you already love deep reds, browse our 10 Autumn Ember Nails for more burnt, glowing shades in the same family. At the salon, say: “tortoiseshell marbled with burgundy and oxblood tones.” Dark reds are forgiving to apply but can stain, so a solid base coat is non-negotiable at home. Burgundy pigments also fade slightly faster in sunlight — a UV-protective top coat helps. Wear time is the usual two to three weeks in gel, and the dark palette hides tip wear beautifully.
Dramatic Stiletto Tortoise Nails
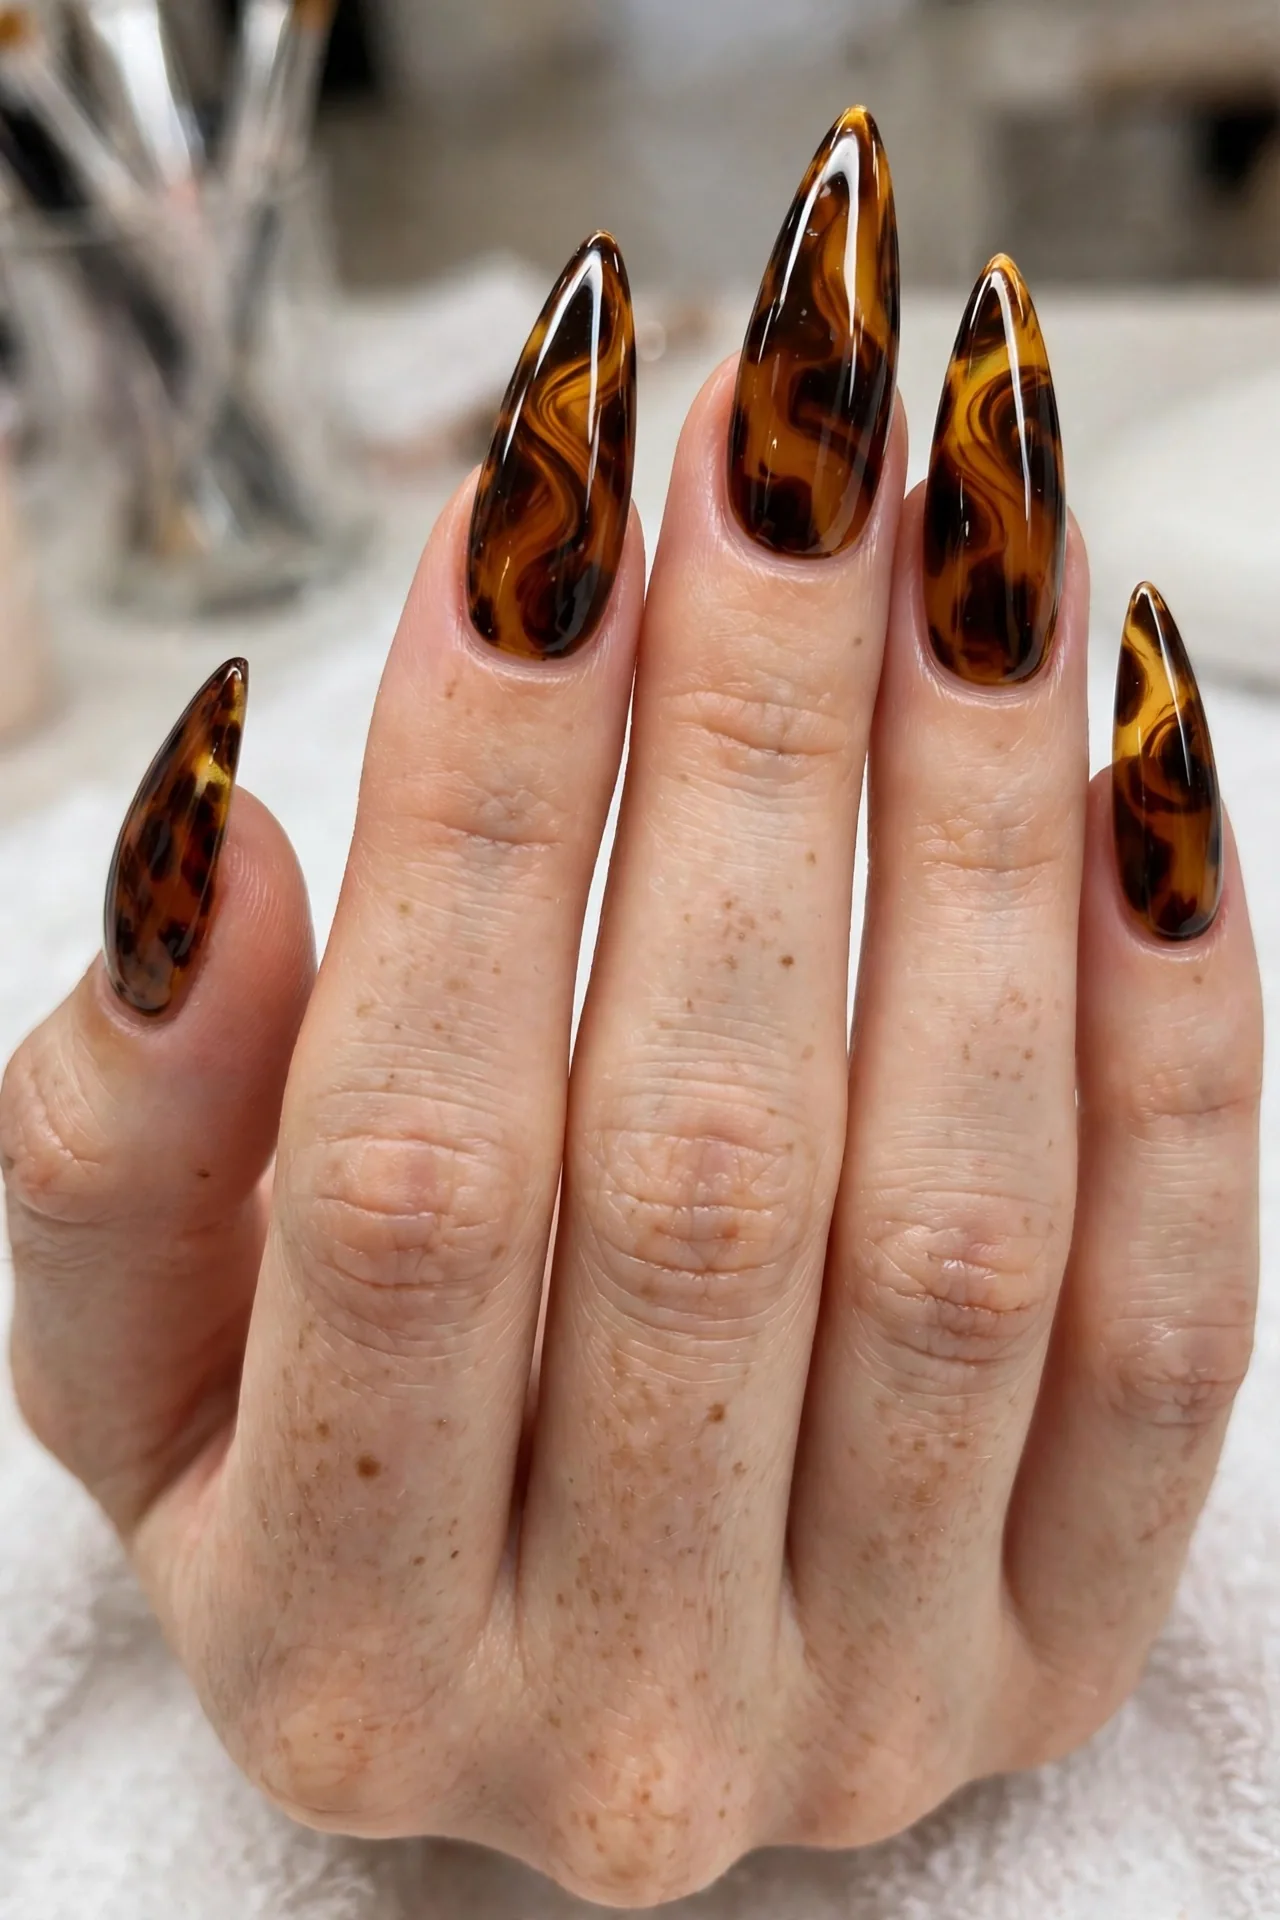
Take the classic amber tortoise and put it on long, sharp stiletto nails for a manicure with serious main-character energy. The extended length gives the marbling room to swirl and drift, so the honey, caramel, and near-black blotches stretch into flowing, flame-like patterns you simply cannot achieve on short nails. This look is pure drama — editorial, fierce, and perfect for nights out, photoshoots, or anyone who treats nails as statement jewelry. It suits bold dressers and pairs beautifully with chunky gold rings. Fair warning: stilettos demand commitment, so this one is for the experienced long-nail wearer.
- Build length with sculpted gel or stiletto tips before any color work begins.
- Marble amber, honey, and dark brown across the full extended nail bed.
- Stretch the darker blotches toward the tip for an elongated flame effect.
- Seal with a flexible glossy top coat that will not crack at the apex.
At the salon, say: “long stiletto set with full amber tortoiseshell marbling.” Ask for slight apex reinforcement since stilettos take more stress — your tech may suggest a hard gel overlay for extra structure. At home, press-on stilettos make this far more achievable: apply the tips, then marble with jelly polishes and seal with gloss. Expect two to three weeks in gel if you treat them kindly; use your fingertips, not your nail tips, for daily tasks. Keep a small tube of nail glue on hand for the rare break, and book fills to keep the shape razor sharp.
Tortoise Ombré Nails
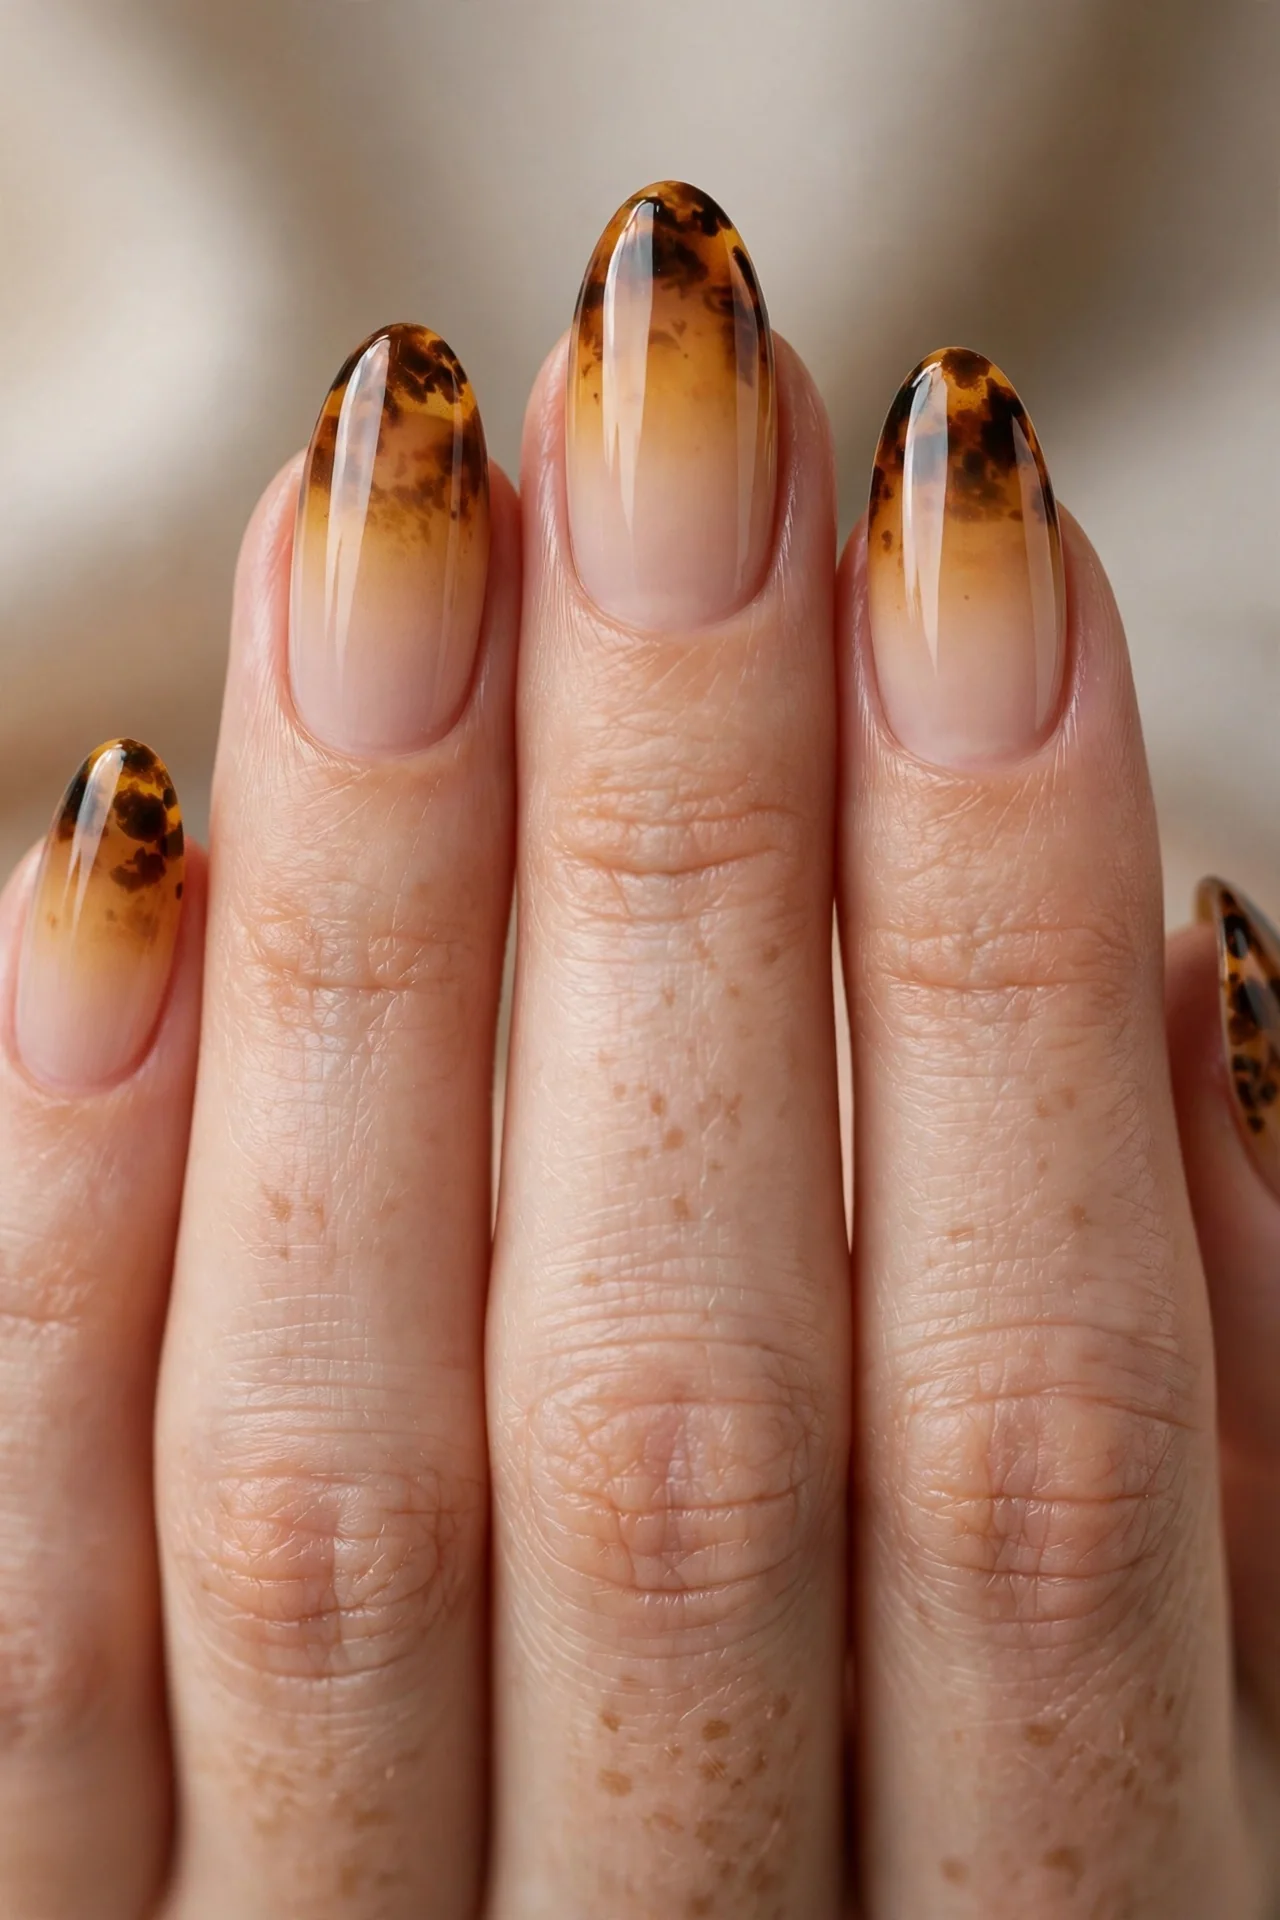
A tortoise ombré fades from a soft nude at the cuticle into full amber tortoise marbling at the tip — like a sunset melting into the classic pattern. The gradient gives you all the warmth of tortoiseshell with a softer grow-out, since regrowth at the cuticle blends invisibly into the nude base. It flatters every nail shape and is especially lovely on medium almond or coffin nails, where the fade has room to breathe. If you love tortoise but find the full pattern a little too bold, this is the compromise that never feels like a compromise.
- Apply a sheer nude base over the entire nail and let it set fully.
- Sponge amber jelly polish across the middle third in thin gradient layers.
- Marble brown and black tortoise blotches only across the tip third.
- Blend the transitions with a dry clean brush before sealing glossy.
Salon wording: “tortoiseshell ombré, nude cuticle fading to tortoise tips.” Most techs will airbrush or sponge the fade — airbrush gives the smoothest gradient, sponging gives the most texture. DIY with a makeup sponge: dab the amber jelly in thin passes, rebuilding slowly until the fade looks seamless. Ombré is forgiving because any unevenness reads as part of the gradient. This grows out beautifully, making it one of the lowest-maintenance tortoise styles in this roundup — simply reapply glossy top coat weekly to keep the fade looking fresh.
Negative-Space Tortoise Clouds
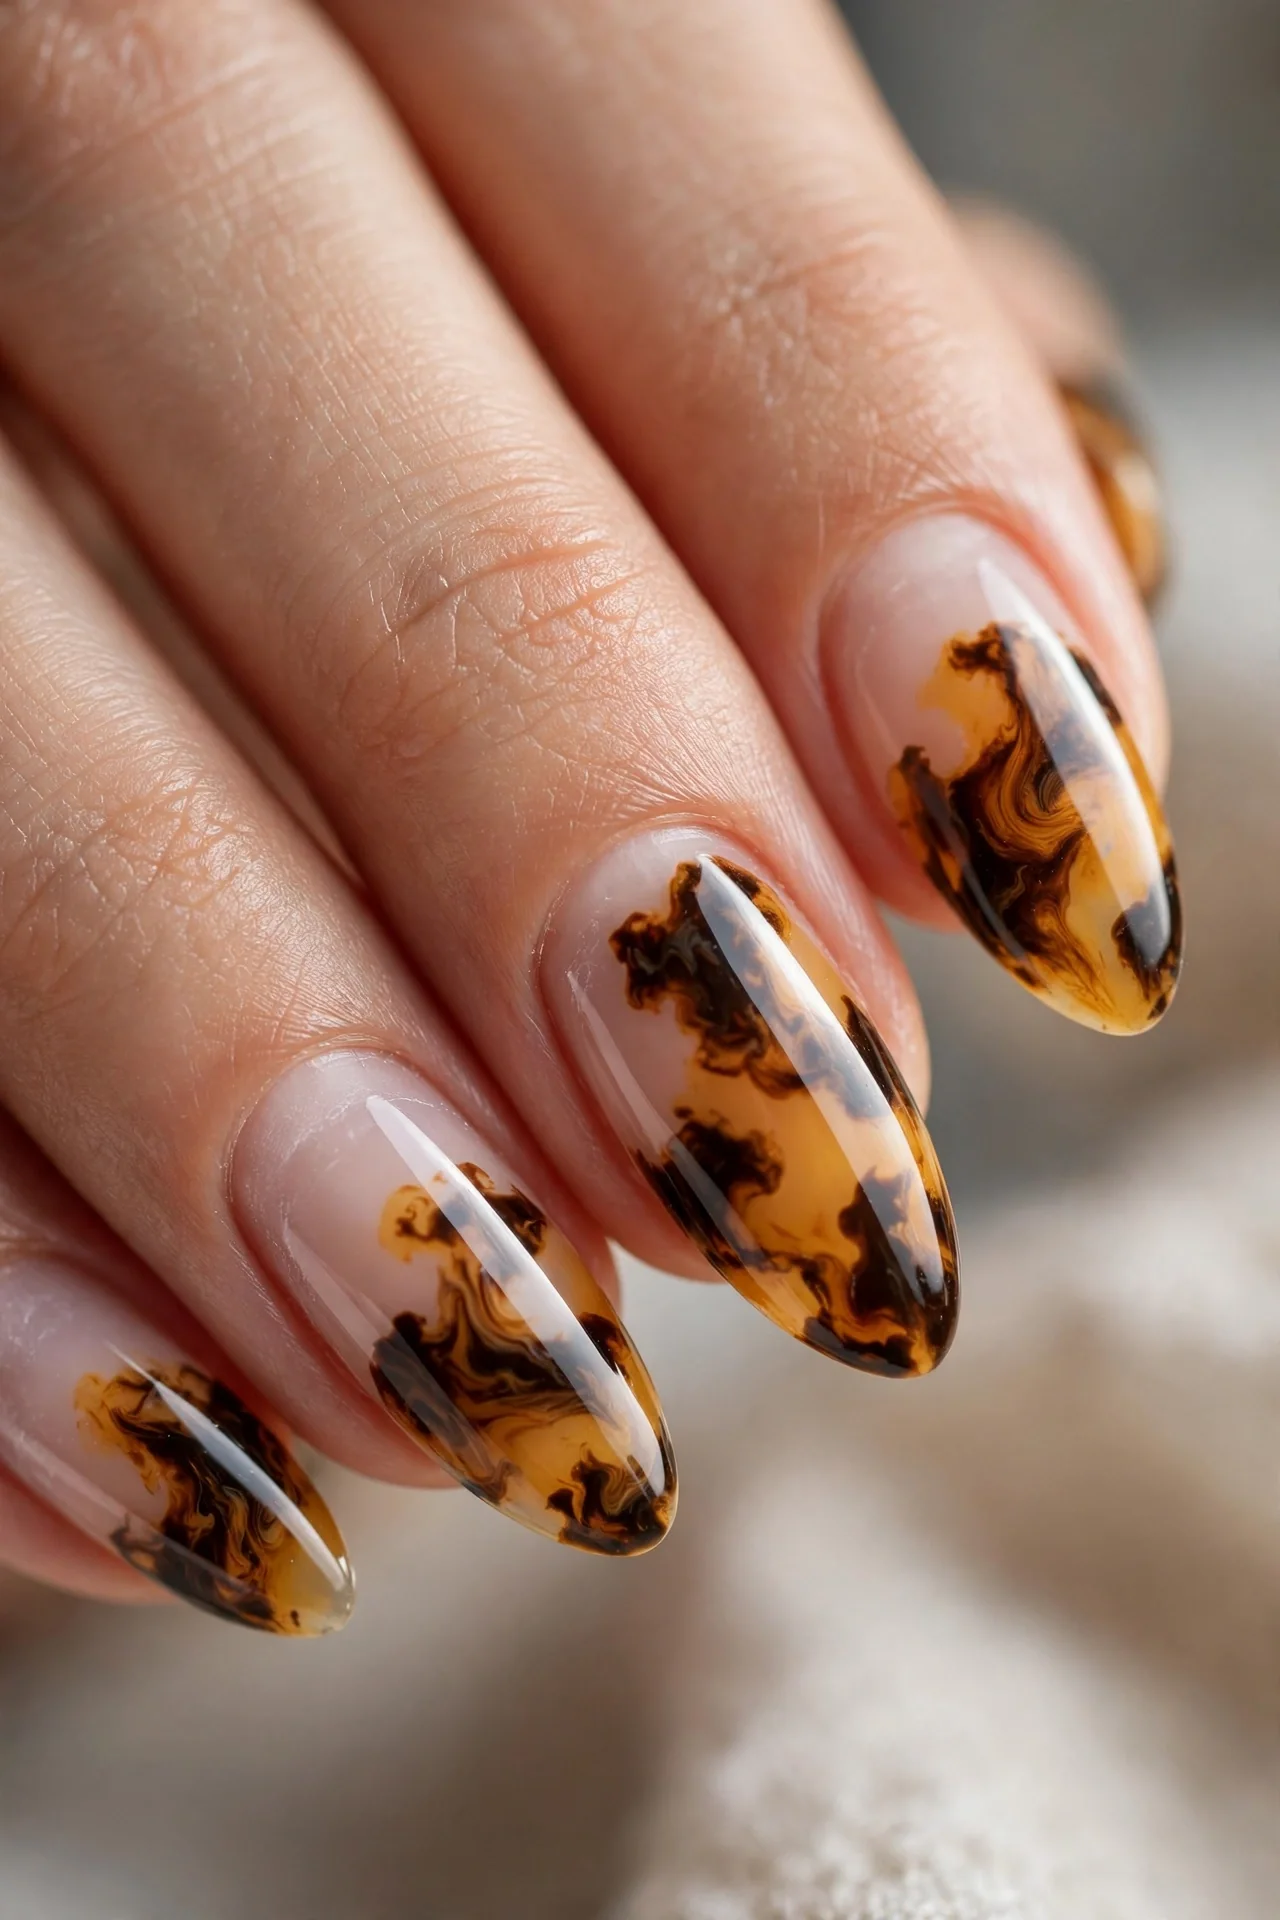
Negative-space tortoise keeps patches of your natural nail bare and lets clouds of amber, honey, and espresso marbling drift across them like leaves on water. The bare sections lighten the whole look, making it feel modern, airy, and slightly editorial — a refreshing break from the heavy all-over pattern. It works best on medium to long nails, where the negative space has room to breathe, and it pairs gorgeously with minimal gold rings. This is the design for tortoise lovers who want the season’s biggest trend with a minimalist twist.
- Start with a clear strengthening base and no colored foundation layer.
- Dab tortoise marbling in irregular clouds, leaving open negative space.
- Vary the cloud placement on each nail so no two look identical.
- Seal with a glossy top coat over everything, including bare sections.
Ask your tech for “tortoiseshell clouds with negative space” and show a reference photo, since the amount of bare nail is a style choice. DIY: use a small piece of sponge or a dotting tool to stamp the marbling on, then feather each edge with a drop of clear polish. Because the bare sections show your natural nail, keep cuticles tidy and nails buffed smooth before you start. Grow-out is nearly invisible — new growth simply extends the negative space — so this stretches a full three weeks with zero awkward phase.
Pearl-Glazed Tortoise Nails
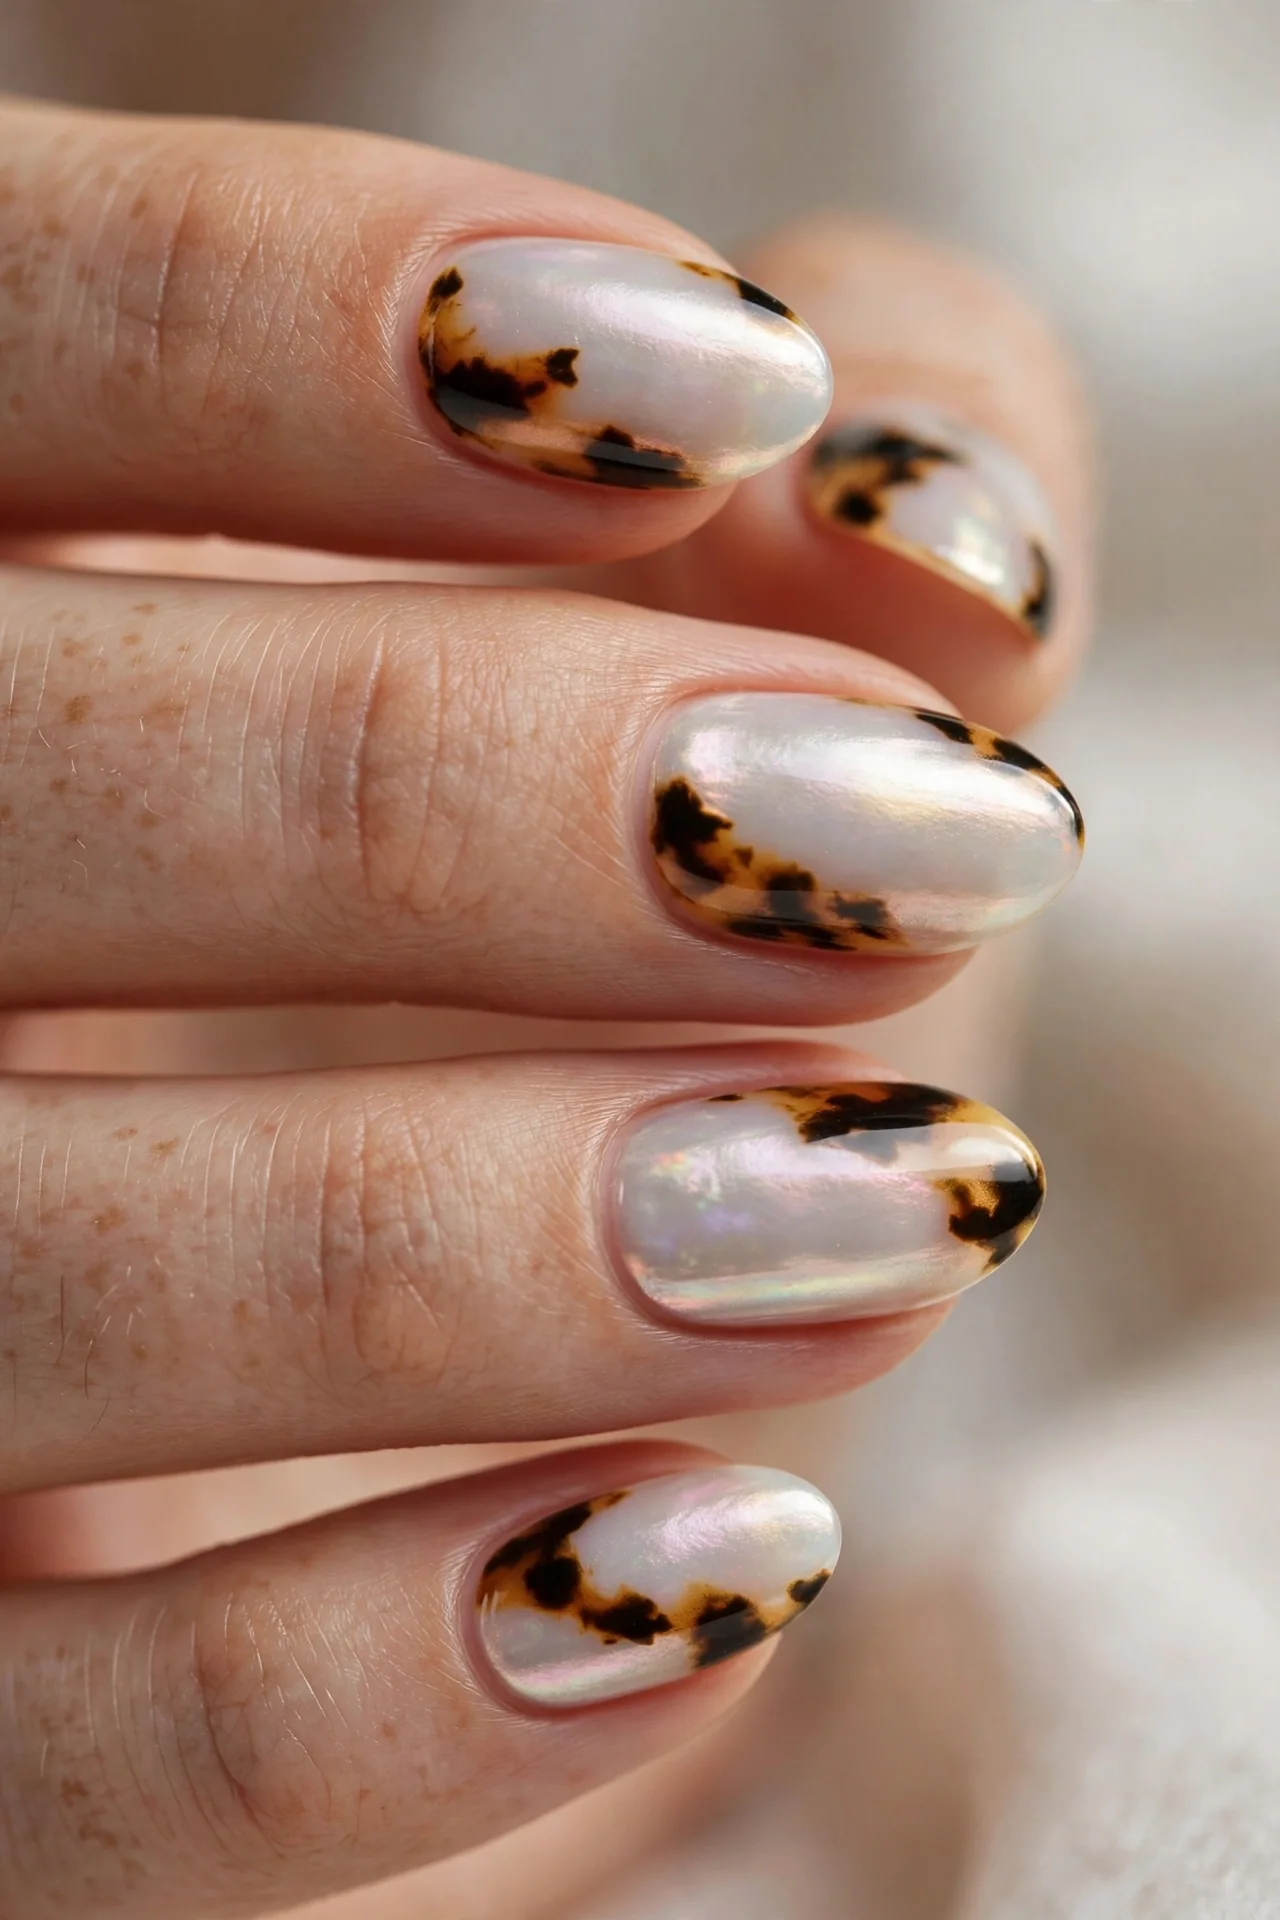
Brush a pearlescent chrome glaze over classic tortoise marbling and you get nails that look dipped in liquid honey with a moonlit sheen. The chrome layer softens the contrast between the amber and dark blotches, adding a dimensional, almost opalescent glow that shifts as your hands move. It keeps every bit of the tortoise identity while adding the glazed finish that dominates this year’s nail conversation. Medium to long almond nails show the glow best, and the finish reads luxe in daylight and candlelight alike — equally at home at the office and at evening events.
- Complete full tortoise marbling and cure the color layers fully.
- Rub pearl or white chrome powder over the tacky no-wipe top coat layer.
- Buff the chrome lightly and evenly for a milky, seamless veil.
- Lock it in with a final no-wipe glossy top coat to preserve the shine.
Salon request: “tortoiseshell with pearl chrome glaze on top.” The key is a no-wipe top coat before the powder — that is what makes the chrome adhere — followed by a final sealing top coat. DIY chrome powders work over gel with a UV lamp; over regular polish the effect is much harder to achieve, so this one favors gel or a salon visit. Chrome finishes can dull with heavy hand sanitizer use, so moisturize instead where you can. Expect two to three weeks of wear, and reapply top coat at day ten to keep the glaze luminous.
Tortoise-and-Leopard Mix Nails
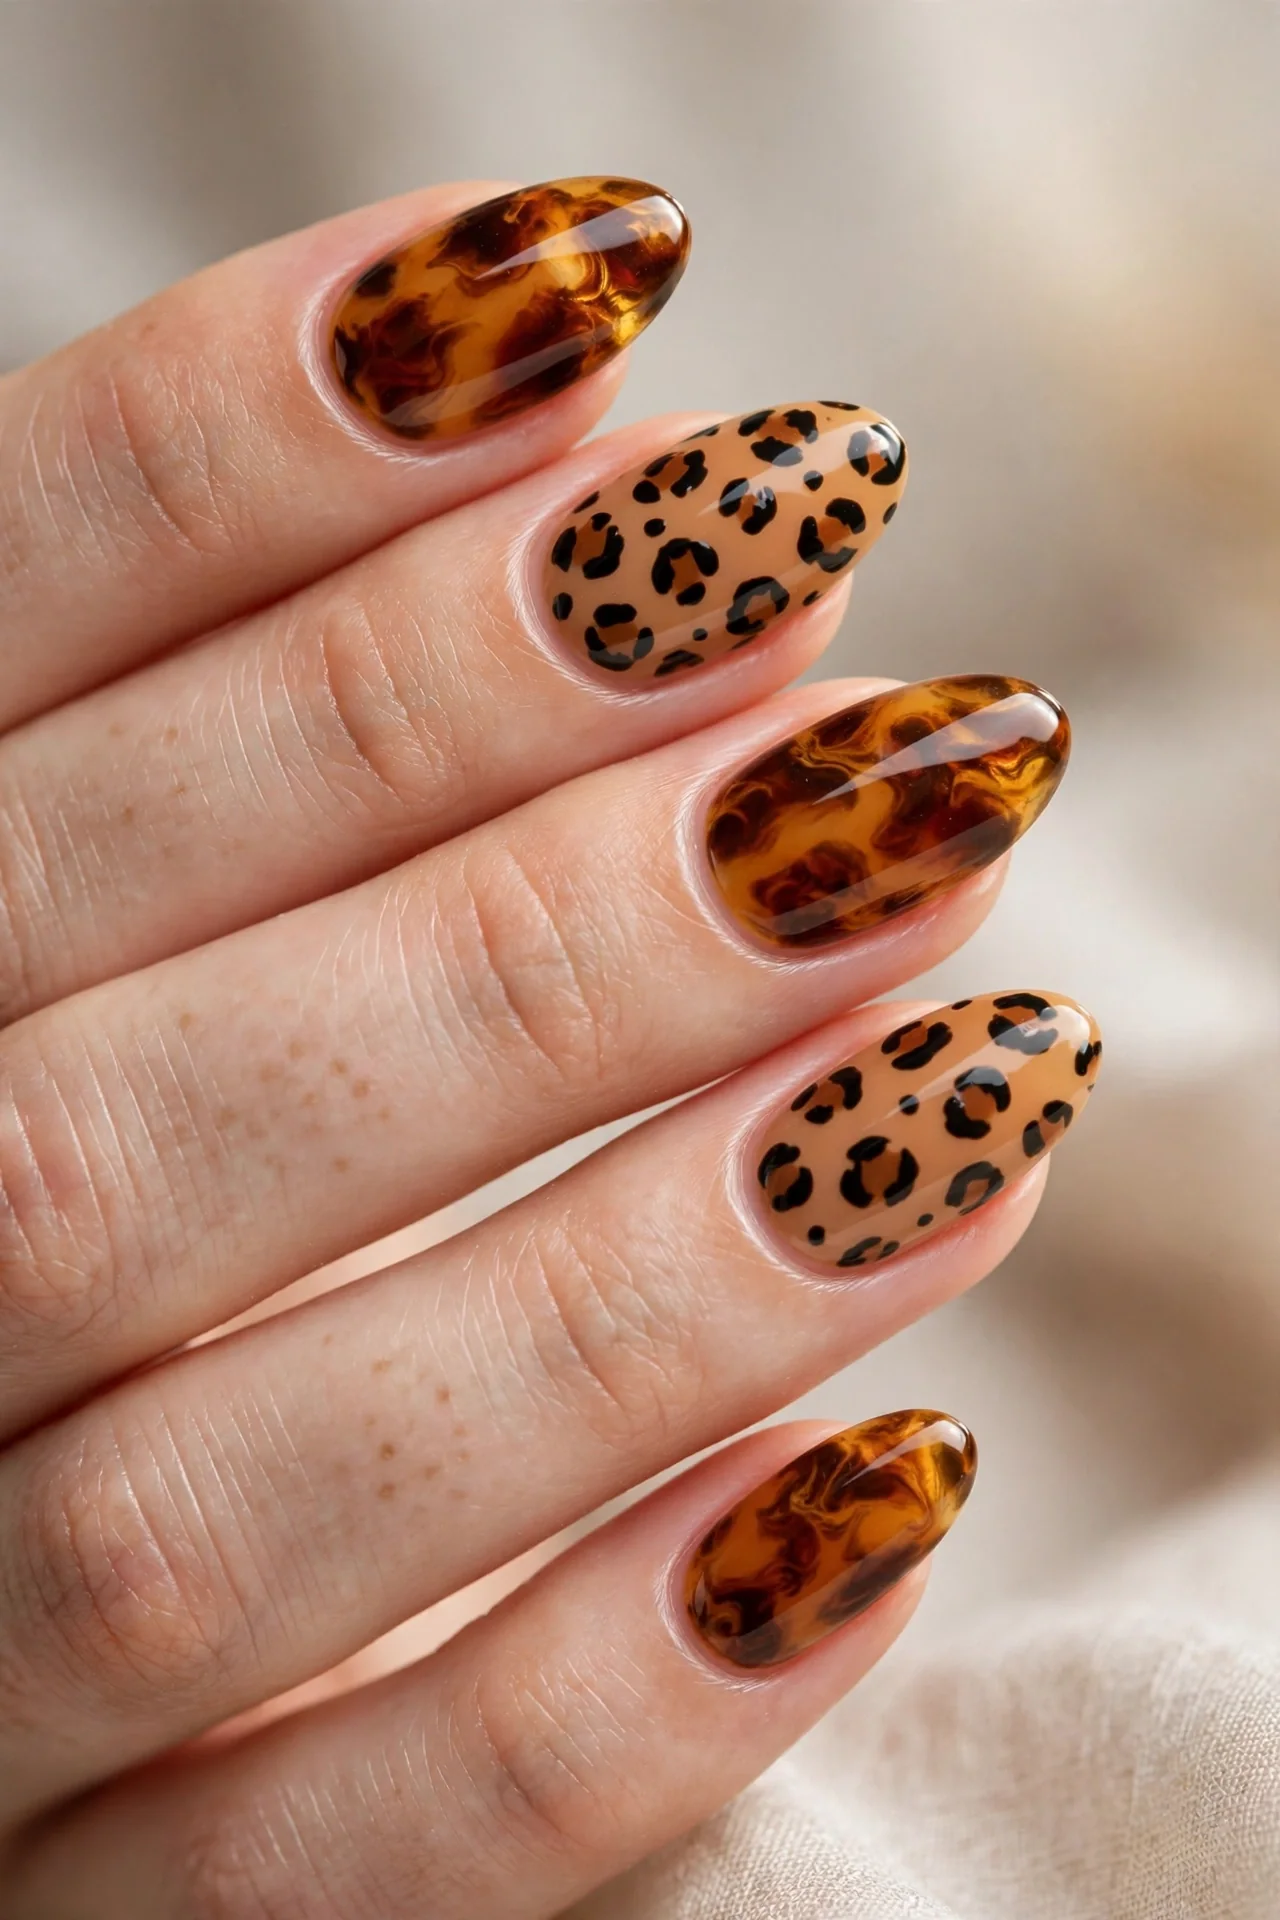
Two animal prints, one manicure: alternate tortoiseshell marbling with leopard-spot accent nails for a maximalist fall set that refuses to be ignored. The prints share the same amber-brown-black palette, so they read as one cohesive story rather than a clash — tortoise for warmth, leopard for wildness. This pairing looks best on medium to long nails, where each print gets its own canvas, and it thrives on confidence. Wear it with an all-black outfit and let your nails be the entire accessory.
- Marble full tortoise on alternating nails (thumb, middle, pinky).
- Paint the remaining nails in a warm caramel or nude base.
- Stamp or hand-paint irregular black leopard spots over the base.
- Add a tiny amber dot inside a few spots to tie both prints together.
Tell your tech: “tortoise nails with leopard-print accents in matching tones.” Matching the leopard base color to one of your tortoise mid-tones is what makes this look intentional — ask your tech to pull the caramel shade straight from the marbling palette. DIY: leopard spots are beginner-friendly; just paint irregular C-shapes and dots, since no symmetry is needed. Both prints are busy enough to hide tip wear and small chips, so this is a durable two-to-three-week set that still looks deliberate as it grows out.
Conclusion
Tortoiseshell nails earned their fall 2026 crown honestly: no other pattern packs this much warmth, depth, and versatility into a single manicure, and every design above works whether you book a salon appointment or reach for jelly polishes at home. Start with the classic amber set if you are new to the trend, or jump straight to the gold-flecked or burgundy-melt versions when you want maximum impact. If this warm, moody palette has you craving more, our 10 Moody Plum Nail Ideas explores the season’s deep purple side with the same cozy energy. Pick your favorite of the ten, save a reference photo, and show your nail tech — your warmest fall manicure yet is one appointment away.
More nail ideas you’ll love: 15 November Nail Colors and 15 Cherry Red Nail Ideas.