15 Bambi Nails for Short Nails: The Sweet Fawn Print
Introduction
If you’ve searched for bambi nails short nails and worried the sweet fawn print needs long claws to look right, here’s the good news: the deer-spotted manicure is one of the most flattering trends you can wear on short nails. Fawn spots are tiny by nature, so they scale beautifully onto shorter lengths — no stamping plate gymnastics, no cramped designs. In this guide you’ll find 15 fawn-print ideas designed specifically for short nails, from classic cocoa-and-cream spots to velvet, chrome, and gold-foil versions, each with salon request wording and DIY steps so you can book or paint with confidence. Bambi nails sit right in fall’s animal-print moment, and they pair beautifully with the warm-toned manis in our 10 October Nail Colours 2026 roundup. As InStyle’s 2026 fall nail trends confirm, soft wildlife-inspired prints are one of the season’s biggest stories — so your timing couldn’t be better. Scroll on for the full herd.
Bambi Nails for Short Nails: The Classic Fawn Print
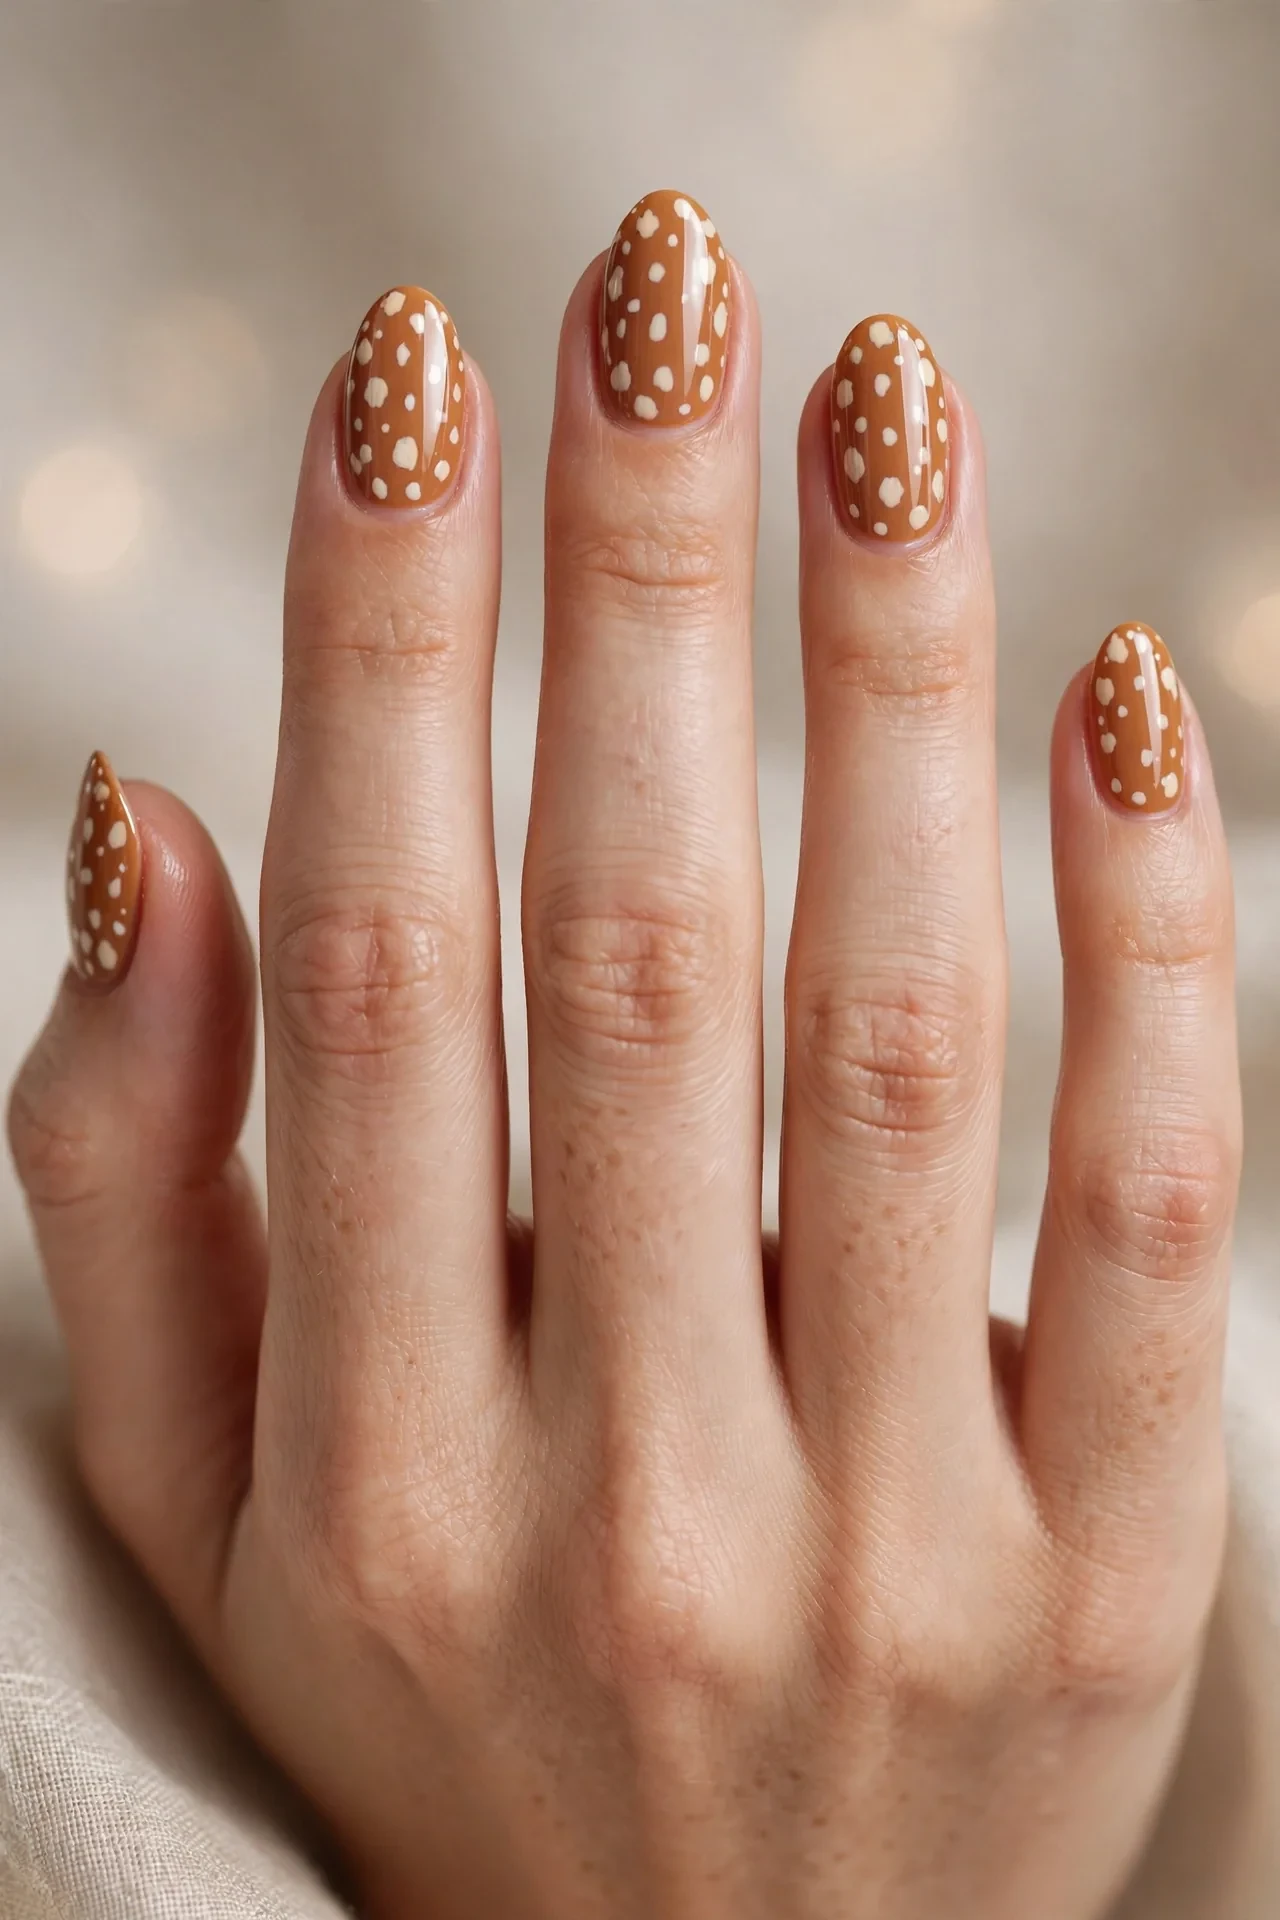
The original and still the loveliest: a warm caramel base scattered with soft ivory spots, just like a baby deer’s coat. On short nails this is pure magic — each nail becomes its own little fawn patch, and the spots stay perfectly proportioned because you only need four or five per nail. The caramel flatters every skin tone from fair to deep, and the ivory dots add brightness without screaming for attention. Wear it to the office, to brunch, to a fall wedding — it reads as playful but polished, and the warm palette glows beautifully under autumn light. The rounded-square shape keeps it neat and modern, and the high-gloss finish makes the spots look wet and freshly painted. It suits natural nails, short gel extensions, and BIAB alike, lasting through two-plus weeks of wear with barely any visible regrowth.
- Apply two coats of caramel polish as your base, curing each layer fully.
- Layer ivory spots with a small dotting tool, varying sizes for a natural fawn effect.
- Seal everything with a thick glossy top coat for that wet-look finish.
- Ask your tech for “fawn-print Bambi spots on caramel” if you want the salon version.
At home, start with a strengthening base coat and two thin coats of your caramel shade — warm toffee tones read most authentically deer-like. Once the base is completely dry (or cured, for gel), dip the small end of a dotting tool into ivory polish, blot once on foil, and press four to five spots per nail in a loose scatter, never in rows. Let them sit for a minute, then float a generous glossy top coat over the whole nail without dragging, which melts the spots slightly into the base for that soft, real-fawn look. Gel wear lasts 2-3 weeks with cuticle oil daily; regular polish needs a top-coat refresh around day five to keep the gloss alive.
Honey-Brown Fawn Tips on Tiny Squares
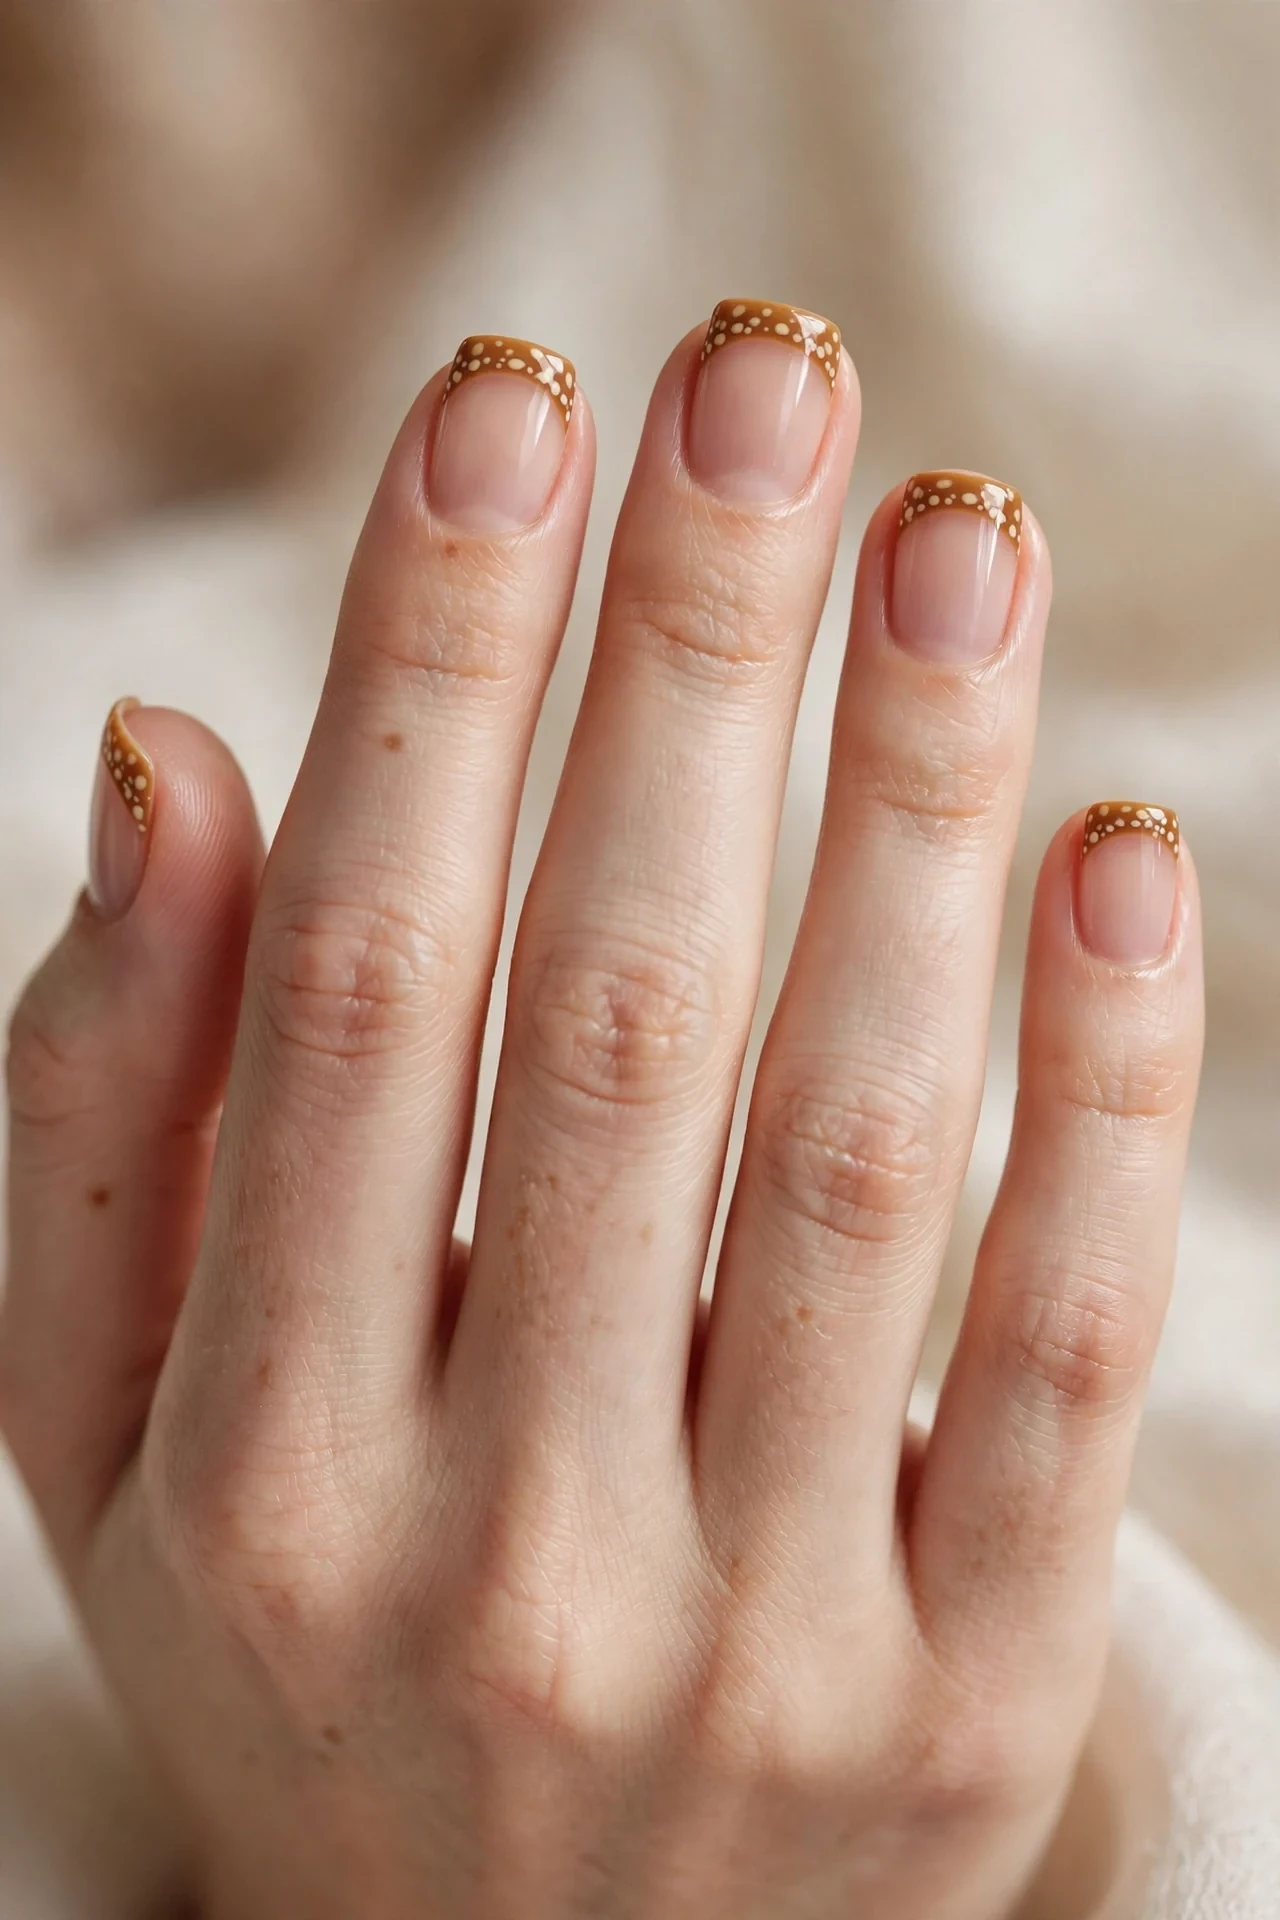
This design flips the classic: instead of spots all over, you get a honey-brown tip band flecked with fawn dots, leaving the nail bed bare and natural. On tiny square nails the effect is elongating — the bare base tricks the eye into seeing a longer nail while the spotted tip adds the Bambi sweetness. The honey shade is warm and golden, flattering medium to deep skin tones especially, and the micro spots keep it delicate rather than heavy. It’s a brilliant office-friendly way to wear animal print, understated enough for conservative workplaces yet distinctive enough to get compliments. The square shape with softly filed corners prevents the look from going too French-manicure formal, keeping it playful and modern.
- Apply a sheer nude base over the whole nail for a clean, even canvas.
- Layer a honey-brown smile-line tip using a thin striping brush.
- Seal the tip band with 4-5 cream micro-dots placed only along the smile line.
- Ask for “spotted French tips, honey-brown with fawn dots” at the salon.
For the DIY route, paint the smile line freehand with a small flat brush, or cheat with tip-guide stickers placed a third of the way down each short nail. Once the honey tips are dry, add the fawn dots with a pin-head or toothpick — cream polish works best against the honey base. Keep the dots clustered toward the center of the tip for a dappled effect, and cap the free edge with top coat twice: once for color, once for structure. Short squares show chips at the corners first, so re-seal the tip every three days with regular polish. Gel tips hold up beautifully for three weeks, and the bare base hides regrowth so gracefully you can stretch the manicure even longer.
Cocoa-and-Cream Speckled Fawn Fade
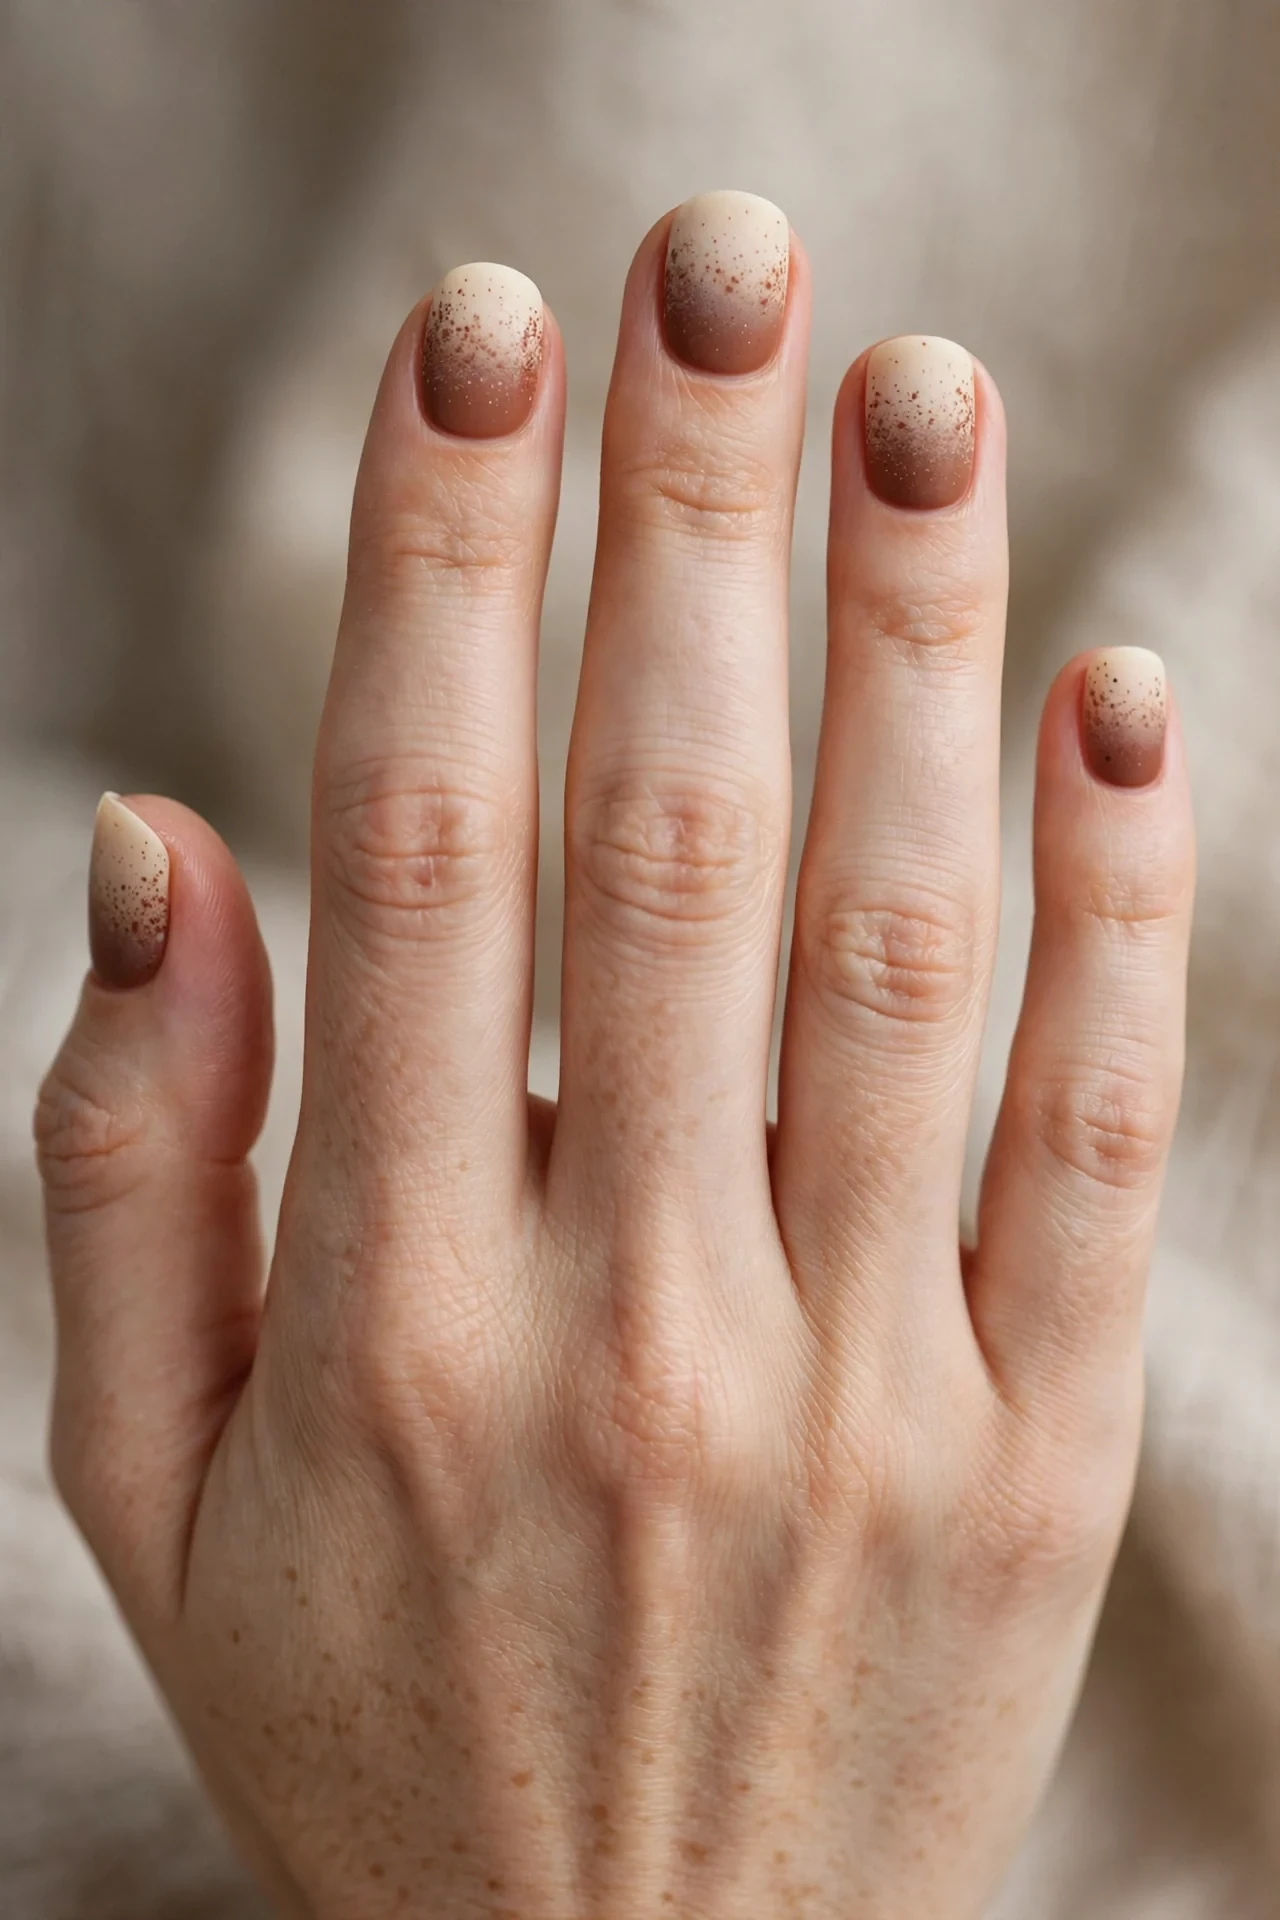
A deeper, moodier take: rich cocoa brown melts into a lighter cream near the free edge, with fawn speckles fading along with the gradient. On short nails, the ombre lift makes fingertips look longer while the fading spots create a dreamy, woodland-morning feel. This is the Bambi design for people who find the classic version a touch too sweet — the cocoa depth keeps it sophisticated, and it pairs effortlessly with chunky knits, leather boots, and gold jewelry. Deep browns flatter olive and warm skin tones particularly well, and the matte or satin finish option gives it an expensive, editorial edge. It works for evenings out, fall events, and anyone wanting an animal print that reads grown-up rather than girly.
- Apply a cocoa brown base at the cuticle, blending upward into cream.
- Layer fawn spots densely near the base, sparser toward the lighter tip.
- Seal with a satin or matte top coat for the moody woodland finish.
- Ask your tech for a “cocoa-to-cream ombre with fading fawn spots.”
DIY ombre on short nails is easier than it looks: sponge it. Paint cocoa at the cuticle and cream at the tip with a small wedge sponge, dabbing the join line until it blends. Repeat two coats, then add fawn spots with a dotting tool — place larger spots over the cocoa zone and tinier ones as you move into the cream so they dissolve into the fade. Gel wear gives you a full three weeks; with regular polish, the sponge technique actually chips less than flat color because the layered texture grips the nail. Keep a satin top coat on hand for touch-ups, and massage cuticle oil nightly to keep the cocoa from dulling at the edges.
Woodland Camouflage Fawn Print
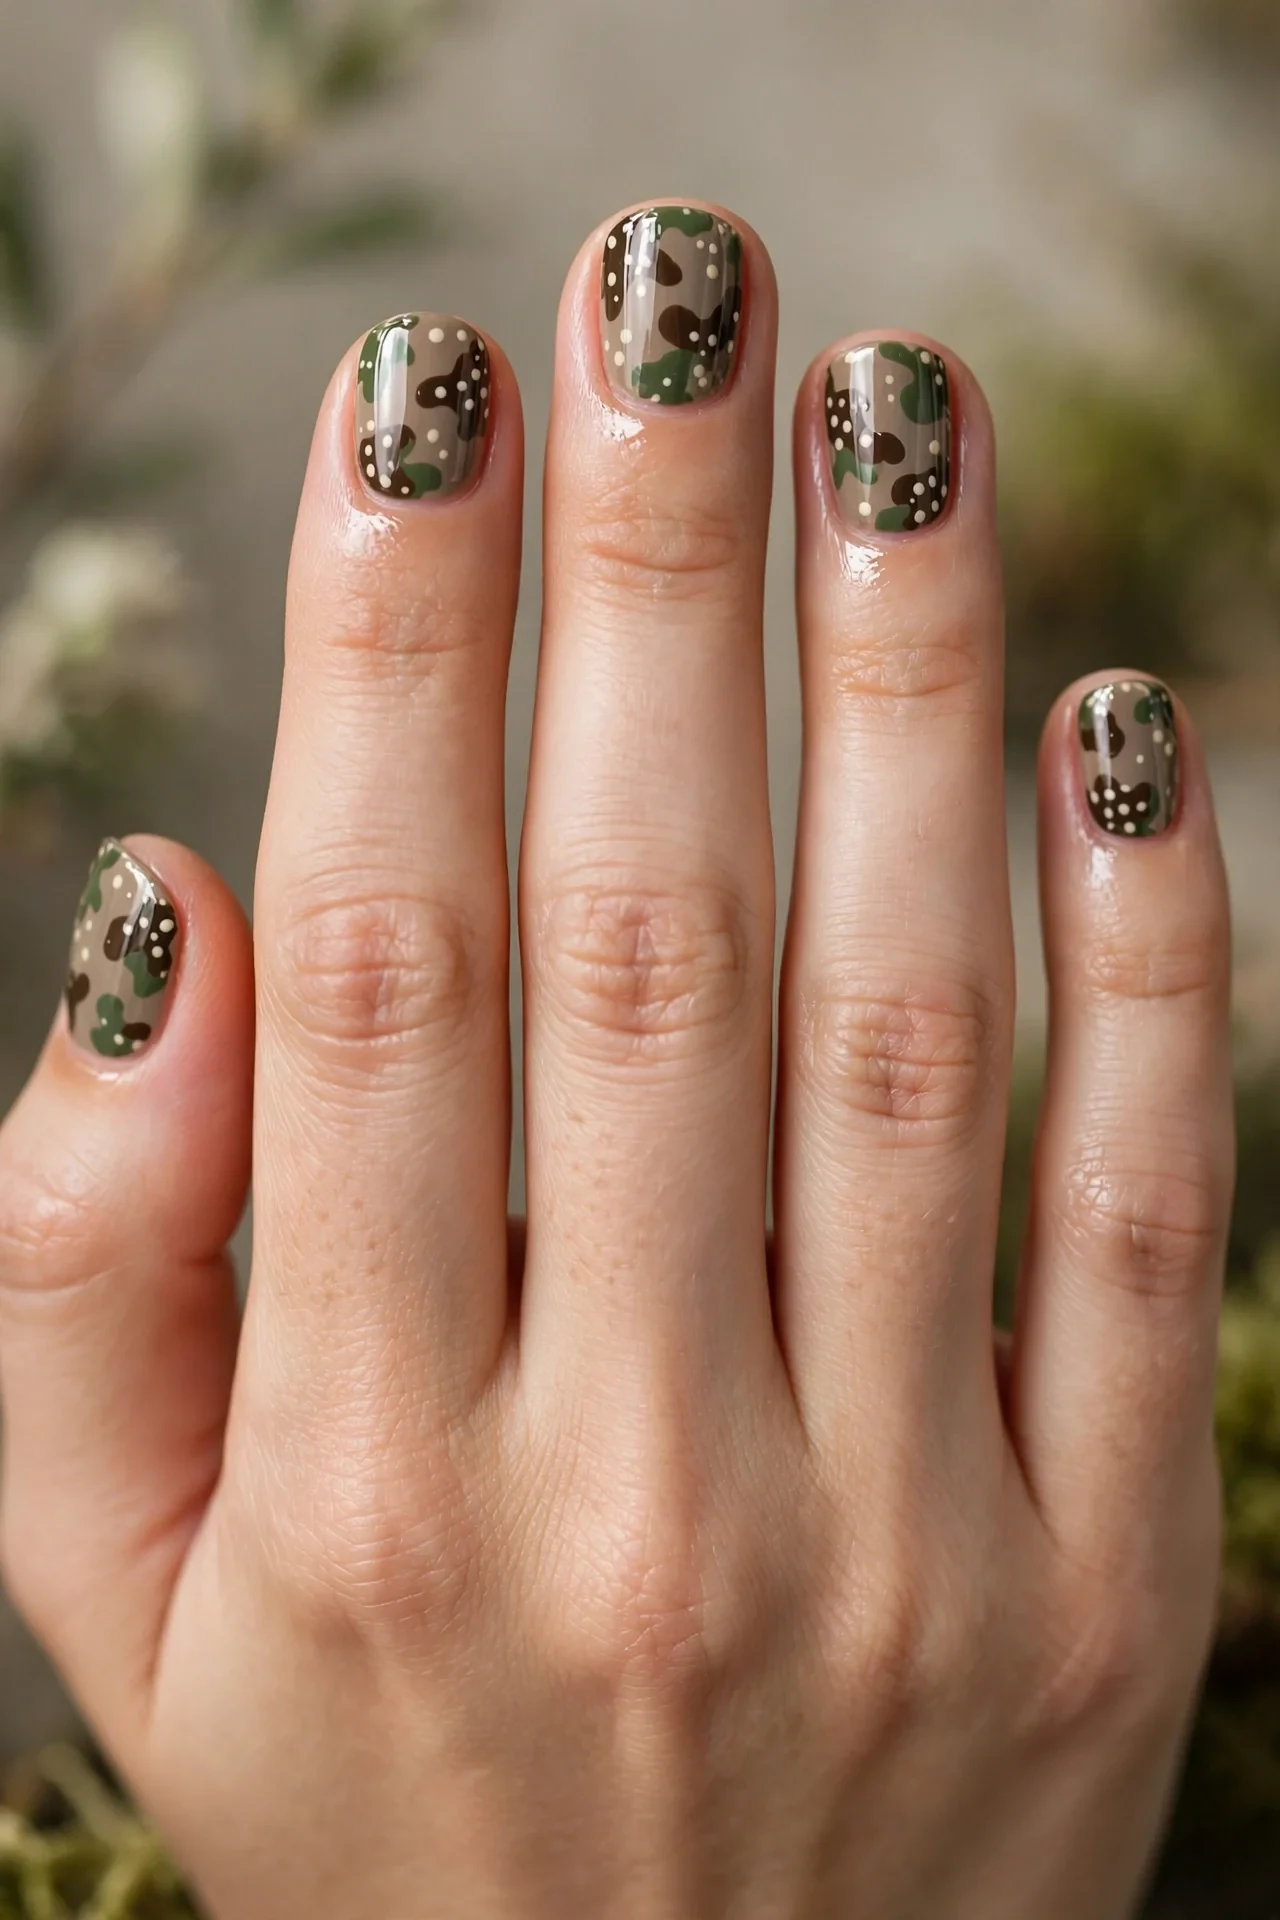
Meet Bambi’s outdoorsy cousin: a forest-inspired camouflage of moss, bark, and stone tones, dotted with cream fawn spots throughout. On short nails this reads like a chic woodland camo rather than a literal deer — the spots become part of the print, giving the whole manicure a nature-textured depth. It’s the strongest option here for anyone whose style leans earthy or minimalist-boho, and the muted palette (olive, taupe, warm gray) is remarkably wearable across skin tones and seasons. The camo blobs keep each nail unique, so the set feels artisanal and hand-painted rather than stamped. Finish it in high gloss and the print gains a lacquered, jewel-like richness.
- Apply a stone-taupe base coat across all ten nails first.
- Layer irregular moss and bark-brown blobs with a small detail brush.
- Seal the camo with scattered cream fawn dots in varied sizes.
- Ask for “woodland camo with fawn spots” and show a reference photo.
At home, build the camo blobs with the corner of a makeup sponge or the flat of a detail brush, keeping shapes organic and overlapping — think forest floor, not polka dots. Two rounds of blobs give depth; let each round dry before the next. The cream spots go on last, placed mostly inside the darker blobs so they pop like real fawn markings. This design is forgiving for beginners because nothing is symmetrical and mistakes blend into the camo. Gel lasts 3 weeks; regular polish wears well since busy prints hide chips brilliantly. A weekly top-coat refresh keeps the gloss over the textured layers, and the earthy palette transitions seamlessly into winter.
Bambi Blush Fawn Spots for Short Nails
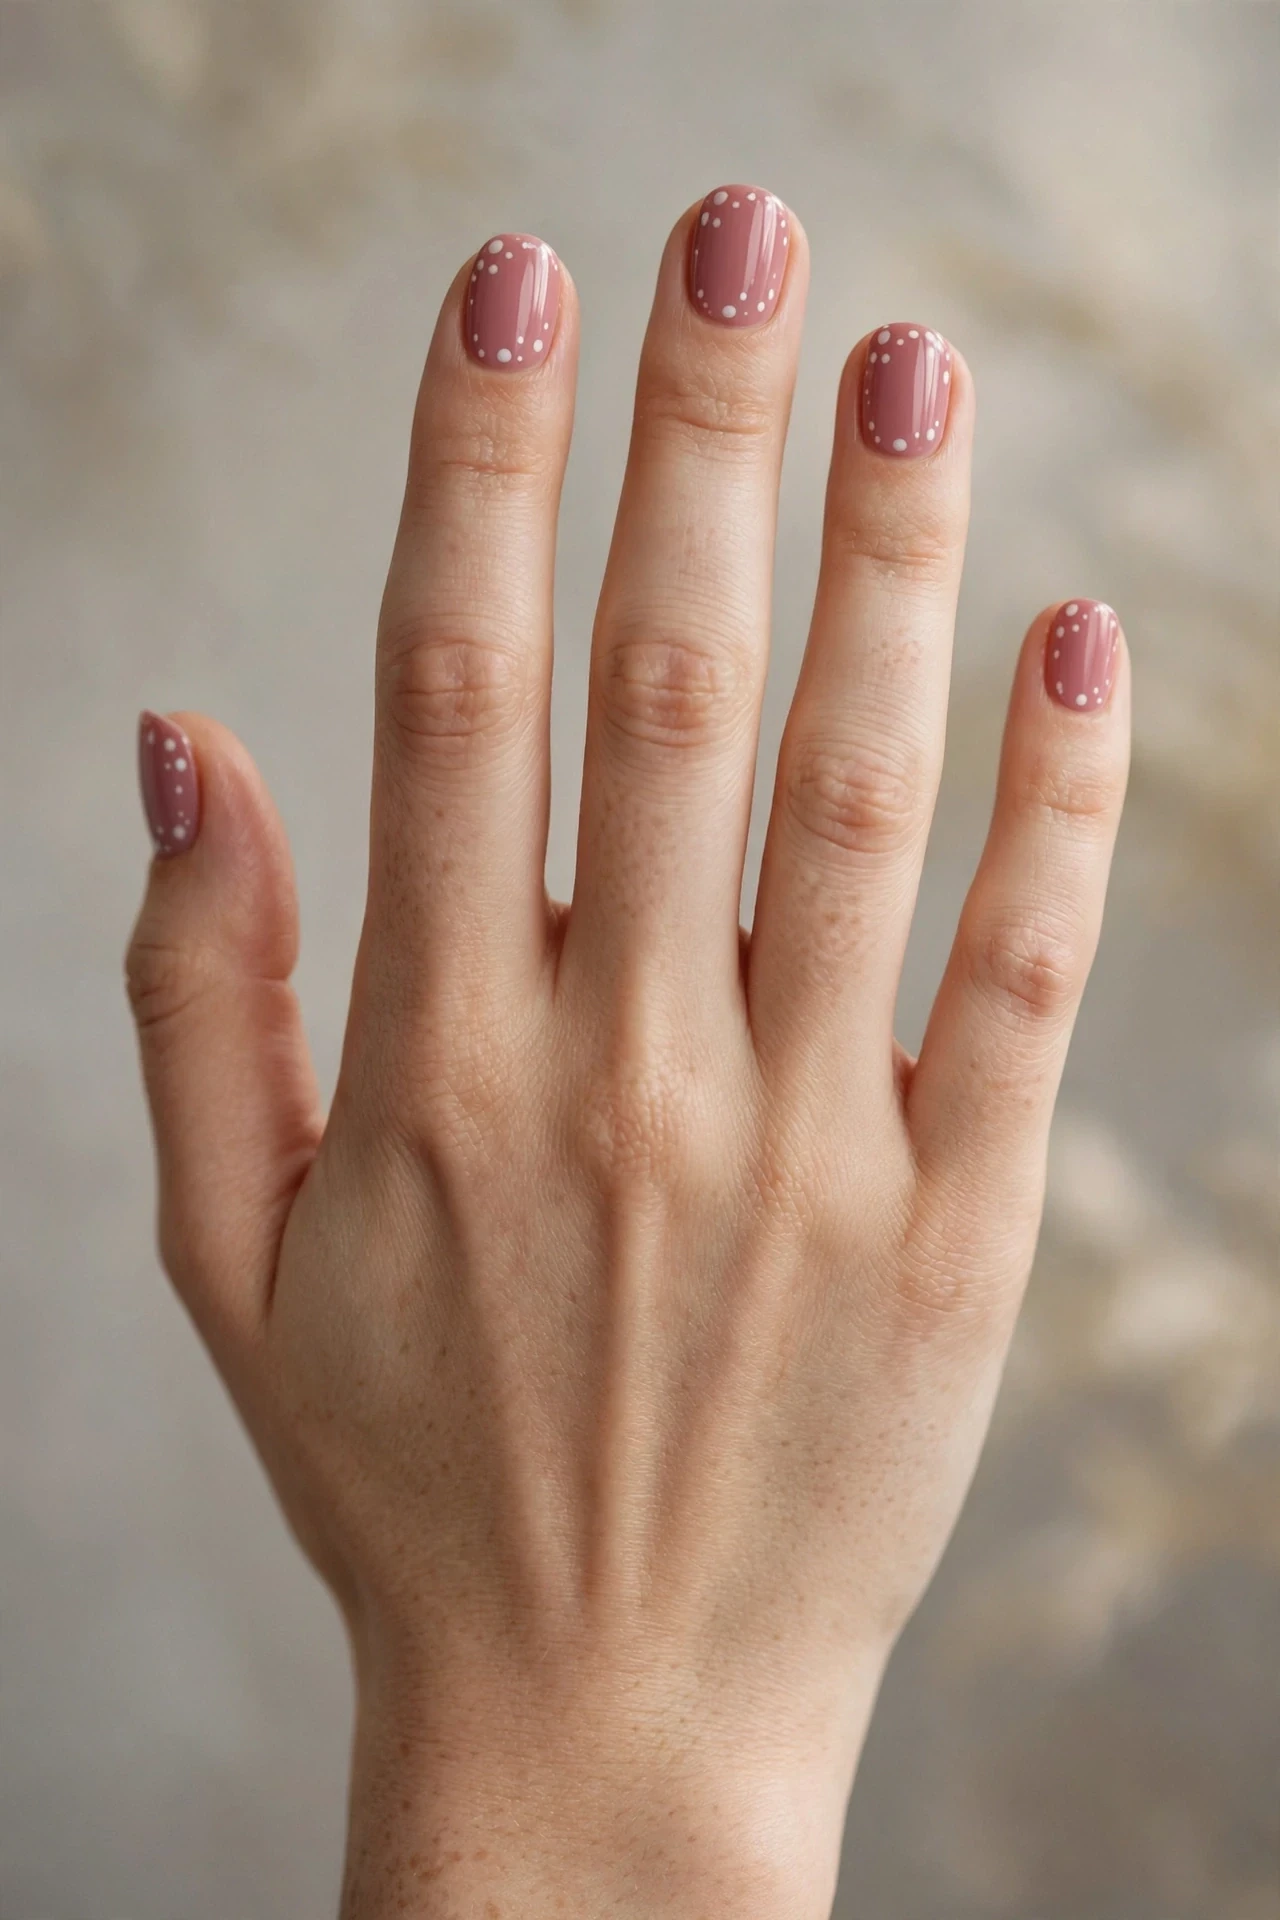
Bambi nails go romantic with a dusty rose base and soft white fawn spots, finished in a dreamy high gloss. On short nails, the blush pink keeps the look sweet and wearable while the white dots add the fawn signature without any heaviness. This is the Bambi manicure for people who live in pinks — it flatters fair to light-medium skin tones beautifully, and the rosy tone makes hands look fresh and youthful. The round shape enhances the softness, and it suits occasions from bridal showers to date nights to everyday prettiness. The spots here are slightly smaller and denser than the classic, giving a dappled, almost cherry-blossom effect. It’s also one of the easiest versions to DIY, since pink hides wobbles and white dots pop forgivingly.
- Apply two coats of dusty rose polish for an even, creamy base.
- Layer small white fawn spots with a dotting tool, keeping them petite.
- Seal with a glassy top coat to make the pink glow.
- Ask your tech for “blush pink base with white fawn spots, round shape.”
DIY is straightforward: the pink base is self-leveling and two thin coats prevent streaks. For the spots, use the smallest dotting tool end or a bobby pin tip, and keep dots to pin-head size — on short nails, restraint is what keeps it chic. Cluster five to six per nail in an irregular scatter, then gloss. Because light pinks show wear faster, cap the free edge with top coat and expect to refresh around day four with regular polish. Gel versions last a full two to three weeks. This pairing also looks adorable alongside warm-toned autumn ombre designs if you want to coordinate pinks with your fall palette.
Mini French Tips with Deer Spots
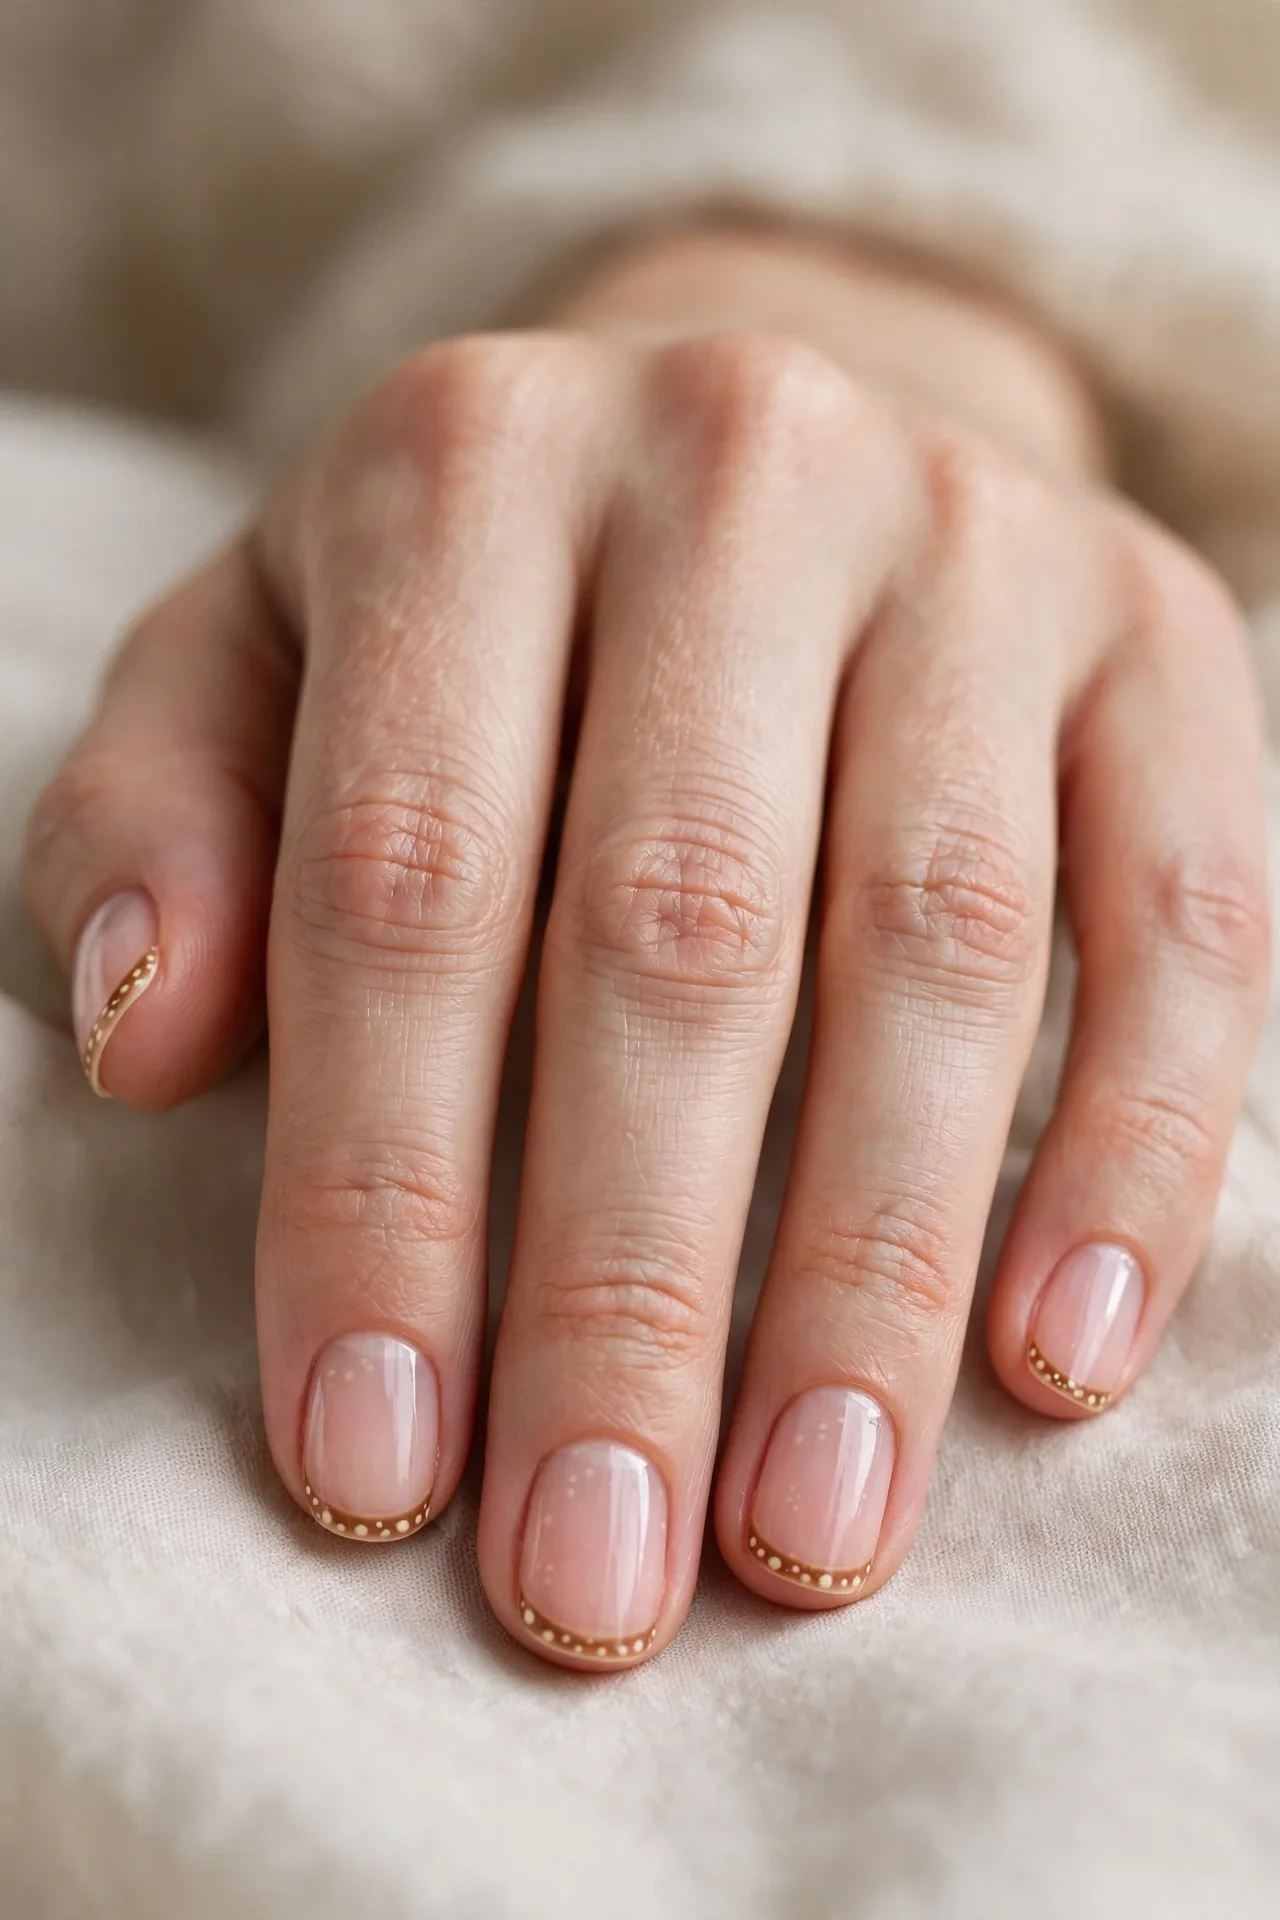
The micro-French gets a Bambi makeover: whisper-thin caramel tips dotted with tiny fawn spots on a sheer pink base. On short nails this is possibly the most elegant deer-inspired design possible — the micro tip is already the most flattering short-nail style, and the fawn dots add just enough whimsy to feel special. The sheer base elongates, the thin tip defines, and the spots surprise up close. It suits every skin tone, every occasion from weddings to job interviews, and it’s the design most likely to convert animal-print skeptics. The ultra-thin tip also means the look reads minimalist from a distance and maximalist only when someone looks closely — the best of both worlds.
- Apply a sheer pink base coat to even out the nail bed.
- Layer a micro-thin caramel tip line with a striping brush.
- Seal 2-3 tiny cream spots along each tip line only.
- Ask for “micro-French with fawn spots on the tip line” at the salon.
The micro tip is the trickiest part for DIY, but short nails help — there’s less tip to line. Rest your painting hand on a table, rotate the finger rather than the brush, and draw the smile line in one light stroke; cleanup with a flat brush dipped in remover fixes wobbles instantly. The fawn dots then take seconds with a pin tip. Because tips bear the most wear, double-cap the free edge with top coat. Regular polish lasts about a week before the micro line needs touching up; gel micro-French holds a pristine three weeks. Daily cuticle oil keeps the sheer base from looking dry, and the whole design grows out invisibly.
Espresso Fawn Ombre on Round Tips
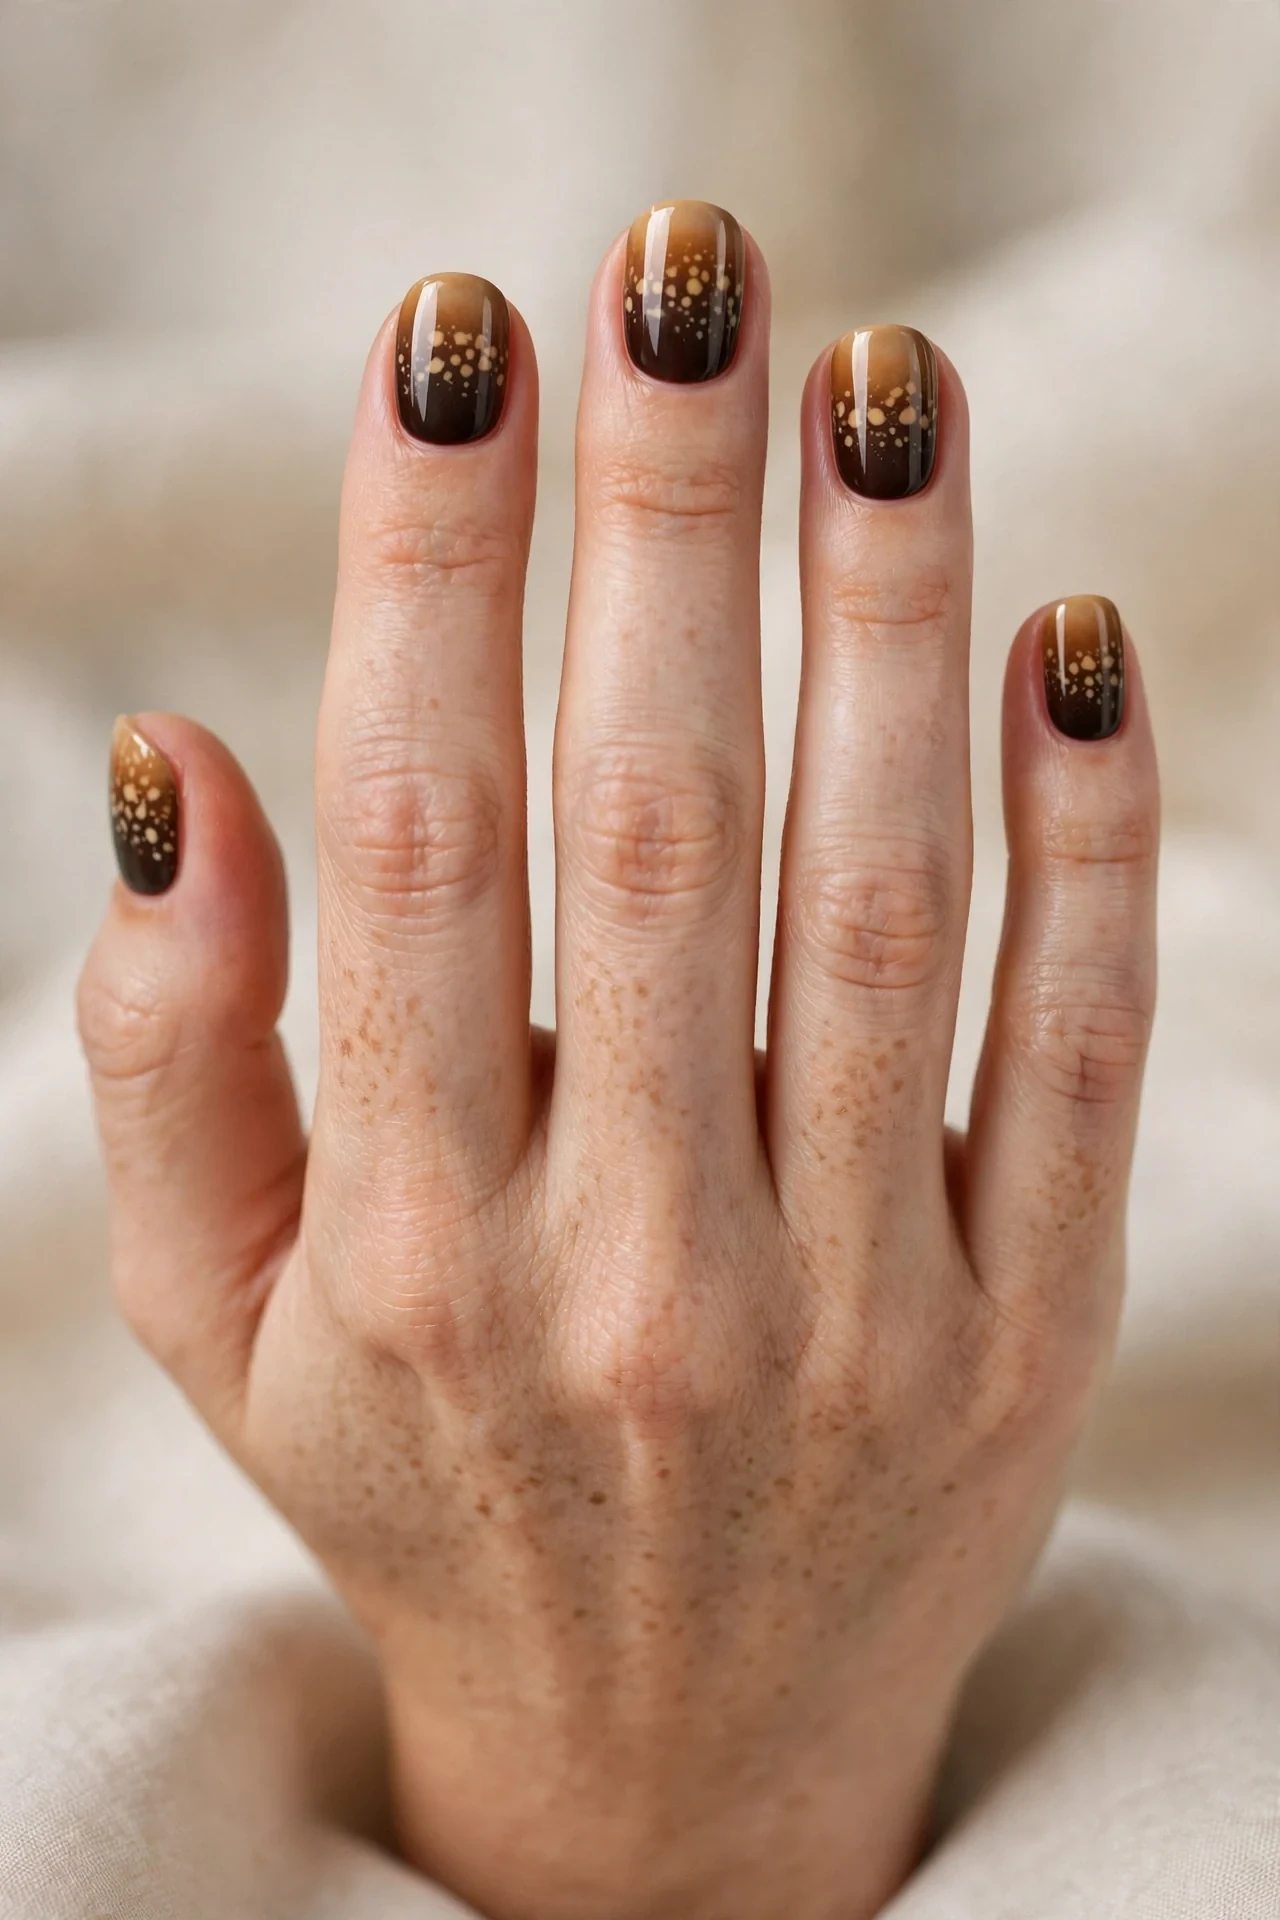
Dark, rich, and quietly dramatic: deep espresso brown at the cuticle fading to a warm caramel tip, with cream fawn spots scattered through the transition zone. On short round nails the ombre creates length while the spots add the Bambi soul — it’s the design for coffee lovers and moody-fall devotees. Espresso flatters deep and warm skin tones gorgeously, and the round shape keeps the darkness soft rather than severe. This is an evening-and-autumn design through and through: think dinner dates, fall concerts, and every pumpkin-spice outing. The gradient also hides regrowth beautifully, making it one of the lowest-maintenance statement looks you can wear.
- Apply espresso brown at the cuticle and caramel at the tip.
- Layer the fade with a sponge, blending the join until seamless.
- Seal cream fawn spots through the middle transition zone.
- Ask your tech for an “espresso-to-caramel ombre with fawn spots.”
Sponge the ombre with a small wedge: paint espresso on one half, caramel on the other, and bounce it onto the nail in thin layers, repeating twice for depth. The spots go on while the fade is slightly tacky so they settle in naturally — five to seven per nail, smallest near the tip. Gel is ideal here for the seamless blend, lasting three weeks with minimal upkeep. Regular polish works too but expect the ombre layers to need a fresh glossy top coat mid-week to stay rich. Cuticle oil daily prevents the dark base from looking matte and tired, and the design pairs beautifully with gold rings for a warm, luxurious finish.
Forest Floor Mossy Fawn Print
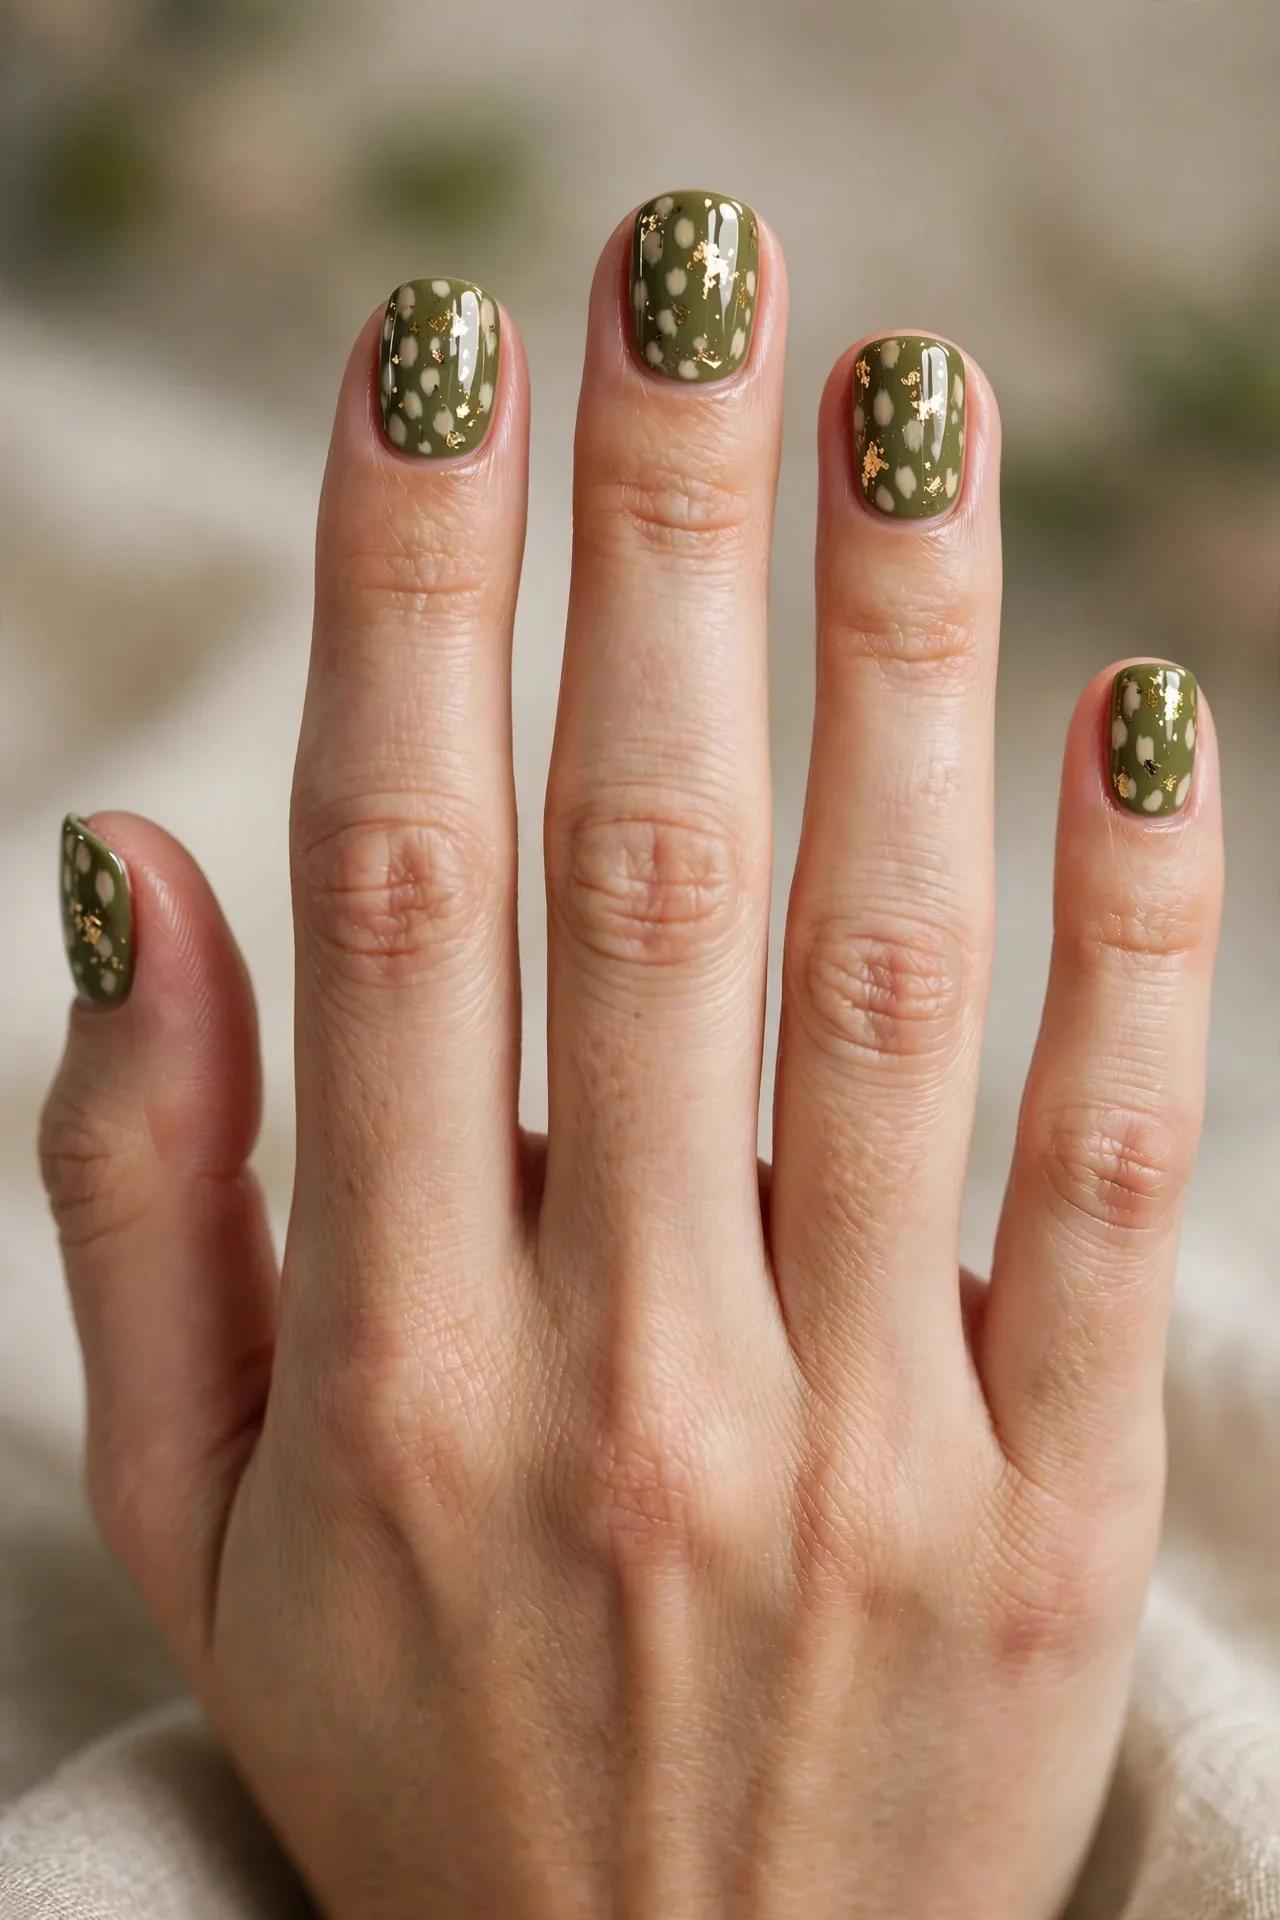
A mossy olive-green base dappled with cream and gold-flecked fawn spots, like sunlight filtering through a forest onto a deer’s back. On short nails this is the editorial Bambi — unexpected, earthy, and deeply autumnal. Olive green suits medium to olive skin tones wonderfully and pairs with everything in a fall wardrobe, from camel coats to denim. The gold-flecked spots catch light and elevate the design from cute to artful, making it perfect for creative workplaces, gallery nights, and anyone who prefers their animal print with an edge. The squoval shape keeps it structured and modern, and the finish can swing glossy for richness or matte for a true forest-floor feel.
- Apply two coats of mossy olive-green polish as the base.
- Layer cream fawn spots with a dotting tool in an organic scatter.
- Seal selected spots with a touch of gold shimmer or foil flakes.
- Ask for “mossy green with gold-flecked fawn spots” at the salon.
For DIY, the olive base needs two careful coats since greens can streak — let the first coat go slightly thin and opaque the second. Place cream spots while the second coat is dry, then press tiny gold foil flakes onto a few spots with tweezers and seal them under top coat so they sit flat. The gold flecks are the detail that makes this design sing, so don’t skip them. Gel wear runs a full three weeks; regular polish benefits from a mid-week top-coat seal because greens can dull. This is also a stunning companion to darker late-fall nail tones when you’re building a late-fall nail wardrobe.
Gilded Fawn Spots with Gold Foil
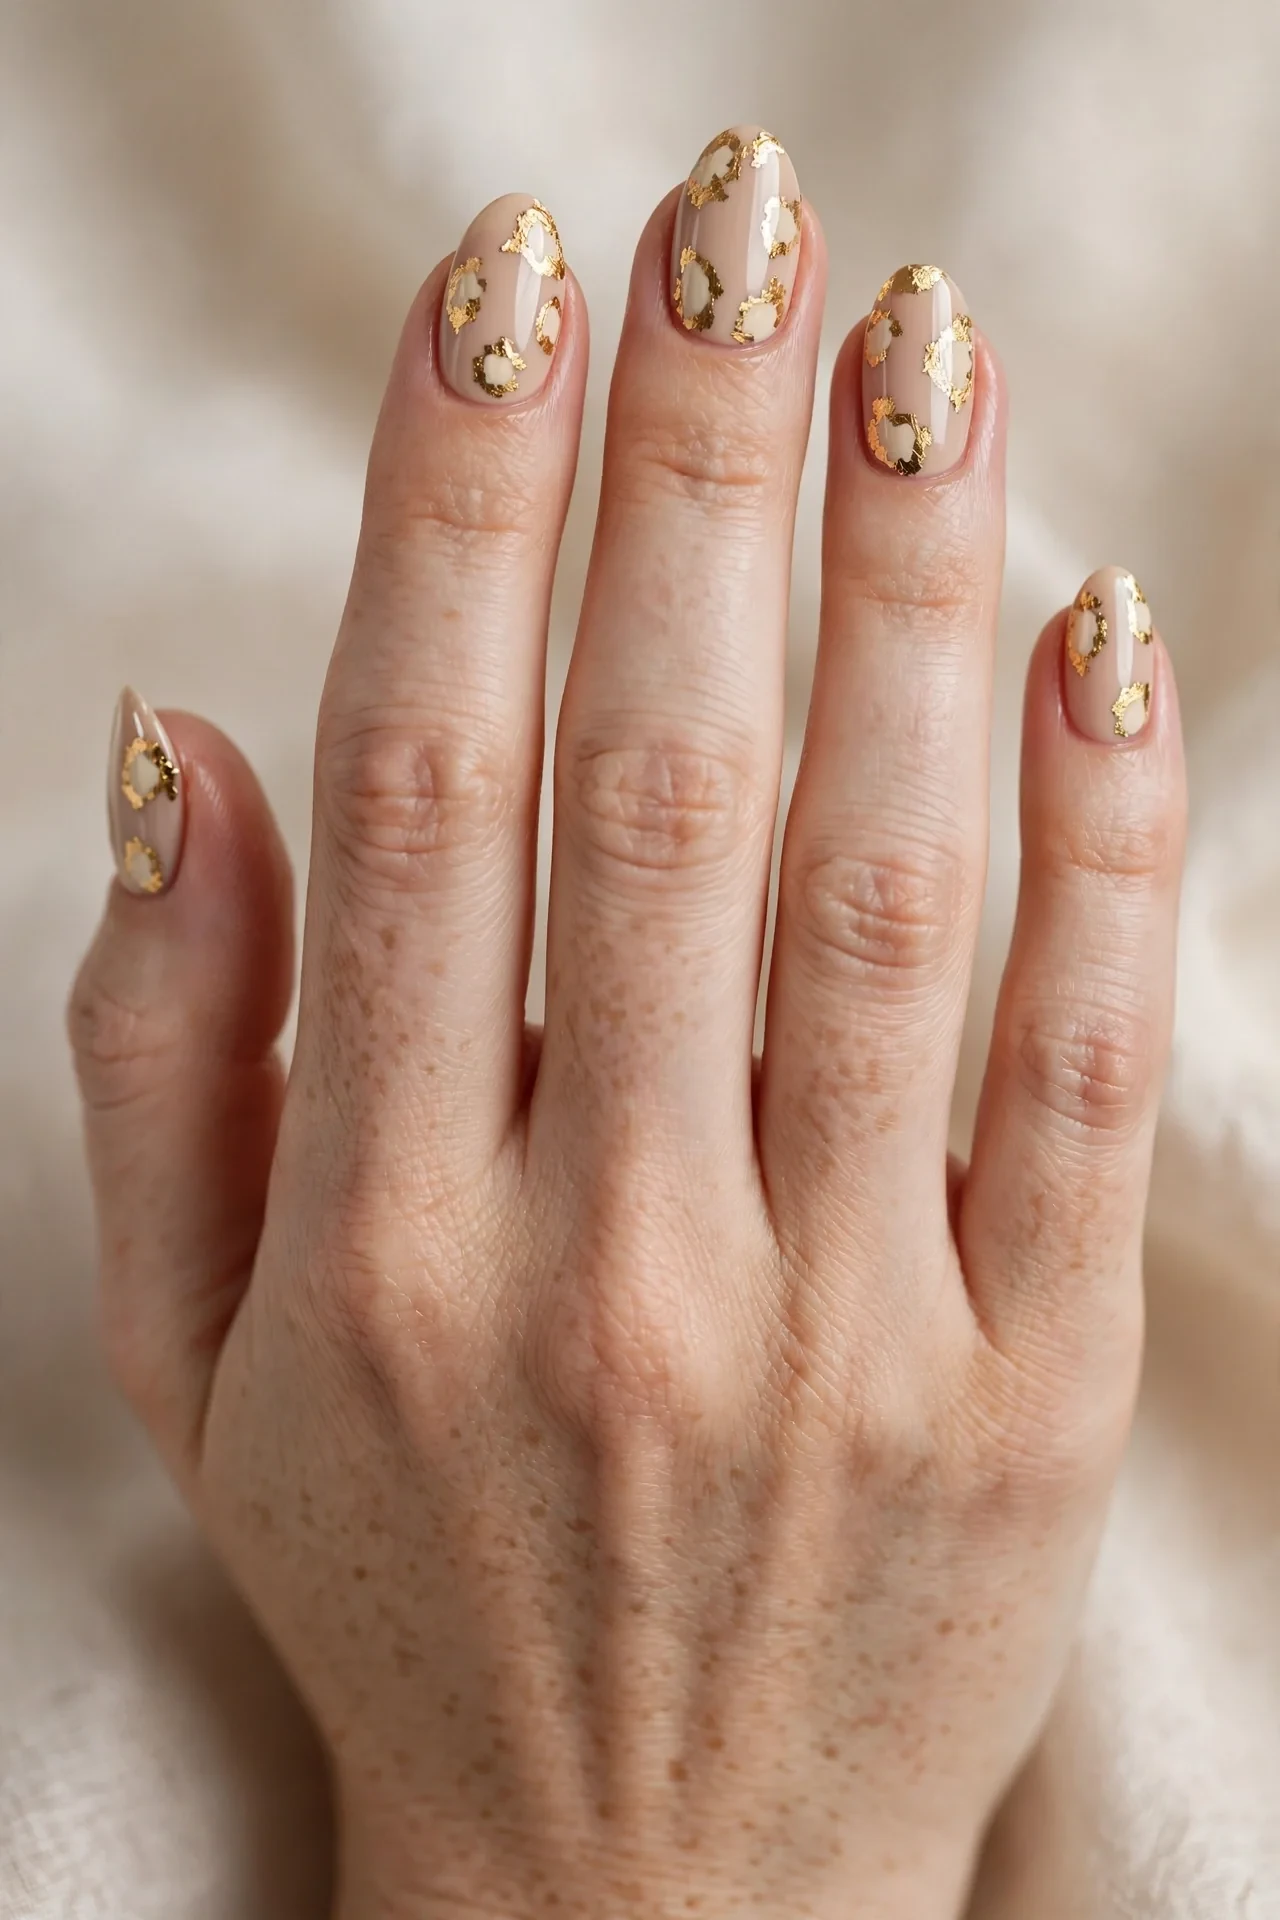
The holiday-ready Bambi: a warm latte-nude base with fawn spots edged or dusted in gold foil. On short nails this is pure luxe — the nude base is elegant and elongating, while the gold catches every bit of light and turns the fawn print into jewelry. It flatters all skin tones because the latte base can be tuned lighter or deeper, and the gold adds warmth that makes hands look radiant. Wear it to holiday parties, New Year’s events, weddings, or anywhere you want your nails to feel festive without going full glitter bomb. The almond shape enhances the elegance, and the design photographs beautifully for anyone who loves a good nail selfie. Gold foil also camouflages minor application imperfections, making it secretly beginner-friendly.
- Apply two coats of latte-nude polish matched to your skin tone.
- Layer fawn spots in soft cream, slightly larger than usual.
- Seal with gold foil flakes pressed around select spots.
- Ask your tech for “latte nude with gold-foil fawn spots, almond shape.”
At home, place the cream spots first and let them dry, then add a thin layer of top coat and press tiny gold foil flakes onto the tacky surface around two or three spots per nail — tweezers give the most control. Float a final thick top coat over everything to seal the foil smooth. Choose foil in warm gold rather than silver for the richest effect against the latte base. Gel wear is a solid three weeks; with regular polish, the foil edges can lift, so cap each nail twice with top coat and avoid picking. Daily cuticle oil keeps the nude base glossy, and the design looks even better as it settles in over the first day.
Milky Porcelain Fawn Dots
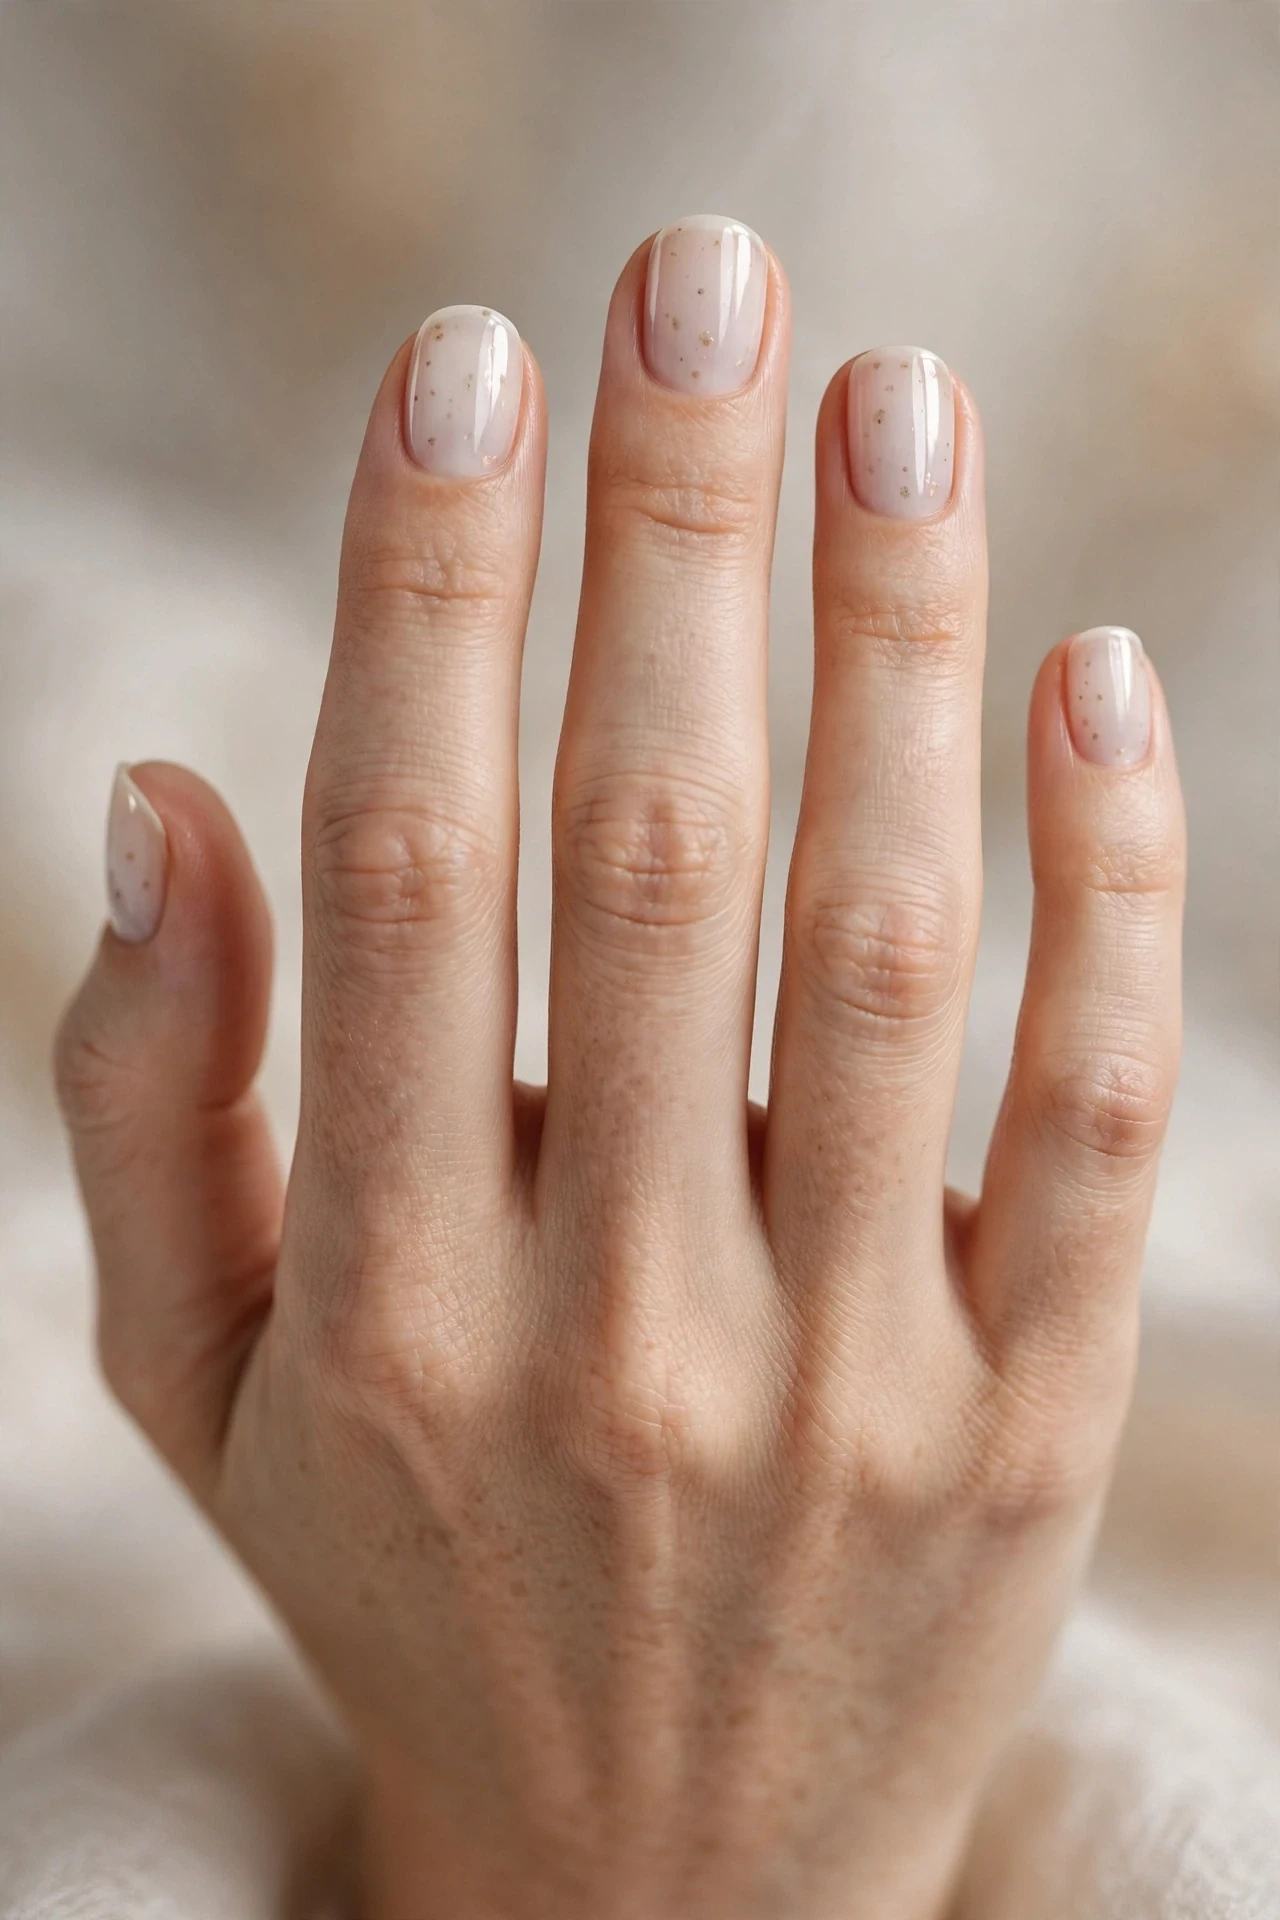
A barely-there milky white base with the softest beige fawn dots — the most delicate Bambi interpretation, almost a watercolor. On short nails the milky translucency makes nails look healthy and luminous, while the beige dots add just enough pattern to be interesting. This is the design for minimalists who still want in on the trend, and it suits every skin tone because the milky base is universally flattering. The sheer finish elongates short nails visually, and the whole look reads clean, fresh, and modern — perfect for brides, professionals, and anyone whose style whispers rather than shouts. Round or short almond shapes enhance the softness.
- Apply two coats of milky white sheer polish for translucency.
- Layer tiny beige dots with a pin tip, keeping them sparse.
- Seal with a glossy top coat for the luminous porcelain finish.
- Ask for “milky sheer base with subtle beige fawn dots.”
DIY success here depends on thin, even coats — milky whites streak if applied thick, so three thin coats beat two thick ones. Let each layer dry fully, then place beige dots sparingly: four to six per nail, keeping them toward the center so the translucent edges stay clean. The dots should look like they’re floating in milk. Regular polish lasts about a week before the sheer base shows tip wear; gel holds two to three weeks and keeps the milky luminosity better. This design is ideal for first-time fawn-print wearers because mistakes dissolve into the softness, and it pairs with literally everything you own.
Fawn Print with Soft Caramel Chrome
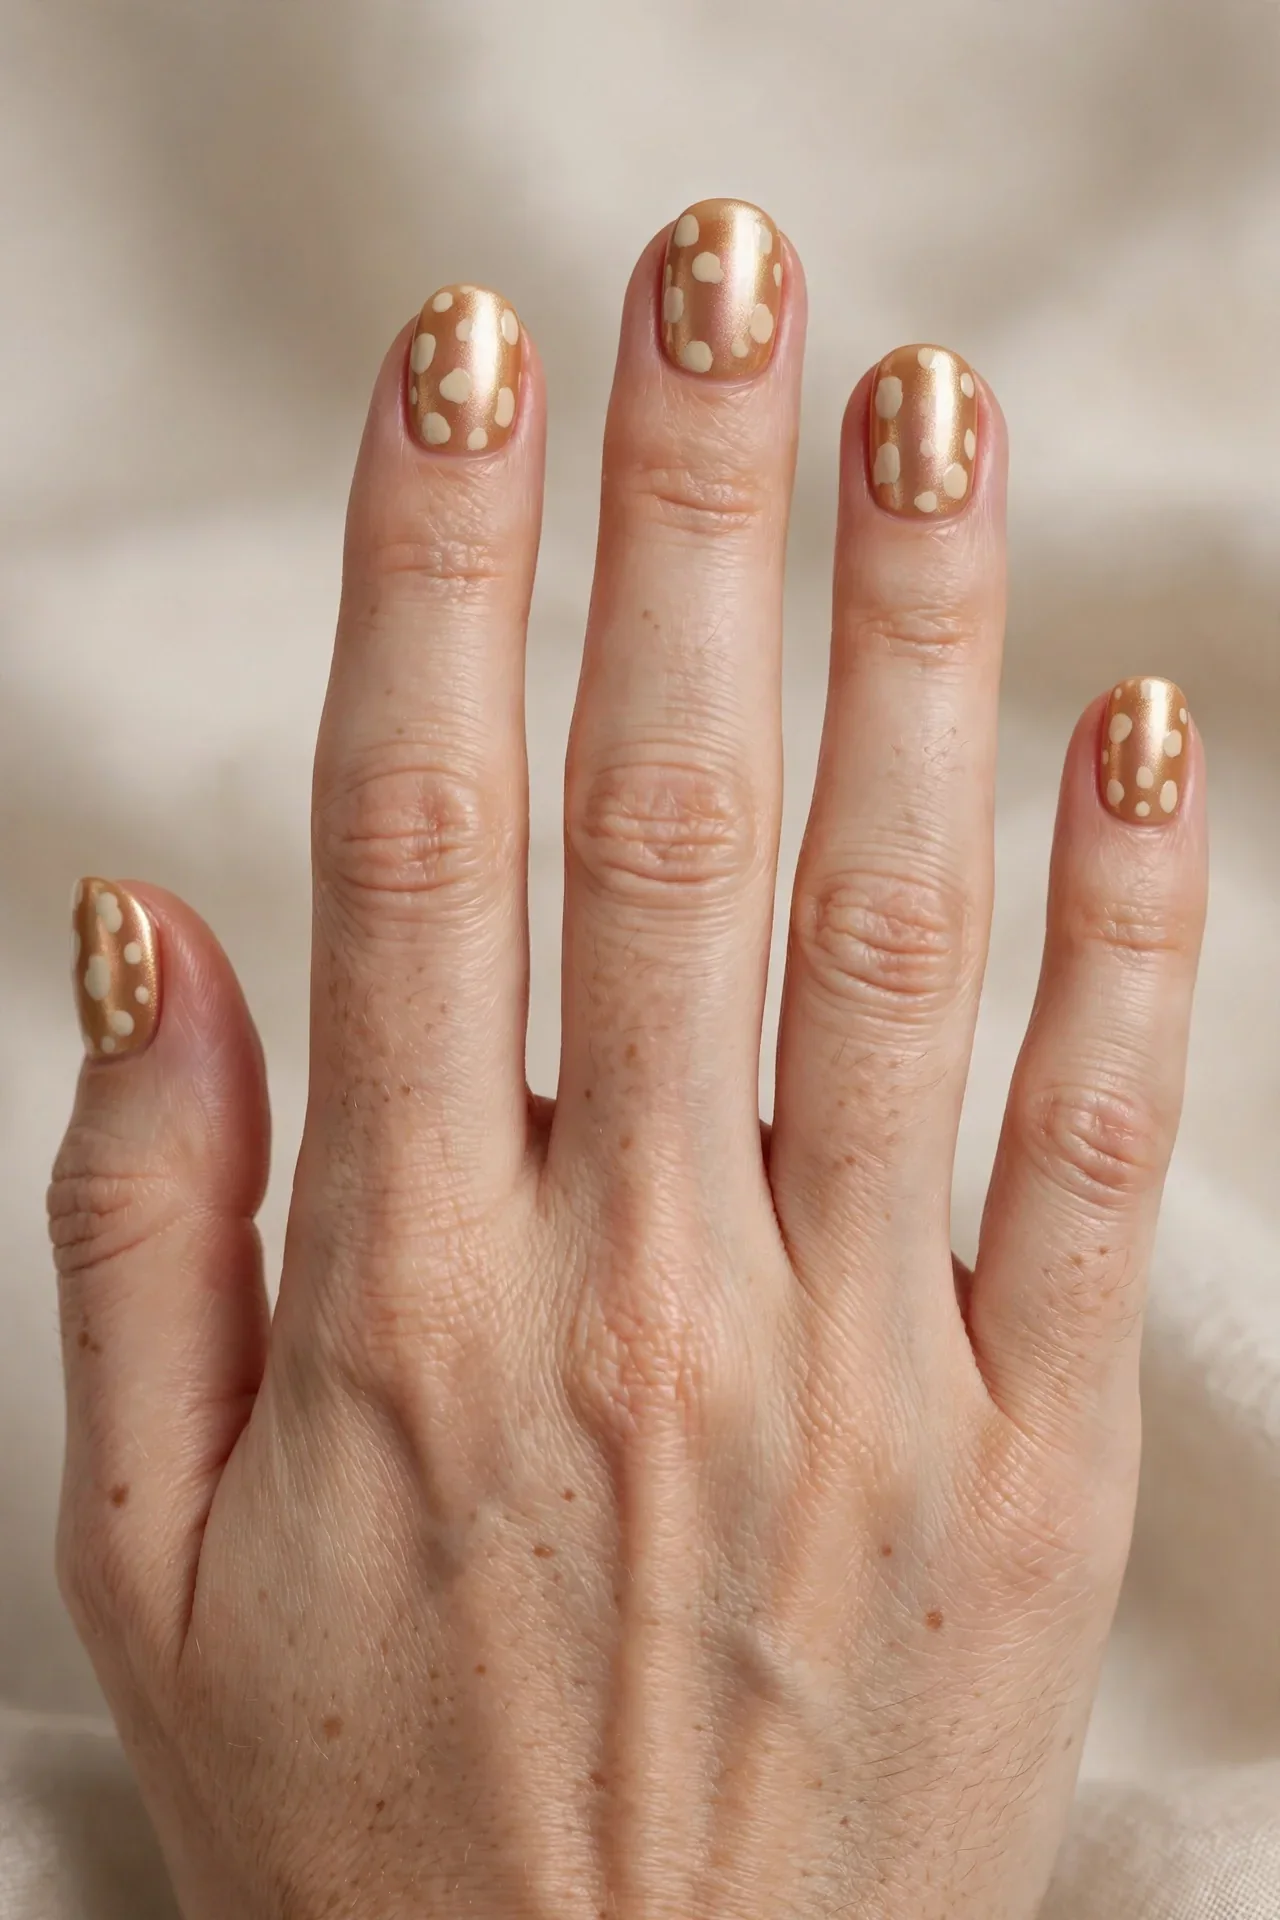
Bambi meets the chrome trend: a caramel base rubbed with a soft pearl-chrome powder, then dotted with cream fawn spots that sit on top of the shimmer. On short nails the chrome adds dimension and light play, making even the shortest tips look dimensional and expensive. The pearl finish over caramel reads warm and glowing rather than cold and metallic, so it stays in the fawn-print family while feeling current and trendy. It suits medium to deep skin tones beautifully and works for parties, nights out, and anyone who wants their Bambi nails to feel a little more glam. The squoval shape gives the chrome a crisp, modern edge.
- Apply a caramel base and cure fully before chroming.
- Layer chrome powder with a sponge applicator, buffing to a pearl glow.
- Seal cream fawn spots on top of the chrome with a dotting tool.
- Ask your tech for “caramel pearl chrome with fawn spots on top.”
At home, chrome powder is the star: apply it over a no-wipe gel top coat (or a regular-polish chrome kit following its instructions), buffing in small circles until the pearl glow appears. The fawn spots then go on top with cream gel or regular polish, sealed with a final top coat — this top layer slightly softens the chrome, which actually looks better. Gel is strongly recommended for this design since chrome adheres best to gel; expect three weeks of wear. Regular-polish chrome kits exist but wear about five to seven days. The spots-on-chrome combination hides minor chrome imperfections, and daily oil keeps the pearl finish from dulling.
Night-Forest Dark Fawn Spots
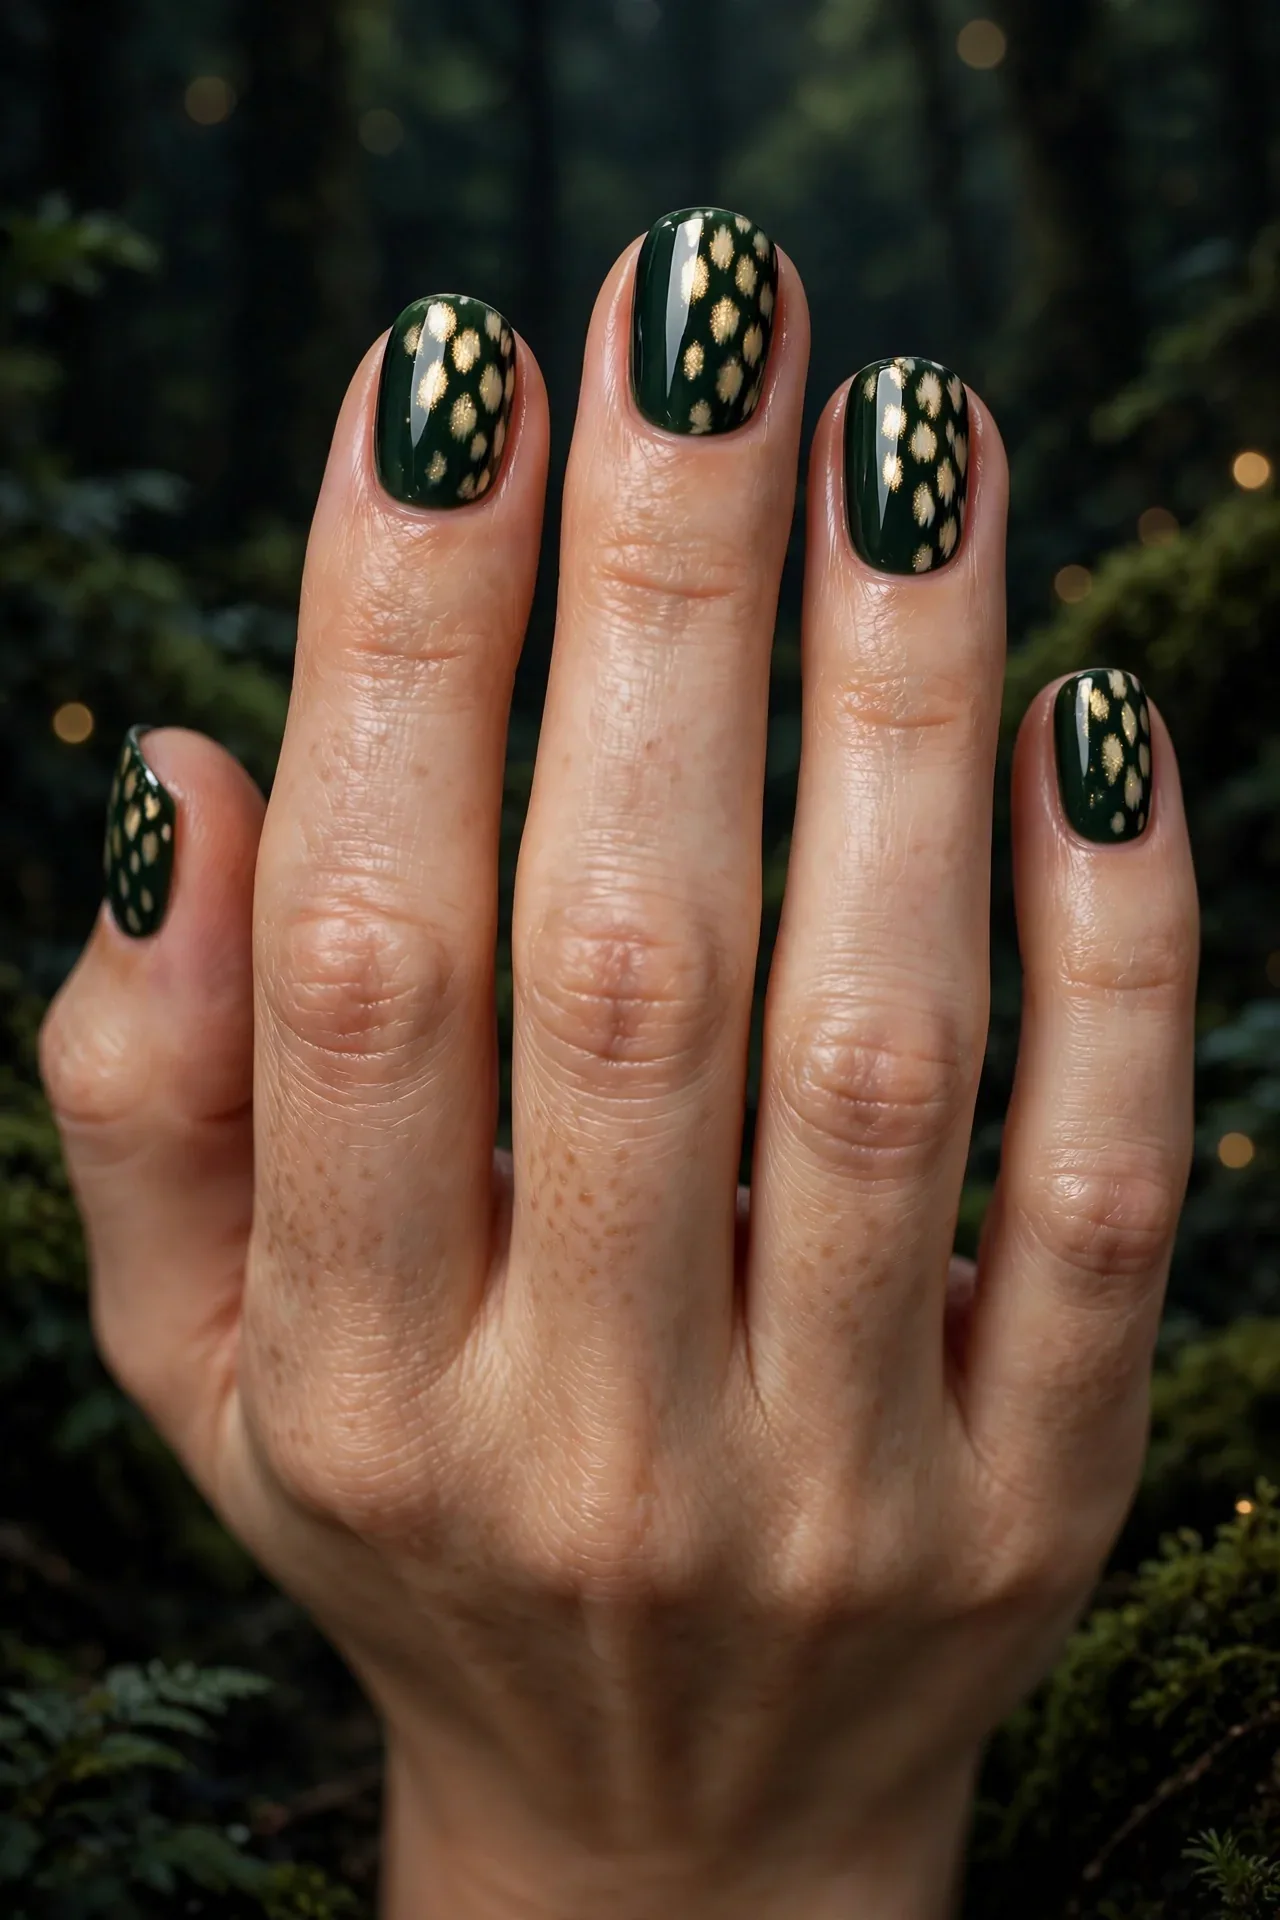
The moody Bambi: a deep forest-green or near-black base with cream and pale gold fawn spots glowing against the darkness. On short nails this is striking — the dark base is slimming and dramatic, while the light spots pop like fireflies, creating a high-contrast look that’s impossible to ignore. It suits deep skin tones with stunning richness and gives fair skin a chic, vampy edge. Wear it to evening events, concerts, or whenever you want your nails to make the statement. The short length keeps the darkness wearable for daytime too, and the round shape softens the drama just enough. This is the Bambi design for people who dress in black and mean it.
- Apply two coats of deep forest green or soft black polish.
- Layer cream spots generously — contrast is the whole point.
- Seal a few spots with pale gold shimmer for extra glow.
- Ask for “dark forest base with glowing cream fawn spots.”
Dark bases demand precision, so DIY painters should use a clean-up brush around the cuticles and apply two thin, even coats. The cream spots need to be opaque — use a dotting tool dipped twice, or two passes per spot — because sheer spots vanish against dark polish. Place them boldly, seven to nine per nail, since the contrast carries the design. Gel wear runs three weeks and the dark base hides tip wear well; regular polish needs a fresh top coat mid-week to prevent the dark color from looking tired. This design looks phenomenal with silver jewelry for a moonlit-forest vibe, or gold for warmth — either way, the spots do the talking.
Velvet Fawn Spots: Bambi Nails for Short Nails
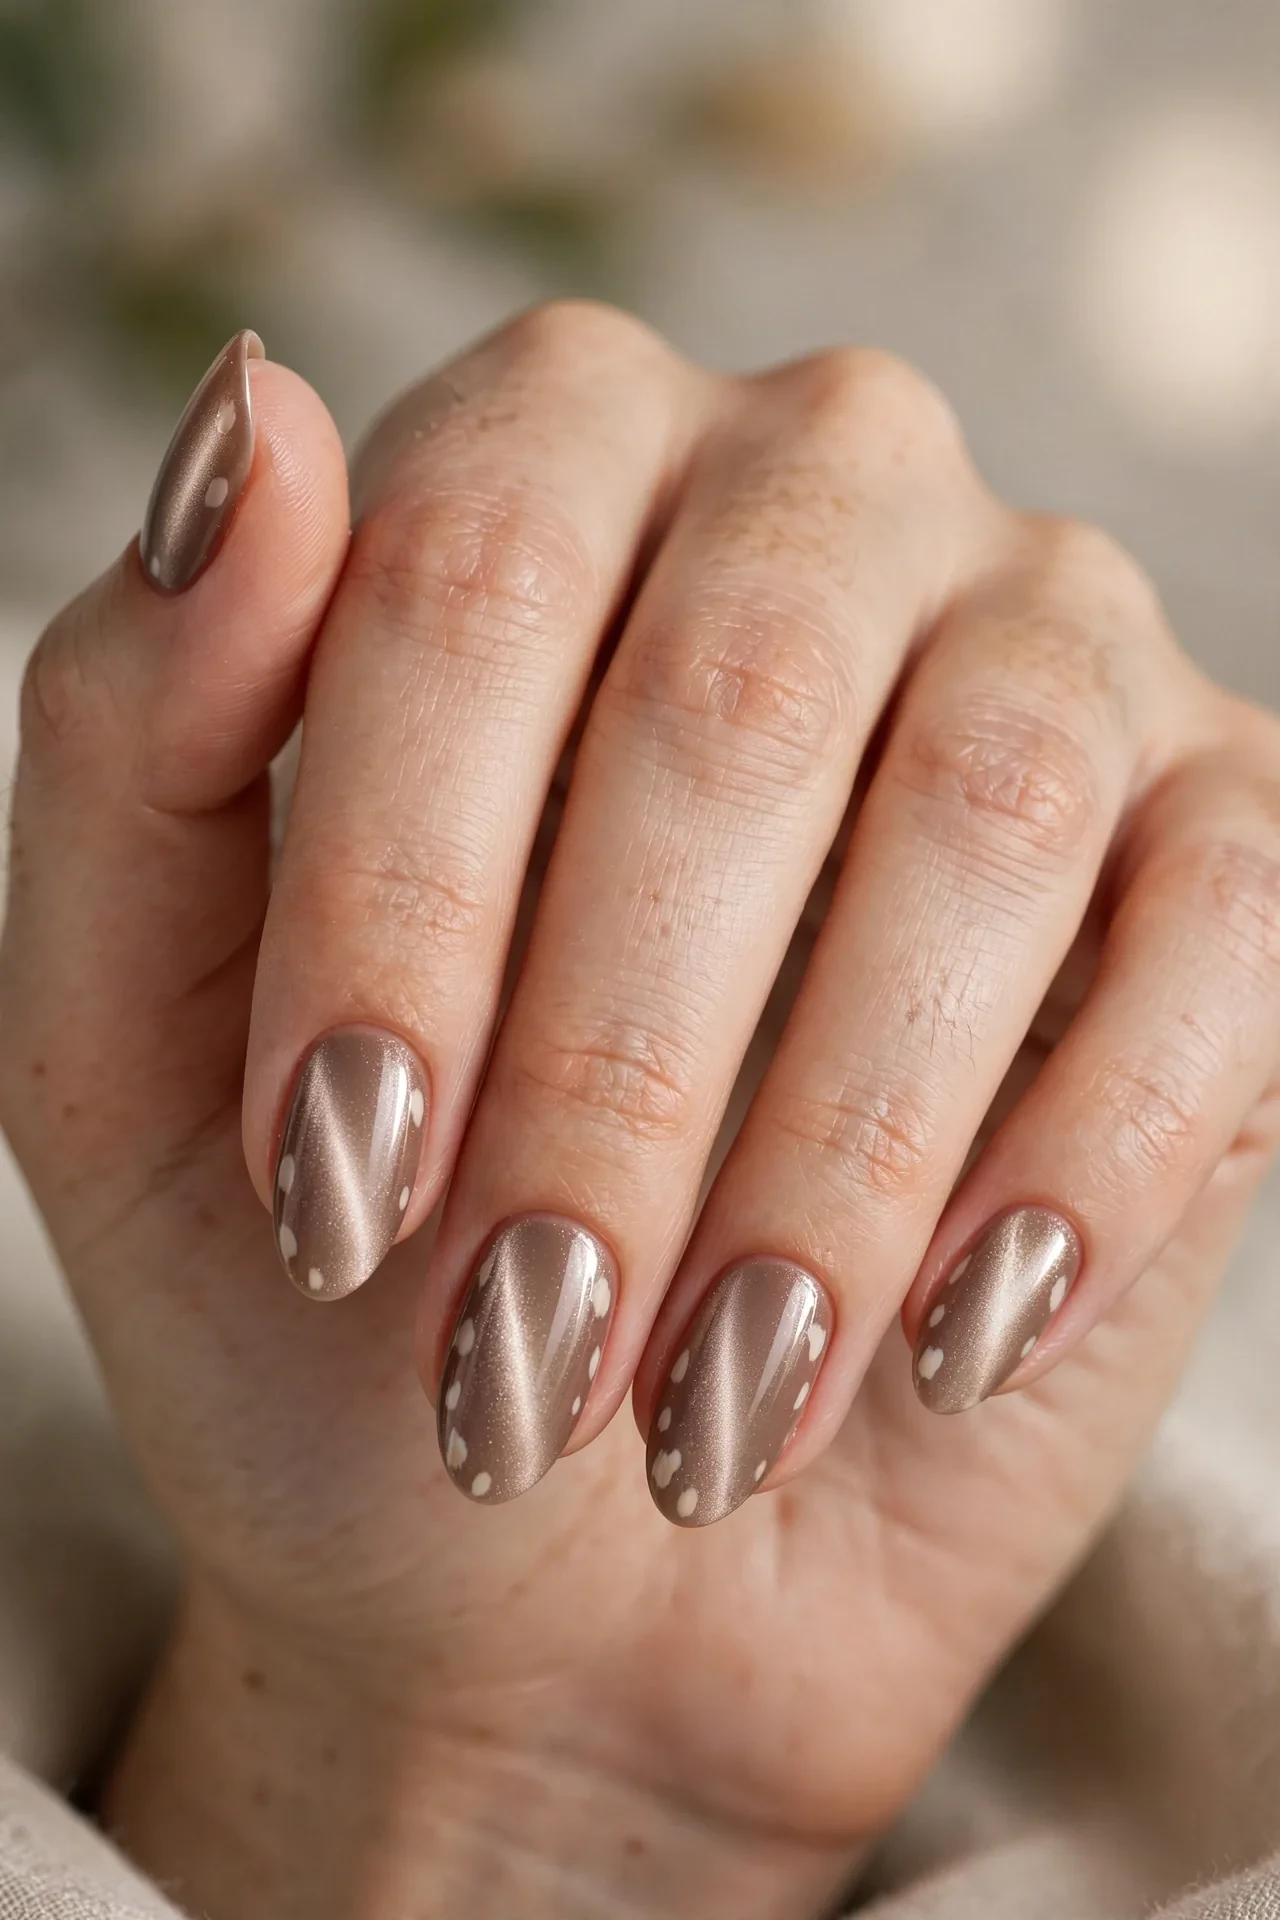
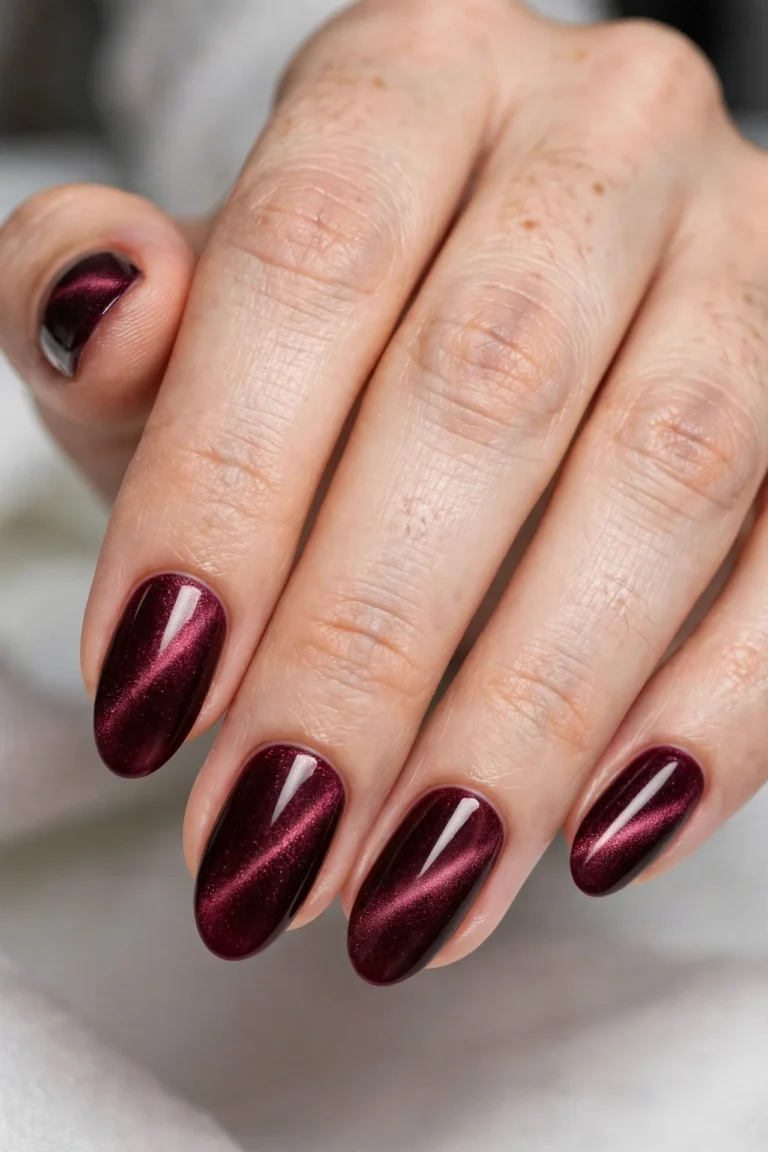
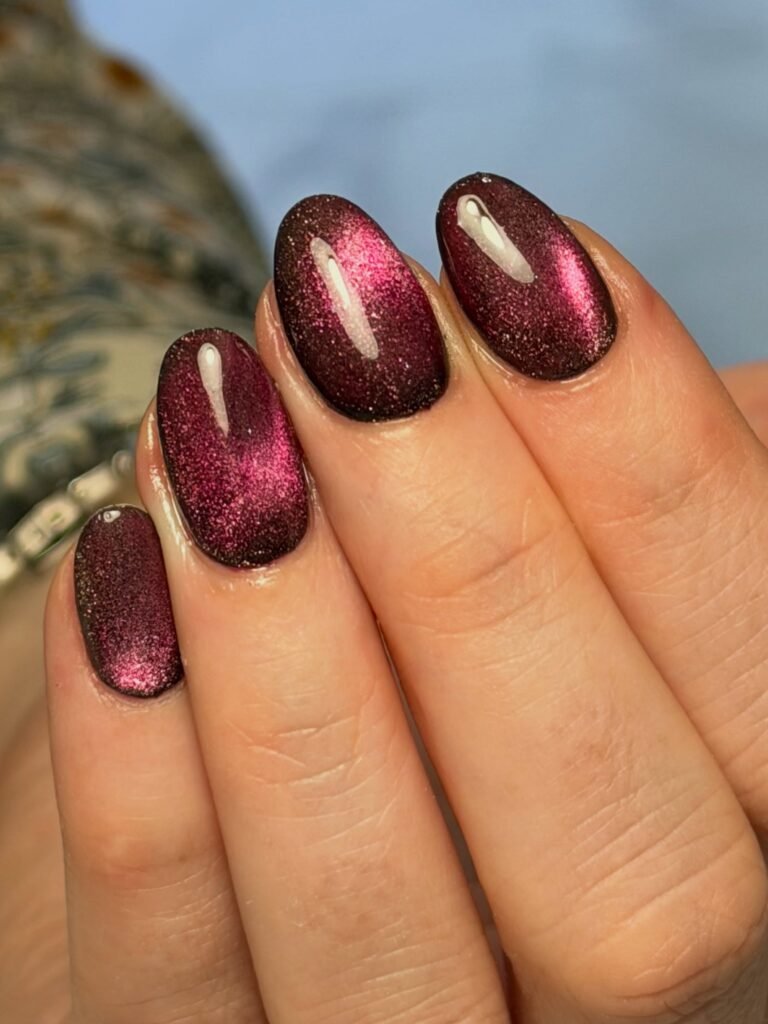
The cat-eye Bambi: a magnetic velvet polish in warm taupe or cocoa, magnetized into a soft glow, then dotted with cream fawn spots. On short nails the velvet depth makes fingertips look jewel-like, and the spots floating over the magnetic shimmer create an almost 3D fawn effect. This is the most luxurious-feeling Bambi design — it suits special occasions, holiday season, and anyone who wants their animal print to feel expensive. The taupe-cocoa base flatters all skin tones, and the velvet finish shifts in the light, so the manicure never looks flat. Short almond or squoval shapes both work beautifully, showcasing the magnetic dimension.
- Apply a magnetic velvet polish in warm taupe or cocoa.
- Layer the cat-eye effect with a magnet held close for 10 seconds.
- Seal cream fawn spots over the magnetized finish with a dotting tool.
- Ask your tech for “velvet cat-eye with fawn spots on top, short almond.”
DIY magnetic polish is very doable: apply one nail at a time, hold the magnet just above the wet polish for about ten seconds until the velvet line appears, then cure or dry before moving on. The fawn spots go over the finished velvet with cream polish, placed in the brighter magnetic zones so they glow. Gel magnetic polish gives the strongest effect and three weeks of wear; regular magnetic polishes exist and last about a week. Keep the magnet steady — wobbles blur the effect — and finish with a glossy top coat to protect the spots. This design earns compliments from strangers; consider yourself warned.
Tiny Negative-Space Deer Dots
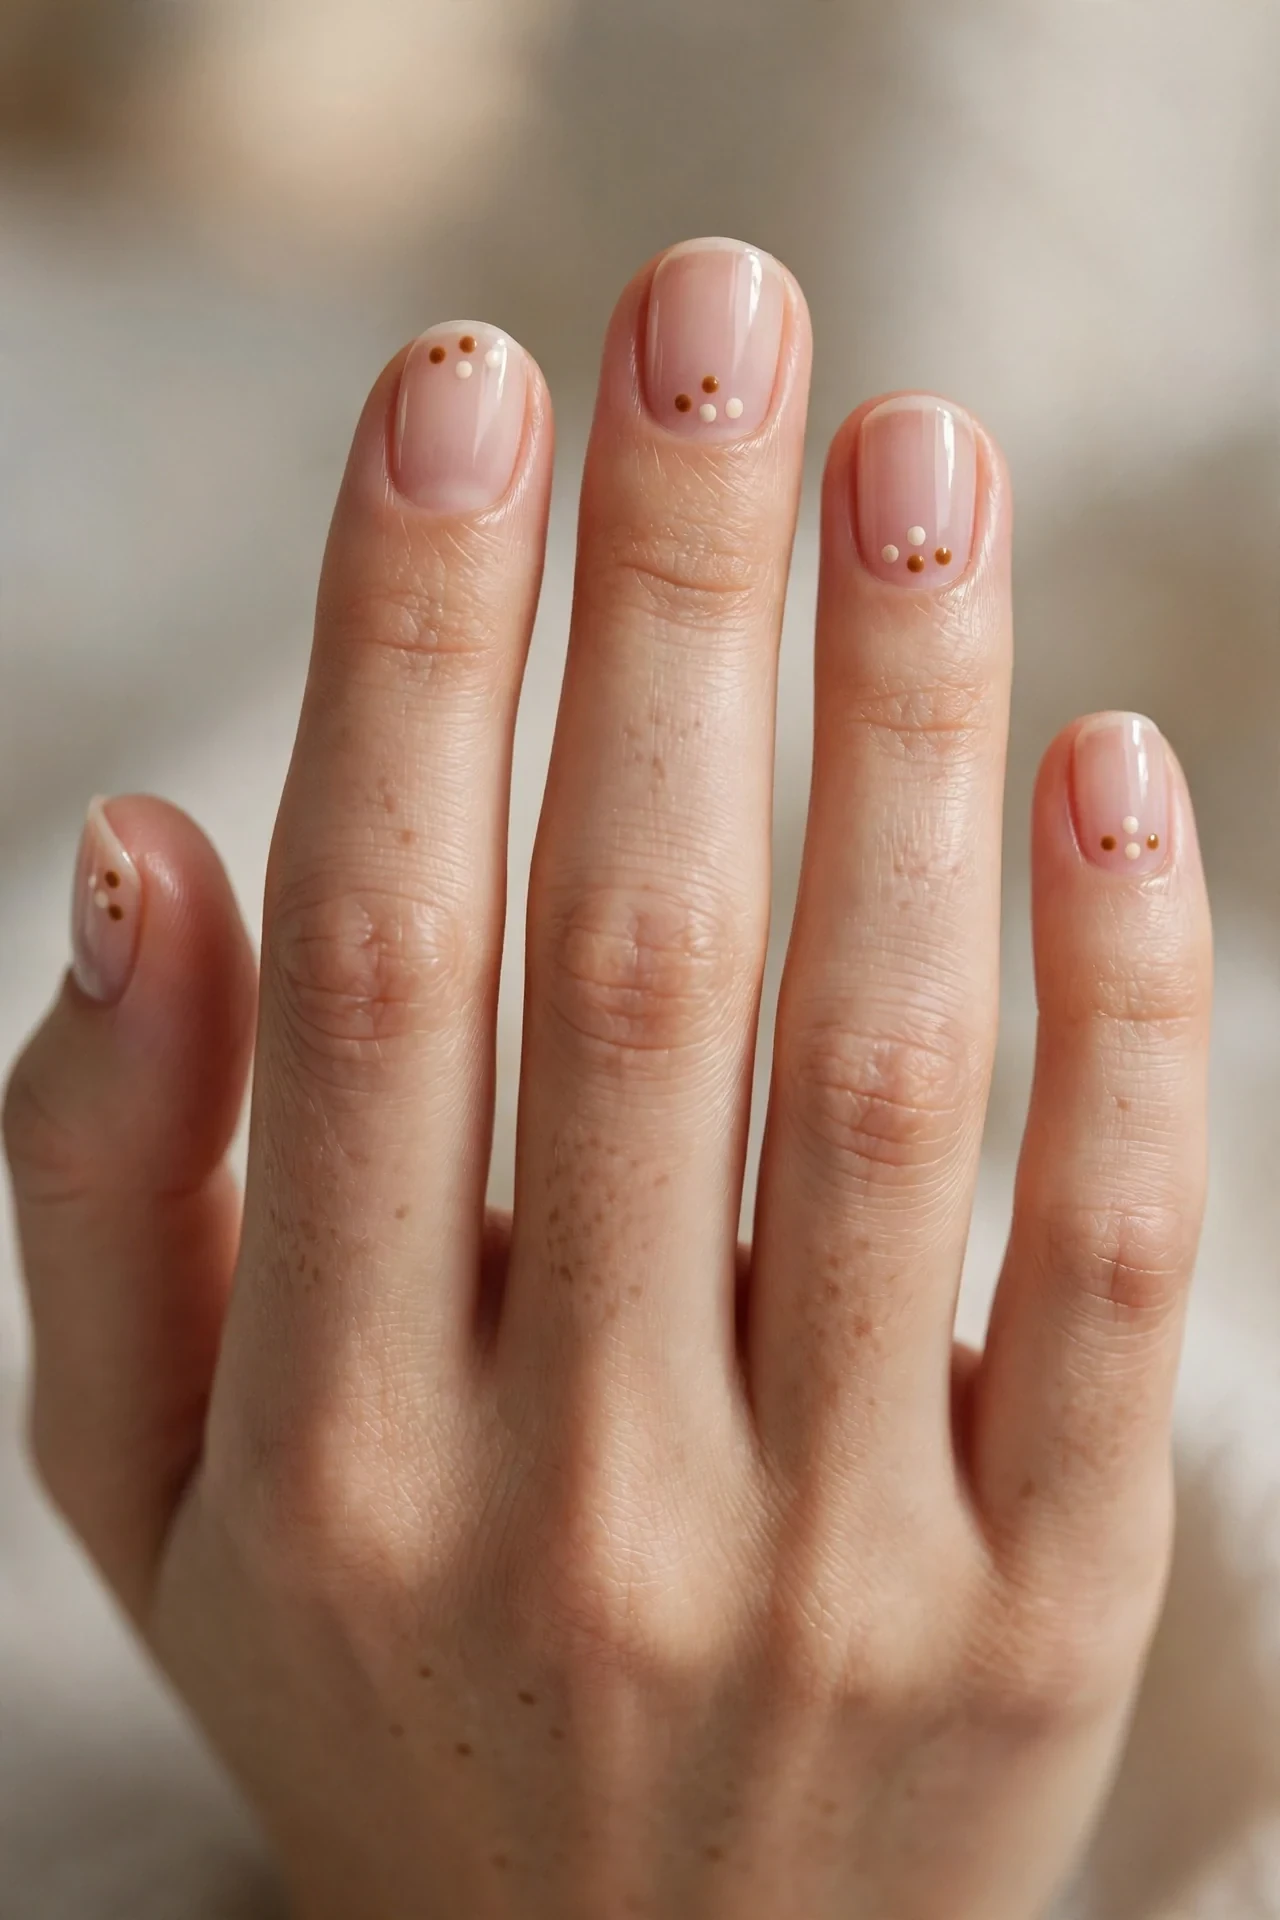
The minimalist’s Bambi: a clear or barely-pink base with tiny, precise deer dots in caramel and cream, surrounded by generous negative space. On short nails the airy layout feels modern and breathable — each nail carries just three or four perfectly placed dots, like a deer glimpsed between trees. This is the design for people who love the idea of fawn print but live in neutrals; it suits every skin tone and every setting from boardrooms to barefoot weekends. The precision is the luxury here, so the short length actually helps — fewer dots per nail means each one lands perfectly. Round shapes keep it soft and effortless.
- Apply a clear strengthening base with a hint of sheer pink.
- Layer 3-4 tiny dots per nail in caramel, alternating with cream.
- Seal with a thin glossy top coat, keeping the finish weightless.
- Ask your tech for “negative-space deer dots, minimal, round shape.”
DIY is all about restraint: use a pin or the smallest dotting tool, blot excess polish, and place each dot deliberately — one near the cuticle, one mid-nail, one near the tip, offset so they never line up. The caramel dots anchor the design and the cream ones soften it. Because the base is clear, regrowth is invisible and chips are nearly undetectable, making this the lowest-maintenance Bambi of all — regular polish easily lasts ten days, gel three weeks. A ridge-filling base coat first gives the clearest, smoothest canvas. This is also the perfect “growing out” design between bolder manicures.
Fawn Print and Tortie Mix
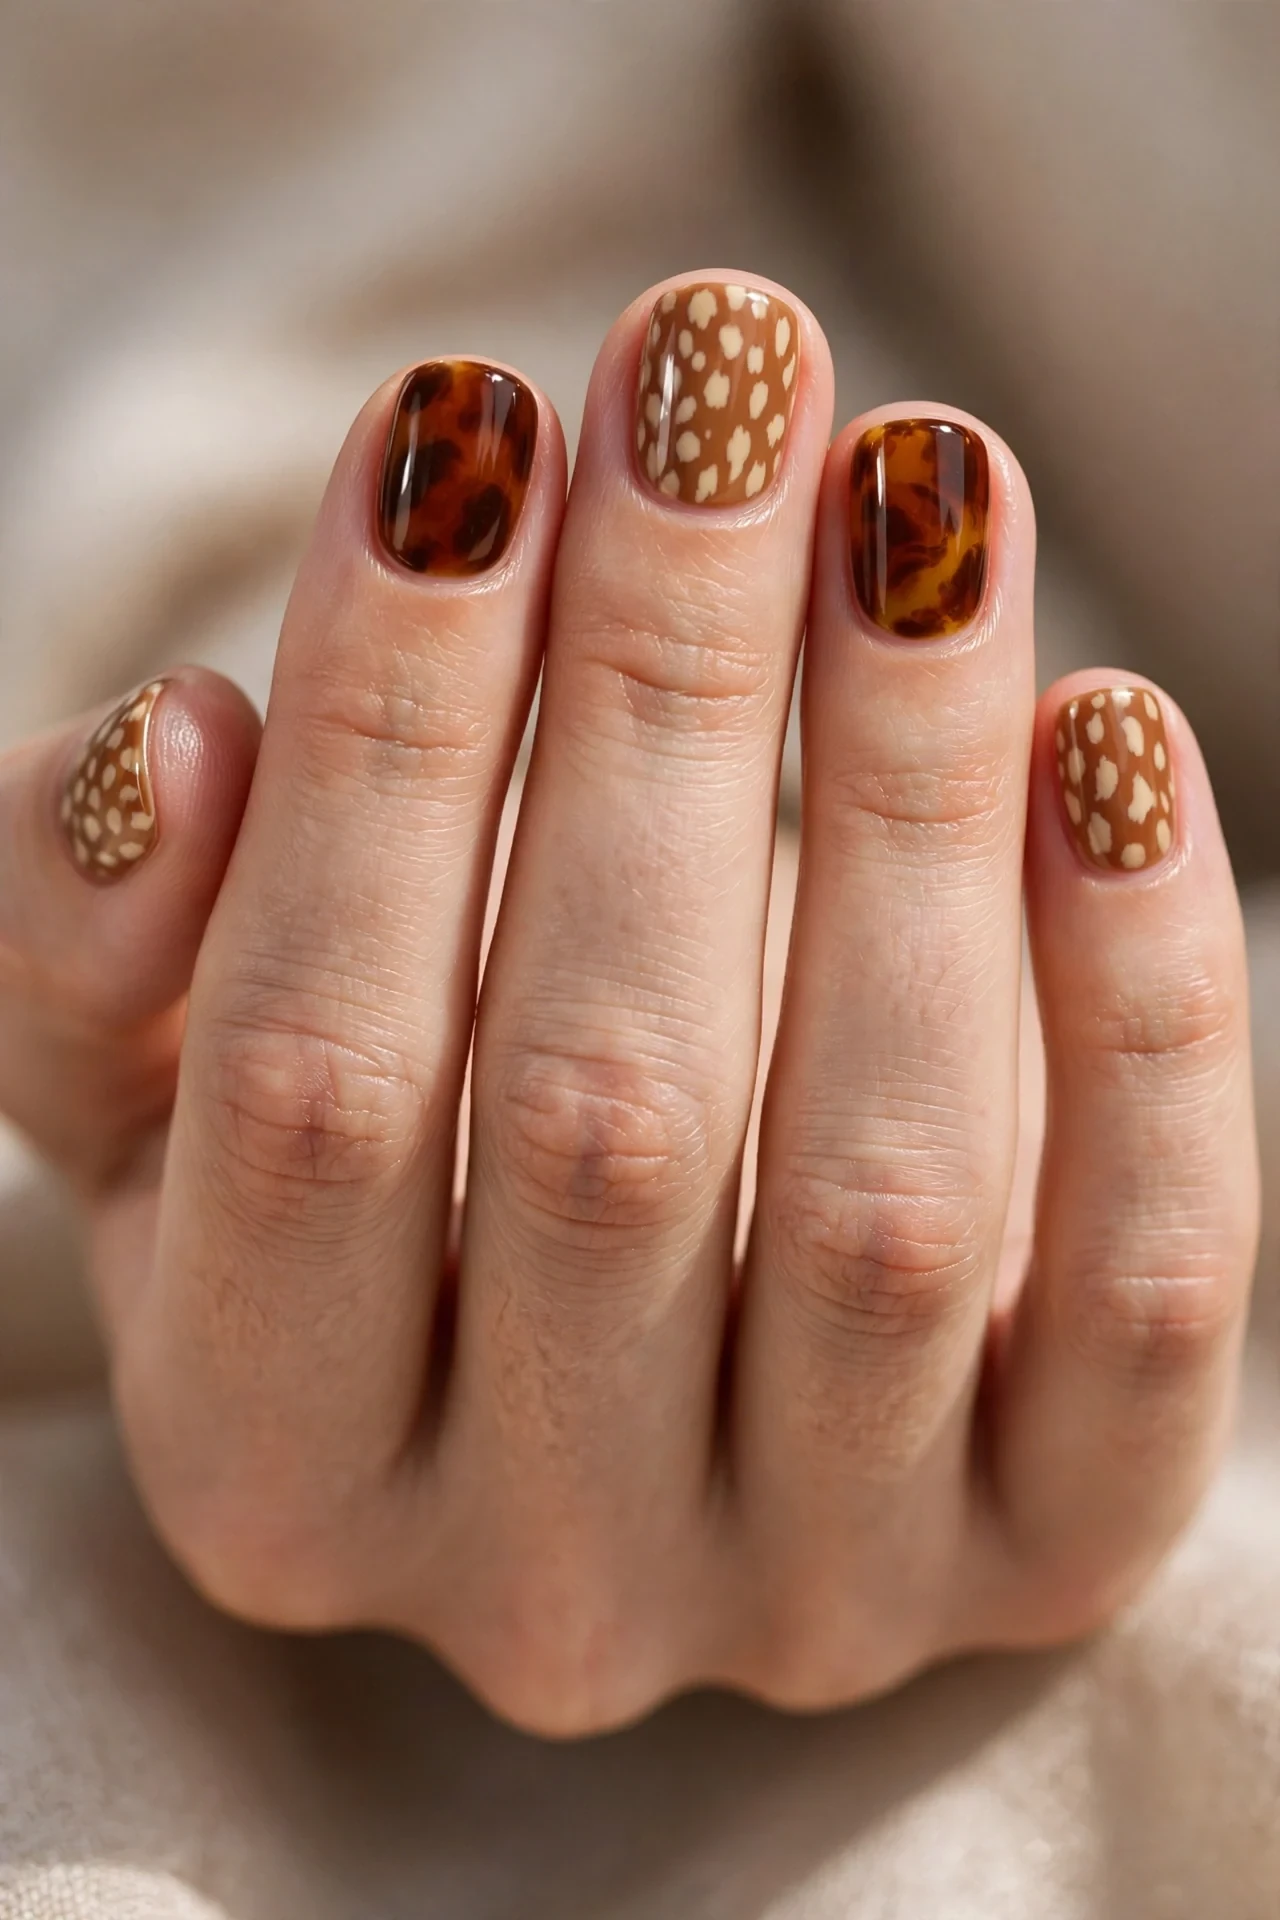
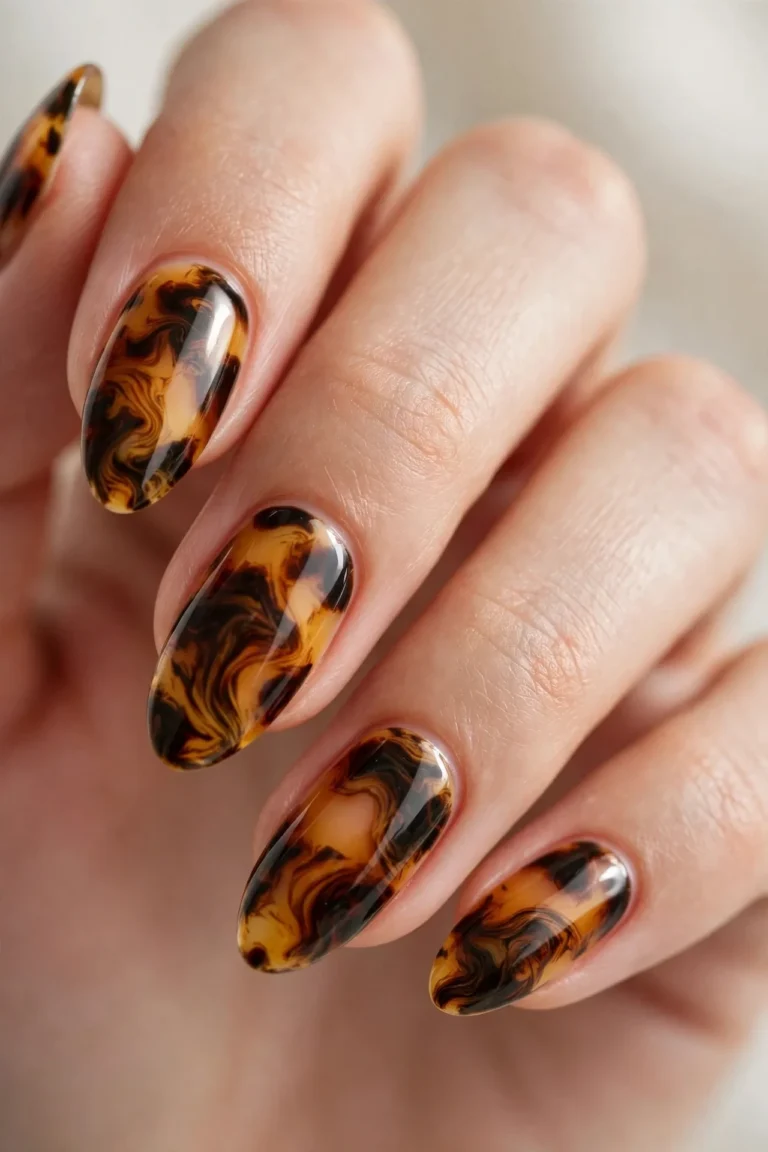
Two fall icons, one manicure: alternate nails of classic fawn print and rich tortoiseshell, tied together by their shared caramel-brown family. On short nails the mix keeps each hand interesting without overwhelming — the tortie’s amber depth and the fawn’s soft spots play off each other like autumn leaves and deer in the same forest. This is the design for maximalists and indecisive souls alike, and it suits anyone who already loves tortoiseshell and wants to try the Bambi trend without committing fully. The shared color story makes it cohesive rather than chaotic, and it pairs with every fall outfit you own. Squoval shapes show off both prints beautifully.
- Apply caramel fawn print on the thumb, index, and pinky nails.
- Layer tortoiseshell on the middle and ring nails with amber and cocoa.
- Seal all nails with the same glossy top coat for cohesion.
- Ask your tech for “fawn print and tortoiseshell mix, alternating nails.”
At home, paint the fawn nails first (caramel base, cream dots), then tackle the tortie nails with the classic technique: amber base, irregular cocoa blobs, a touch of black-brown depth, all melted under glossy top coat. Keeping the fawn spots and tortie blobs in the same warm family is what makes the mix work — if one nail runs cool and another warm, the set clashes. Gel gives you three weeks of this statement set; regular polish holds about a week before the busy prints need a gloss refresh. If you love this pairing, explore more of the amber family in our 10 Autumn Ember Nails for designs that coordinate perfectly with the tortie side.
Conclusion
Bambi nails on short nails prove that the sweetest trends don’t need length to shine — fawn spots are tiny by nature, so they fit short tips more naturally than almost any other print. Whether you fell for the classic caramel-and-cream, the moody night-forest version, or the luxe velvet cat-eye, you’ve now got 15 ways to wear bambi nails short nails with salon wording, DIY steps, and wear-time tips for each. Start with the design that matches your fall wardrobe, keep that cuticle oil handy, and don’t be surprised when strangers ask about your manicure. And if the fawn print has you craving more autumn warmth, our 15 November Nail Colors: Transitioning Into Winter roundup picks up right where Bambi leaves off — same cozy palette, brand-new season. Happy painting, and may your short nails stay forever spotted.