15 Stiletto Nails for a Bold November Look
Introduction
November is the month to stop playing it safe, and stiletto nails are your loudest, sharpest way to do it. That dramatic tapered point stretches your fingers, sharpens any outfit, and turns even a plain black sweater into a statement — which is exactly why stiletto nails dominate your feed every late autumn. In the next few minutes you’ll get 15 bold designs built for November: velvet finishes, moody ombré, glassy chrome, and deep wine tones that pair perfectly with this season’s palette. If you’re easing out of softer autumn shapes, browsing the 10 Fall Nails 2026 Trends first will show you where stilettos fit in the bigger picture — then come back here for the full-length drama.
Velvet Burgundy Stiletto Nails
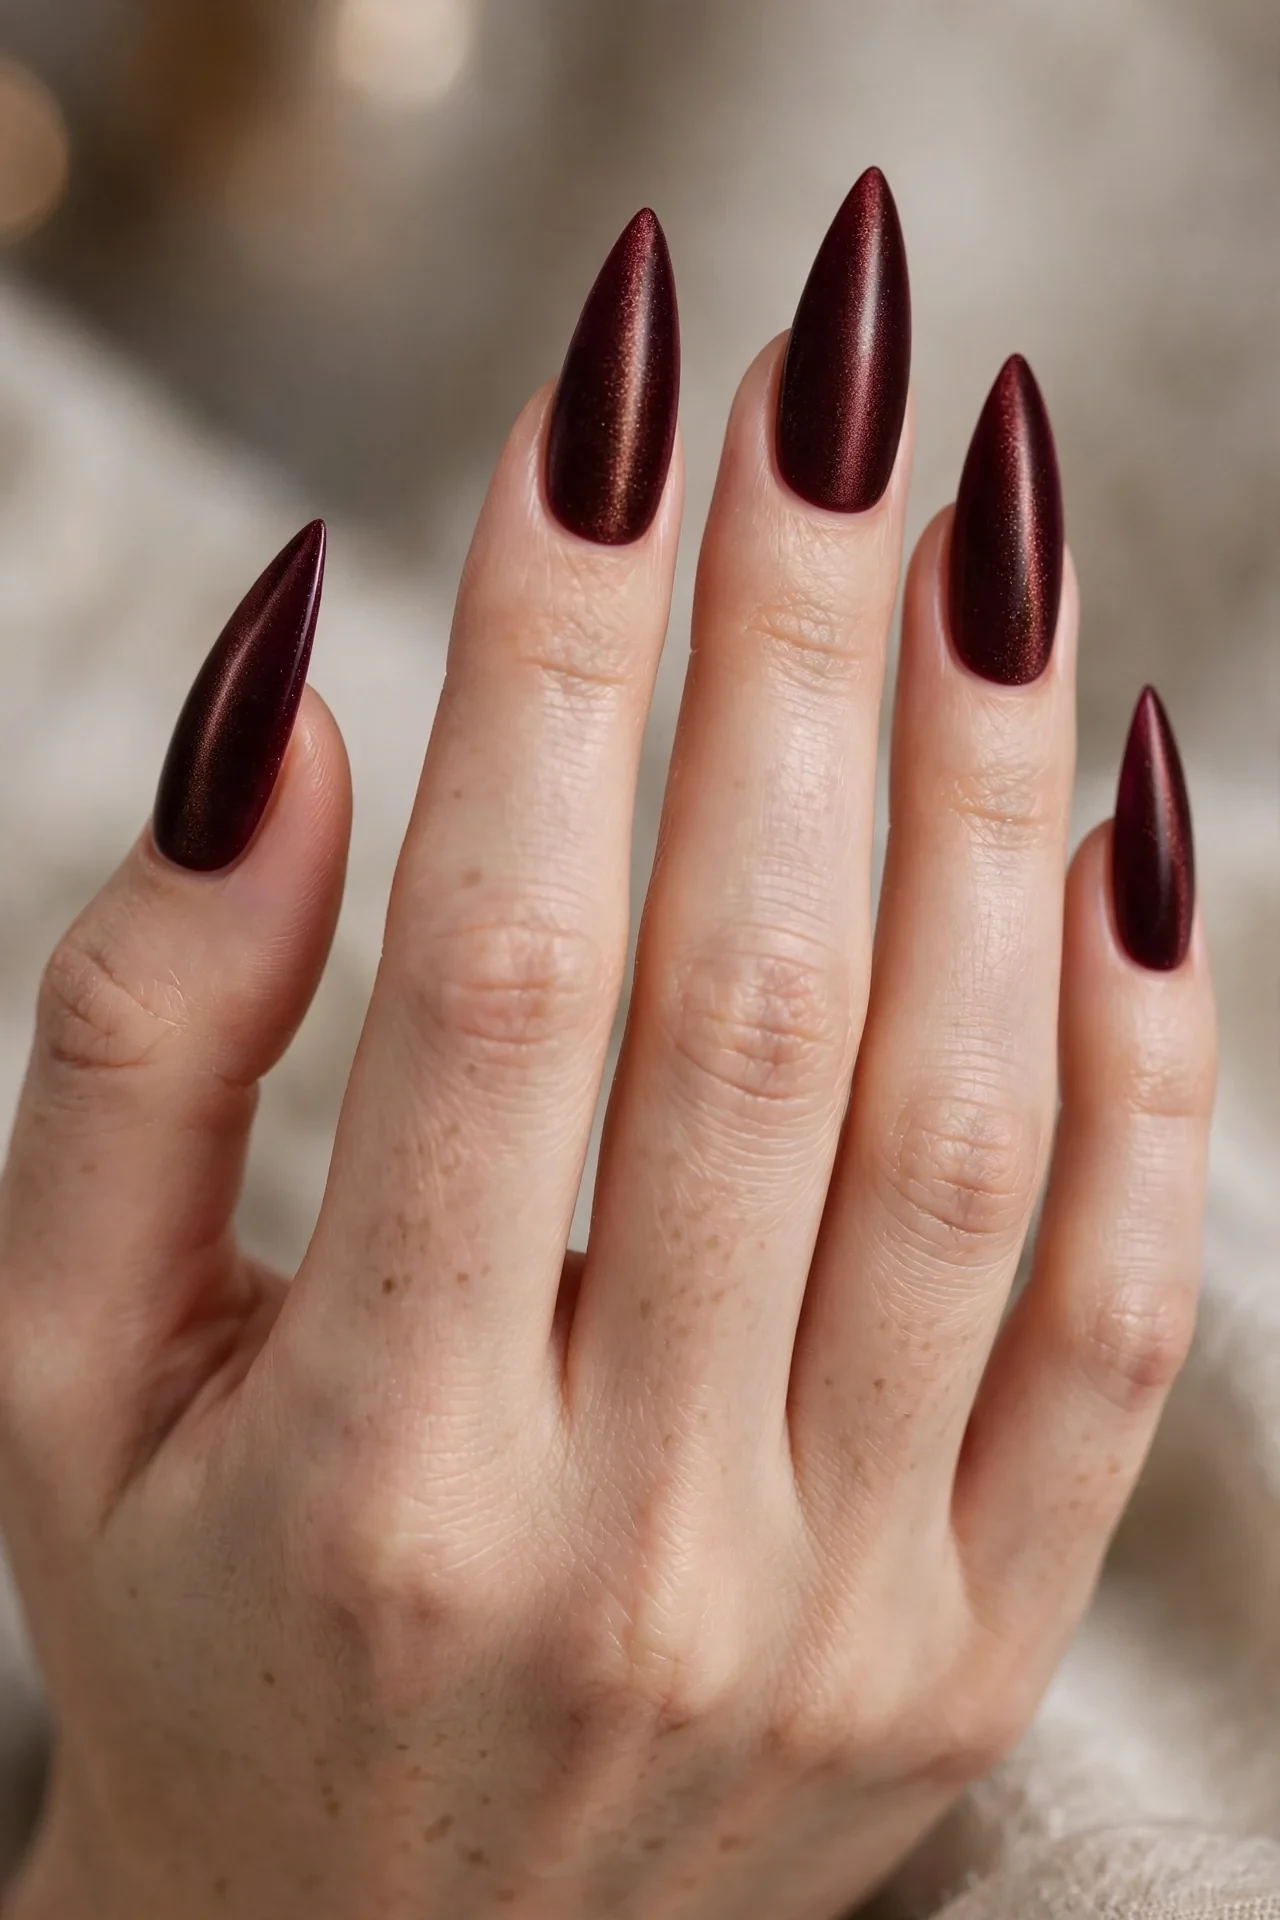
Nothing says bold November quite like deep burgundy on a razor-sharp point. This design starts with a rich wine base coat finished in a plush velvet matte texture that drinks in the light, then layers a faint velvet-cat-eye shimmer at the center of each nail so the color shifts like crushed velvet fabric. Long stiletto nails carry this best, but medium lengths still get the drama. The tone flatters warm and deep skin tones beautifully, and it’s made for evening plans — dinners, parties, and every late-night photo. The pointed silhouette keeps an otherwise classic color from feeling predictable, which is exactly why this is a November staple.
- Ask your tech for a long stiletto shape with a softly reinforced apex.
- Apply two coats of deep burgundy gel for full, even coverage.
- Layer a magnetic velvet-cat-eye polish and set it with a magnet before curing.
- Seal with a velvet matte top coat to lock in the plush finish.
At the salon, ask for “burgundy velvet stiletto nails with a magnetic cat-eye under matte top coat” — most techs know the velvet technique. At home, press-on stilettos in a wine shade get you 90 percent there; file the tips slightly sharper and add a velvet matte top coat for the effect. The matte finish hides minor chips well, so expect two to three weeks of wear from gel. Keep cuticle oil on nightly, because matte top coats look best on hydrated nail edges, and avoid acetone-heavy removers that dull the plush look.
Espresso Glazed Stiletto Manicure
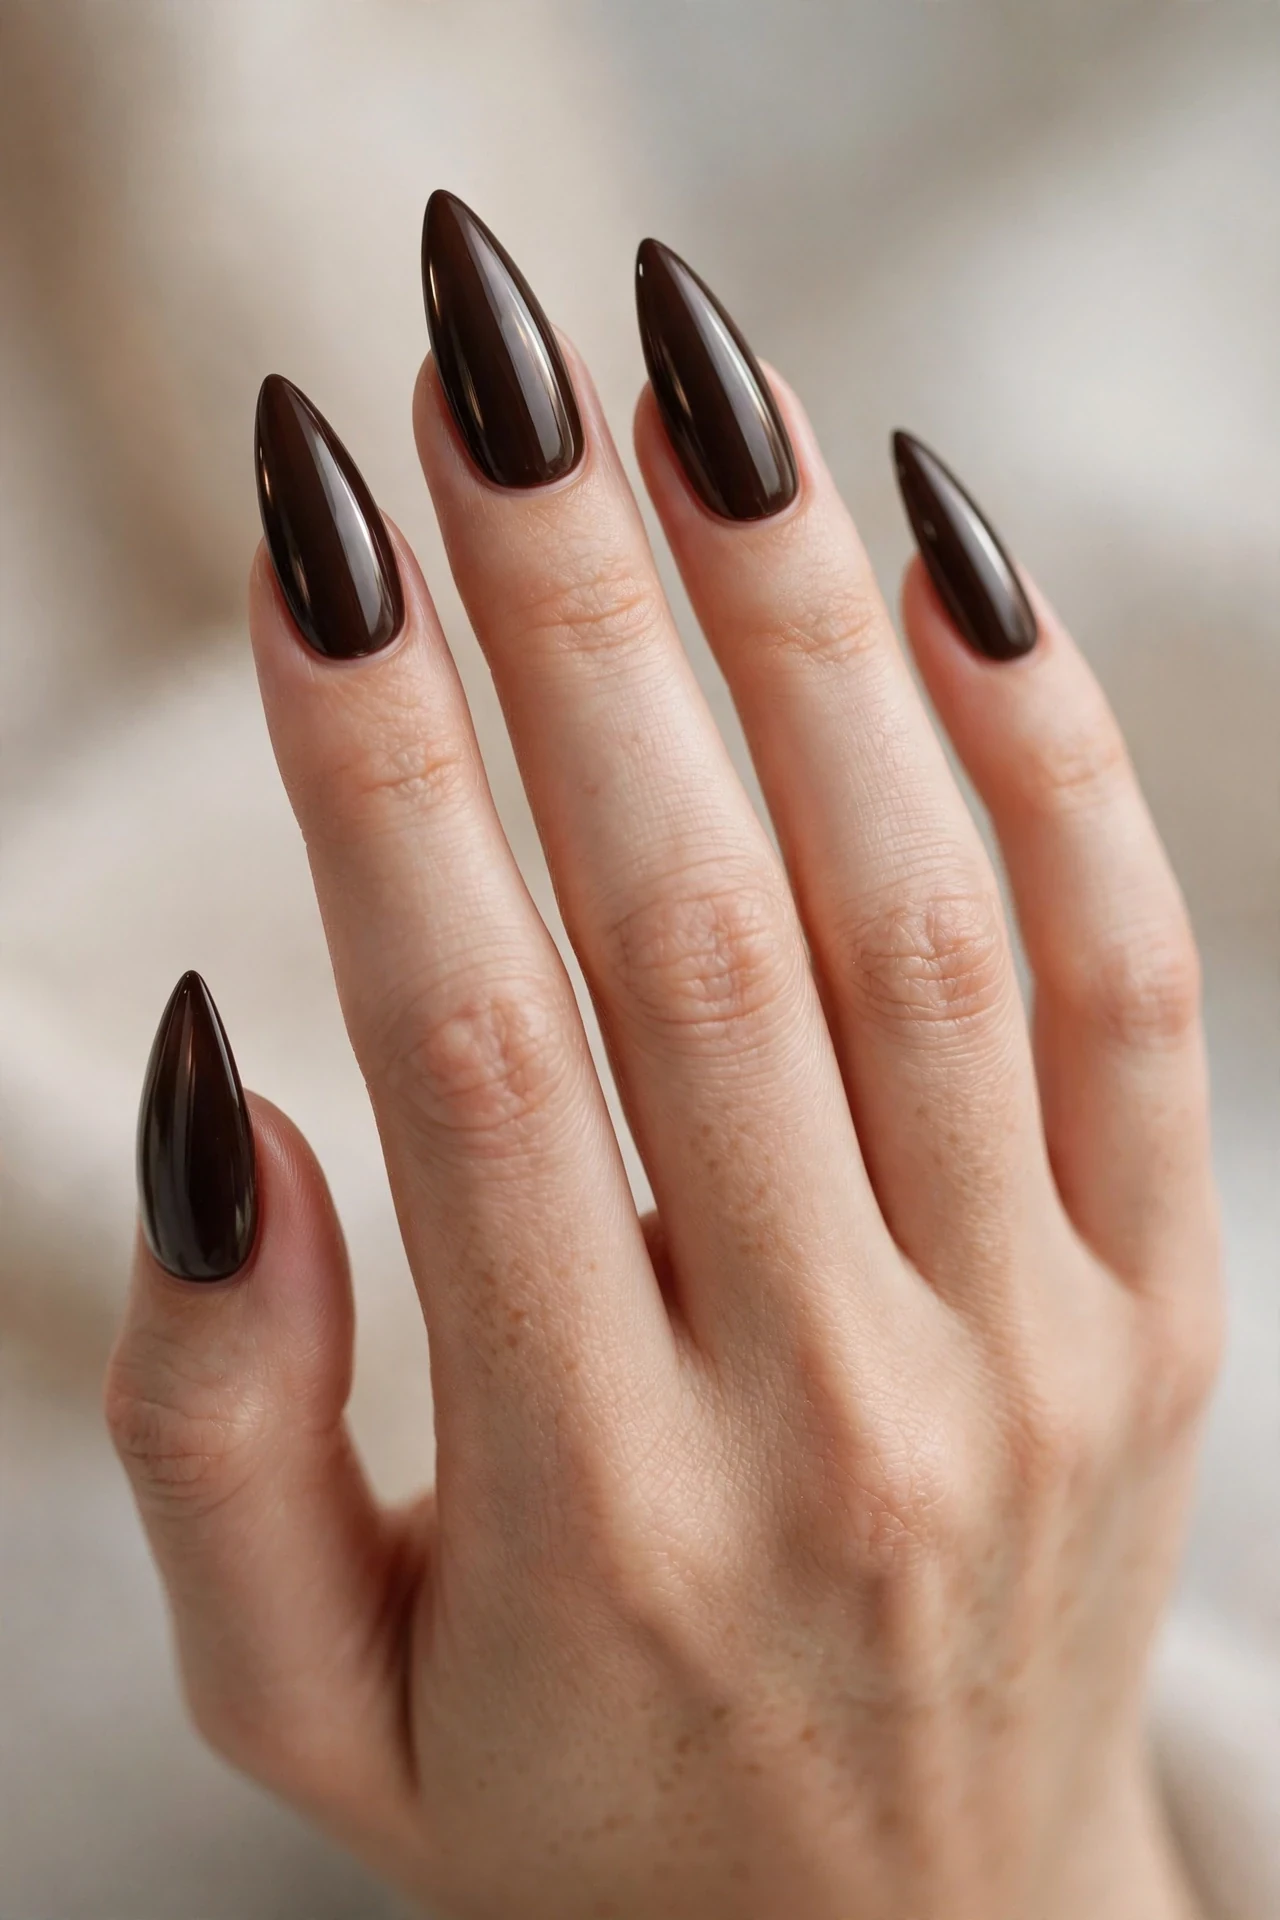
Chocolate brown is having its moment, and the glazed finish keeps it from looking flat or heavy. Picture a rich espresso base — almost black at the edges — with a glassy, donut-glaze top layer that catches light along the stiletto curve. This stiletto manicure reads expensive and quiet, the kind of bold that whispers instead of shouts. It suits medium to long nails on every skin tone, especially medium and deep ones, and it works everywhere from the office to date night. The pointed shape elongates shorter fingers, and the glossy finish makes the color feel wearable daily rather than costumey.
- Apply a dark espresso gel base in two thin, even coats.
- Layer a sheer chrome or pearl glaze powder over the tacky layer.
- Smooth a no-wipe glossy top coat to create the glass effect.
- Ask your tech to slightly narrow the sidewalls for a true stiletto taper.
Tell your salon you want “espresso glazed stilettos with a chrome glaze layer” — a good tech will know the Hailey Bieber–era glaze method. DIYers can fake it with a dark brown press-on set plus a chrome powder rubbed over a no-wipe top coat, then sealed. Glossy glazes show scratches less than matte finishes, so this wears beautifully for three weeks. Reapply a thin clear top coat at home around day ten to refresh the shine, and keep the tips capped to prevent lifting at the point.
Midnight Emerald Pointed Stilettos
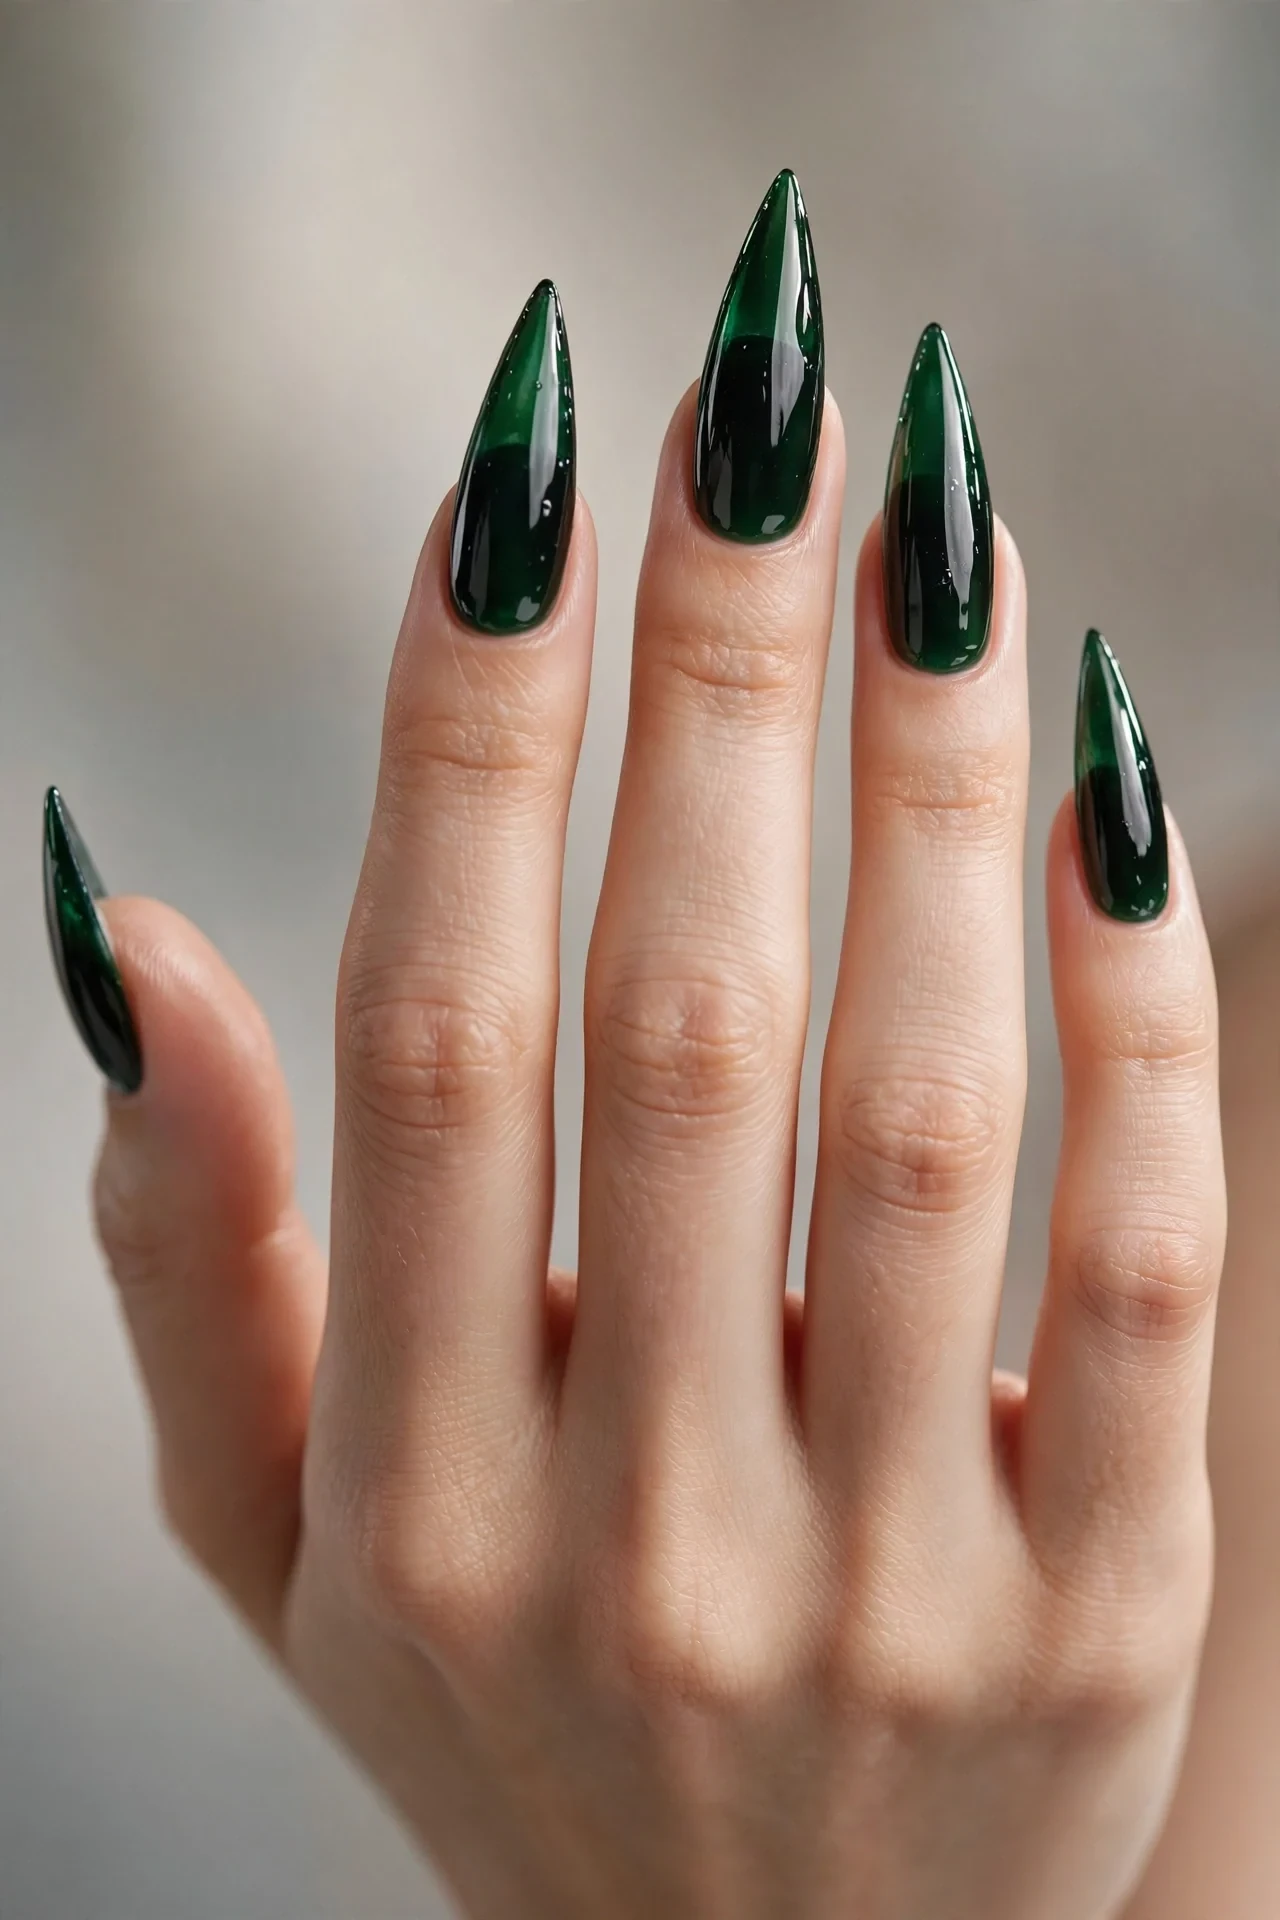
If burgundy is November’s classic, emerald is its confident little sister. These pointed stilettos pair a blackened-green base with a glossy, almost wet-looking finish that reads black indoors and reveals green depth in daylight — a color-shifting trick that keeps people staring. The darkness slims the nail bed visually, which makes this flattering on wider nail plates, and the gloss keeps it luxe instead of goth. Wear it to holiday dinners, concerts, or anywhere you want the room to notice your hands without a single jewel in sight.
- Apply a blackened emerald green gel polish in two coats.
- Layer a deep green jelly coat to build glassy depth.
- Seal with a high-gloss no-wipe top coat for the wet look.
- Ask your tech to keep the tip ultra-sharp and file-free of chips.
Salon wording is simple: “blackened emerald stilettos, glossy jelly finish.” A magnetic cat-eye in emerald over a black base gives a similar depth if your tech suggests it. At home, layer a green jelly polish over a black base on long almond press-ons, then file them into a point — jelly finishes are forgiving for DIY. Dark greens hide growth lines well, stretching wear to nearly three weeks, but they can stain the natural nail slightly, so always use a good base coat and keep removal gentle with soaking rather than picking.
Black Cherry Chrome Tips
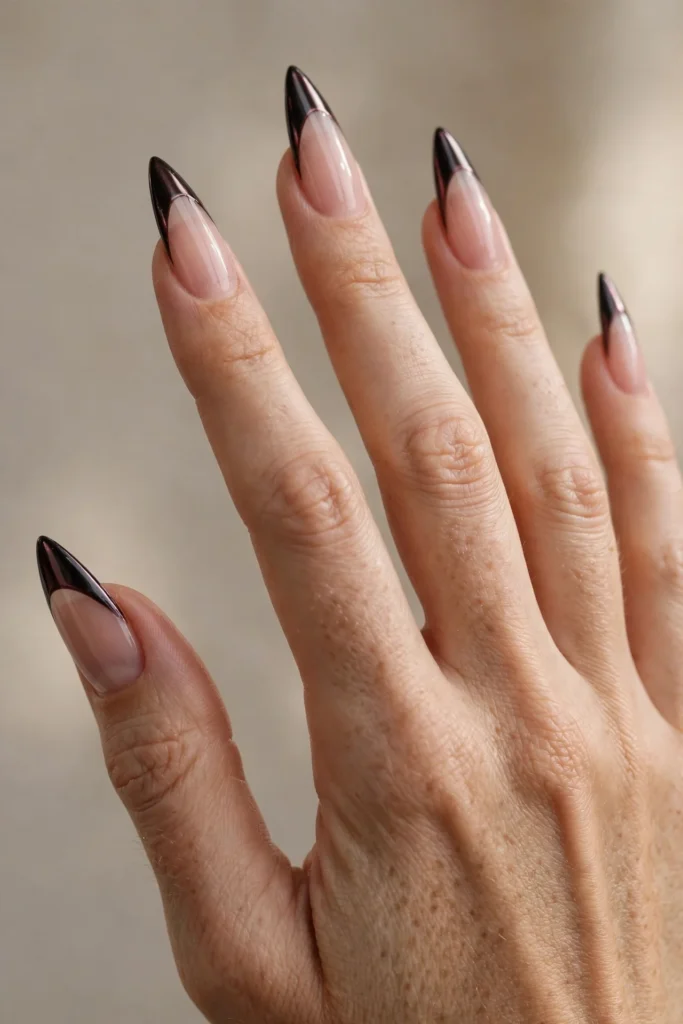
This design gives you the drama of black tips without committing the whole nail. A sheer nude-to-pink base lets your natural nail show through, while the tips melt into black cherry — a near-black red — finished in a liquid chrome that looks like polished metal. On a stiletto shape the effect is arrow-like and fierce. The nude base means regrowth is nearly invisible, so this is the most low-maintenance bold look on the list. It flatters every skin tone and works for anyone who wants edge at the office without HR noticing.
- Apply a sheer nude or milky pink gel base across the full nail.
- Sponge or airbrush black cherry chrome onto the tips in a sharp V.
- Rub chrome powder into the tip for a liquid-metal finish.
- Seal the whole nail with glossy top coat, capping the free edge.
Ask your salon for “chrome French tips in black cherry on a nude stiletto base.” Chrome French is one of the trickiest techniques, so see a tech who does chrome regularly. DIY shortcut: paint nude, add a black-red gradient at the tip with a sponge, then press chrome powder only onto the tacky tip area. Because the base is nude, you can easily push this to three weeks. Keep a clear top coat in your bag for touch-ups, and file the tip straight back if it chips — chrome hides the repair surprisingly well.
Golden Hour Ombré Stilettos
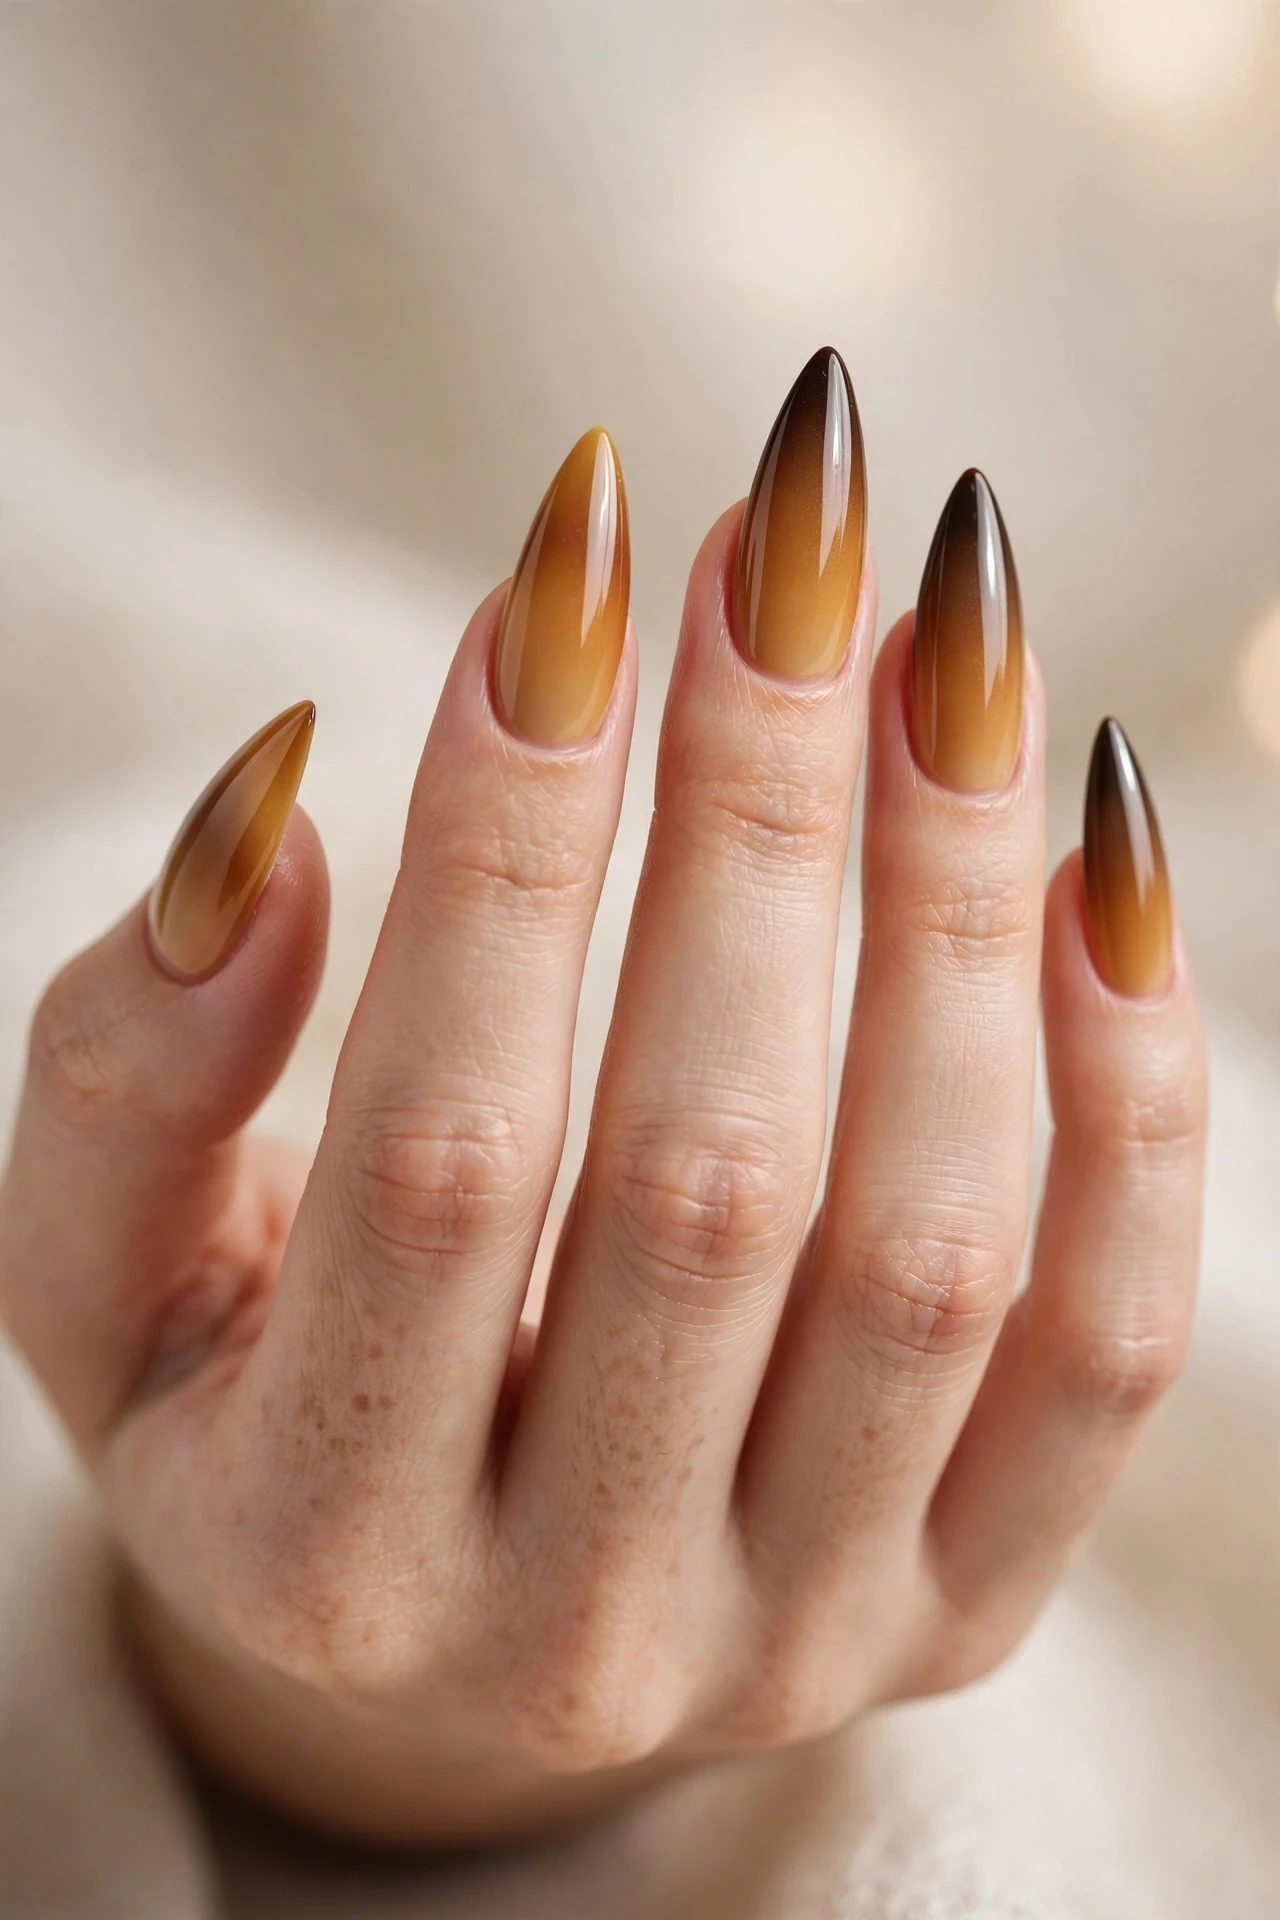
Think of the last warm light of a November afternoon — that gradient from burnt caramel to amber to deep cocoa — melted across long pointed nails. This ombré flows from a golden caramel at the cuticle through amber mid-nail to a dark espresso tip, blended so smoothly it looks airbrushed. It’s the warmest, friendliest bold on this list, and it glows on medium to deep skin tones especially. The finish works for Thanksgiving week, cozy weddings, and anyone who wants a statement that feels like candlelight.
- Apply a caramel nude base as your starting shade.
- Sponge amber and espresso gel in horizontal bands, blending the edges.
- Repeat the sponging twice to build a seamless gradient.
- Seal with glossy top coat to melt the layers together visually.
Salon request: “vertical caramel-to-espresso ombré on long stilettos, glossy finish.” Airbrush gives the smoothest result, so pick a tech with an airbrush setup if you can. At home, makeup sponges are your friend: dab the colors onto the sponge and press onto the nail in layers, cleaning up edges with a brush and acetone. Ombré naturally camouflages regrowth, giving you a full three weeks. The blended look survives small chips better than solid colors, so this is a forgiving choice for first-time stiletto wearers.
Matte Cocoa Sharp Stilettos
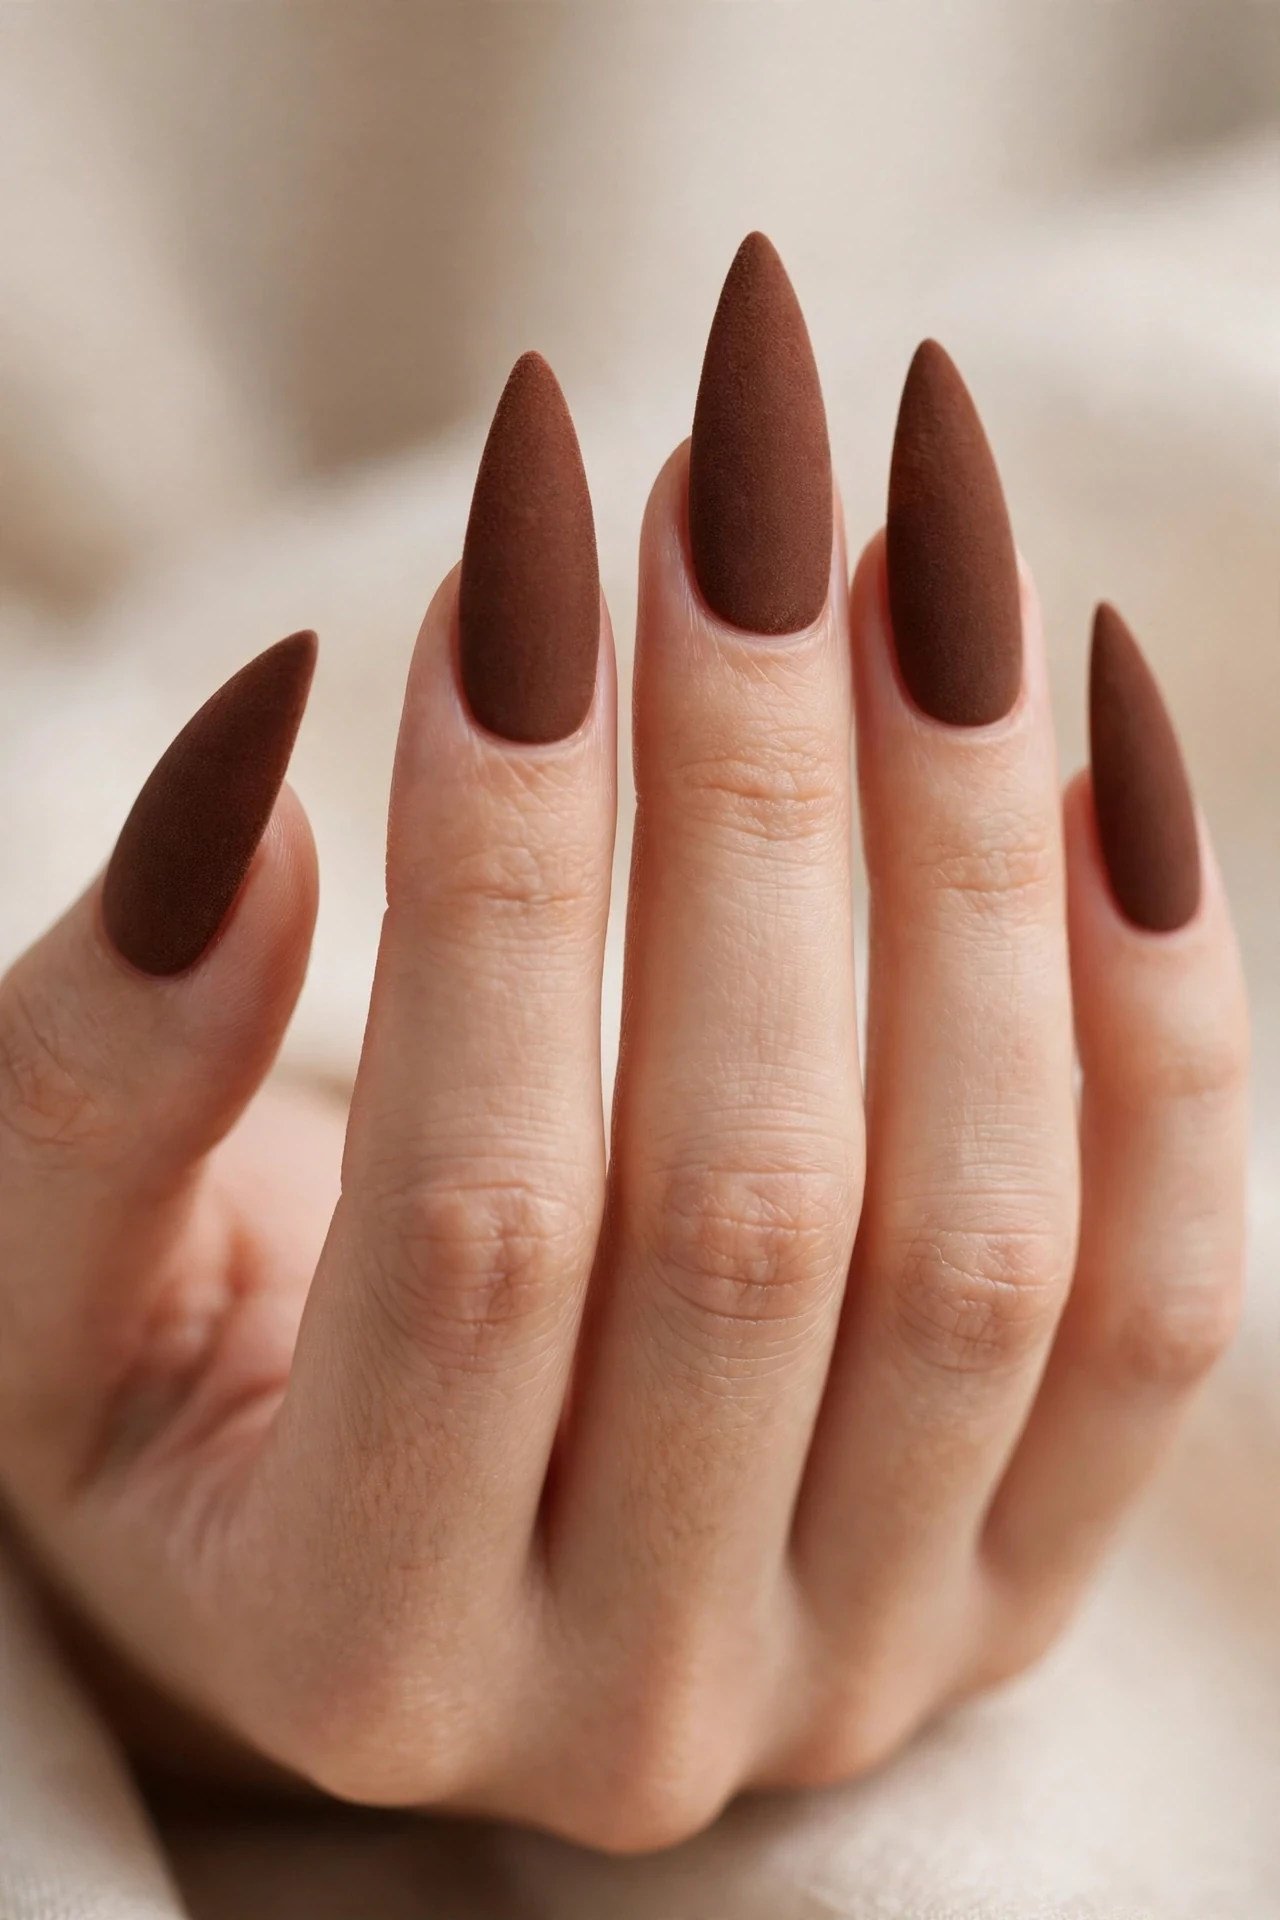
Matte finishes turn chocolate brown into something architectural, and on a stiletto shape that means pure sculpture. A flat cocoa base with zero shine emphasizes the clean lines of the point — every angle becomes intentional. This is the minimalist’s version of bold: no glitter, no chrome, just color and shape doing all the work. It suits long nail beds best and looks striking on fair to medium skin. Wear it with gold jewelry and oversized knits; the matte texture against chunky textures is a November dream.
- Shape nails into a precise stiletto with crisply filed sidewalls.
- Apply two coats of flat cocoa or milk-chocolate gel polish.
- Skip any shimmer layers to keep the surface perfectly matte.
- Seal with a velvet matte top coat, avoiding any gloss.
Ask for “matte cocoa stilettos, sharp taper, no shimmer.” At home, press-on stilettos plus a matte top coat nail the look in minutes — matte top coats even out minor DIY imperfections. Matte finishes show oils and smudges more than gloss, so wipe nails with alcohol pads occasionally to restore the flat finish. Wear runs about two weeks before the tips start glossing up naturally; a fresh matte top coat layer mid-week buys more time.
Cranberry Aura Stiletto Nails
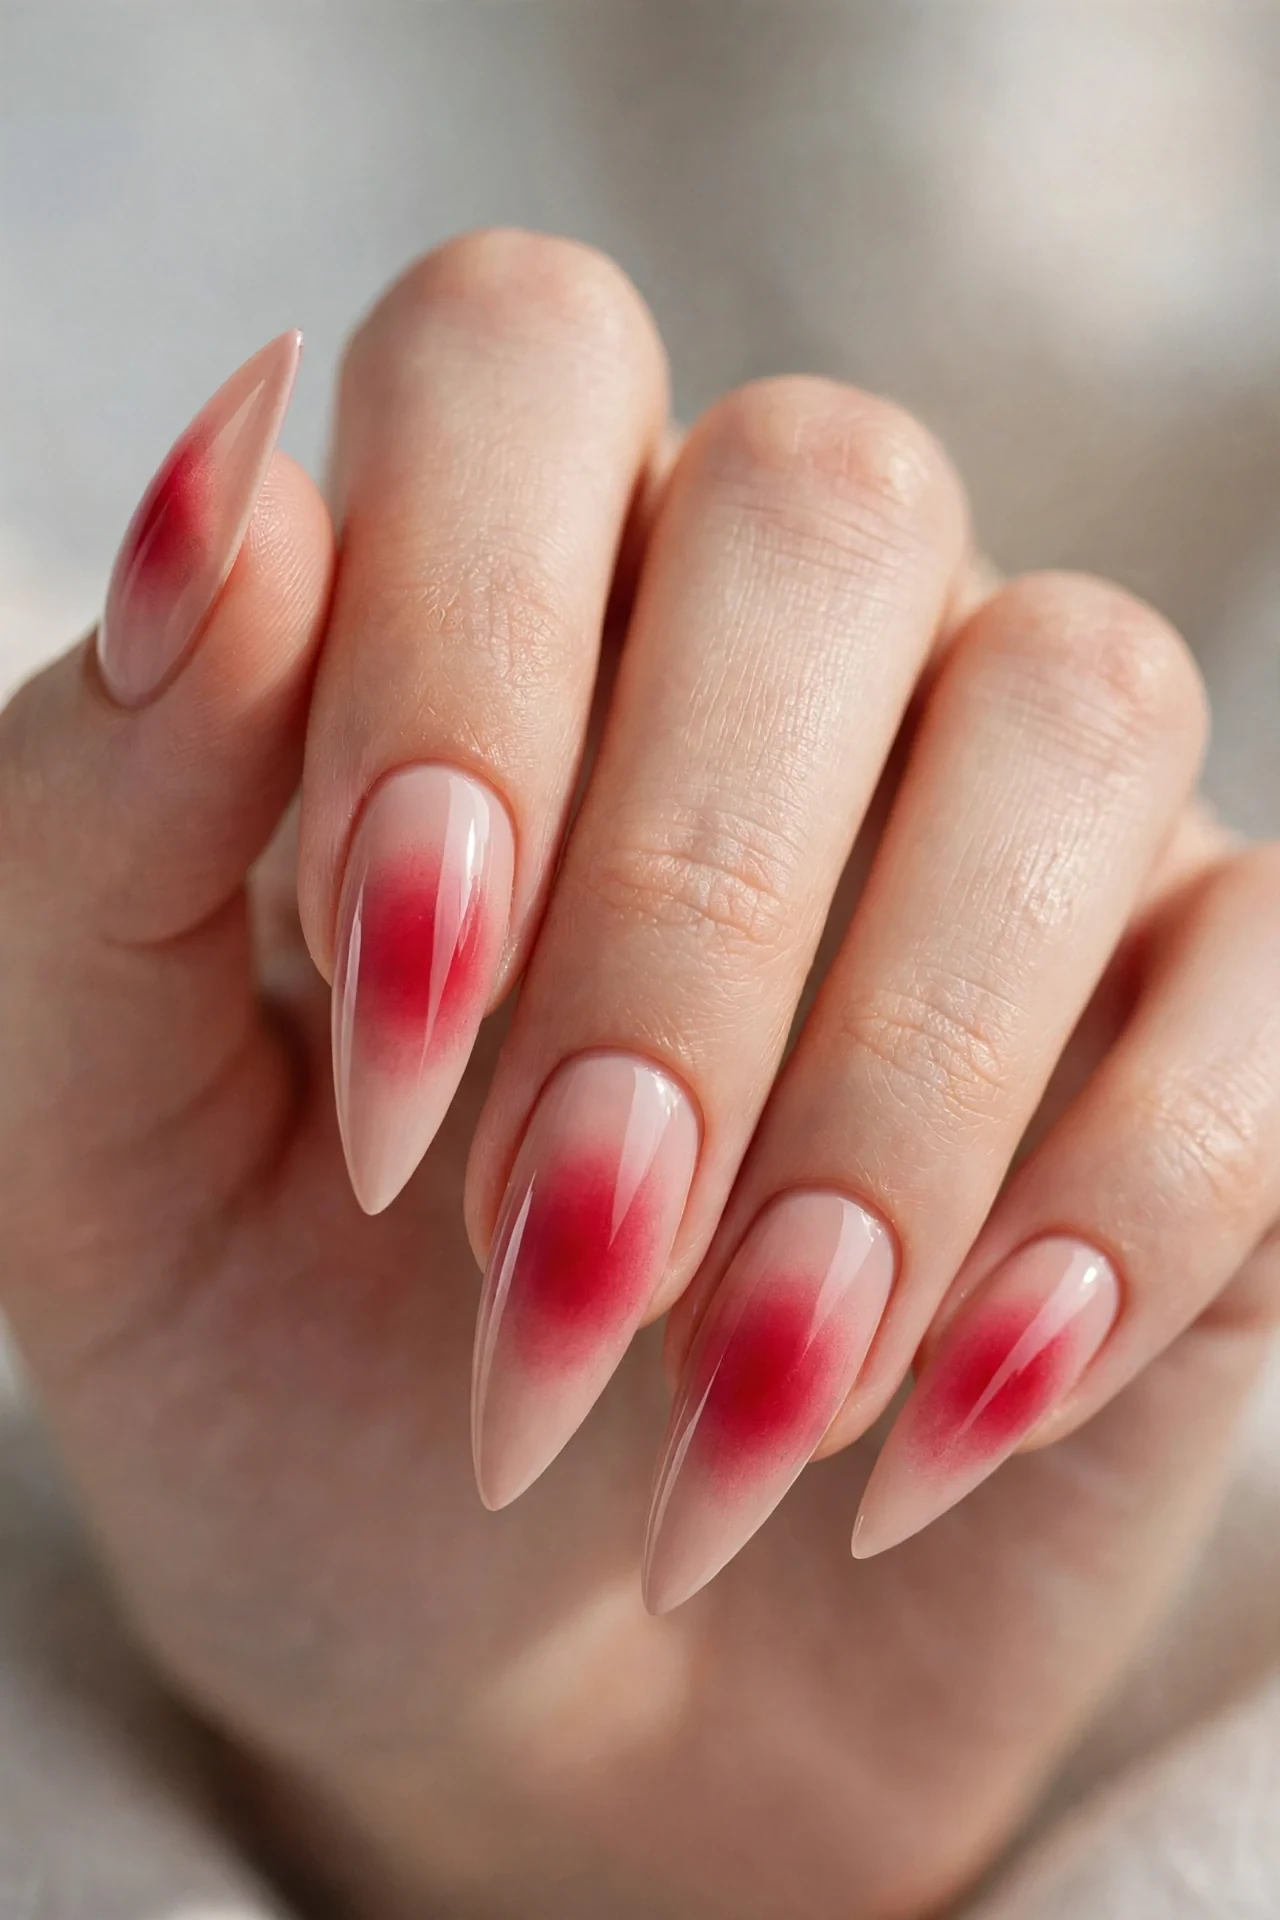
Aura nails put a soft glow at the center of the nail, and in cranberry tones it looks like the nail is lit from within. A pale blush base blooms into a saturated cranberry center — airbrushed so the edges melt seamlessly. On stiletto nails the aura concentrates toward the wider base and fades into the point, which draws the eye along the whole length. It’s softer than solid cranberry but still unmistakably bold, and it flatters fair to medium skin tones. This is your pick for holiday parties where you want compliments, not questions.
- Apply a milky blush or nude gel base in two coats.
- Airbrush or sponge cranberry pigment into the center of each nail.
- Blend the edges outward until the color melts into the base.
- Seal with a glossy top coat to deepen the glow effect.
Salon wording: “cranberry aura on blush base, stiletto shape, glossy.” If your tech lacks an airbrush, sponging with pigment powder over a tacky layer works beautifully. DIYers can use eyeshadow pressed onto tacky polish for the aura center — seal well so it doesn’t flake. Aura designs hide regrowth for nearly three weeks because the base stays light. Refresh the shine weekly with clear top coat, and note that the airbrushed pigment can fade slightly faster than the base, so avoid harsh hand soaps in week three.
Amber Tortie-Inspired Stiletto Manicure
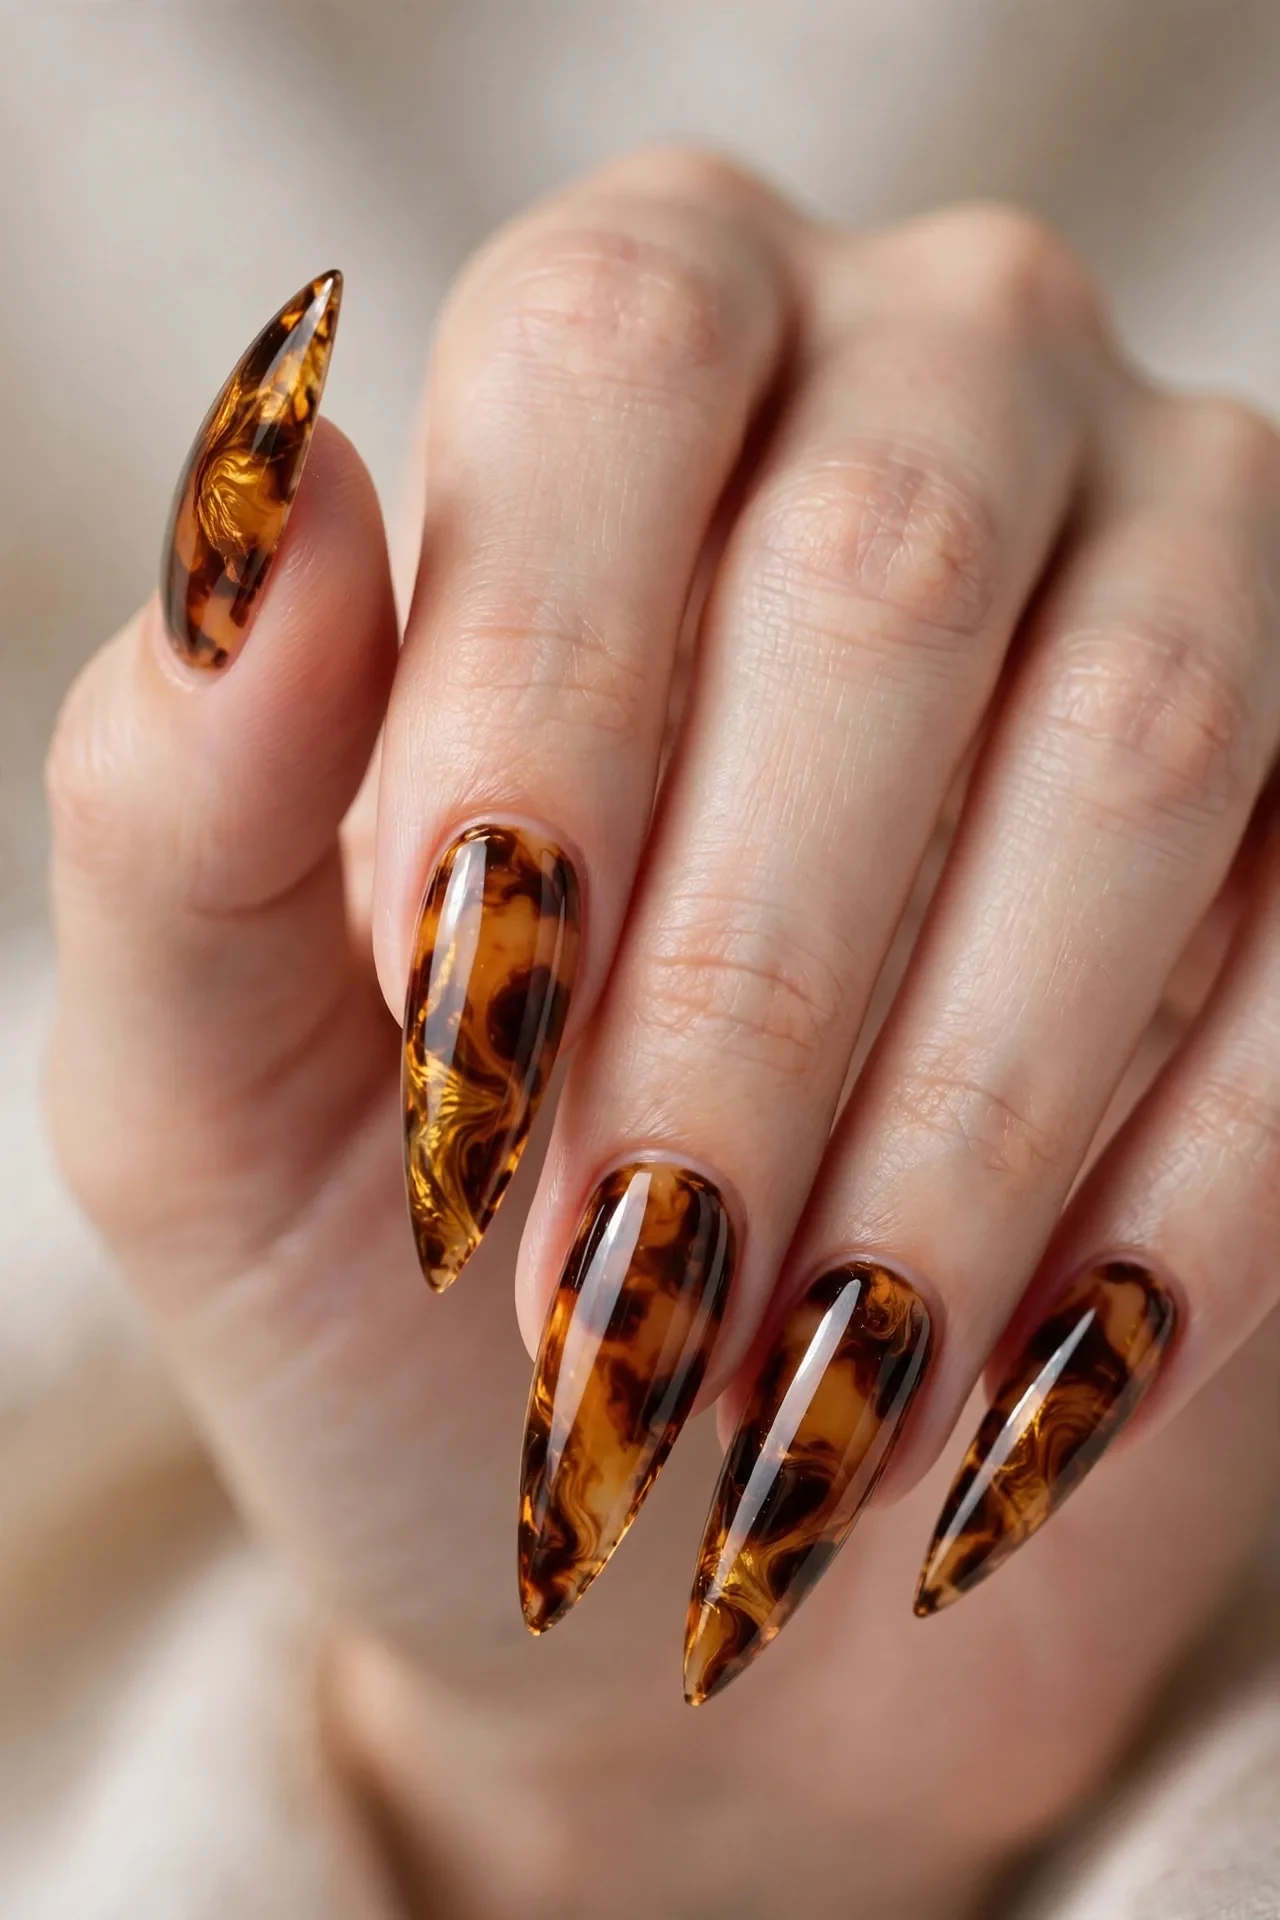
Tortoiseshell print was made for pointed nails — the amber, honey, and espresso marbling follows the stiletto taper like it was designed for it. This version swirls translucent amber and honey with dark chocolate patches, each nail slightly different, finished glossy so it looks like polished amber stone. If you fell for the 15 Tortoiseshell Nail Designs trend, this is its sharper, bolder evolution. Long nails show the pattern best, and every skin tone wears tortie well. It’s bold in a vintage-luxe way — old money, but make it November.
- Apply a sheer amber or honey jelly base coat.
- Drop dark brown and chocolate gel inks onto the tacky base.
- Swirl lightly with a detail brush for a marbled tortie effect.
- Seal with glossy top coat to mimic polished amber.
Ask your tech for “tortoiseshell print on long stilettos, glossy amber finish” — blooming gel gives the most organic marble. At home, use alcohol inks or jelly polishes on a sheer amber base; the randomness is the point, so don’t overthink placement. Tortie patterns hide chips and wear brilliantly, easily lasting three weeks. Because each nail differs, small repairs are invisible — just patch, marble, and seal.
Sapphire Cat-Eye Stiletto Points
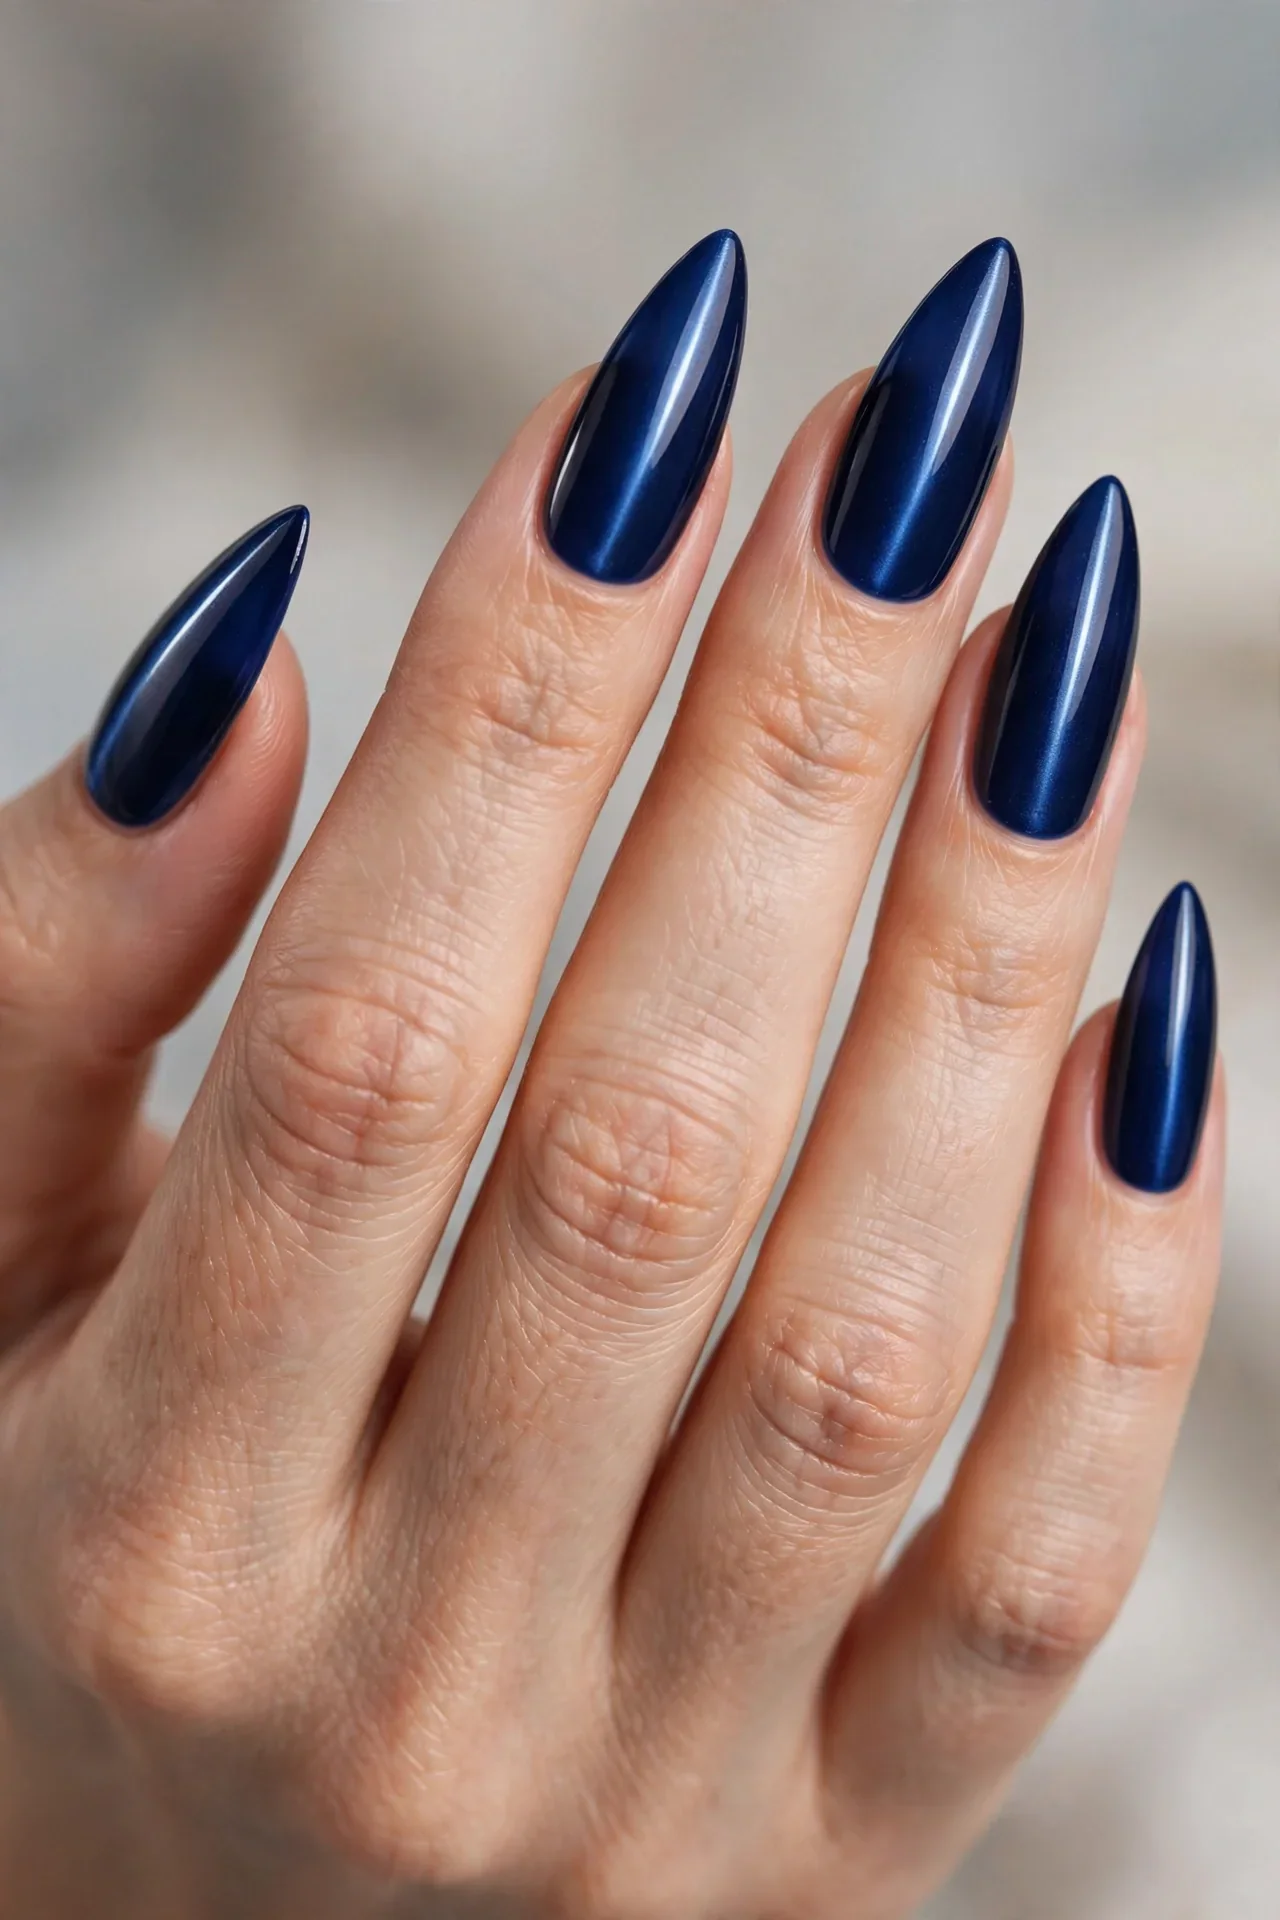
Cat-eye polish and stiletto shapes are a match made in drama heaven. A deep sapphire magnetic polish shifts from midnight blue to electric cobalt as you tilt your hands, with the magnetic line running down the center of each point like a blade of light. These gel finishes are endlessly documented in roundups of fall gel nail ideas from Byrdie, and sapphire is the shade that photographs best. It’s bold in a jewel-box way — striking on all skin tones, and absolutely made for evening events and holiday parties.
- Apply a black or deep navy gel base for maximum contrast.
- Layer sapphire magnetic cat-eye polish over the base.
- Hold the magnet at an angle to pull a sharp center line, then cure.
- Seal with glossy top coat to amplify the magnetic shift.
Salon request: “sapphire cat-eye on stiletto, sharp magnetic line, glossy.” The magnet technique takes practice, so choose a tech comfortable with cat-eye work. DIY cat-eye kits are affordable — just work one nail at a time so the polish stays wet for the magnet. The dark base hides regrowth well, giving three easy weeks. Keep nails away from strong magnets afterward (they can subtly disturb the effect over time), and refresh gloss weekly.
Blush Nude Stiletto French
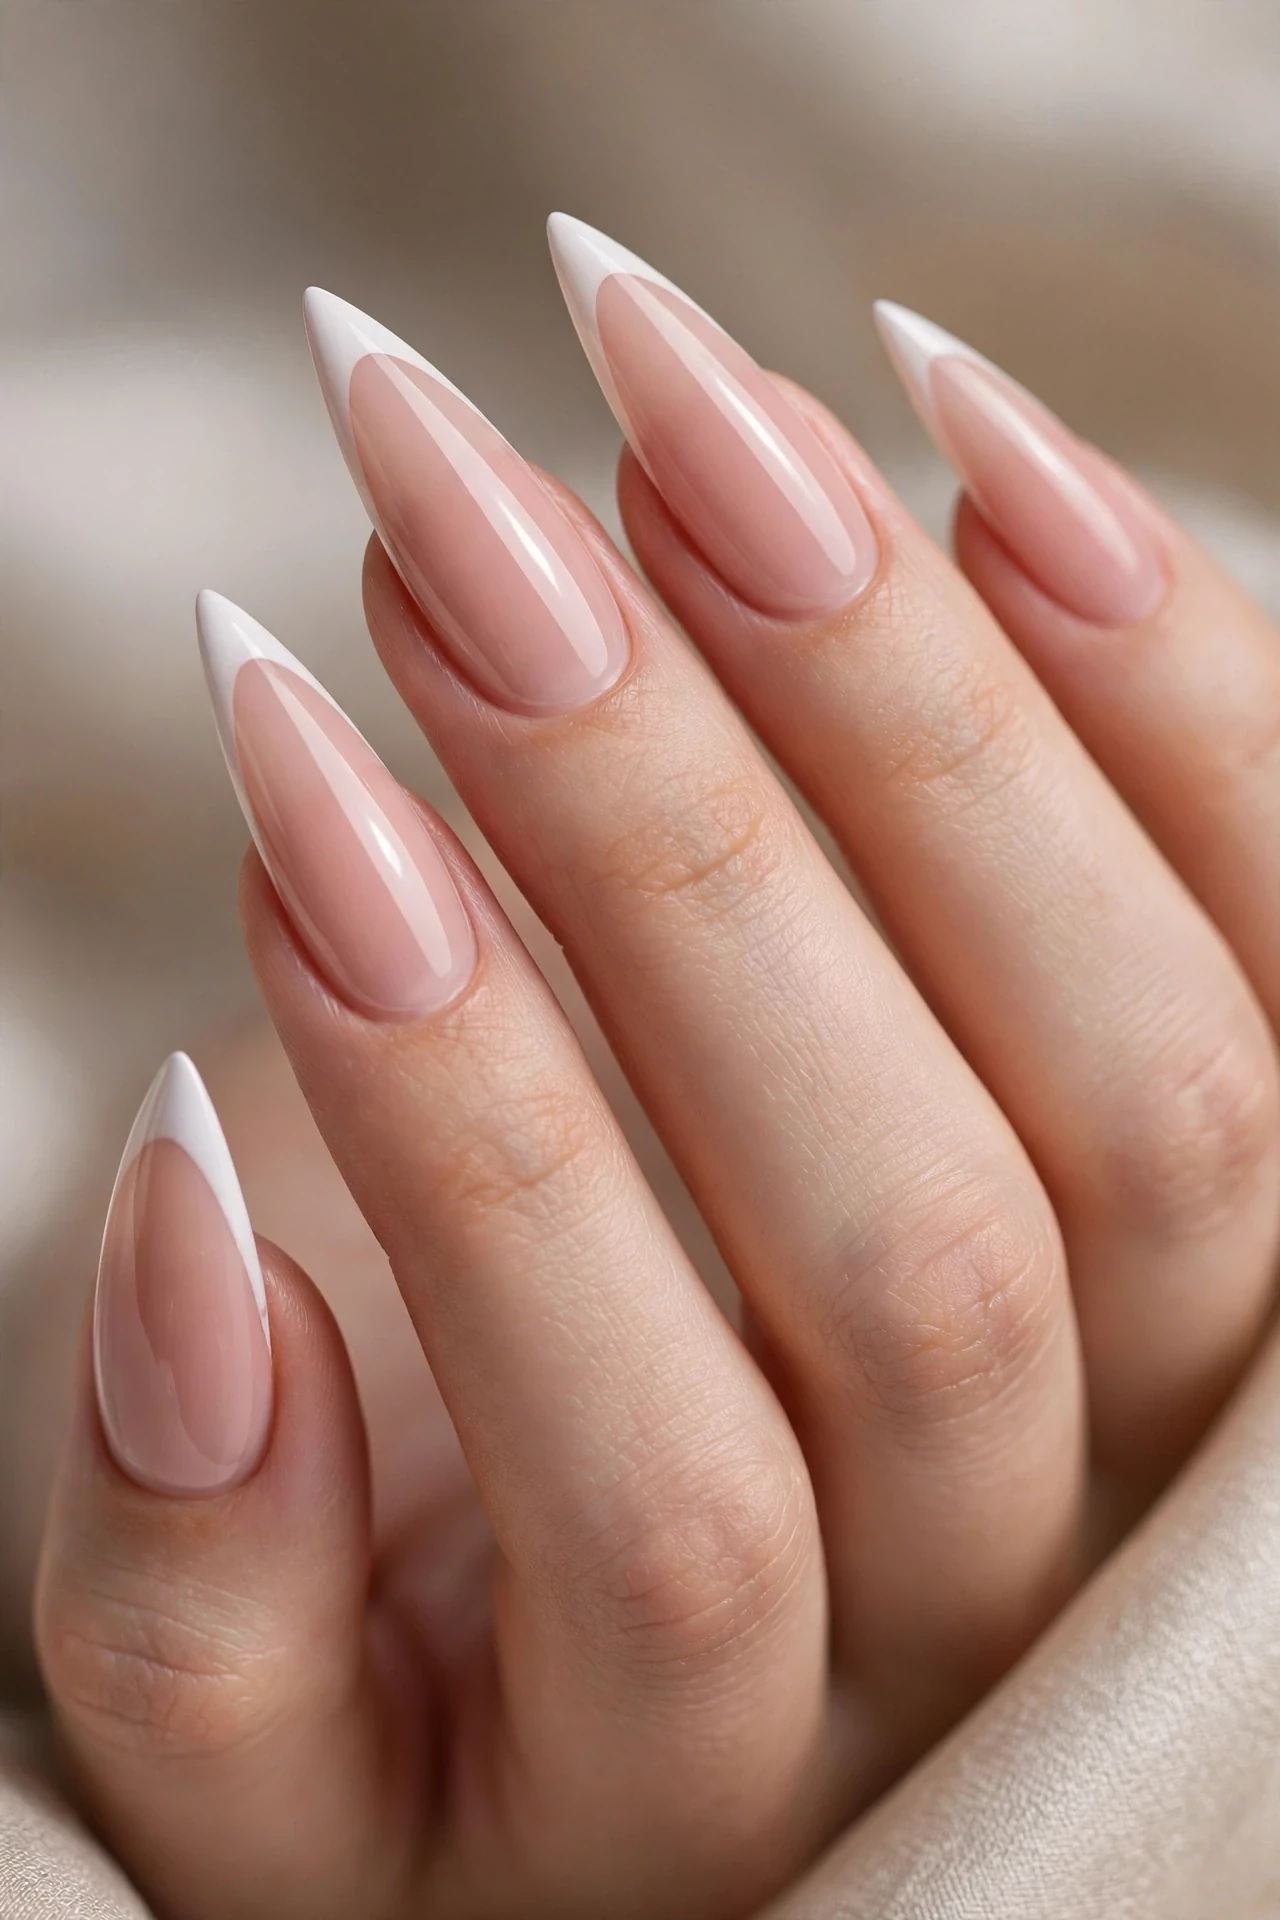
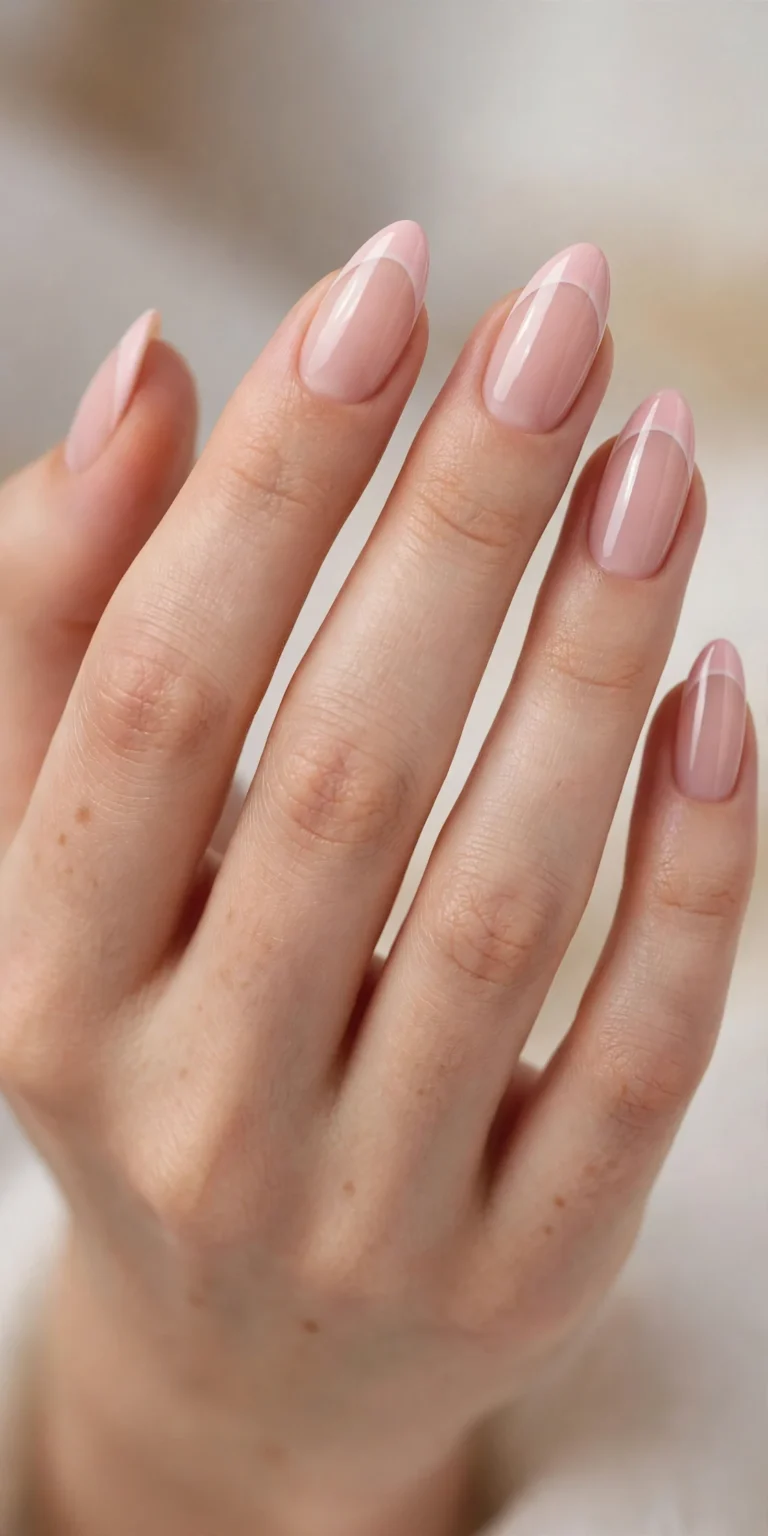
Not every bold look needs dark color — sometimes the shape is the statement. A blush nude base with crisp white micro-French tips on long stilettos is bold because the silhouette does the talking while the palette stays elegant. The nude elongates the nail bed, the white tip sharpens the point, and the whole thing reads polished and expensive. It suits every skin tone (match the nude to yours), every occasion from job interviews to weddings, and anyone trying stilettos for the first time who isn’t ready for vampy shades.
- Match a blush nude gel to your skin tone as the base.
- Paint thin, precise white tips following the stiletto V.
- Keep the smile line high and sharp for maximum drama.
- Seal with glossy top coat for a classic French shine.
Ask for “blush nude micro-French on long stilettos.” A steady hand matters, so this is worth a skilled tech’s appointment. DIYers: use French tip guides or a thin detail brush, and accept that the sharp V is forgiving — asymmetry is less visible on pointed tips. Nude bases grow out invisibly, so you’ll get a full three weeks. Touch up the white tips with white polish if they dull, and this look doubles beautifully as a bridal or work-safe bold.
Gunmetal Mirror Stiletto Nails

For maximum edge, nothing beats a full chrome stiletto. Gunmetal — that dark, smoky silver-black — coated in mirror chrome turns each nail into a tiny blade of polished steel. On the pointed shape the reflection bends along the taper, so your hands look liquid-metal in motion. This is the boldest look on the list, full stop. It suits confident dressers, night-out looks, and anyone whose November wardrobe is mostly black. Fair to deep skin tones all carry it; the chrome reads neutral against everything.
- Build long stiletto tips with a smooth, ridge-free surface.
- Apply a black gel base and cure completely.
- Rub gunmetal chrome powder over the no-wipe layer with an applicator.
- Seal with a chrome-safe top coat, capping the free edge carefully.
Salon wording: “full gunmetal mirror chrome on long stilettos.” The surface must be perfectly smooth or every bump shows, so prep matters enormously. DIY chrome kits exist, but the mirror effect is genuinely hard at home — this is a salon splurge. Mirror chrome chips more easily than other finishes, so expect two weeks and handle with care: no opening cans with your nails, and a clear top coat refresh at day seven helps. The payoff in photos is unmatched.
Burnt Orange Foil Stilettos

Burnt orange is November in a bottle, and gold foil makes it celebration-ready. A rich pumpkin-spice base gets torn gold foil pressed into the tips and cuticle area, finished glossy so the foil catches light like embers. The foil placement is intentionally irregular — no two nails match, which keeps it artistic rather than fussy. Long to medium stilettos carry the warmth best, and the orange-gold combo glows on warm and medium skin tones. Wear it through Thanksgiving and every cozy gathering after.
- Apply two coats of burnt orange gel polish.
- Press torn gold foil pieces onto the tacky tips and base.
- Pat gently so the foil adheres in irregular, organic patches.
- Seal with two layers of glossy top coat to smooth the foil edges.
Ask your salon for “burnt orange stilettos with gold foil accents, glossy.” Foil work is quick for techs and relatively easy at home — foil adheres to tacky polish without special glue. Because the design is irregular, chips and regrowth hide well for nearly three weeks. Double top coat is essential: foil edges lift if under-sealed. Refresh the gloss at day ten and the foil stays locked down.
Plum Jelly Stiletto Tips
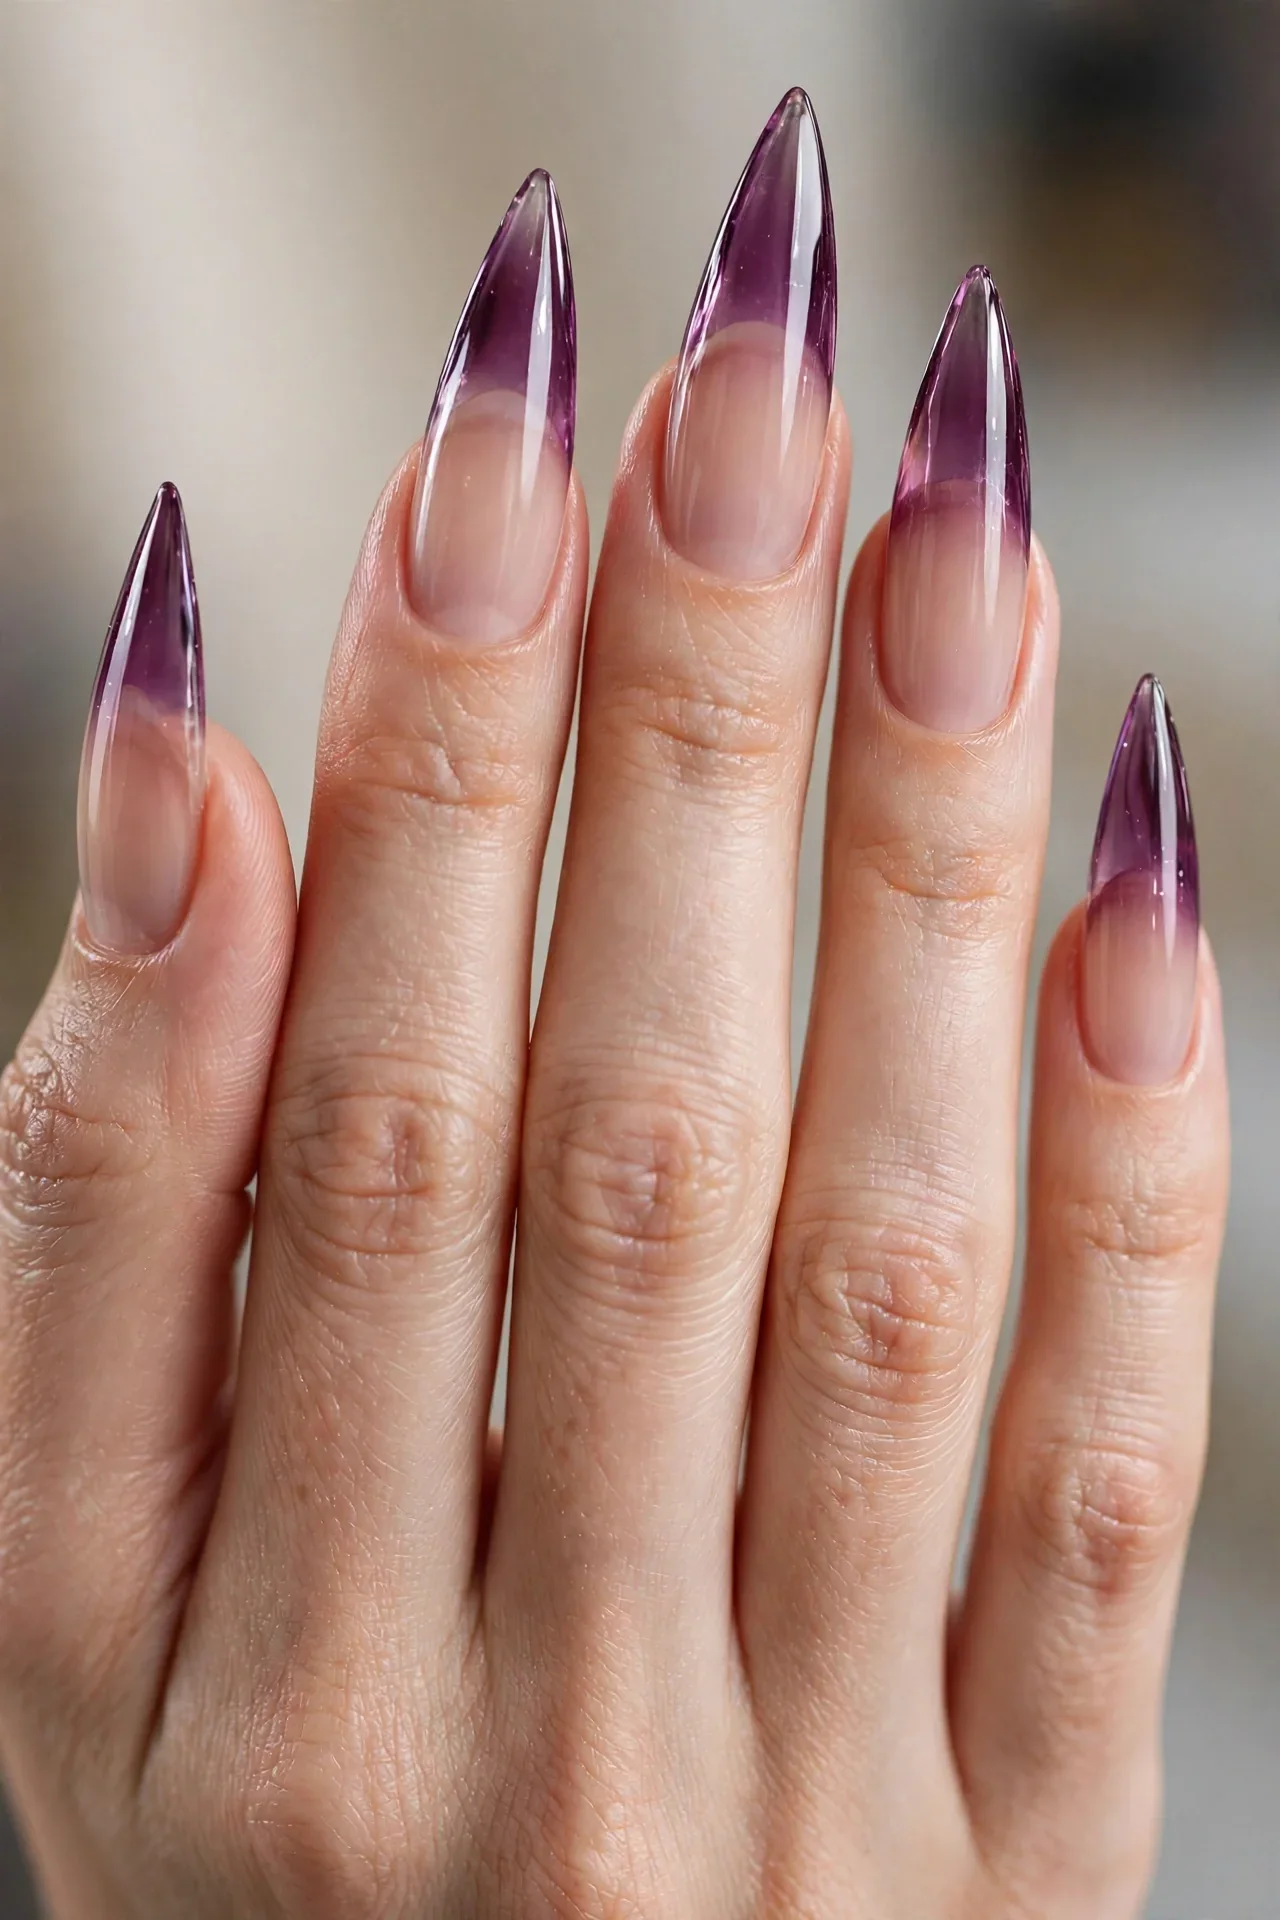
Jelly finishes give color a glassy, translucent depth, and plum jelly tips over a nude base are pure stained-glass drama. The sheer nude base keeps it wearable while the tips glow deep purple-red where the light passes through — on a stiletto point the effect is like a gemstone. It’s bold without heaviness, flattering on all skin tones, and one of the most low-maintenance designs here since regrowth melts into the nude base. Perfect for anyone who wants color at the tips and subtlety everywhere else.
- Apply a sheer nude or blush jelly base over the full nail.
- Build plum jelly polish at the tips in two to three layers.
- Blend the jelly downward so the color fades into the nude.
- Seal with glossy top coat for the glass effect.
Salon request: “plum jelly French fade on nude stiletto base.” Jelly polish is forgiving and layers beautifully, making this a great DIY project on press-ons. The translucency means brush strokes barely show. Expect three weeks of wear with invisible regrowth. Jelly tips can look slightly thinner in color after two weeks of sun exposure, so a weekly clear top coat keeps the plum saturated.
Icy Crystal Accent Stilettos

Pair frost with fire: a deep oxblood stiletto base with icy crystal accents on one or two nails per hand. The base is a dark, wine-black red in high gloss, while the accent nails get a scattering of crystal rhinestones or an icy shimmer gradient from cuticle to tip. The contrast between the dark base and the sparkling accents is what makes this bold — it’s a November night sky on your hands. Long nails show the crystals best, and this is made for formal events, holiday galas, and New Year’s previews.
- Apply oxblood or wine-black gel in two coats on all nails.
- On accent nails, place rhinestones or crystal pixie dust before curing.
- Set larger crystals with a dot of nail glue, then cure.
- Seal non-accent nails glossy; cap accent edges with top coat.
Ask for “oxblood stilettos with crystal accent nails.” Rhinestone placement is quick salon work and easy DIY — press-ons with pre-set crystals exist too. Crystals are the weak point for wear: expect two weeks, and carry nail glue for emergency reattachment. Keep accent nails out of heavy-duty tasks, and this look will survive every party photo.
Scarlet Statement Stilettos
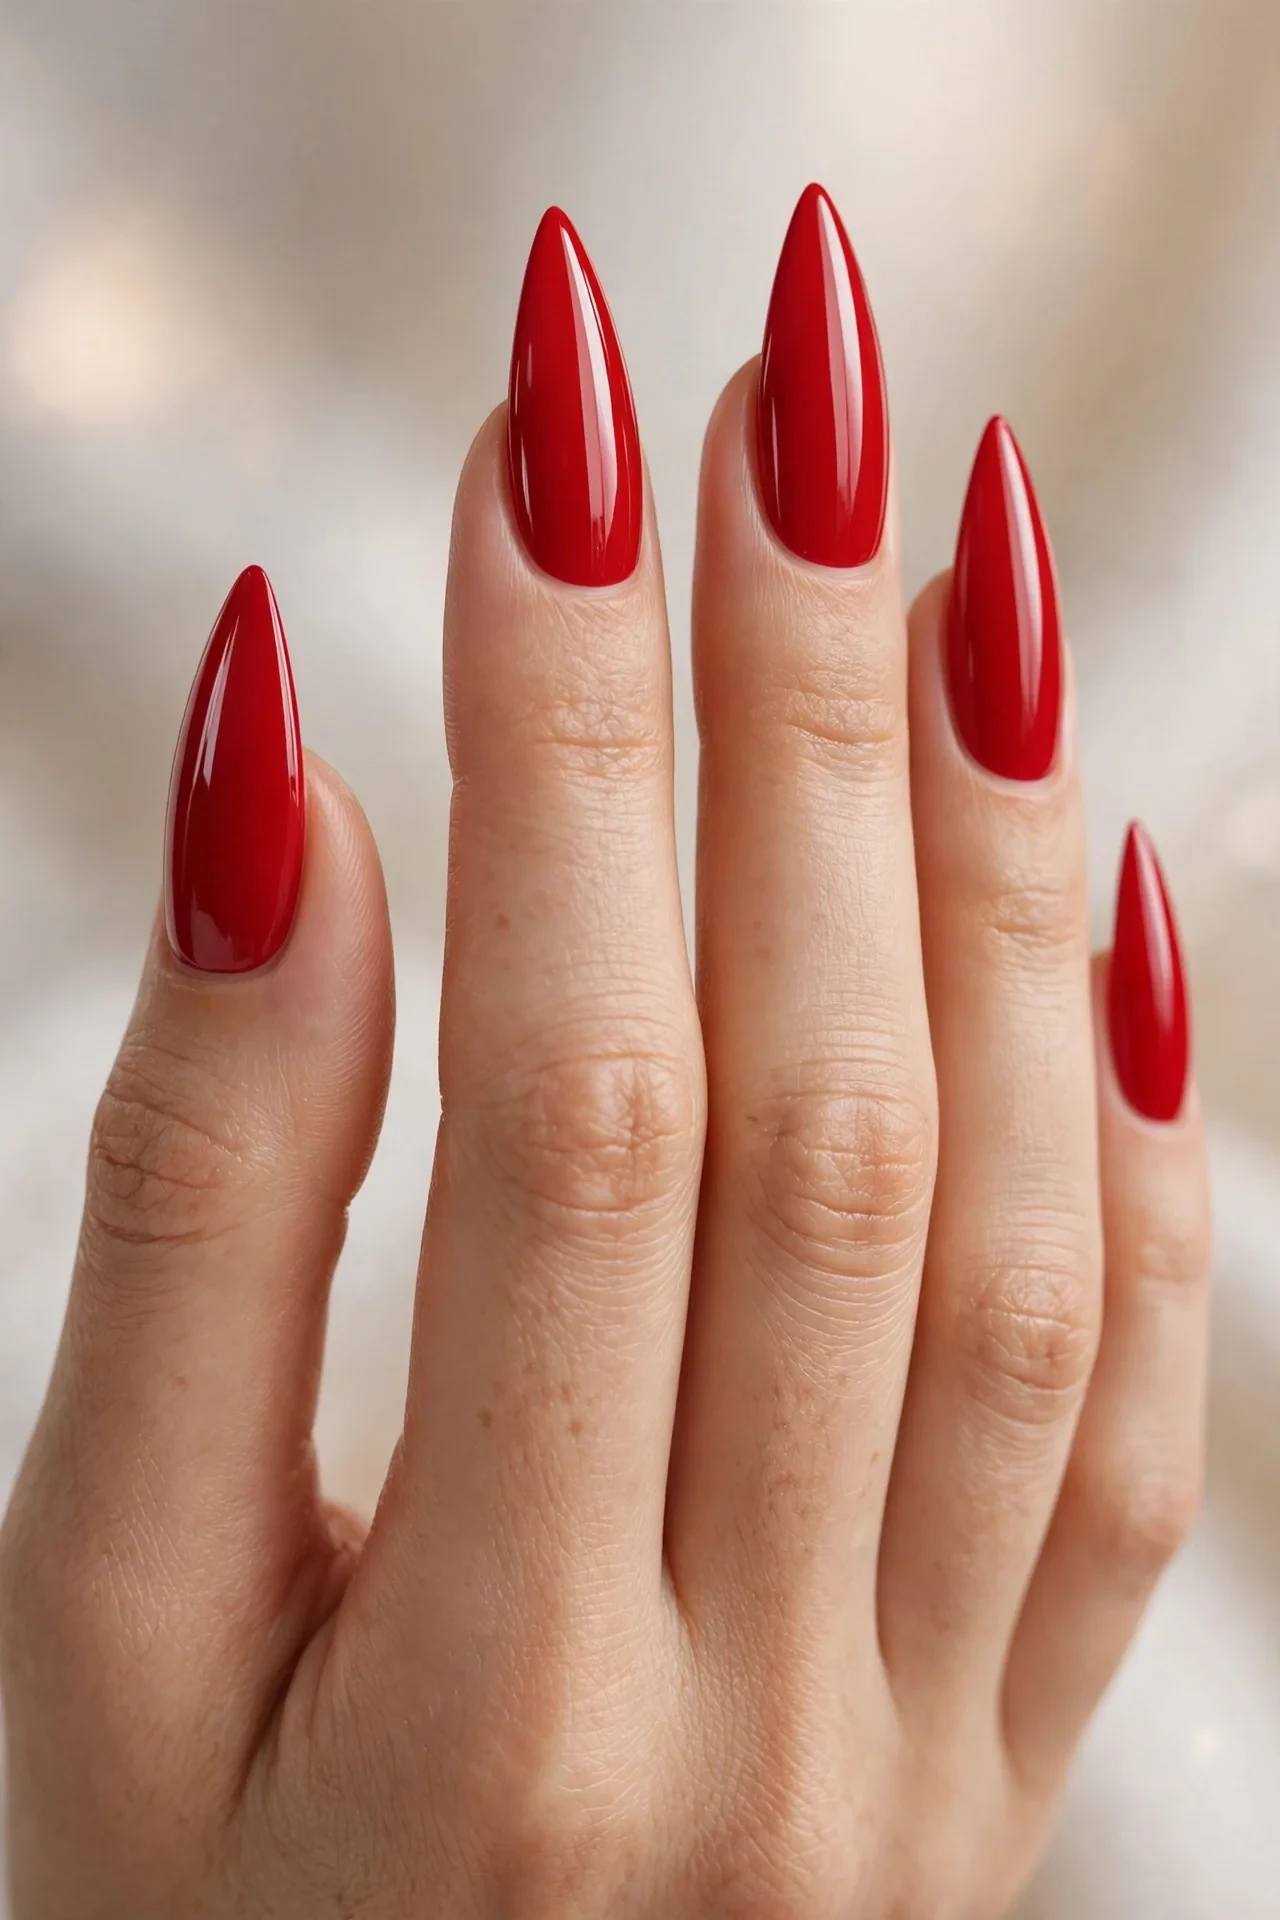
Sometimes the boldest move is the most classic one: pure, unapologetic scarlet on a perfect stiletto point. No chrome, no art, no texture — just a rich true-red cream in a mirror-gloss finish, shaped sharp enough to make a point (literally). Red is the one shade that never leaves the November conversation, and the stiletto shape gives it fresh attitude. It suits every skin tone, every age, and every occasion from boardrooms to ballrooms. If you’re only trying one look from this list, make it this one.
- File nails into a clean, symmetrical stiletto shape.
- Apply a ridge-filling base to create a flawless canvas.
- Layer two thin coats of true scarlet red cream polish.
- Seal with a high-gloss top coat for mirror shine.
Salon request is beautifully simple: “classic scarlet stilettos, glossy.” At home, this is the most achievable look on the list — red cream polish is forgiving and one bottle does the whole job. Red hides chips better than you’d expect, but tip wear shows, so cap the free edge carefully and expect two to three weeks from gel. Keep a matching red pen for touch-ups, and remove with non-acetone remover to avoid drying the cuticles.
Conclusion
Bold November nails are about choosing a look that matches your mood — and stiletto nails give you fifteen ways to make that choice loudly, from velvet burgundy to mirror chrome. The pointed shape does half the work for you, stretching your fingers and sharpening even the simplest color into a statement, so pick the finish that fits your life: low-maintenance nudes for busy weeks, vampy darks for nights out. And if scarlet stole your heart here, you’ll love the deeper dive into reds in our 15 Cherry Red Nail Ideas — the perfect companion to your new stiletto manicure. Book the salon appointment, save your favorites, and let November be the month your nails do the talking.